Hi,
I have a compaion project to practice what I learn in this course. I have some slopy wall's in my house and I tried to model a door in that slopy wall. But instead of a quick modelation I found out that is super hard to do,
It looks like so:

The first thing is to place a simple box to that sloping wall. The way I finally did it was to use the Snap To Face Method (with the Align Rotation to Target option) and to some edge alignments after (as far as I remember :-) ). It was an endless try and error (and Googeling additionally).
As fas as I understand it, the Align Rotation to Target option uses the Face Normal direction of the target and the Z-Axes-Direction of the Origin Point of the source to do the alignment?
So I rotated the Origin Point before the snapping with some success.
But here are my question:
1. Is there a simpler and more intuive way to simple align one face of an object to another face from a different object (in object mode) without so many manual steps?
2. As a result as you can see in my picture the Origin (Local Orientation) of my box is now rotated to the world (I did also a lot of Apply Trasformations on my way). With that I'm not able to Scale or move my Object in a precise way. Is there a way to precisely align the Origin Orientation back to my box? I tried snapping the origin, but without success.
Greetings, Bernd
Hi Bernd bbguenthe ,
As for point 2: Do not Apply the Rotation of your Objects, if you can avoid it! (Now you must suffer.) Luckily it's a 'cube':
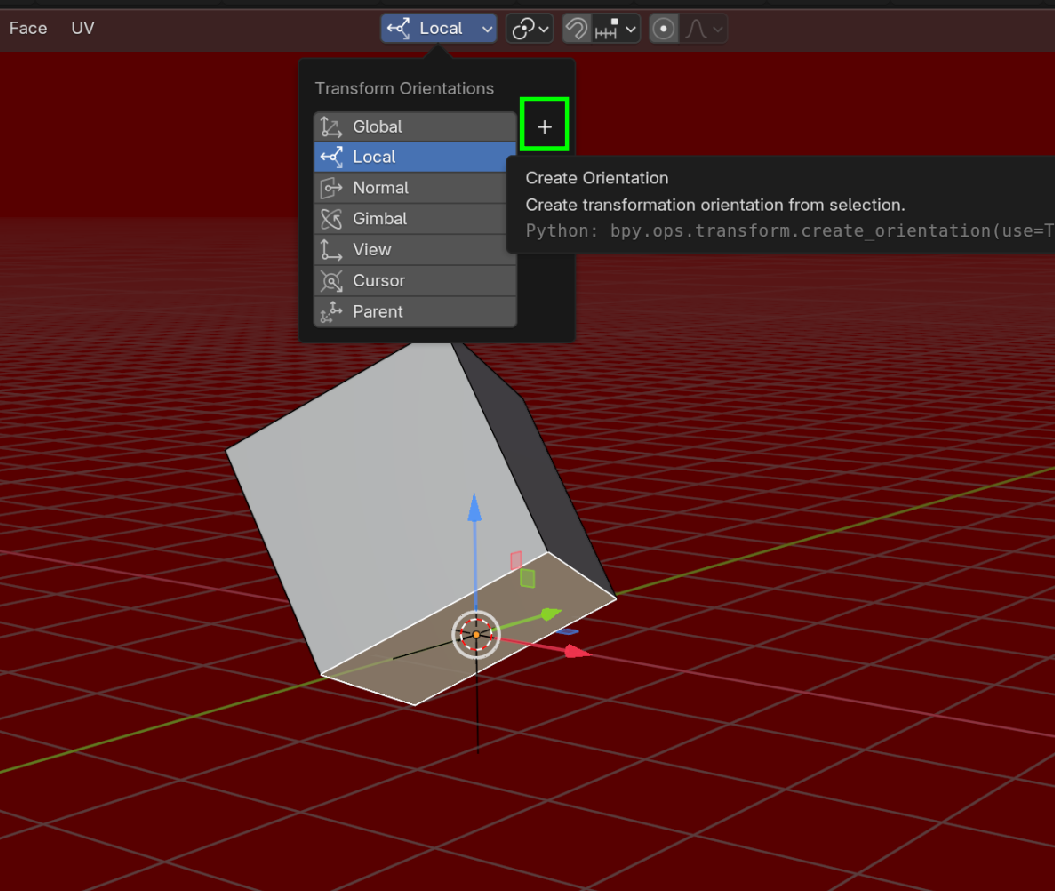
Switch to Edit Mode, Select 1 Face and make a Custom Transform Orientation, by clicking the '+'
Then switch to Object Mode, go to Options > Transforms > Affect Only > Origins. Now you can Align the Origin to your Custom Orientation:
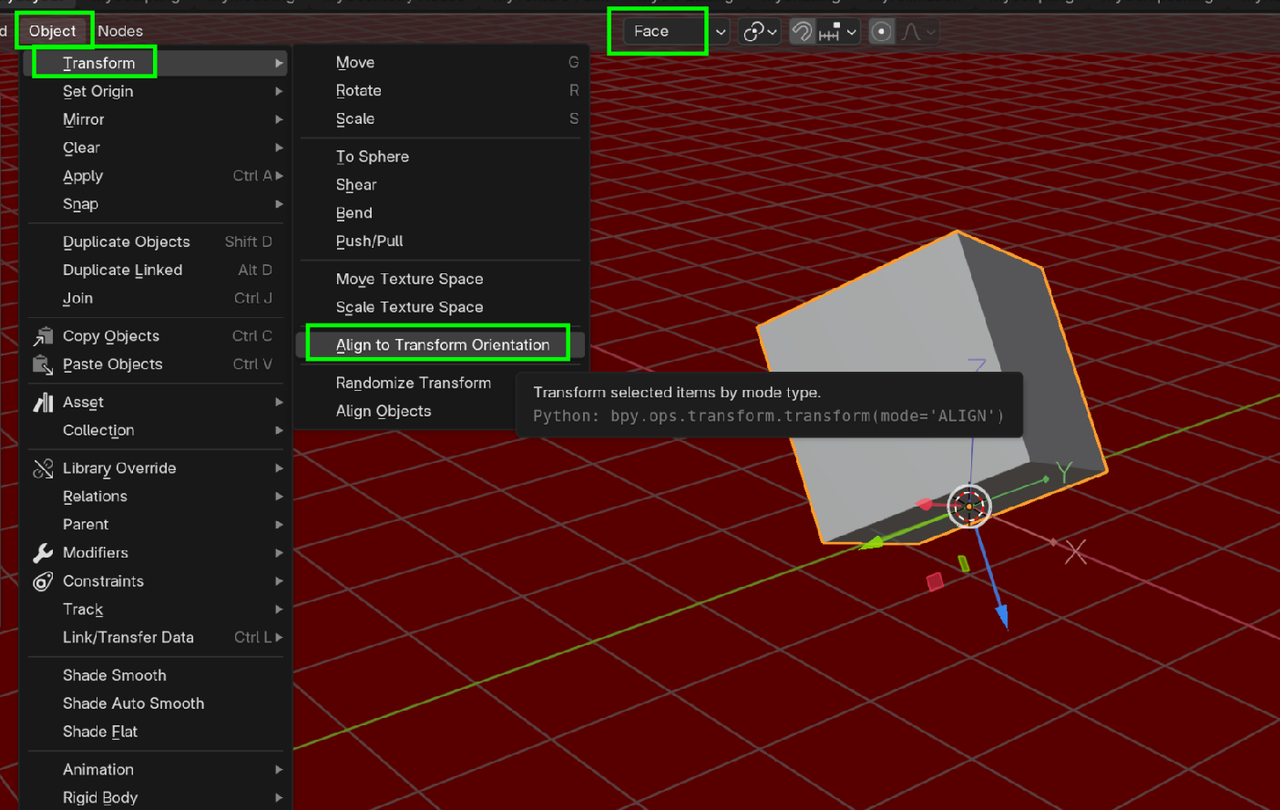
Don't forget to disable the Option (> Origins).
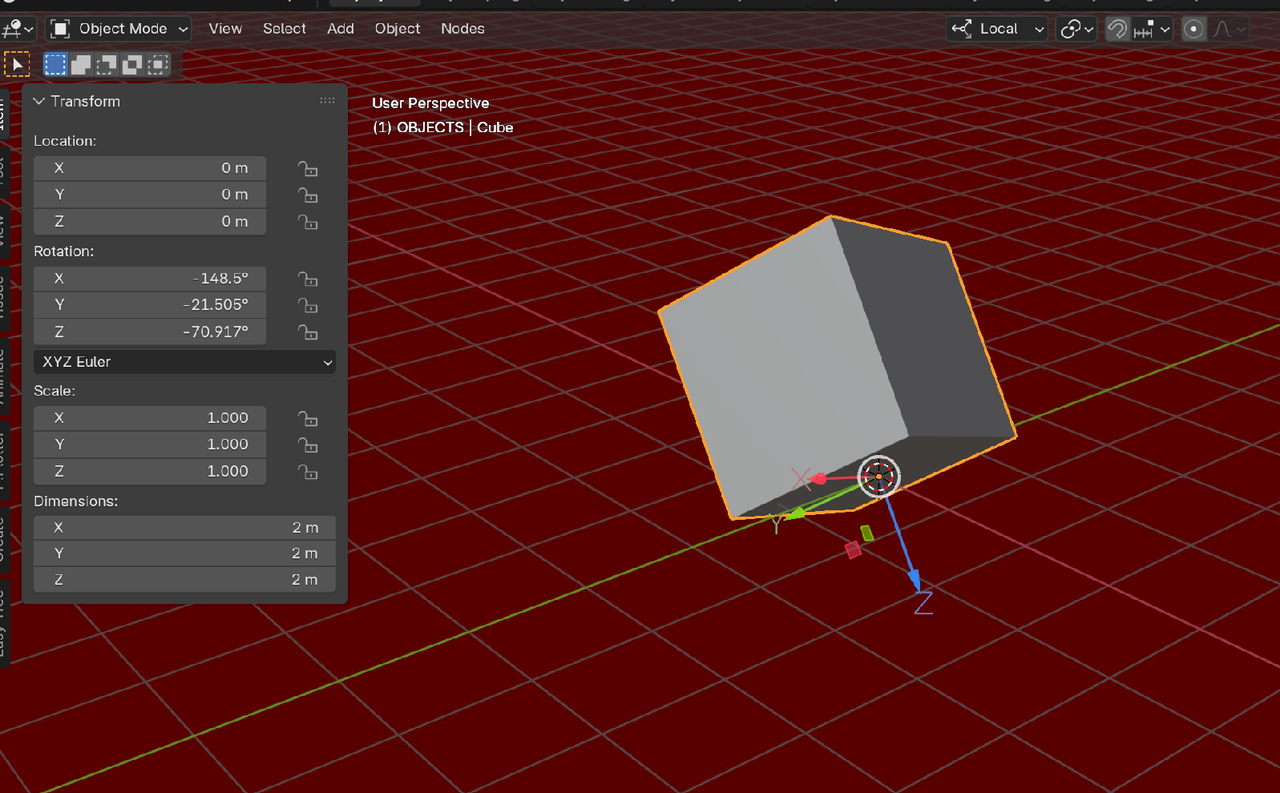
You now have the Object's Rotation back (apart from possible multiples of 90°, depending on which Face you Selected in the first step)):
As for point 1.: Not sure if this is easier for you, but you can use Set Cursor and set the Projection to Geometry. Then place the 3D Cursor on the Face you want. Add an other Object (I mostly use an Empty for this kind of thing) and set that to Align to the 3D Cursor.:
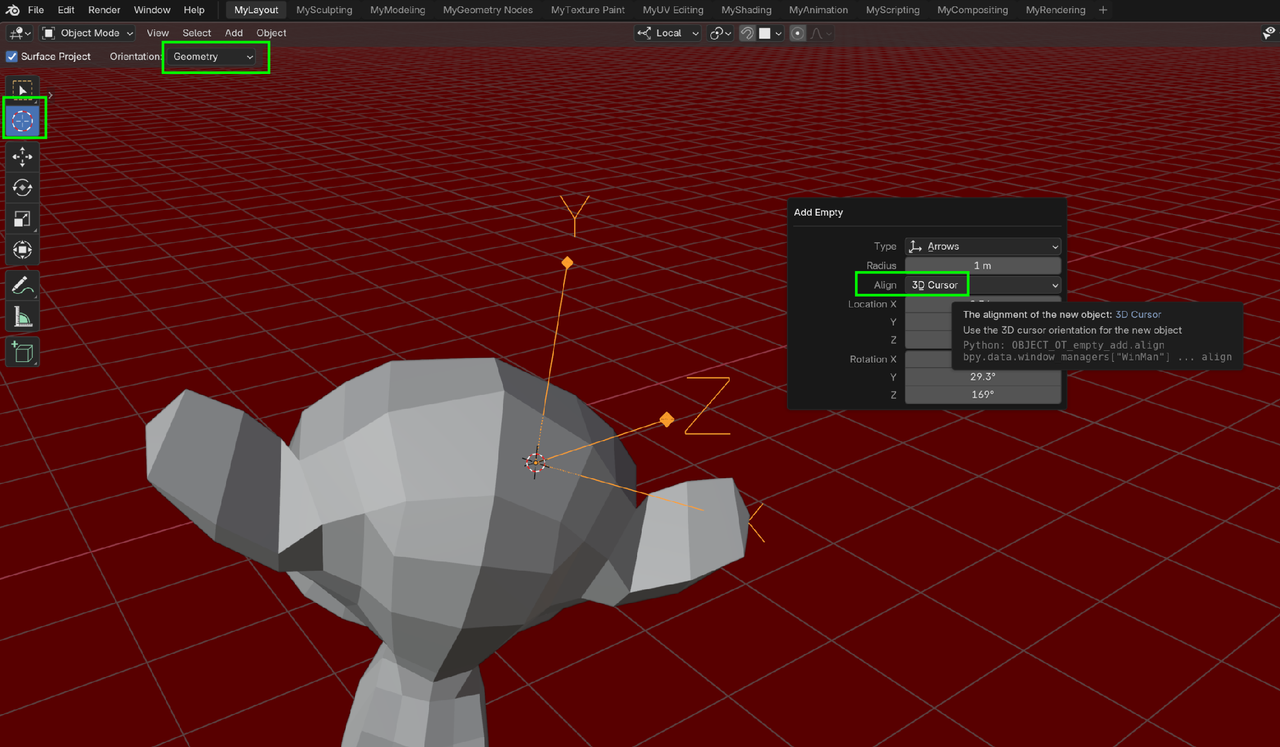
Then Parent tne Object to the Empty and you can Snap the Empty to any Surface you want (with Align Rotation to Target enabled). (Again, similar to above, you might need to Rotate 180°, because the Z is facing the wrong direction).
Hi Bernd bbguenthe
Looks like Martin already got you covered for the origin orientation. I totally agree with not applying rotations, except for specific reasons (array cutter objects sometimes, set new default rotation). At least with Martin's steps you can get it back.
I usually find the snapping with align rotation to target somewhat unhandy, because of above steps. It always seems to require some extra objects and additional rotation afterwards, with, as you pointed out, the z orientation and normal directions. Sometimes it's unavoidable though and Martin already gave you a good way with the empty.
For your specific case with the door along a slanted wall I wouldn't use align rotation to target at all. Here's how I would go about it with precision:
1. On your wall select 3 vertices along the angle (blue circles)
2. Fire up MeasureIt, click "show" and with the vertices selected click on "Angle". This will give you the precise angle of your wall. You can adjust the precision in the tool.

3. In Object Mode select your door. Since it already stands at 90 degrees to the wall in this case, it only needs to be rotated by the difference.
So R->Z->46.41038
4. Your door now has the correct same rotation as the slanted wall. If you did this in object mode, your local rotation will be correct and you can move and snap it regularly.
Alternatively you can also for example press g->y->y to move it along its local y axis without changing the general transformation in the header.
Another tip: If you model the door yourself, I personally prefer to model it first aligned with the global axis and then rotate it in place. Can make things easier for certain operations.
Hope this helps with your situation. :)
Omar Are you thinking about the "Copy Global Transform" addon?
Hi Martin,
big thanks you for your answers! Never heard of the steps you mentioned for my problem #2. I have now my orientation back :-)
For my problem #1 the tip with the empty is also great. I have tried some addons, but all of them are a bit better, but a had other problems with them. Which one(s) would you recommend? I'm thinking of buying boxcutter/hardopts/machinetools/meshmachine, are they any good?
I also want to give you a very postive feedback! You answered more of my questions on different topics in the past and your answers are always precise very understandable and with a fast response time. THX a lot
Regards, Bernd
Hi Sascha,
yepp this is also a clever idea. A bit of math ( :-) ) but I'm able to do this. And good tips also. For me it's visually easier to model it in place, but what you said makes absolut sense.
And Omar, thank you to for mentioning the addon. Will have a look into it.
And will nerver, ever apply rotations, I swear!
Hi Bernd,
Thanks a lot for your kind words!
I actually don't use a lot of Addons, but I do have Hardops and Boxcutter and they are fantastic, (and have life-long support and updates, so worth the money), but I'm not sure they'll help with these specific problems.... I also hear great things about MeshMachine from someone whose opinion I trust (and who knows a lot about Addons from using them and writing them),
Hi Bernd,
It's math I can do, so anyone can do it 🤣
As always in Blender there are many ways that lead to a result. At least now you have lots of options.
Btw. there are certain situations, where applying the rotation makes sense. I do this twice during the course I believe, but also explain why in that situation.
Under normal circumstances though mostly not the rotation and pretty much never ever the location. :)
Omar The "copy attributes menu" addon gets a specific mention in the beginning of the course. 😉