Hello. Yeah as you say, from Blender version to version things have changed a lot. Good news is, it's just UI stuff, a name change here, a setting there. Core Blender functionality is still the same, it's just that you would have to know your way around Blender to get settings to match. That is why we always recommend to use the same Blender version as in the course, it's so much easier to follow along with what's on screen. The knowledge behind these lessons applies no matter which Blender version you are using, just that when you're a beginner you tend to follow click by click and it can get messy when what's on screen is not the same as what you have. So download Blender 2.71 and remember it's not about the software.
There's a good short thread talking about this topic here if you want to get your head around Blender versions dilemma:
https://cgcookie.com/community/18260-learning-through-different-versions-of-blender
Hi Ashlee AAko1999 ,
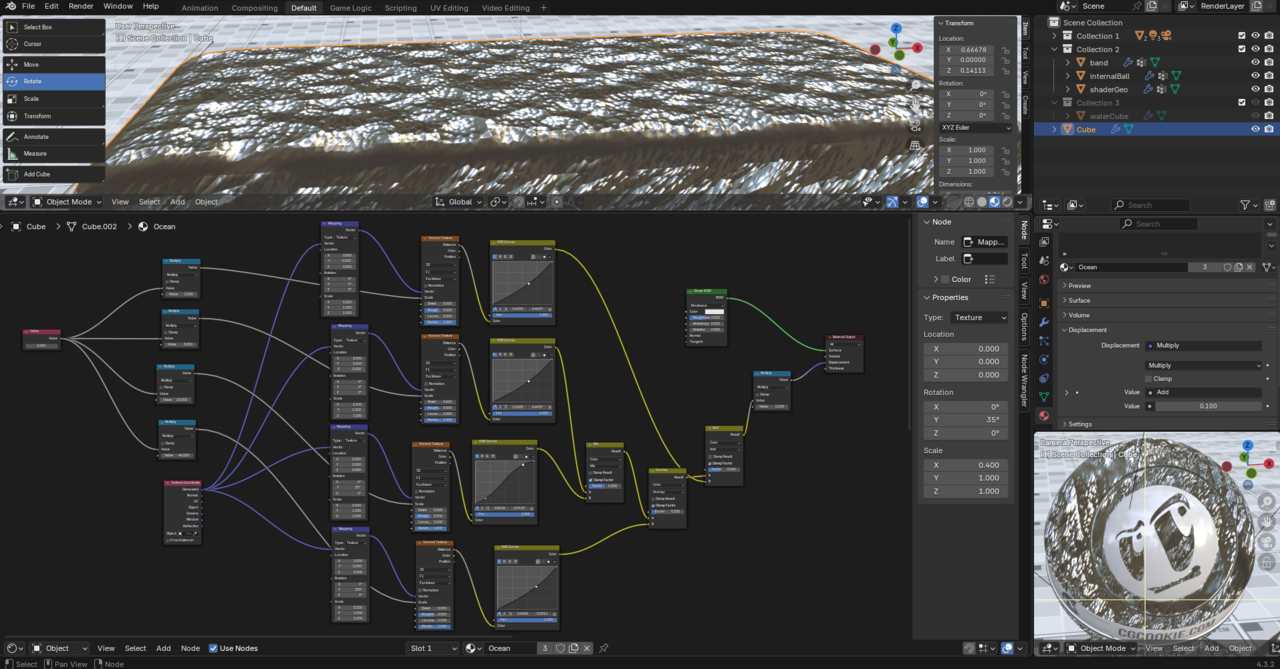
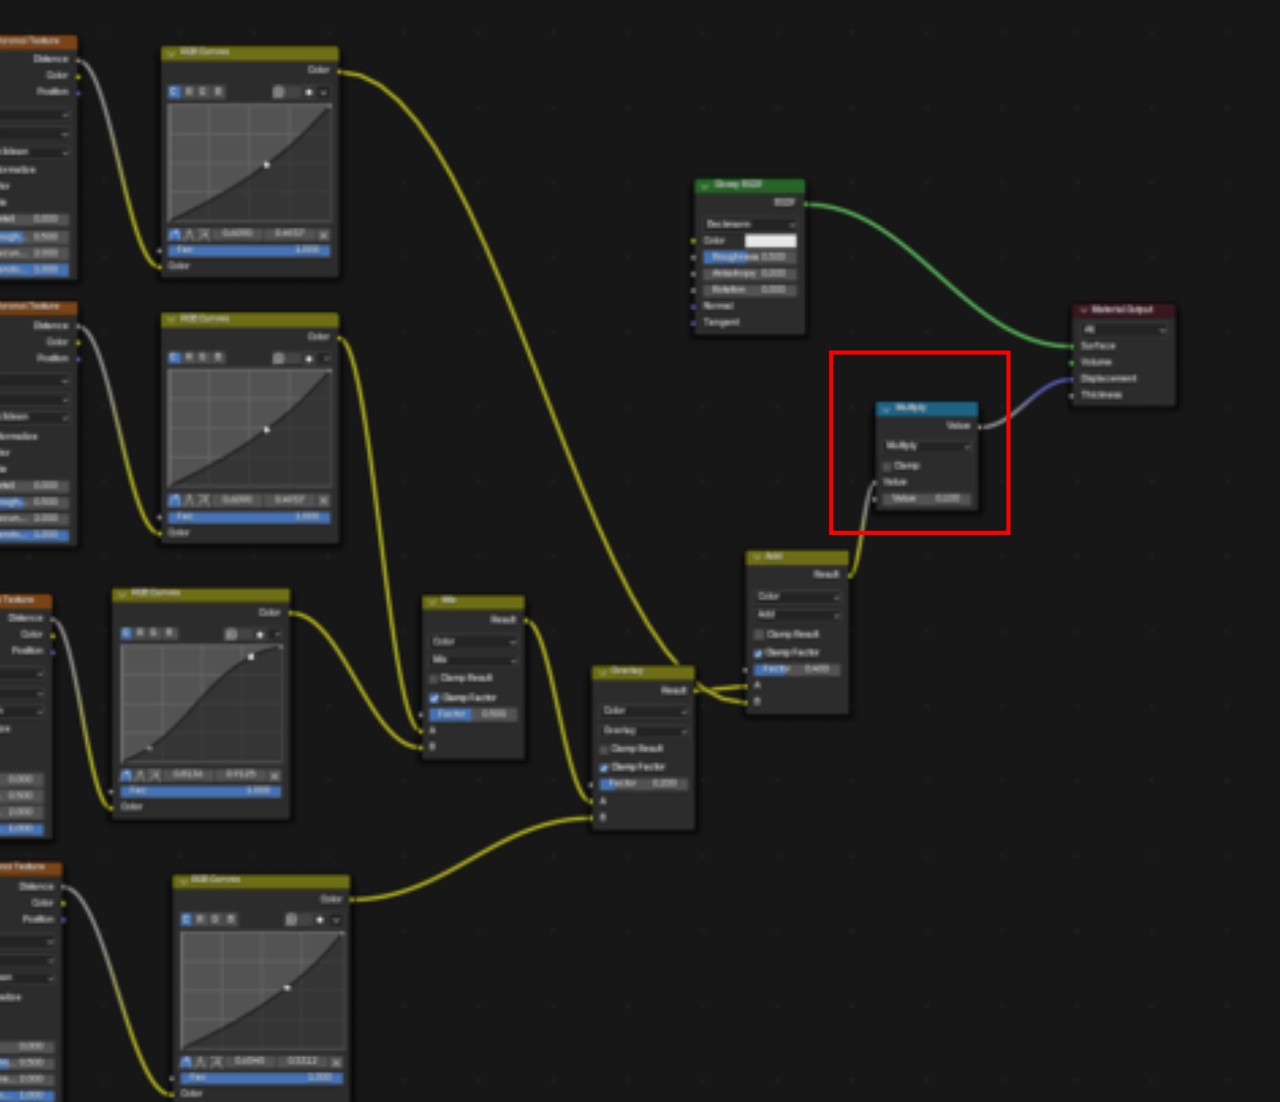
One important change is the Displacement. You should remove this Multiply Node:
and use a Vector > Displacement Node instead (so not a Vector > Vector Displacement Node):
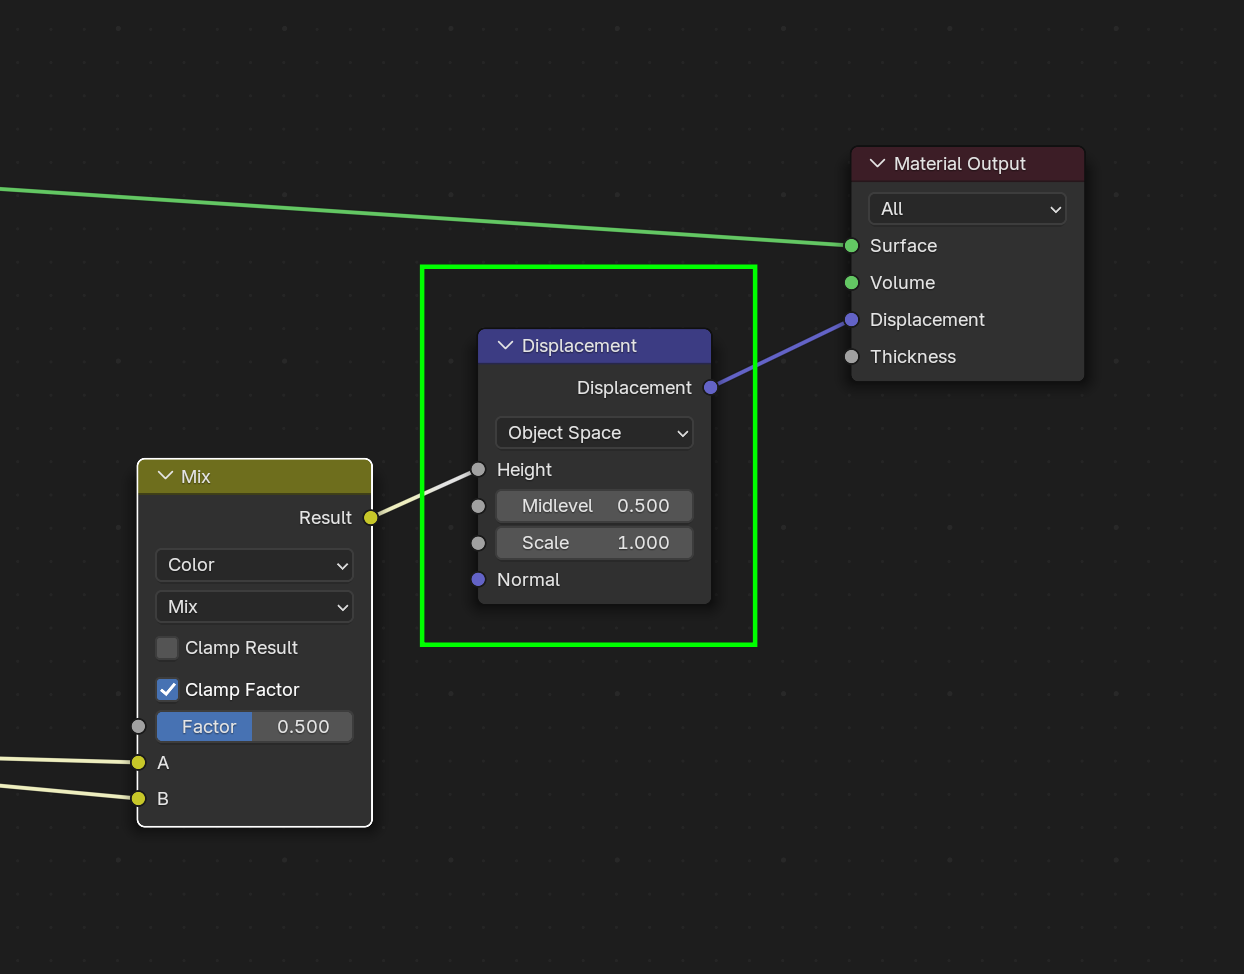
The Scale Value is more or less what the Multiply Node did.
I had seen from a couple of other threads that people had used a displacement node instead of a math node, but it seemed I got a similar result when I tried it. I understand I should get the same result if I use the version of blender as in the video, I just don't plan on using that version so it seems it'd make more sense to try following along and figure out how to get the same result in a version I plan to use. I feel like I understand the fundamentals of how to add textures, but I don't fully understand more advanced nodes or how they all can work together yet, so maybe it's better for me to deepen my understanding of that and come back to this problem at a later time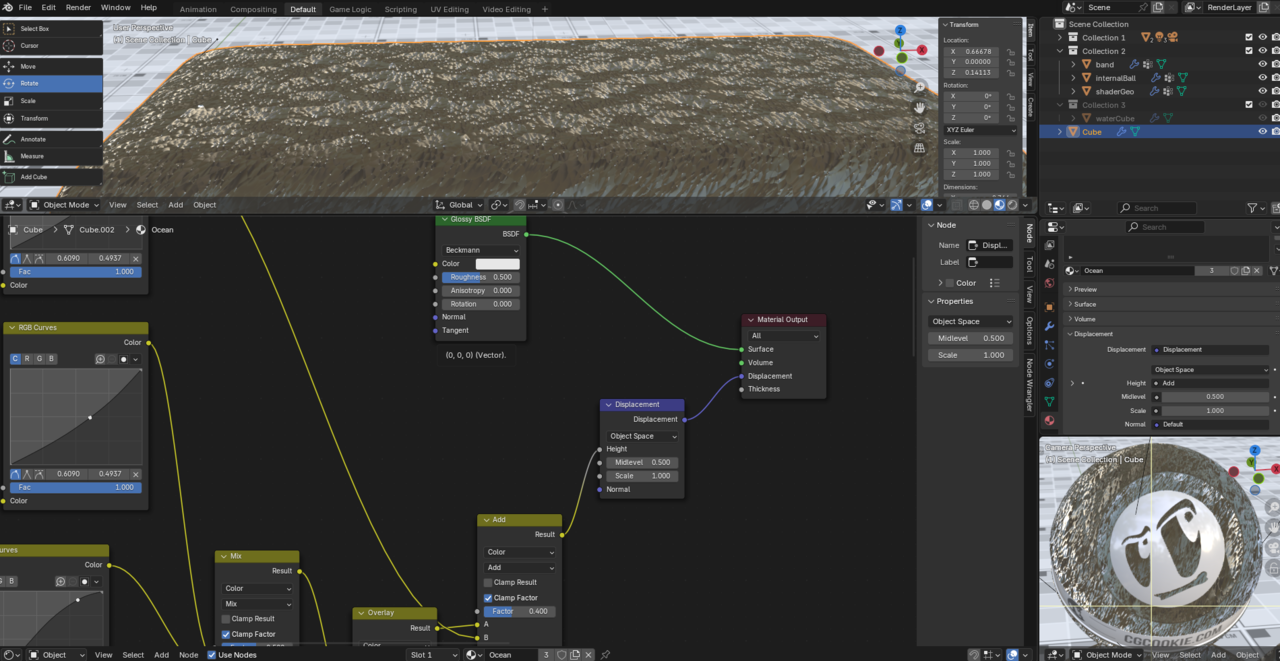
Hm,
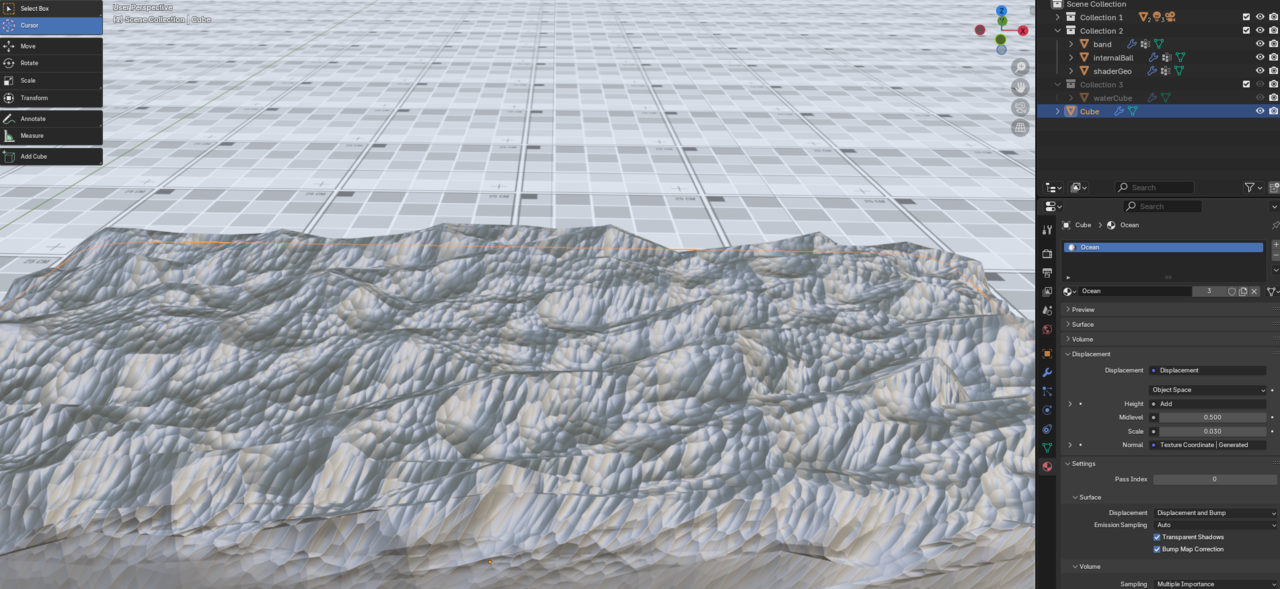
It almost looks like you don't have any real Displacement; dpn't forget to change the Settings in the Material Tab to Displacement and Bump and maybe try increasing the Roughness of the Glossy, to get rid of distracting reflections from the Environment that is being used in the Material Preview Mode:
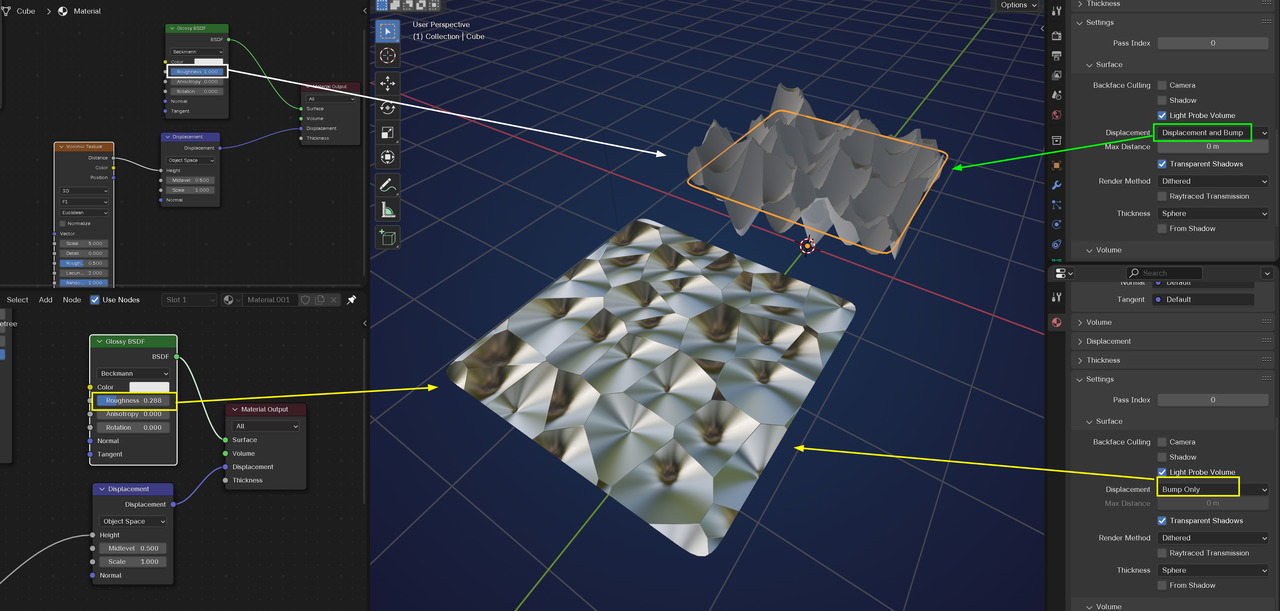
You were right about it being set to bump only. I thought it was already set to displacement and bump and changing it made a huge difference. It feels like I just need to smooth it out a bit and it should start looking good. Thanks for the help