Hi all,
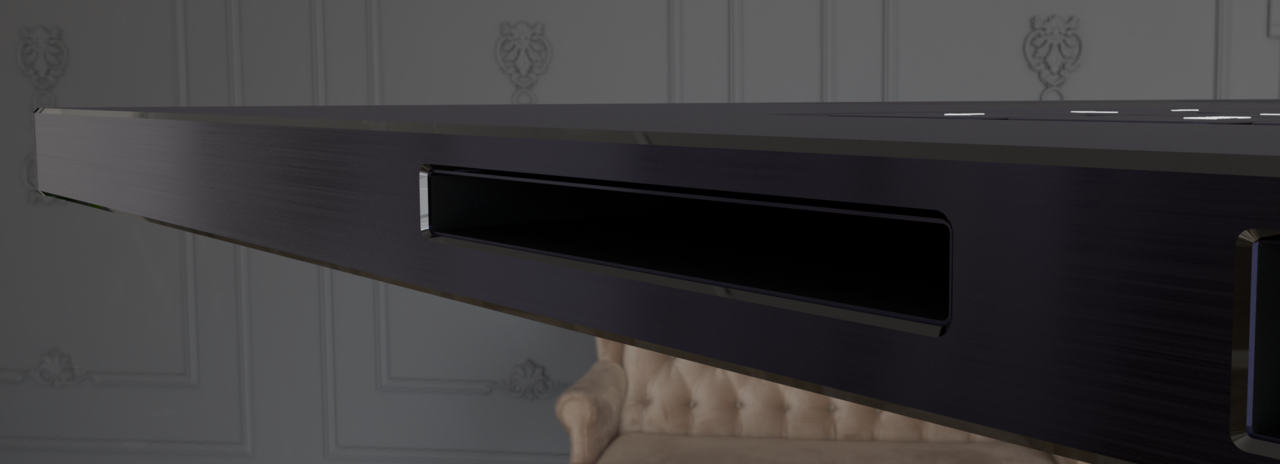
I was attempting to apply the bevel to the SD card port with the bevel modifier but am getting some janky results. Any idea what might be causing this? I don't see any glaring issues in the geometry, but maybe I'm missing something. Thanks in advance
Source file: https://www.dropbox.com/t/1MI7PCwqqlqE9wlM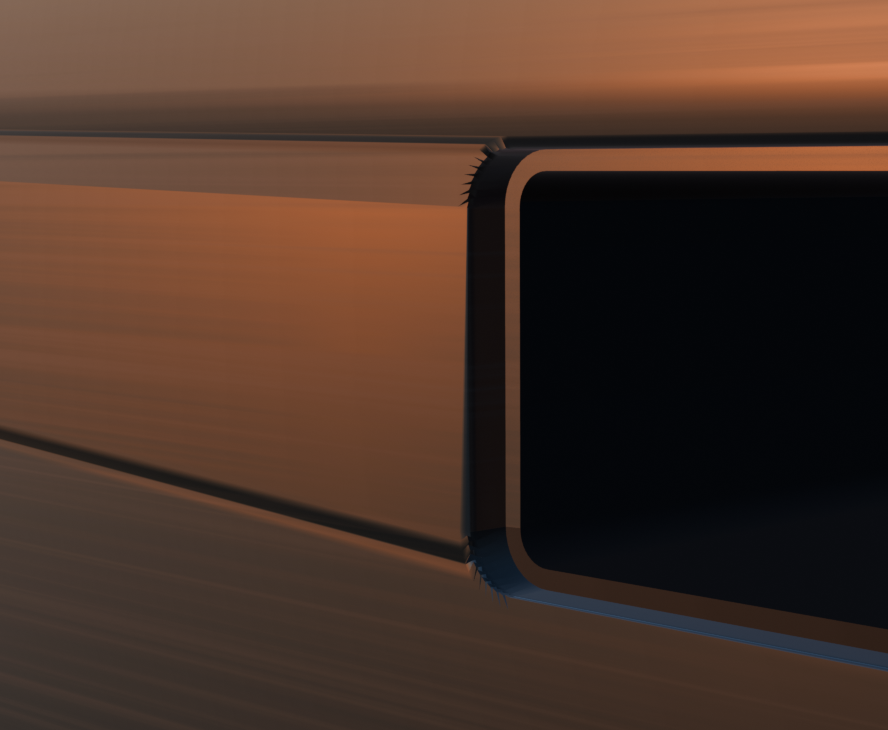
Can you send your bevel parameters, in the file I open everything is ok
Thanks for your reply, in the screenshot you sent it appears they may be turned off under the modifier?
Hi Jack jjack___ ,
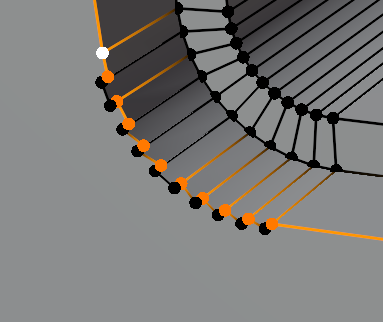
You appear to have some 'double Vertices' (I Moved some of them a bit, so it's easier to see):
Thanks Martin! That cleaned up the jagged edges. I mustn't have had the threshold low enough when merging by distance.
If I increase my bevel segments by more than 1, I still seem to get these weird shading artefacts though, is there another issue with my mesh that may be causing these? I can get rid of it if I take the shade auto-smooth angle down to 10 degrees, but that does mean I'm getting some faceting in other areas.
Source file: https://www.dropbox.com/scl/fi/e4ef2r4mwecdqhkagy7iw/laptop-merged.blend?rlkey=6bmvzw07ro0o6bj2bffqy8o78&dl=0
Single bevel:
Multiple bevel segments: 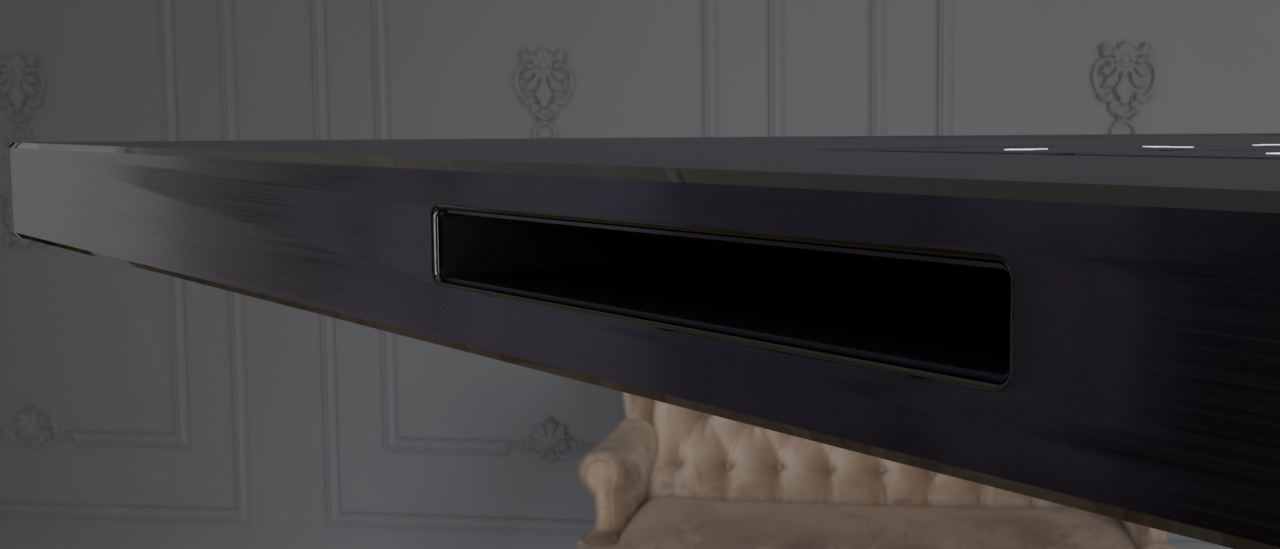
As a side question, is there a way to easily delete faces assigned to a material? For example I'd like to remove the USB port from this selection: 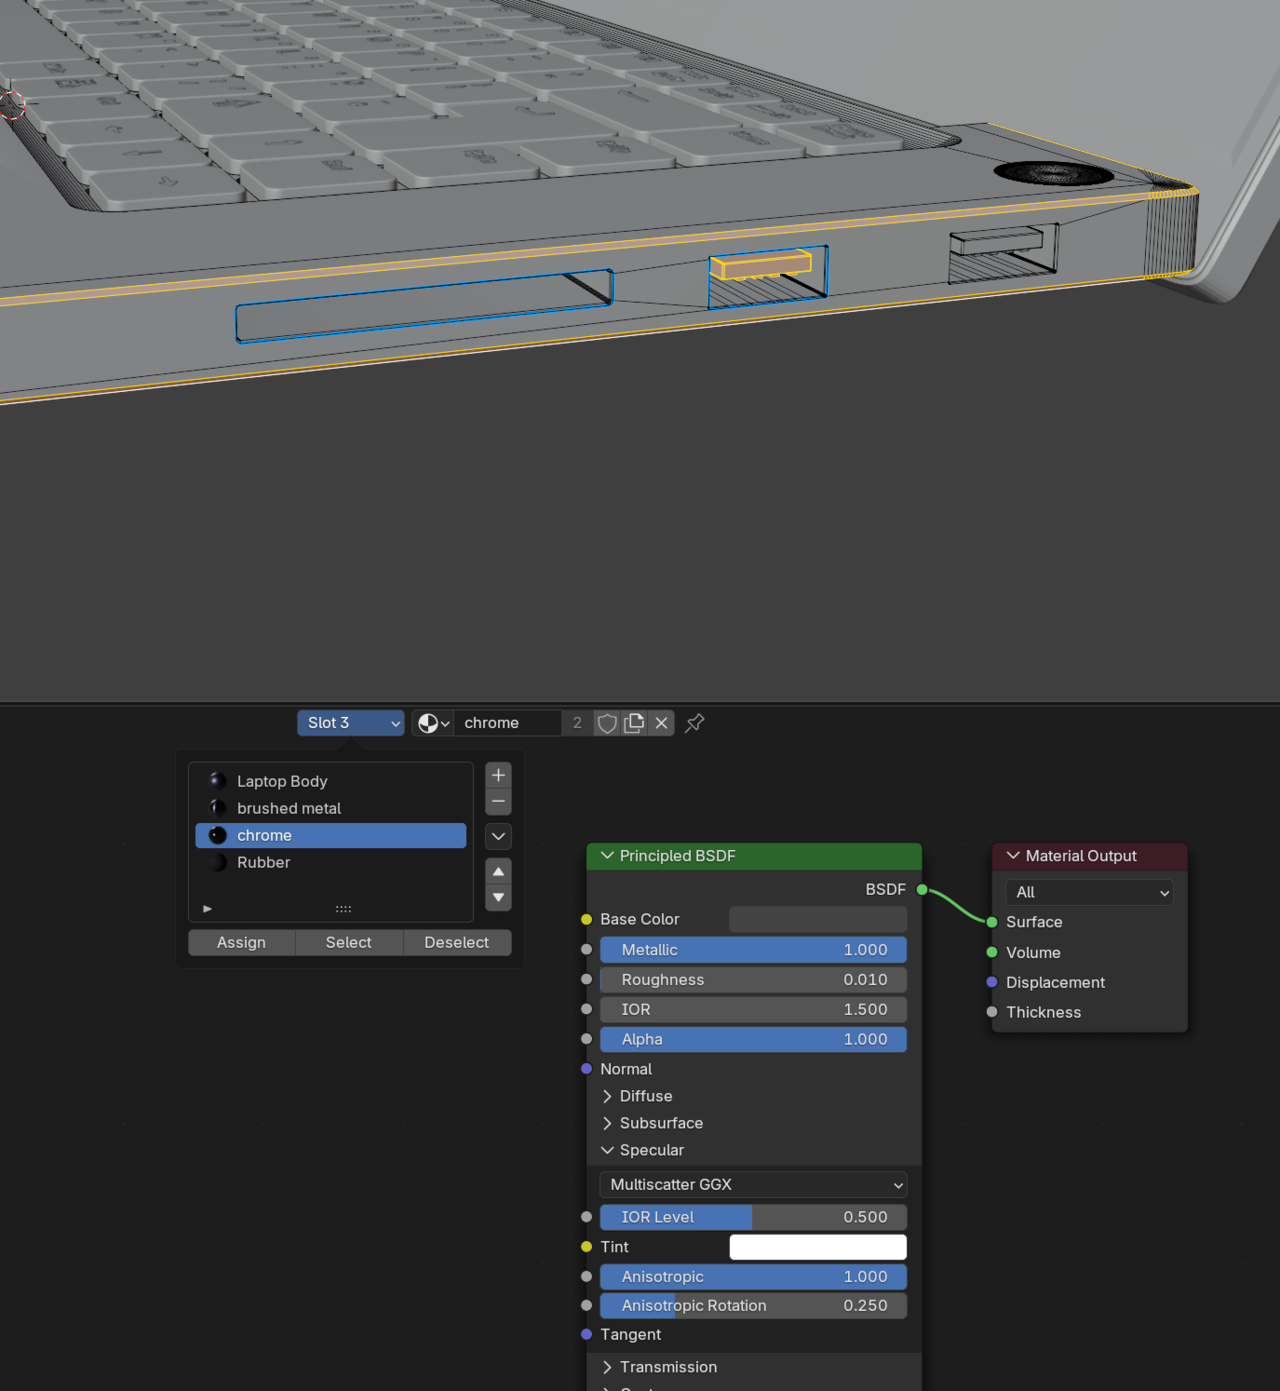
Thanks again for your help
Hi Jack jjack___ ,
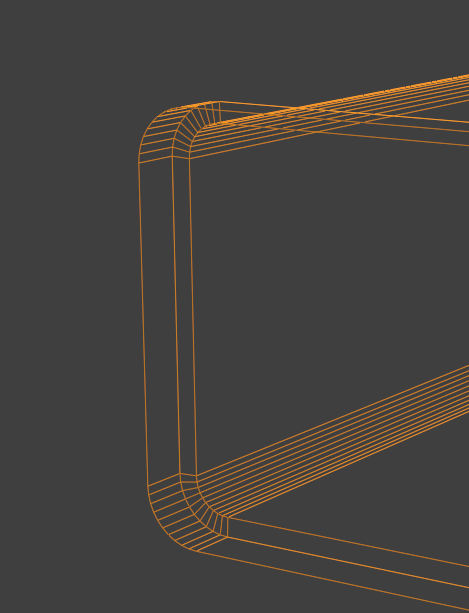
Increasing the Bevel Segments changes the Angles between the Faces (what Blender calls Edge Angles):
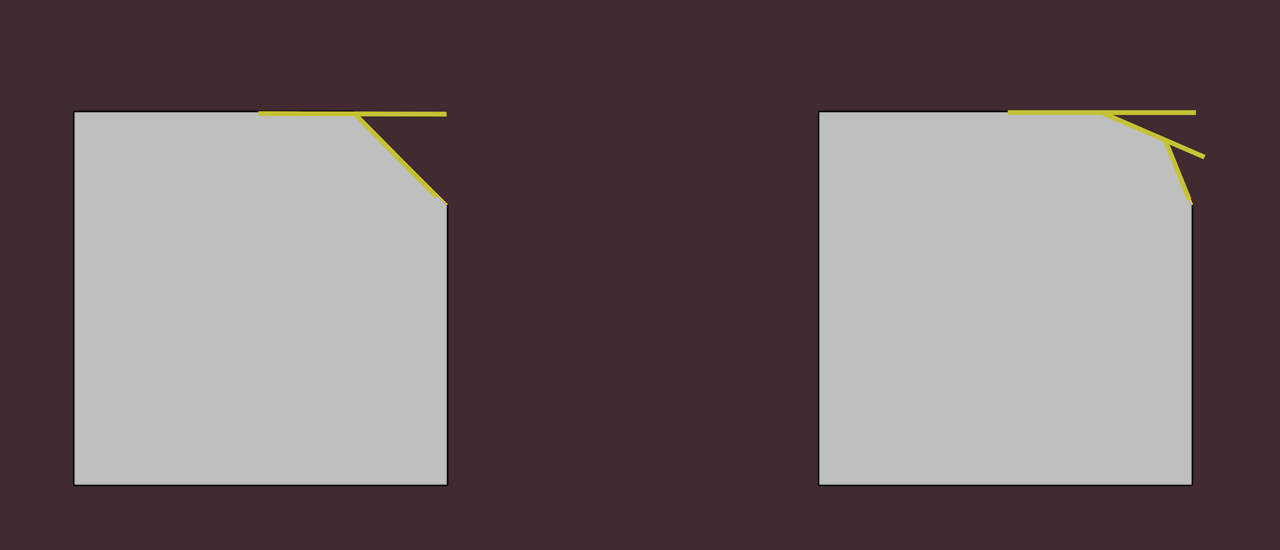
that's why lowering the Threshold helps in those areas:
The Faces, that then get Smooth Shaded, but you actually want Flat Shaded< can be fixed manually, by Selecting them and CTRL+F (Face Menu) > Shade Flat.
And to your side question, yes! You can Select parts that are Assigned to a Material in the Properties Editor:
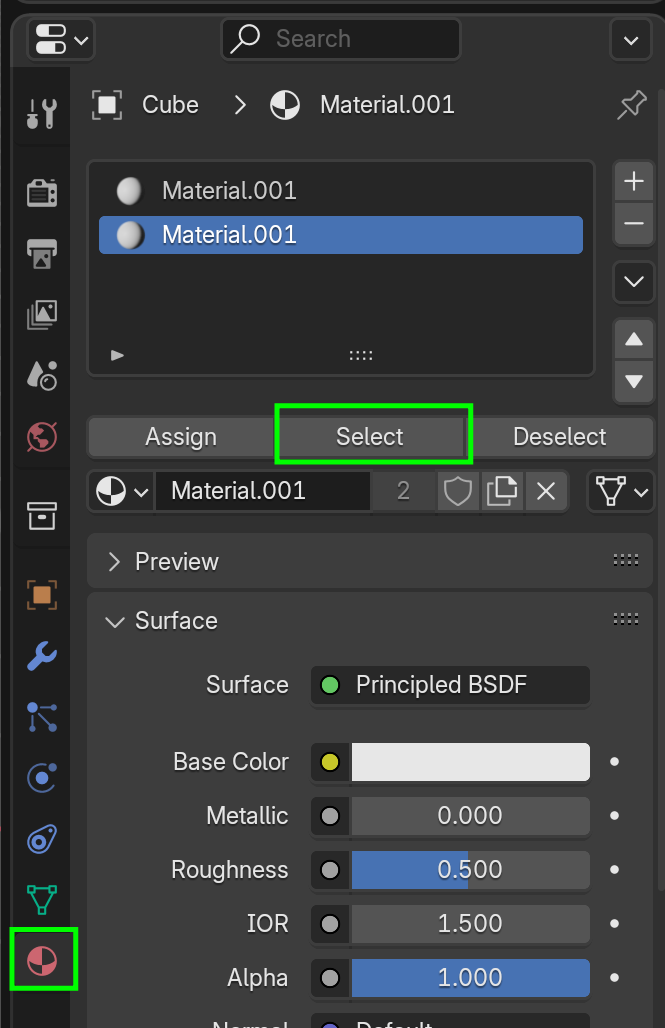
Make sure nothing is Selected before doing this, or you'll end up Deleting more than you actually want.
Thanks Martin! Didn't know you could manually shade faces flat on a case by case basis, that's a great help and solves the issue.
Am I having those shading issues in the first place because of messy boolean topology? i.e. if I was to go back and remodel those areas with even quad topology, would that solve the issue without using the 'shade smooth' or 'shade flat' options? Or would I use those settings anyway, even with perfect topology? Just trying to understand the underlying cause behind it.
In terms of assigning materials, I mean that in the case I accidentally assign some faces to a material that I don't want assigned, is there an easy way to 'un-assign' / remove them from a specific slot?
HI Jack,
I say, that it'll be mostly because of the Auto Smooth (Smooth By Angle).
Auto something doesn't always work as you would like, because of the fact that it takes away some of your control. That's where 'manual labor' comes into play.
You can't un-Assign it as such, but you can simply Assign them to another Slot.
Fantastic, that's a great help. All clear now - thanks again for all your help!