Hi there! I'd like to know if one of you could help me. I need to animate the thickness (individually by each point) of a bezier curve. I've been trying it, but I only find the way to appear and disappear the whole curve.
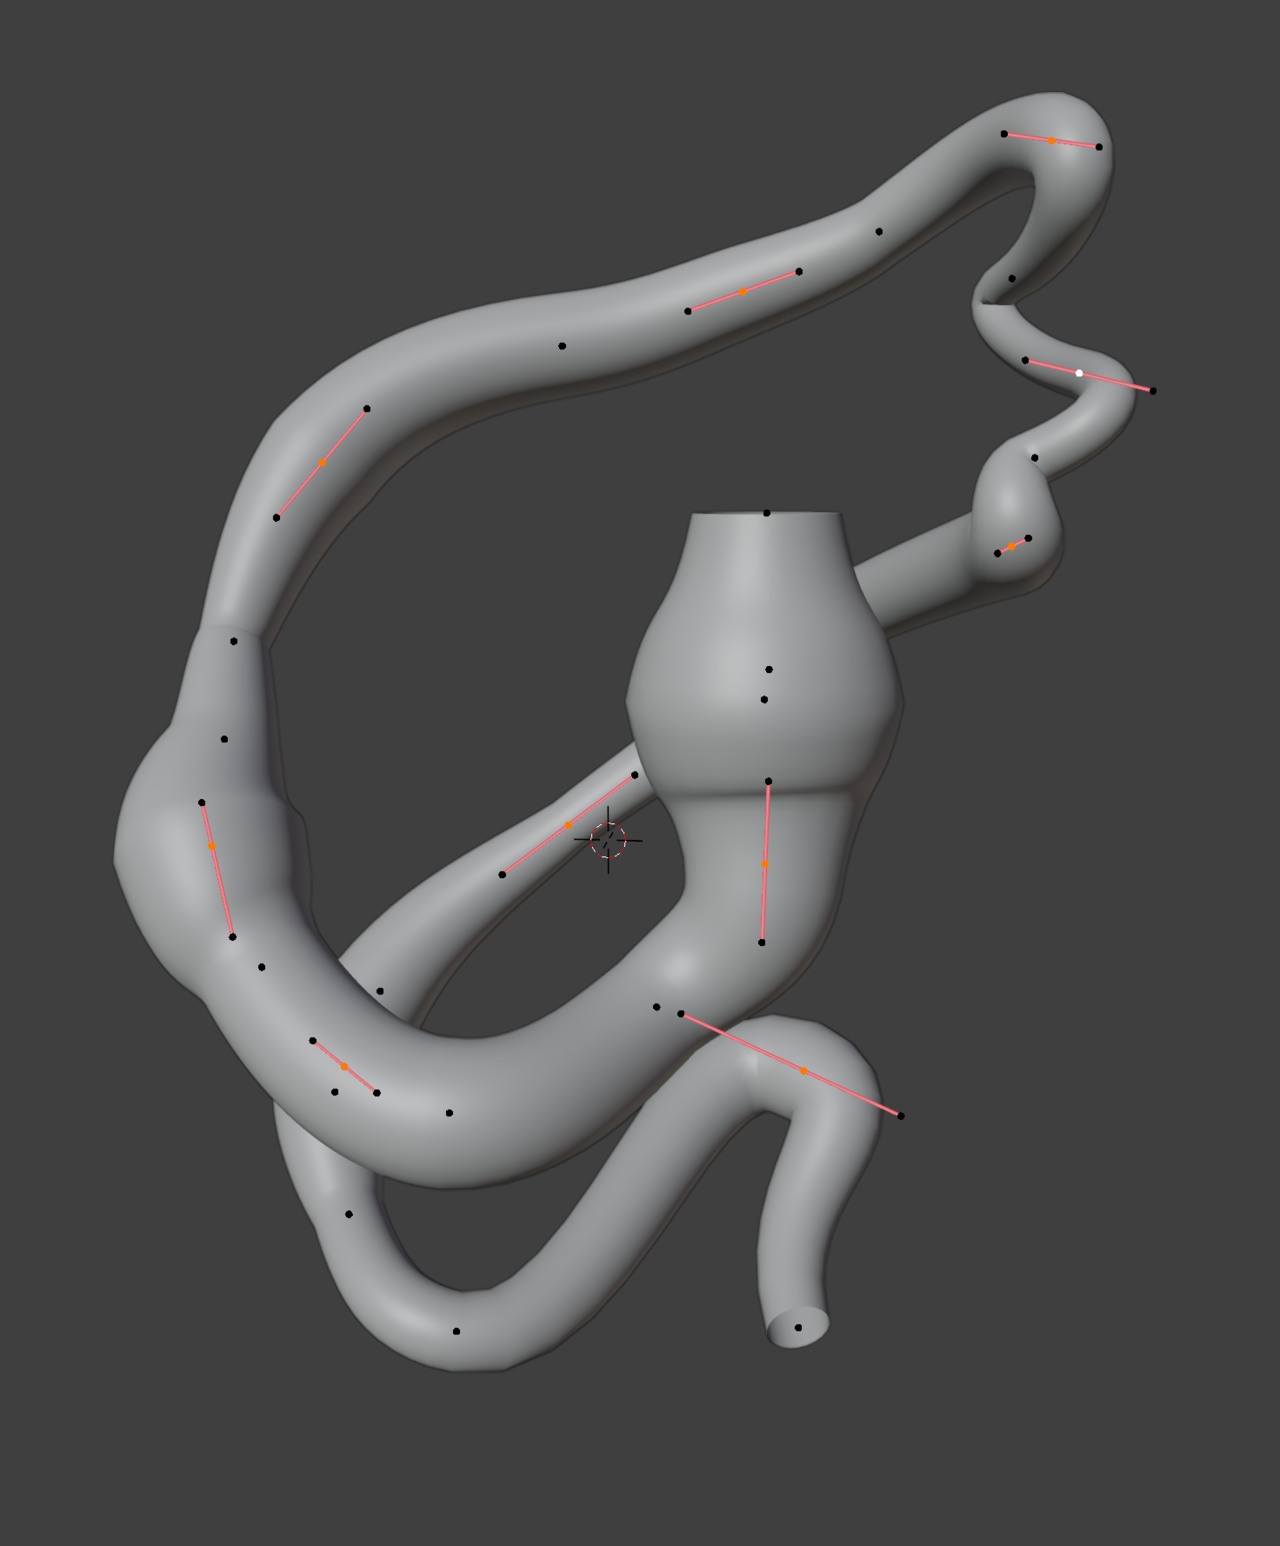
The main idea would be to make it feel that there is something flowing inside, like a hose with different elements inside, although I need to keep the whole tube where it is, except with some bumps here and there.
I will appreciate your help :)
https://www.youtube.com/watch?v=vhD74mTtrVw
I once made a freestyle video. haha. Unfortunately you can't see my mouse and you can hear my keyboard, but maybe you'll understand it anyway.
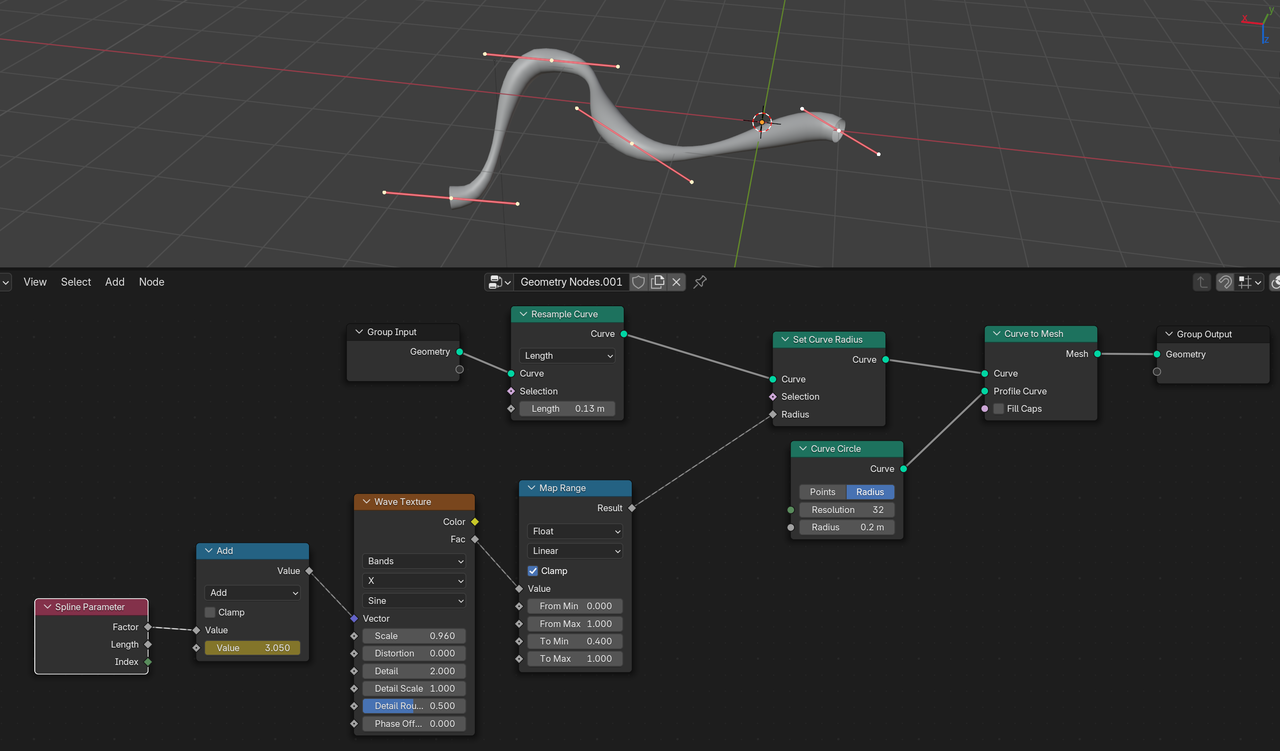
It's actually just a displacement modifier, linked to an empty object. You have to check the parameters yourself, maybe you have to set it differently or another texture is suitable. I would perhaps do it like this
Mesh might be easier, but if you want to keep it a curve then I have 4 methods I can think of: Note: You can change the radius with alt+s hotkey.
1. Shape keys are the easiest way to do it.
2. Use a lattice object along with a lattice modifier.
3. You can use Keyframe animation.
3A. Driver method: create custom properties. then right click and copy as new driver. Then in edit mode of the curve select the control point and on the n-panel item tab right click and paste driver on the radius.
3B. While in edit mode keyframe the radius. Either right click on radius and click insert keyframe or with mouse cursor over radius field press the I key. Me personally I'd just go thru and create the first keyframe for all of the control points. Then in dopesheet click view menu and check show sliders. This way you can adjust the values thru the channels of the dopesheet. As soon as you make a change in the slider it will change an existing keyframe or add a keyframe if there isn't one on the frame you're on.
4. Use another curve as a tapper object. works best if it has the same number of control points. If I remember correctly you just have the move the control points of the taper object along the Y axis. this can be done with shapekeys or using hooks. select control point and press Ctrl+h->New object. it will create an empty and hook the control point to that empty. then just animate the empty.
Hi ![]() JOLUVIAN ,
JOLUVIAN ,
In addition to the great answers, given above...
If possible, using a Mesh will definitely be the easiest way and:
If you go with Converting the Curve to a Mesh (keep the Curve!), you can go more advanced and use the Vertex Weight Proximity Modifier. That way you can use specific (even irregular) shapes (crawling animal?): https://www.youtube.com/watch?v=KjDAM6rdG8g
Of course I can guide you through the process, if you're interested in using this method, but I recommend you give it a try yourself first.
Hello to all!
First of all, thank you so much for all your help.
For now the one it's closer to what I need is Shapes keys, although I want to learn what Martins says, but it's kind of very difficult for me to understand all the steps geometry nodes, it's the one that looks what I exactly need, I'm going to keep on trying it, I'm copying all the nodes you have, however my curve doesn't get affected and I don't know what's the node that says ADD on the left of Wave, if you know any tutorial for those wonderful solutions, I'll appreciate it.
PS: Sorry if my English is a bit precarious, it's not my native language.