From what you explained I think I know what you want. There are a couple of ways to do this.
First, is the cursor method:
1. Change transform orientation to 3D Cursor.(Comma) Default is global.
2. Select what you want to align based on.(Face/edge/vertex or multiple)
3. Shift+numpad 7 to align view to the normal of all selected items.(This is top down view based on the normal.)
4. CTRL+LMB to move the 3D cursor or use cursor tool. Note:By default cursor tool is set to Surface Project with view orientation. If this has been changed then it effect the CTRL+LMB as well as the tool. You will want to make sure that these are set to default otherwise you will get different results.
5. Select what you want to move and move it with move tool or pressing G.
Second, is the define view method:(My preferred method.)
1. Select what you want to align based on.(Face/edge/vertex or multiple)
2. Click the transform orientation dropdown. Where it says Global on the header or Cursor if you changed it in the first step.
3. Click the plus sign. [Optional] Change the name. By default faces will be name face, edges will be named edge, etc.
3a. Change to the new view if for some reason Blender doesn't do it.
4. Select what you want to move and move it.
Notes: You can select a created view and click the X to the right of the name field to remove it. If you do this a lot then you may want to right click on the plus sign and either assign a hotkey to it or add it to your quick favorites.
Bit of a convoluted answer I think, but it would involve pivot points, transform orientations and snapping's. I think it's better if I point you to a couple of videos where stuff like this is used to achieve the goal.
https://cgcookie.com/lessons/mesh-normals-and-shading-3c7b99fa623e95e5
https://cgcookie.com/lessons/pivots-snapping-and-proportional-editing
https://cgcookie.com/lessons/mesh-components-and-object-origins
In this lesson at around 17:50, JL re-orients the local axis to align with whatever he wants
https://cgcookie.com/lessons/modeling-the-left-leg-i
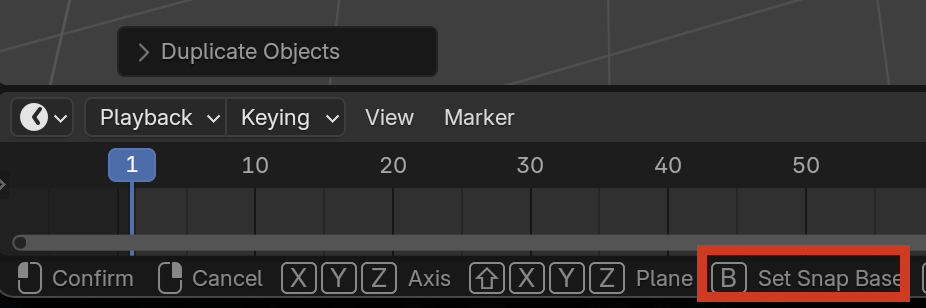
You can also use B when snapping to set a base:
You can turn on Face Orientation when Snapping to get your object to align with the normal with aligning the rotation to the target.

Forgot to mention that you can also right click on the x to add delete orientation to hotkey or quick favorites. It will delete the currently select custom orientation. Don't worry you can't delete the system defined orientations. Side note on quick favorites: The create/delete orientation is assigned per mode. So, if you do it in edit mode(Mesh) it won't be available in object mode or edit mode(Curve), and yes you can also create orientations in object mode.