Hey Blenderites,
Does anyone know if it's possible to offset animation on multiple collection instances from the same master collection?
I've searched the web for hours with no luck.
-Scott
It's your origin point. Right click on the cube->Set Origin->Geometry to origin. The follow path follows based on the origin.
Hi Dwayne,
Ok, I followed your directions, but this is the result - still offset, with the addition of a blue line.

Dwayne - you were right originally - Geometry to Origin worked. I first did Origin to Geometry and that maintained the offset. And Alt G doesn't fix the problem.
Martin - Why shouldn't I ever use "Apply Location"? There must be some situations where this is used?
Hi Scott,
"Why shouldn't I ever use "Apply Location"? There must be some situations where this is used?"
I'm sure there are (albeit it'll be very rare), but I can't remember a situation where I needed it.
That being said, I remember, from my short Blender time before joining CGCookie, that I used to always Apply All Transforms, "just to be sure."
Okay Scott, here's a more in-depth explanation (this is also covered in the Blender Basics, just in a slightly different way);
First of all: we are talking about Mesh Objects here!
Each Object has its own orthogonal Coordinate System. Where the three Axes cross, is the Object's Origin. Transformations done in Object Mode, are done to the Object's Coordinate System!
For instance, here's a Cube:
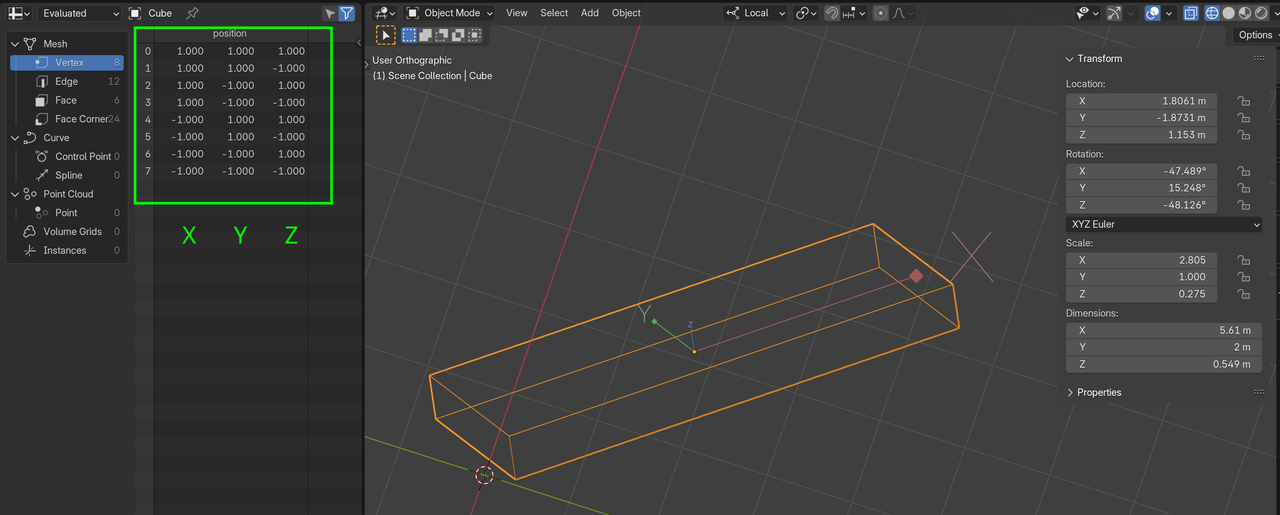
The Positions of the Vertices are measured in the Object's Coordinate System.
Applying a Transform, 'resets' that Transform to the World.
So Applying the Scale, for instance, makes one unit in the Object's Z-Axis, the same as 1 unit in the World, and the same for the other Axes.
It doesn't change how the Object looks, but it changes its Vertices' Positions.
Applying All Transforms, would change all the Vertices' Positions to their Positions according to the World's Coordinate System, again, without changing the Object visually.
The main thing to remember is, -'always' Apply the Scale, avoid Applying the Rotation and 'never' Apply the Location.
Hi Martin - thanks very much for your in-depth explanation on this. I'm beginning to understand the concepts. And I'm sure applying one or more of the transformations has gotten me into trouble lately. But not applying a transform (location, scale, rotation) has also caused problems, so you need to know when and where to use this function.
At least with Blender you don't have object history to deal with like in Maya. That can cause a whole different series of issues, but I think it's similar to this transformation thing in Blender.
I'm sure I'll have more questions come up with this, but thanks for your expertise!
-Scott
The thing to remember is you have data and that data is contained in an object. Transforms are done at the object level and are applied to the data. For example the default cube is 2MX2Mx2M. If you tab into edit mode and choose edge length in the overlays dropdown you will see that all edges are 2M. Tab to object mode and scale 2 times(press S 2 and enter). The dimensions on the N-Panel show the cube as 4Mx4Mx4M. Tab into edit mode and all the edges are still 2M. This is because the data hasn't changed. Tab back to object mode. The scale transform is at 2. Meaning that it multiplies the data by 2. If you apply the scale(Ctrl+a->Scale). Then the scale is set back to 1, but the dimensions are still 4M. Tab into edit mode and you will see that all the edges are now 4M. Almost all the modifiers work at the data level.
With rotation, when you rotate in object mode the local axis doesn't change. To see this select the move tool. Then change the transform orientation(Comma key or on header change global to local) to Local. Then rotate the object(R key) notice that the local axis is no longer aligned with the world axis. If you apply rotation the local axis will now be aligned to the world, but the data was changed to match the rotated state.
Location is rarely applied. I wouldn't say never. The local axis's X, Y, and Z all meet at the local origin(Orange dot) also called the objects center. When you move in object mode the location is base off of the movement from the local origin to it's reference point. By default the reference point is the world/global origin(Where the 3 global axis meet). When you apply location it changes the local origin back to it's reference point while leaving the data in the same place. The reference point can be changed like when you make the object a child of another object. Now the reference point is the parent object. In the case of the follow path constraint you are changing the reference point to a point along the path. So the objects local origin follows the curve. If you have anything in the location then the object will be offset by that amount. Since you applied the location you changed the objects data in relation to its center/origin.