Session Practice: Light Shape Hallway
Light Shape Hallway; R + G+ B = White
What's the first S in KISS stand for? Completely disregarding criteria #2 of keeping it simple, I wanted to experiment with red, green and blue lights converging on the floor to make white. Used a simple volumetric shader for light shafts. Doorway in the far distance showing the sun light, beckons the viewer to move further in. Unwrapped the hallway so all bricks run horiz/vert.
The animation is a little fast, but took so long to render I left it as is. Should prolly have slowly moved the camera forward too.
http://www.regalmedia.com/video/LightShapeHallway.mp4
(Might have to right-click below and Show Controls)
Thanks! Now that you show that to me…I’m pretty sure Kent covered it…and I blanked out. Doh!
http://www.regalmedia.com/video/Museum.mp4
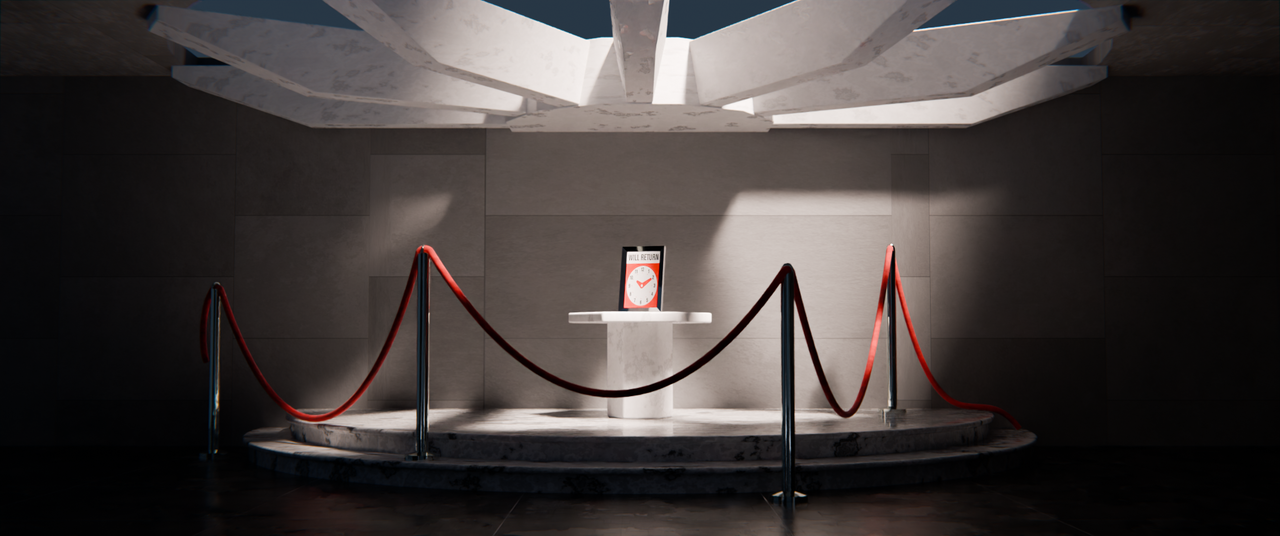
CORE | Fundamentals of Lighting: Scene at Sunset
I tried lighting the exercise scene at sunset. First time I've ever understood light linking...felt almost like painting with light. Neat!
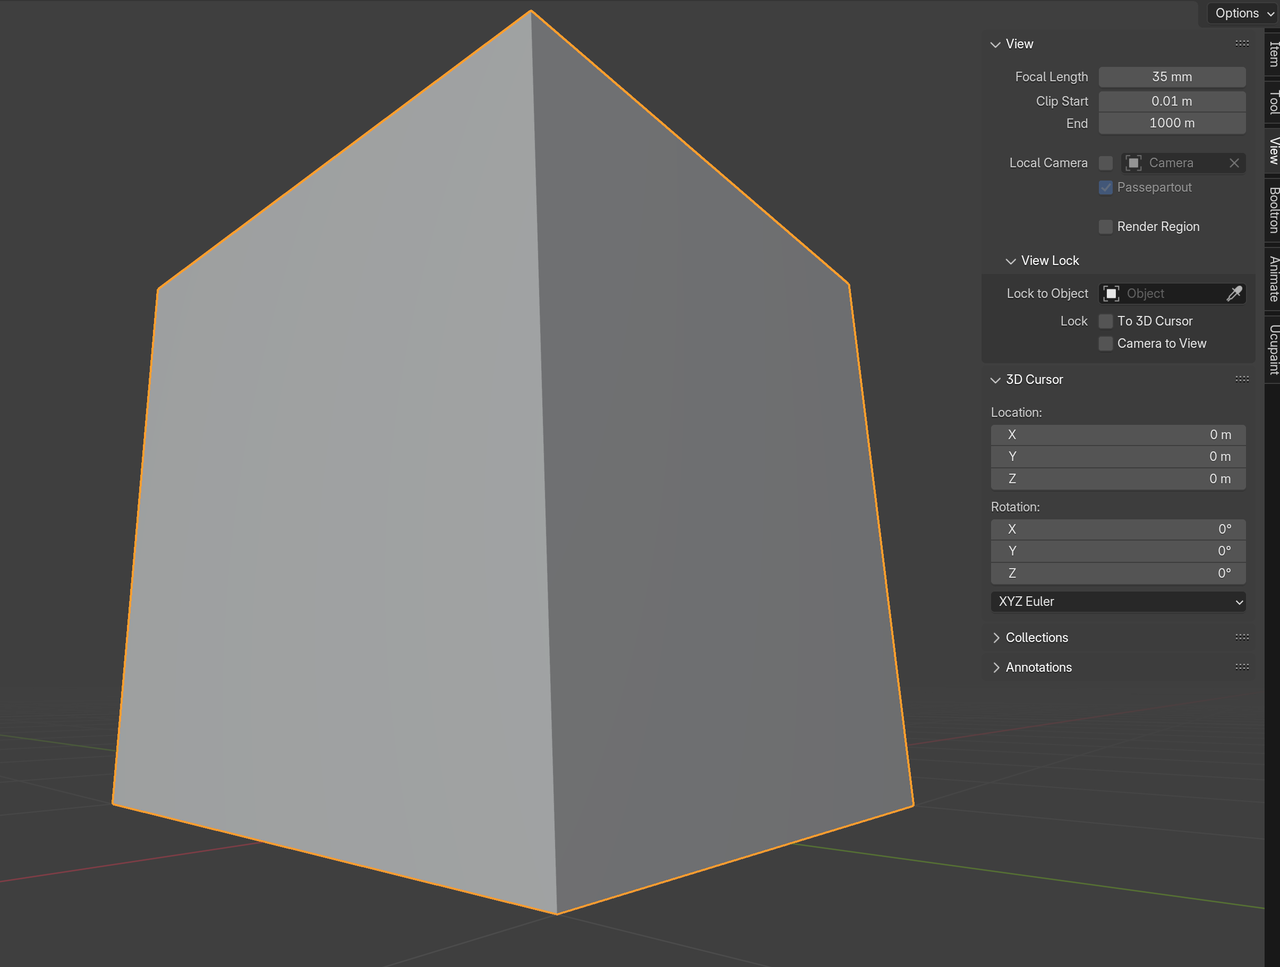
SESSIONS | Ancient Pillars: Don't delete the cube!
Ever have those times when you have so many ideas running through your head but can't decide what to do...and you sit staring at the screen for far too long? This is what happens.
I stared at the Blender cube while trying to think of a creative scene that was different from the lesson and wasn't any of the direct suggestions. I drew blanks until I thought the cube could be the actual subject. How could I make the cube appear larger-than-life and imposing?
Video: http://www.regalmedia.com/video/BlenderCube.mp4

Self Feedback
If I had more time I would have tried making it look like the cube was under construction or investigation...maybe some scaffolding or a crane up top to further give it some scale. As it was, I must have futzed with the cloud volume and spotlights for way longer than a couple hours in both Cycles and EEVEE.
Just could not get what I wanted. I'm afraid at the end of the day, it's a cube with a strange material.
Still...think twice before you delete the cube next time. *smirk*
Tried that originally but couldn't frame it satisfactorily. Started feeling like the frame was either empty-ish or was just two flat sides. Using a 15 - 10mm focal length. Then thought to look from above and add the grid to give you something else to look at and provide scale. Really wanted things at ground level to fade more in the distance to sell it, but couldn't get that "depth/fog" effect working. Gradients, color ramps, volume meshes, volume environment, ugh. Brought my machine to its knees. :)
Prolly could have modeled the spot light with more fidelity, kept it in the frame like you were standing next to it, and kept the upward viewing angle showing the cube disappearing into the sky beyond the reach of the spot light. No matter what, I'm still going to feel bad whenever I delete the default cube. :)
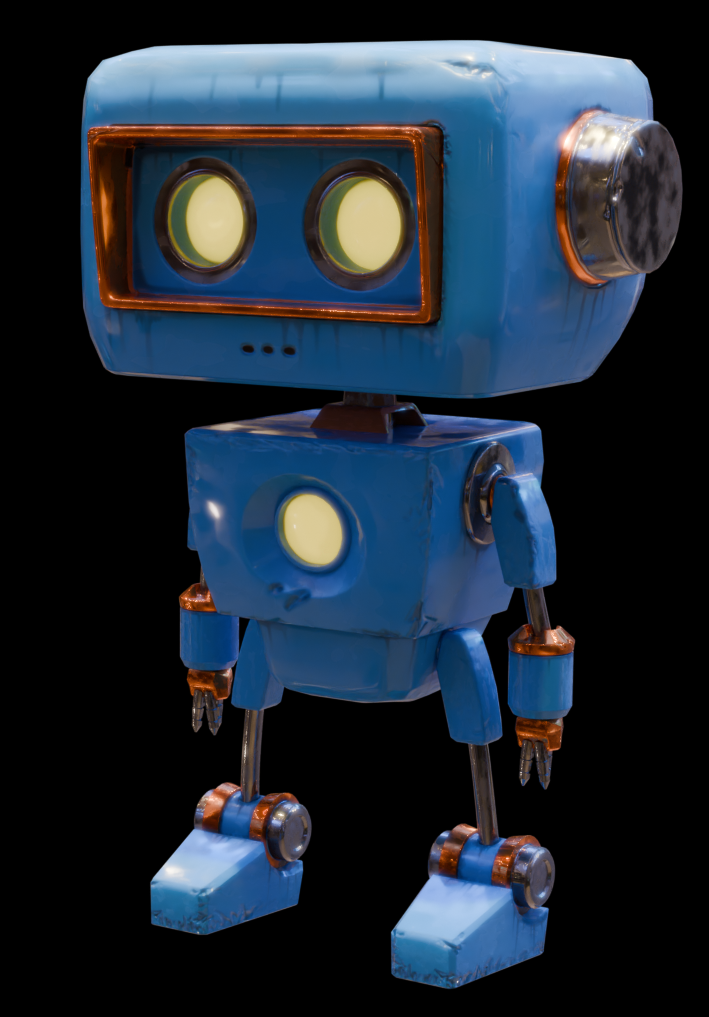
CORE | Textures: Who's the dirty little 'bot?
Disclaimer: I am not an artist. I am hand painting with a mouse.