I purchased a model of a diesel locomotive and loaded it into my scene. I want to animate the windshield wipers but one of the wipers is just floating in space with an odd local and world orientation. (The artist apparently just left it hanging there. 😀) The wiper's origin is back at the rear of the locomotive, as is the origin of every other one of the model's components.
Tasks required:
1. Move the origin to the base of the wiper arm. (Complete)
2. Attach the wiper to the appropriate face on the locomotive body that corresponds to where the wiper would be in the real world. (Complete)
3. Align the local z-axis of the wiper with the normal of the body face so that the wiper can be rotated around that axis to make it behave like a real wiper. (Done so far by eyeballing it. Would snapping help in this case? How to?)
4. Parent the wiper to an empty so the empty acts as a controller. (Necessary? Desired?)
5. Figure out how to set up the world orientation and transforms so that when animated, the wiper rotates around its local z-axis and not the world z-axis. Currently, the wiper rotates into/out of the body no matter which axis I rotate around. (Confused)
Thanks! Please direct me to a better place to post if here isn't appropriate!
Hello Jeff. What exactly is the issue? Sounds like you know exactly what needs to be done.
For point number 4, as you say it's not necessary, if you're the only one that will be using the model and it's not part of a big pipeline or anything, you can work a bit out of the ordinary and it's ok.
And for point 3 and 5, I think the way JL does customs rotations in this video will help you out with that one, it's around 17:53
https://cgcookie.com/lessons/modeling-the-left-leg-i
I'll also add that the process is pretty tedious, so I did write an add-on for it, which you can get for free on the extensions website:
https://extensions.blender.org/add-ons/orient-and-origin-to-selected/
Thank you, guys! I'll watch and try and post back my results. Cheers.
I got stuck. I figure pictures tell the story best. Thanks in advance!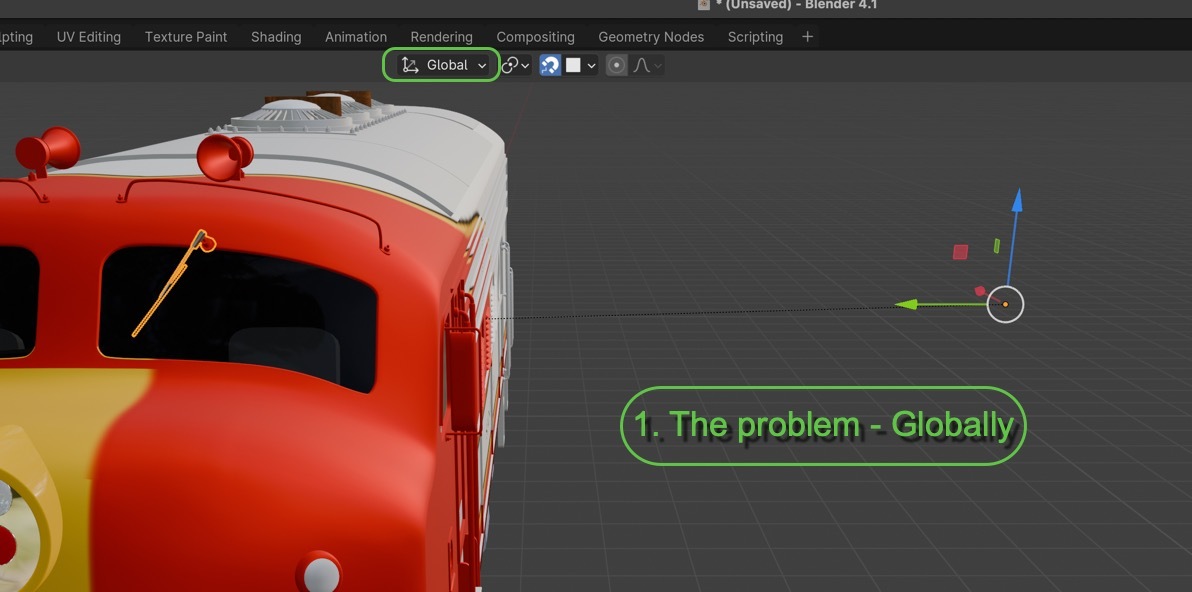


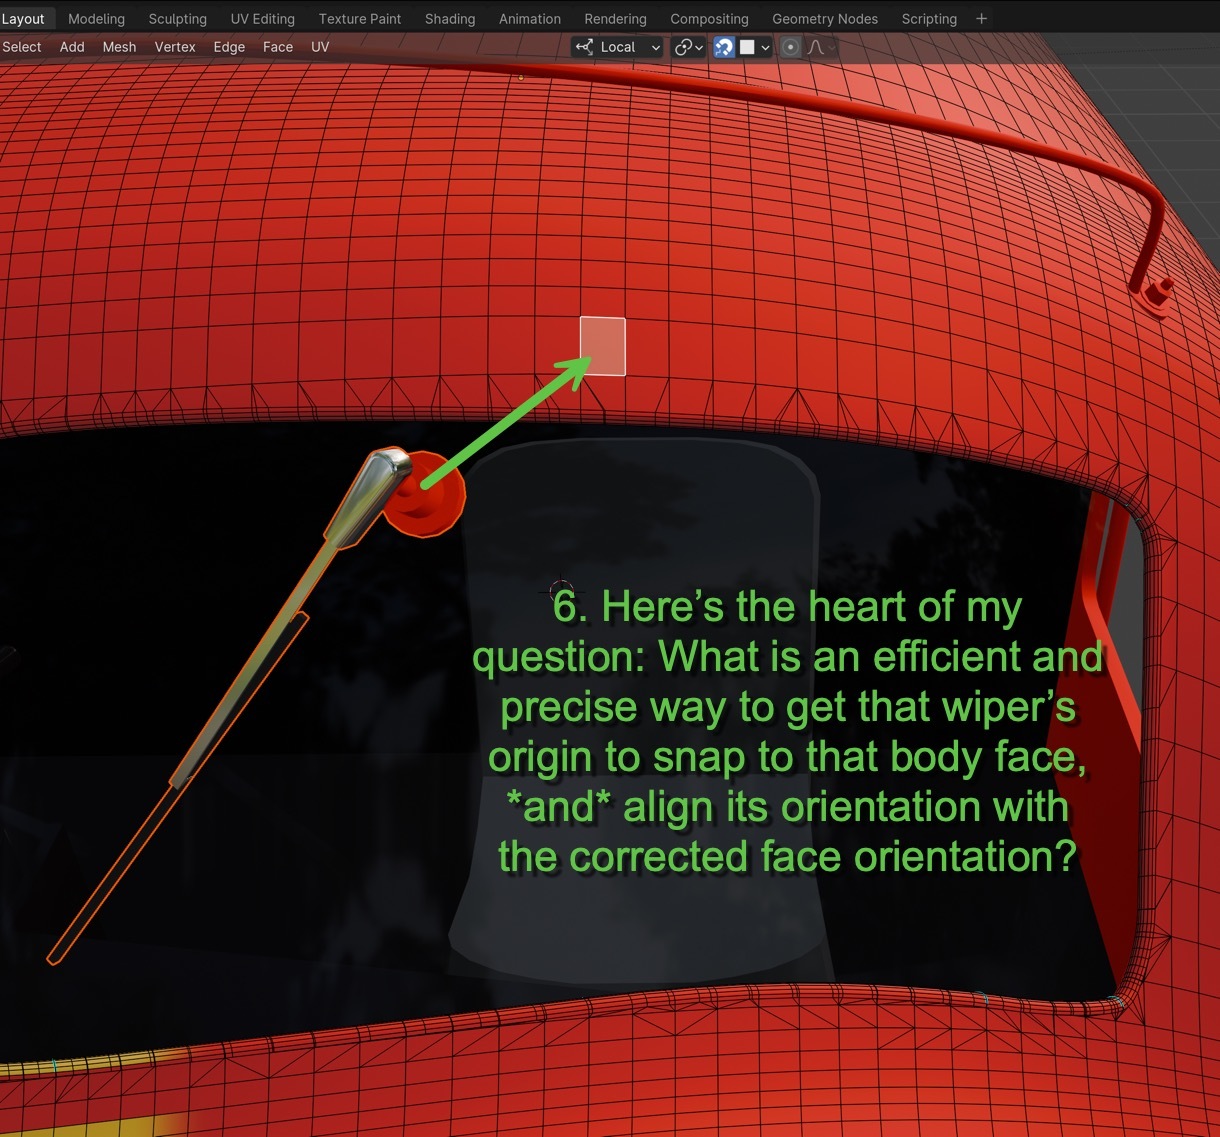
If the wiper blade has its Z axis pointing up through that connection, you can turn on face snapping in Object Mode and enable Align Rotation to Target and that should allow you to snap it right there. If you need it to be 100% exactly to the center of that face, snap the cursor to the face first and then snap the object to the cursor.
Omar also mentioned custom orientations, like shown here, and if you create one you can use Object -> Transform -> Align to Transform Orientation.
>If the wiper blade has its Z axis pointing up through that connection,
"Aye, there's the rub!" It didn't point up through the connection after I moved the origin; it pointed to True North. I thought about that for a while and decided to try selecting more of the connection's geometry than just the outside of the base. I Selected>Linked to select the whole connector, and the z-axis lined up perfectly through the center of the connector! <applause>.
I figured I should try to create a custom orientation at this point, but I discovered this very nice Orient to Selection button in the Transformation Orientation drop-down. 😀 So things aligned and the origin stayed at the base where it belongs.
I tried face snapping while moving the wiper object in Grab mode and using the Move tool, but it was not cooperating. I tried changing the snapping settings to Closest, Center, Median and Active, but the wiper kept snapping at an unexpected angle to the face (Align Rotation to Target checked), or snapping to things far away that didn't make any sense. I finally tried what you suggested, even though I don't need the exact center of the face:
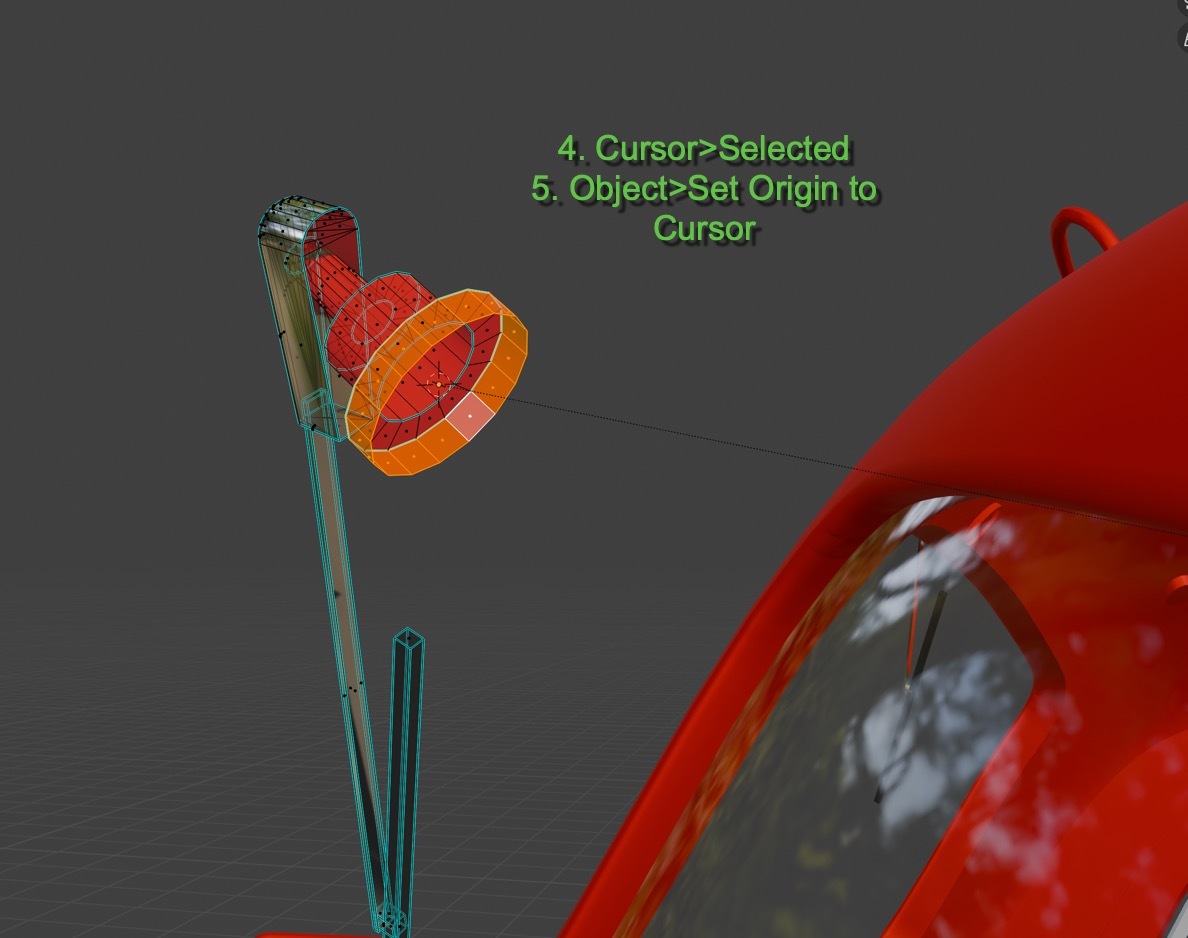
>If you need it to be 100% exactly to the center of that face, snap the cursor to the face first and then snap the object to the cursor.
Here is the Local result. Local z rotation works perfectly. Global and animated z rotation were problematic (more on this later)
.
Once the wiper was in position and the z-axis rotation working correctly, I applied my rotation transformations. After that, scrubbing the z rotation value caused the wiper to rotate around True North(!). <panic> After undoing, I tried applying rotation to deltas, which got me what I wanted. I have absolutely no idea why that worked.
Google gave me another suggestion, which was to *not* apply my rotation transforms, but instead switch the rotation mode to ZXY Euler from XYZ Euler. That also worked, and the logic is a little more clear to me than the delta transforms. But now my wiper rotation values for X and Y are 15.974 and -48.523. (I guess I should write those down, eh?) 😀
>This is why I prefer to use armatures.
I actually tried using an armature earlier on in my adventure, but for whatever reason, it suffered from similar positional and rotational problems. I think it has something to do with the offset origin and the parenting structure, but it could also have just been user error.
Armed with the knowledge I've gained here, I set things up with an armature for the wiper and got it to work. It seemed more difficult to get everything lined up and positioned correctly, but the end result was the same.
What advantage(s) do you get by using an armature vs. positioning the geometry itself, please?
There is also nothing wrong with eyeballing it, place the object manually to get the best approximation you can.
For the armature, it will all depend on what you want. If you are rigging the train then you want all the controllers to be in the same place. With an armature you will get all your animation data stored in one single place I believe? Also is just the "right" way to go, the legit way, organizational-wise, since the objects themselves shouldn't be the holders of the animation. It's best to have an empty parented at least. Why, well that's the thing you'll learn on the Animation and Rigging Fundamental courses.
Thank you, Omar.
>There is also nothing wrong with eyeballing it, place the object manually to get the best approximation you can.
I have to fight my OCD on that. The tiniest wobble in the rotation is like a pebble in my shoe! But you are right; my dad used to say that "better is the enemy of good enough".
>an armature......is just the "right" way to go, the legit way, organizational-wise, since the objects themselves shouldn't be the holders of the animation. It's best to have an empty parented at least
That's what I've done over the years with motion graphics (After Effects, Motion). I thought I could get away with a shortcut here since the wipers are the only thing on the train I want to animate. My dad also used to say, "Why is there always time to do a job again, but never enough time to do it right?"
>If you are rigging the train then you want all the controllers to be in the same place
I really just wanted to repair the model so I could make the wipers rotate like real windshield wipers. I thought it would be easy..........
I should set up a list of rules for myself:
Rule #1: Everything will be twice as hard as you think it will be when you start a project.
Rule #2. Ignore Rule #1. Everything will be 5x harder than you think it will be.
Question: should I take the Rigging course first, or the Animation course?
@JL
I'm working hard on understanding the concepts you discussed in the videos on orientation and transforms that are linked to in this thread. I want to understand the "why" of what I'm doing and not just what buttons to push. Both videos are excellent presentations. I'm just not as fast a learner as I used to be. 😀
With the armature there are 2 goals to answer.
For positioning goal: you would select the wiper and position the origin to the base edge loop. Then alt+g, alt+s, alt+r to clear all transforms. Then press / to go to local view(aka isolation mode). Tab into edit mode. Rotate and move wiper if needed. The only part that is important on alignment here is the base's bottom needs to sit on the XY plane just like you want it to sit on that face. Next step is to rig it. You will need 3 bones minimum. A root bone that is aligned to the world axis. A base bone that is aligned to the base and a arm bone for animating wiper arm. Additional bones you may want to add for advance animation later are a bone for the truck and one for the blade(the rubber piece of the wiper). As for aligning it depends on if you add a bone for the truck. If you do then you want to align using the wiper base bone. If not then you can align with base or root bone. While in pose mode add a shrink wrap constraint to the bone and point to the truck as the target. I'm not sure if you want project or target normal project method. It should be one of them. The on surface. The. Move the bone until you are on the face you want. Once it's in place press Ctrl+a->visual transform to pose. Now you can remove the shrinkwrap bone constraint and the bones will stay in that position.
Edit: forgot to mention that you can apply the armature modifier instead of applying to pose if you don't plan on using the armature for animation. If this is the case then you only need 1 bone.
Goal 2 animation: you want the heads of the base bone aligned to the bottom of the wiper base. Then the tail of the base bone and the head of the arm bone you want at the pivot point of the arm. The center of the rounded part of arm that attaches to the top of the base. The tail of arm bone needed to be positioned so that the axis you want(x, y, or z) of the bone points/follows the normal of the rounded area of the arm. This will become the axis you rotate the wiper with. Technically you don't need a root bone, but it's common to have one. Also if you decide to add a truck bone then the root bone would be used to move both the truck and wiper.
Answer to the delta transform. Delta transforms are just another transform on top of your normal transform. This is useful in several situations. The most common is if you use empties for animation. Once you have the empty position where you want it you apply the transform to the delta so that later when you clear transforms(alt+g, alt+s, and alt+r) the empty will go back to the delta transform position. Basically the same thing as the rest pose with an Armature. Another use is if you have a driver on a transform channel and want to adjust or offset that value you can do it thru the delta.
Hi Dwayne,
Thank you for taking the time to explain the rigs in detail, and for giving me options for how to proceed. Both of your explanations are very in-depth, but I mostly understand what you are saying despite my extremely limited knowledge of rigging. I prefer the simpler Goal 2, I think. One question, please: I don't know what you mean by the "truck". Are you referring to the body of the tram?
Yes the body of the tram. Sorry, somehow I got it in my head it was a firetruck. Don't have any idea where that came from. I'm just going to blame it on being old.
We should compare ages to see who's older. I'm 66. If you're older, then I still have hope and time to try to get better at this stuff. 😀