Tip for Model Orientation

Hi there :) I'm used to the 3DS Max workflow, which can rely heavily on instances, or in Blender terms, 'linked objects.' When working on the top piece, it's a lot easier to move things around if you create a linked duplicate (alt+D) that is then rotated 45 degrees. That way, you can have one copy that is straight and another that is turned. So, regardless of what kind of transformation you're trying to make, at least one of the copies will align with the global X and Y axis. It makes it so you don't have to fiddle with trying to transform along the normals at all. Kinda hard to explain without screenshots, so I'm hoping that explanation makes sense.
  • Gr8 tip! 🙏💯
2 loves
Reply
  • TheRavensCurio replied

    Here's my practice piece with the screenshot for example! 


    8-11 200553 copy.jpg

    • 🤘
    • Stellar! 🔥
    1 love
  • Martin Bergwerf replied

    Yeah, that's a great trick, instead of using Local Transforms.

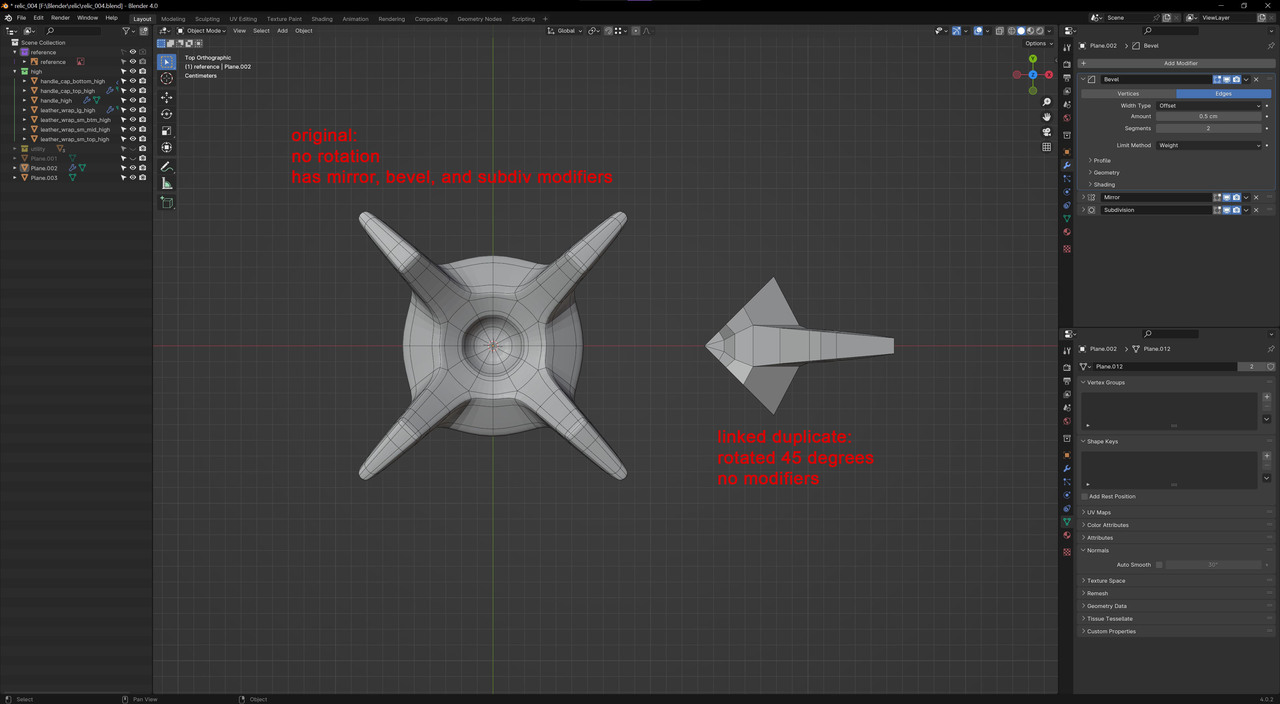
    In general; in Object Mode: ALT+D followed by ALT+R. You can use that for any weirdly oriented models.

    Just make sure to: always Rotate in Object Mode and never Apply the Rotation! (At least, as long as possible, there are times, when you have to Apply Rotation, that will break this workflow.)

    If your Scene has a lot of models, you might be better off, just model in a separate file (unrotated) and Link them in in an 'assembly file'.

    2 loves
  • Omar Domenech replied

    I used this trick all the time, but then I learned about custom transformations. If you're interested, JL does it around 17:52 in this video:

    https://cgcookie.com/lessons/modeling-the-left-leg-i

    2 loves
  • Martin Bergwerf replied

    I learned about Custom Orientation (a life saver, that always works, no matter what) from the legendary Jonathan Williamson in what is at the moment the oldest Course, still in the active library:

    https://cgcookie.com/courses/interior-architectural-vizualization

    1 love