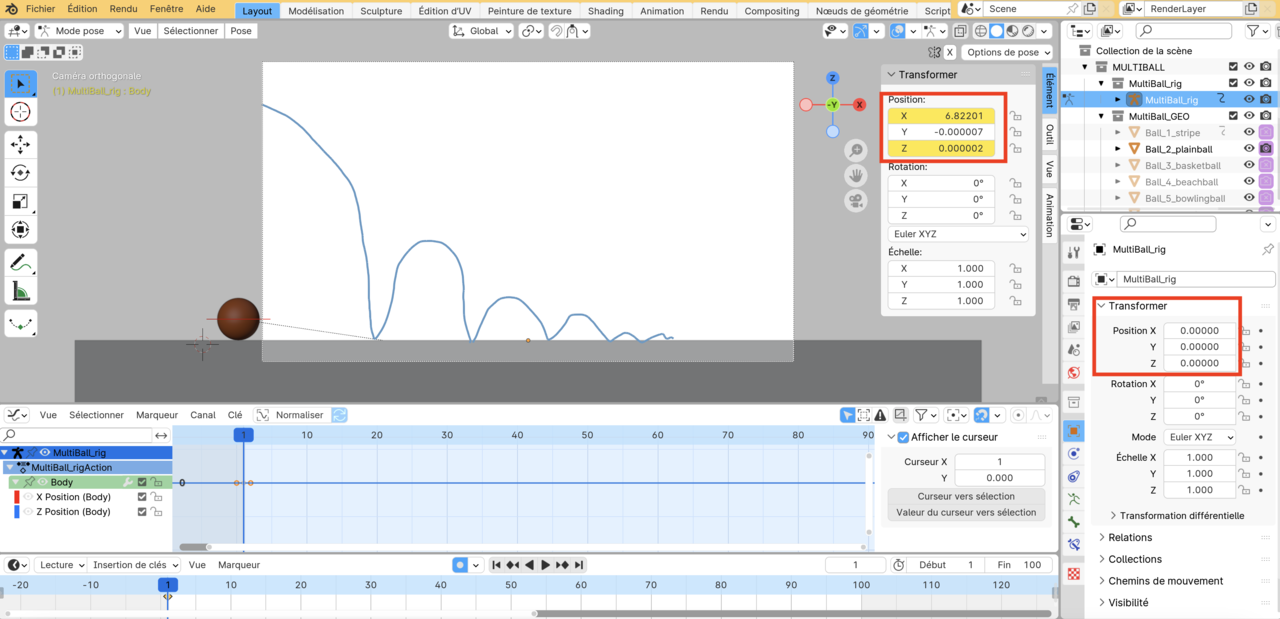
I try to do the Bouncing Ball exercise (Fundamentals of Animation) and I get two strange things. First, the rigged ball seems attached by a dotted line. Why? Second, I can't get only two keyframes: I get a line between them. Again: why?
Hey! The yellow line between the keyframes indicates that the keyframed property has not change during that interval.
And the dotted line, I think, could be indicating that the ball is parented and has moved from its parent origin? Something like that. It is a relationship line I think
Hi Marie,
Martin is correct. The dotted line is called the 'relationship line'. You can disable this in the viewport overlays, however, it shows you the parent/child relationship.
In this case it is the Body control that is a child of the Root bone.
As for the Keyframes, what is shown in the timeline editor are 2 keyframes that have the same value (ie - they don't change between those frame numbers)
So maybe you have keyframed the wrong part of the rig? or you have keyframed that body control at the same position twice instead of 2 different positions.
There's many things that may have gone wrong in your situation, but what is shown there is a keyframe that doesn't change value.
Hope that makes sense.
Let us know if you need more help.
Well, well, well... I need more help. I have listened again the lesson but I still get that result: the two keyframes have the same value, even if I've moved the ball. But I noticed that the values don't change in the window at the right of the board. Look at my two screenshots:


What have I done wrong???
Hi Marie,
Nothing seems to be wrong.
The X Position changes (red curve in the Graph Editor). The Z Position stays the same (blue line), because that hasn't changed yet.
Those Positions on the right, that stay at 0.000 for all three Axes, should not change...they show the position of the Rig, not the bones in Pose Mode.
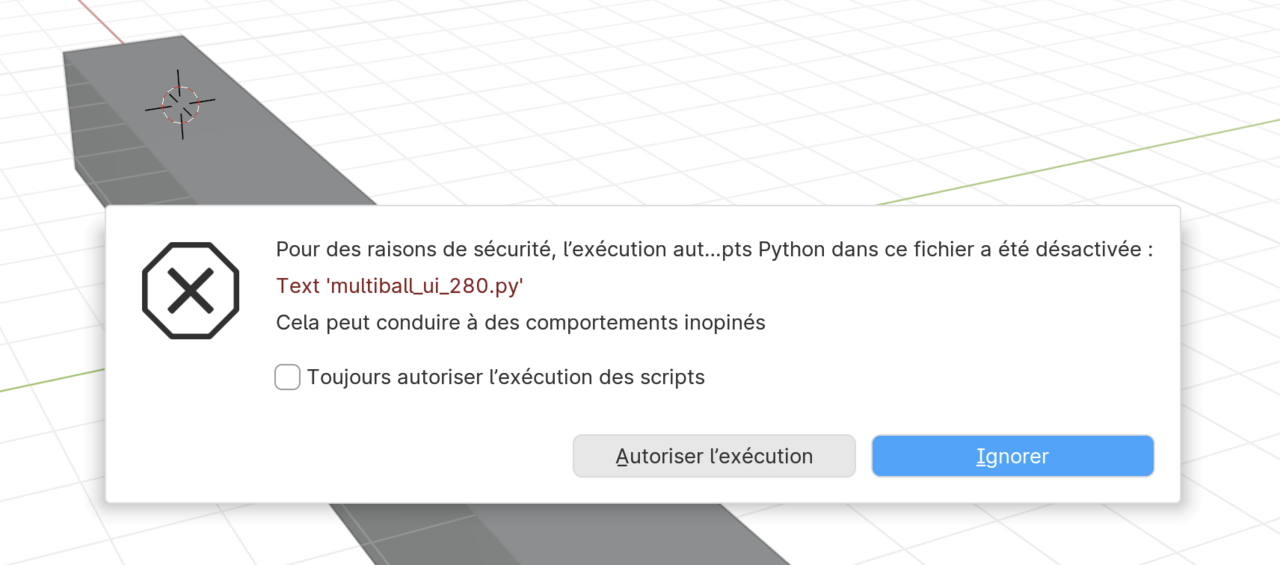
Just wondering... I close the file without saving it in order to start again. That reminded me that I got that warning when I opened it the first time but I didn't bother because I thought it was because I am in Blender 4.0 (instead of 2.8). I clicked on Ignore. Should I have accepted instead???
It's just asking for your permission to run scripts, in case you got it from a untrustworthy source. I typically allow execution or set it to automatic so it never asks me again. I do this because I never go about downloading from weird places on the internet. If you ignore then the scrip wont run and if the rig needs that script it wont function correctly.
Hi Marie,
Yes some terms can be confusing as the can be used interchangeably.
The term "Rig" usually means an armature object. This is the container that all the bones live inside.
The keyframes you were looking at on the right in your screen shot are the values of the object. The object is staying at 0,0,0, however the "Body" bone is being animated as seen in your Graph Editor.
I can see that you don't have any keyframes on the object (or it will be yellow). But the reason you have the connected line between the keyframes is most likely that you have keyframed other bones as well. They will be the ones that don't change value between the keyframes.
But really you don't need to worry too much about how the keyframes are looking. If it's doing the right thing, then it's working.
As for the warning message - Omar is correct.
That is Blender warning you that a script is trying to run when you open the file.
I assure you that it is safe (I wrote it - but it's just the ui control script). The reason it's warning you is that technically someone could write something that doesn't something nefarious to your system.
Let us know if you have any more issues - but hopefully that solves some of the confusion you might be having at the moment.
First: thank you Omar and Wayne for your concern. I accepted the script to run but it didn't change the connected line between the keyframes. But I went on the exercise (because the animation was working) and encountered many difficulties in understanding why I was doing some actions: that can be a mix of my (not good enough) English and some «Blender logic» I haven't catch yet... (Like: how can a linear interpolation can produce a parabolic path? Does the strategy «e minus 2», in order to remove frames, require a numpad to work? I dont' have one and I'm on Mac. And why do I have white keyframes and yellow keyframes?) ...I think I will take some rest now!!!
Hi Marie,
I can only imagine how difficult it can be to learn Blender in another language other than your native tongue. But I think you are doing well with your English.
Let's see if I can answer some of those questions you had.
The relationship line (the weird dotted line) isn't related to the python script at all. It is a viewport setting.
You can turn it on/off here.
In regards to the linear motion having a parabolic path. This is only the horizontal component of that movement, (X Location).
The Z location (up and down) will be parabolic. You can learn more about this in the animation bootcamp, however that course is all about improving your animation skills and is much more advanced than this course.
And you do not need a numpad to use the Extend/Shrink tool. E -2 will work on the top row of numbers.
In regards to some keyframes being Yellow and some White, that shows which keyframes are selected. (Yellow is selected, white is not selected)
I hope that helps solidify some of your knowledge. You're probably not going to understand everything all at once, but as long as you keep learning, you will get there :)