I thought it would be a while until I had to bother you folks again, but oh well, here I am :*)
I am having issues with the Displacement Map, as you can see in the pic below, the displacement map is causing the texture to look "pixelated" or "grainy", when i unplug it, the texture looks ok again, (but the height info is lost).
I had a similar issue once, Omar was there, but back then I wasn´t sure where the issue lies. Now I think the issue is inside Blender(some setting tweaking maybe?) since the Displacement map.png, as far as my human eyes can see, doesn´t look pixelated at all.
Does anyone know what the issue here could be? Some Notes: it is 16 bit png, but even getting the Displacement map as 32bit exr does not help. Neither does changing the res from 2k to 4k.
I also tried adding a subsurf modifier so the mesh has more geometry, but it changes nothing.The Texture is supposed to be varnished wood, quite smooth.
Thank you again for reading this long post, tips and help are appreciated!

I've seen this before too and can't quite remember what it was. Did you check apply scale and unwrap with the right coordinates plugged in? Also check under material settings -> displacement if it's set to displacement and bump since you have a bump map plugged in too. Hope that does it for you or someone more knowledgeable comes by.
On a personal note (cabinetmaker here): If it's supposed to be varnished wood I would scrap the displacement altogether and only use subtle bump or set the scale to something like 0.001. If done right the wood would be sanded and prepped so there's not much displacement going on after varnishing (with very few exceptions). That's beside the problem however, sorry.
Hey Sascha~
Yep, Scale applied, uv unwrapped, no stretches whatsoever, and the texture coordinate is plugged into the UV (I usually just Ctrl Shift T and let Node Wrangler Plug the Textures in), I have no bump map, but I tried switching to "Displacement and Bump, and it sadly doesn´t solve it either...
I agree with your note regarding the subtle bump, the displacement map here serves(from what it looks like) to accentuate the different height between the darker rings of the wood and the lighter overall wood (no clue what it is called)
Hm, sorry, then I'm out of answers for now. Looking for it too though.
Well switching the Scale from1 to 0.1 kinda solves it... I mean it doesn´t look grainy after that anymore (or maybe the grain is just so small now that I can´t see it)
Anyways, if someone has encountered similar issue, feel free to Chime in!
Hi Nougat Time, from just looking at your screenshot (without reading the answers), I would also have said that the Scale of the Displacement is simply too high; the Pixel size doesn't seem to change left and right. But where neighboring Pixels can look like the colors transition smoothly, the Displacement sooner looks like 'stairs'...height difference is easier seen by us than color difference. This is also the reason, that for Height maps 32Bit is recommended.
I'd further suggest, you have the Setting set to Displacement Only and not to Displacement and Bump (even if you use a Bump Node as well).
I think also it depends on how zoomed in you are. We tend to get way too deep in the view and not realize in the render is not going to be so close and you'd need like a 32K texture for things not to get pixelated if you are too zoomed in. Try doing a real render to see how it all holds up.
Hey hey,
so changing the scale definitely helped! I wasn´t sure on this wood texture since the displacement is too subtle anyways, but when i tuned it down on my previous model, it helped a ton, this is the texture before and after i tuned the scale...I guess i just assumed the default scale should be 1 since that was what Ctrl Shift T gave me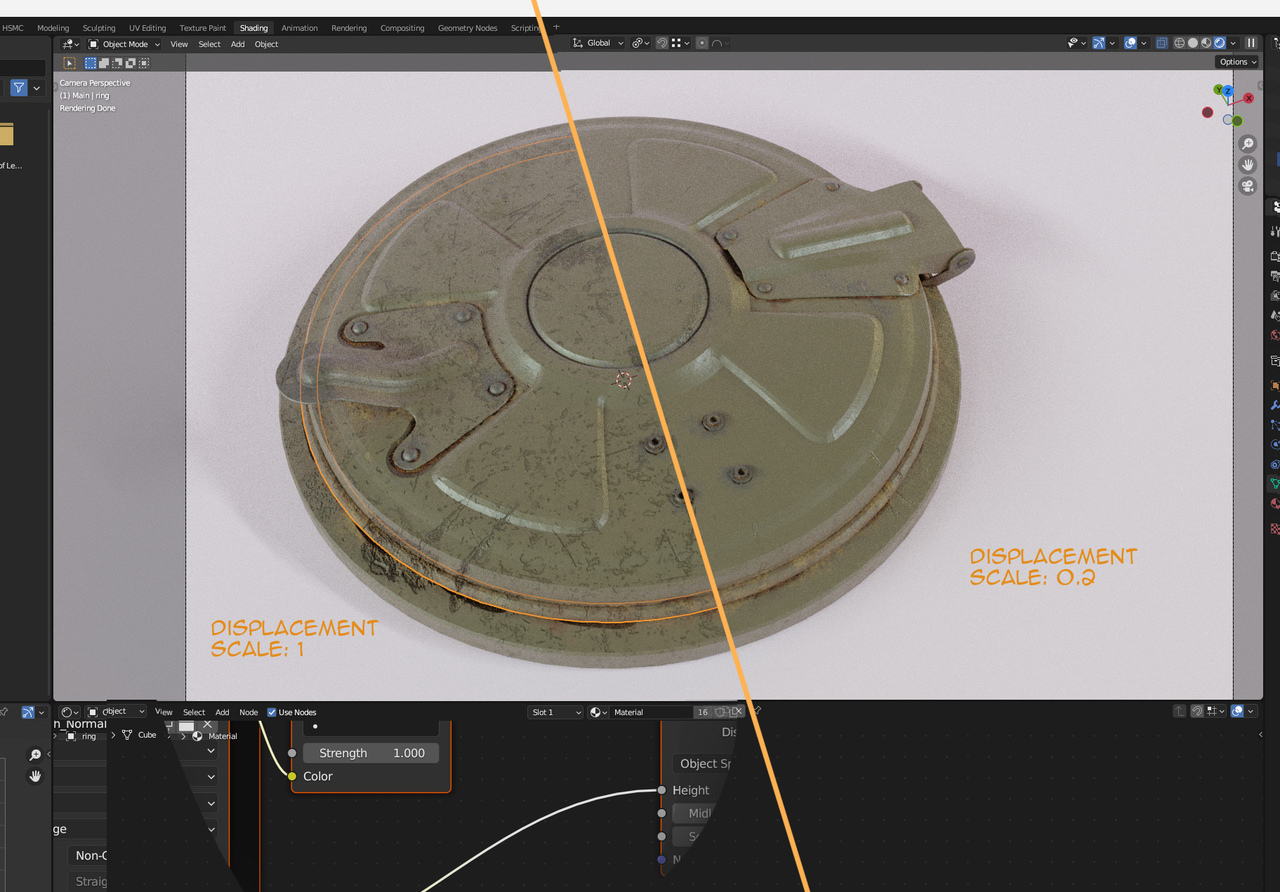
Now it´s almost identical to what it should look/looked like in Substance Painter, so cheers!
Zooming too close could be the issue otherwise, but here it appears to be a scale issue (from what it looks like), thank you Martin, Omar and Sascha!
(Ps. Sascha I took ur tip and left out the displacement map entirely, if my human eyes can´t tell the difference with it on and off, might as well disregard it, so... good tip!)