PNG to height for print

Question Modeling

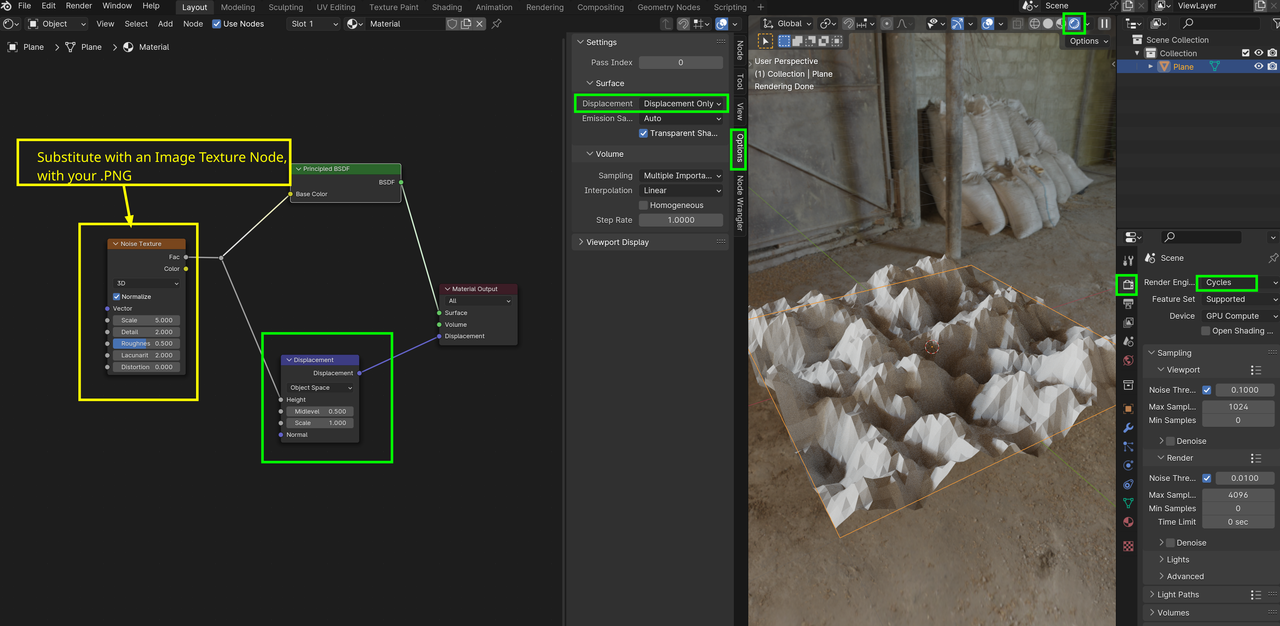
I'm trying to modify the height of a plane (or a rectangular solid) with subdivisions based on a .png file.  My goal is to print out the final product and then hand color or paint it using raised topology as a guide, so it is necessary to modify the mesh, not just apply a, say, bitmap.

I've tried several tutorials on the internet without success.  Ideally, I would like to use just Blender, but I have access to GIMP as well.  And I would like to avoid a single use tool, but eventually I'll give in and do it if I have to.

I've seen references to converting an image to Grease Pencil and then to Bezier Curves, but I couldn't get it to create a Grease Pencil object.

I tried using a texture to modify a subdivision surface, but nothing seemed to happen.

I'd be happy to use geometry nodes, as well.

But what I need is a very simple, efficient workflow to use a PNG or JPG with a smattering of dots into raised bumps on a flat mesh.

Here are 2 very simple images to illustrate what I'm trying to do.

 mpleImageForPost.png

Figure 1: Simplified PNG image

I would like to either directly modify the mesh below or use a Boolean operation to add it to the mesh.

024-03-05 102902.png

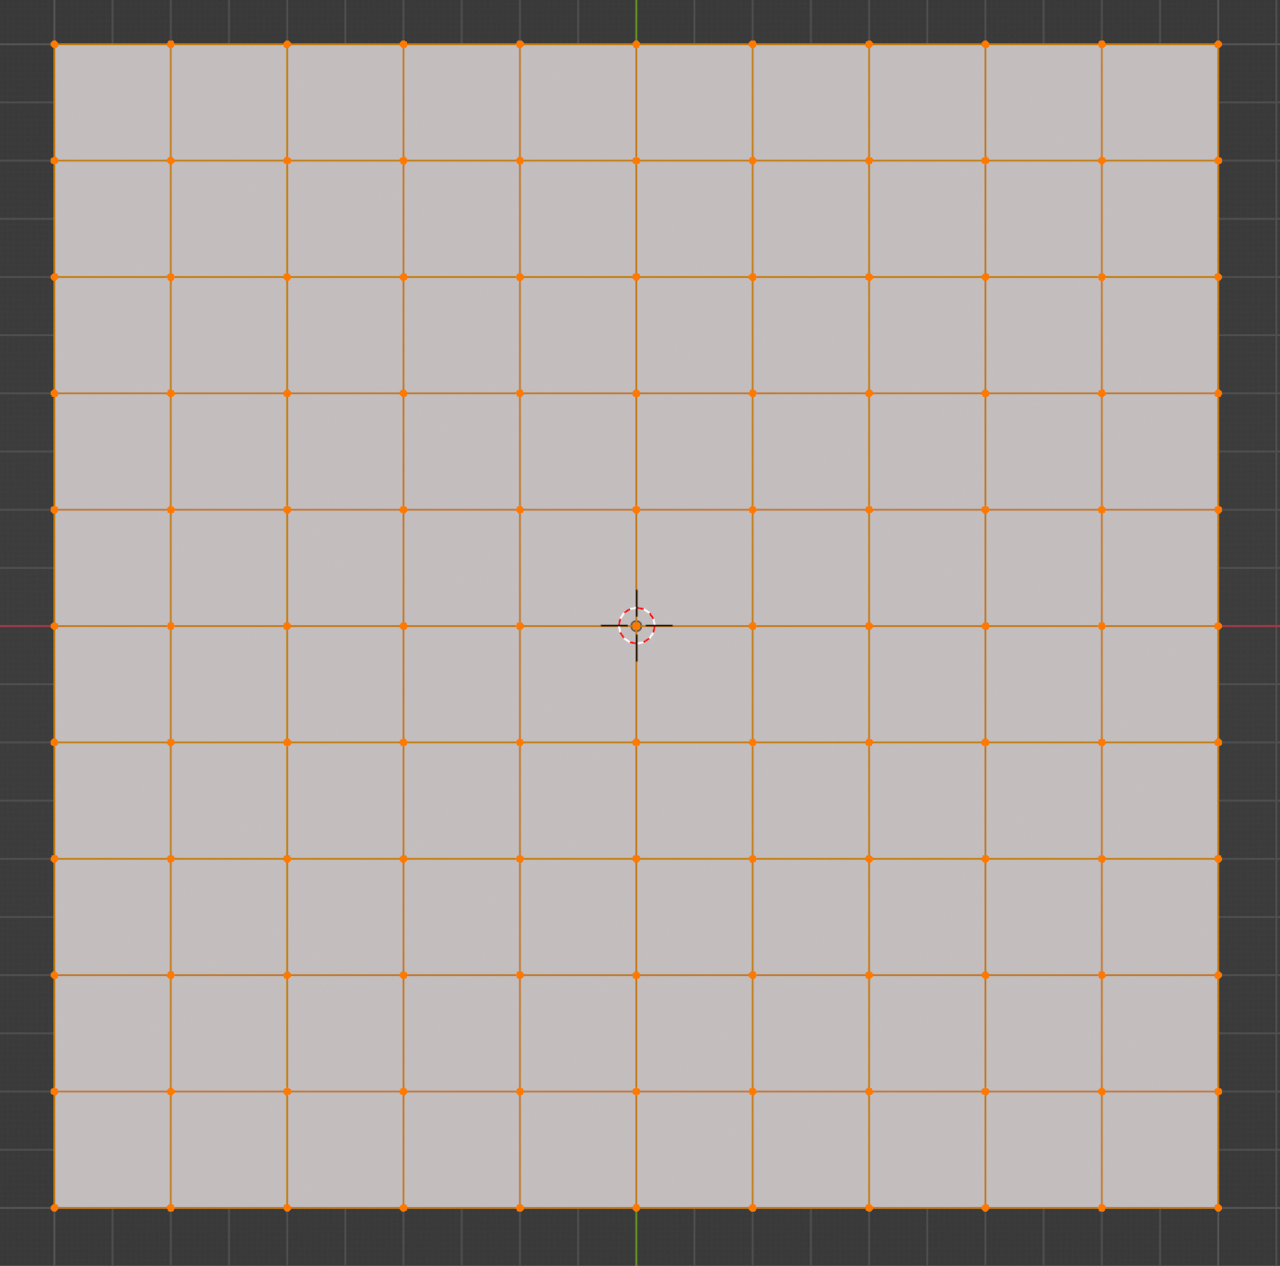
Figure 2: Simple mesh

PixelHeight.png

Figure 3: Simplified outcome, showing perpendicular extrusion

  1. I drew a low resolution image using GIMP
  2. I imported the PNG using Add > Image > Images as Planes [needs config]
  3. I subdivided by 100 using Edit Mode >  A > Edge > Subdivide > Number of Cuts: 10 , Repeat

024-03-07 141913.png

Figure 4: Subdividing the Plane ( at 10 x 10)

  1. I added a Displace: Modifiers > Deform > Displace
  2. Built a texture with the image: Texture > Open 
  3. Set the displace texture
  4. Set displace strength to -0.2

And it mocks me.

024-03-07 150305.png

Figure 5: Clearly, I need another approach

Next up, Geometry Nodes!

1 love
Reply
  • Omar Domenech replied
    Well, what you're asking is an entire workflow, out of the scope of what a single forum post should aim for. We can point you towards a couple of tutorials that go into it, but you've said you have seen a few already.

    Do you have a specific issue when you're trying to use an image texture with subdivision modifier? That should work, it's the best approach to achieve what you're after. You can use micro displacement and displacement modifiers with lots of geometry. Walk us through your set up, post some screenshots, we can spot any mistakes and get it working.
    1 love
  • Martin Bergwerf replied

    Hi David RRavenMenace ,

    Do you mean something like this (I highlighted the important parts):

    Displacement_01.png


    1 love
  • Martin Bergwerf replied

    Oh, I see what you mean now (the images didn't show before...)


    1 love
  • Omar Domenech replied

    Yeah you can achieve that with image textures and displacements. You said you tried it and didn't work. What exactly happened?

    1 love
  • Martin Bergwerf replied
    Solution

    You could use GN for this (this is probably not the best GN Tree for this, but it works):

    Displacement_02.png


    1 love
  • David Crocker(RavenMenace) replied

    Cool, Martin Bergwerf!  I think the geometry nodes approach is what I'm looking for.  I am not familiar with GN at all, so I'll take a step back and go through some coursework to get the basics down, and then try this approach.

    Thanks!  And thanks, Omar Domenech!

    • 🤘🏼