Just finished watching the lessons and first of all: another awesome course! Very cool how we get the fundamentals regardless of version. Thank you for that!
On one side note: have CG Cookie already released a video elsewhere that would touch on the fundamentals of Light Linking? Something that could be added on top of the knowledge we get from this deep dive course?
I ask because I'm using Blender 4.1 and I know it's a long-wished for feature, so I was hoping to see what that is all about.
Separately, is there a way to save a lighting setup we might use often (let's say, studio lighting for displaying product models, or a sweet starting point for the portrait lighting we're about to create as the final project for this course?
I'm thinking something we can drag into any other scenes, something like the asset browser, but for camera/light setups?
Hopefully that makes sense... lol.
For Light linking: You can check out Grant Abbitt's Light Linking video until they create one here.
For Lighting setp:
Awesome, thank you!!
I'll definitely check it out, and looking forward to a CG Cookie take on the light linking topic!
I'll add those in my assets browser right away, but quick follow up question: do you have any resources to recommend on appending the scene? Since it's your preferred method, I'm curious.
Let me note that I add objects like infinity screen, light box mesh, a camera set to photographer's height, etc. I also have an empty that I have all the lights point to. To do this add the empty, select the light, add a track to constraint on constraints tab of the properties editor, set constraint's object to the empty.
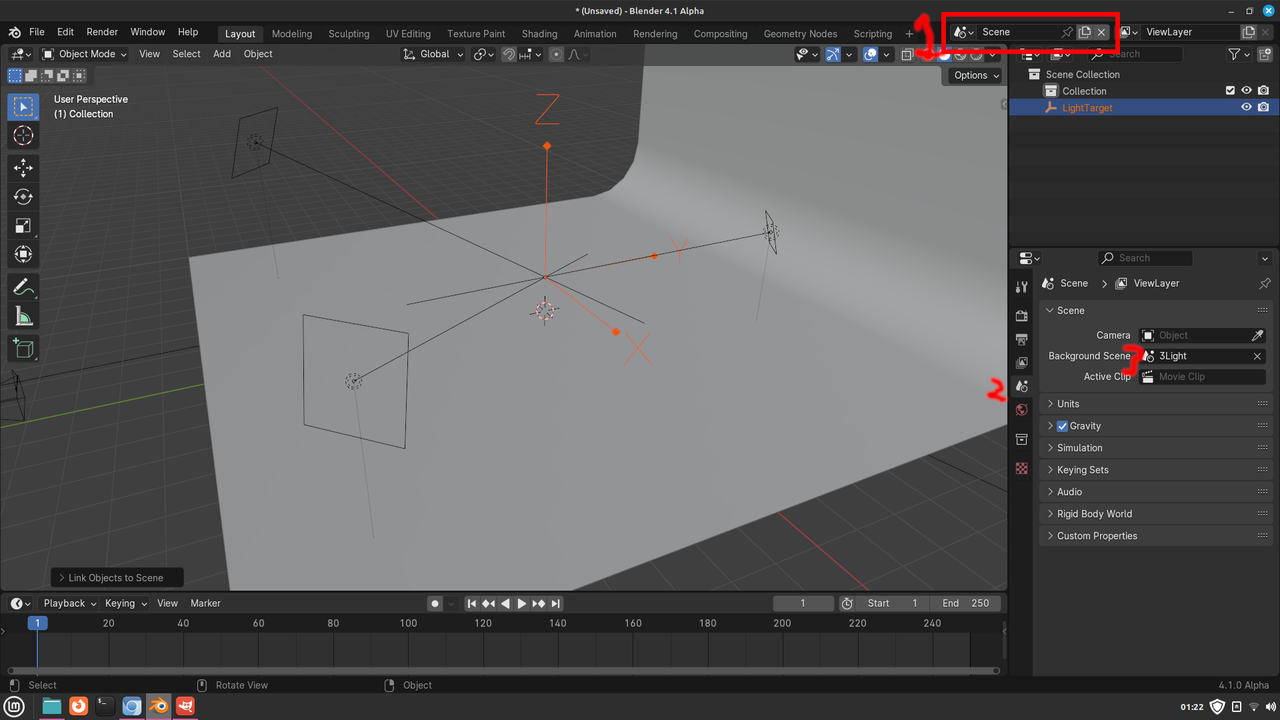
The setup is easy. Setup your default lighting. Then in scene controller Number 1 in the image below. Change the scene name to your light setup name. For example: 3Light. Then save your blend file.
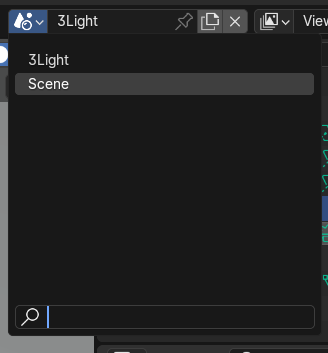
You can make changes to the lights(Camera) through the light's scene which you can switch by clicking icon to left of the scene name in the scene controller(#1 in image)


If you use the empty to focus the lights like I do you can link it to your scene to make it so you can move it around in your scene. You can also link the camera if you want to have control of it in your scene. Select your light scene
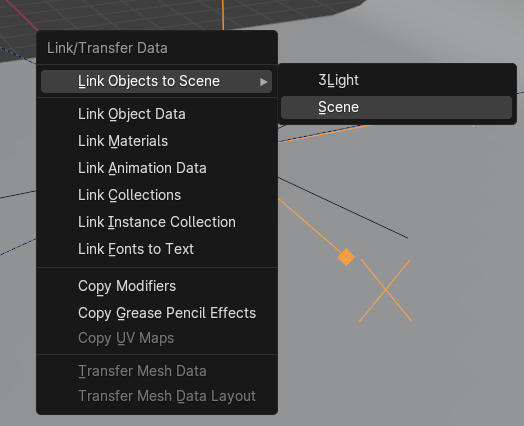
Then select the empty(Or any objects you want to link to your scene). Then press ctrl+L->Link Objects to scene->Your scene name. Default is Scene.

Then switch back to your scene you now can work with the empty(Or the objects you linked) in your scene.
I used to keep libraries of things that would be pre-setup, but each scene is so different and I would modify it so much each time that I stopped doing it. But yes, it is a good idea to have blend files with materials set up as libraries and to manage assets from. The Cubicity course is all about those things:
https://cgcookie.com/courses/cubicity-creating-and-utilizing-asset-libraries-with-blender
Awesome, that is exactly what I was looking for, thank you for the thorough explanation ![]() dillenbata3!
dillenbata3!
I hear you Omar! There's a slippery slope in pre-setting too much. But for a simple 3Key Light System, with perhaps a simple turn-table animation to look at product models can be handy. I imagine by saving an entire scene like Dwayne shows would save the animated aspects of it too?
It could also just be my habit from editing and 2D animation workflows. I have starter files for a few scenarios that happen too often, especially when working with strict brand guidelines.
And totally, I have the Cubicity course on the horizon! I'm trying really hard to not get sidetracked and finish all the Fundamentals courses first, but the list of goodies is so tempting!
Yes, if you have animations like on the camera it will be appended as well. If you're just doing a turnaround animations and a simple 3 point light setup you may want to just enable the addons Tri-Lighting(Under lighting category) and Turnaround Camera(Under animation category). Then save any screen or light box meshes as assets. Tri-Lighting is easy. You select the object that you want the lights to focus on then press shift+a->Lights->Tri-lighting I think or maby 3 point lights. Sorry don't remember of the top of my head. Then use the adjust last operator(expand the setting box in left hand corner of 3D viewport or press F9 to bring it to the mouse cursor) to adjust the lights strength, angle and size. Note:This is where I got the idea of setting a track to constraint. I think it still does that. Then with the focus object still selected do the turnaround camera. Open N-panel(Technically called the sidebar. Hotkey is N). on Animation tab there is a turnaround camera panel. Expand, then set your setting and click turnaround camera button. I remember that the button was in a weird place at the top it looks like it a label but it's a button. Also if they haven't changed it, the x, y, and z settings are not degrees of rotation, but the number of rotation that happen in the frame range you set. There are other options as well. Side note:These are are things that I used more in a TD role. The animators/modelers would do any clean up or changes as needed. So I don't really know how useful they would be in a solo workflow.
Oh totally forgot to mention a cool feature added in 3.3. That is scene pinning. You can create a workspace(Right click on layout tab at top and click duplicate). Then click on the new tab or the original. It doesn't mater. Change your scene to another scene. Then click the thumb tack icon next to the scene name. This way all the other workspace(Tabs) will use the scene you have set, but when you switch to this workspace/tab it will switch to the scene you have pinned. I'm working on a storyboard for my project and was using this. That's what reminded me of it.