Hi there,
After going through the exercise I have a couple of questions:
- My mask is not nearly as dark as it shows on your screen. I assume it is just because of a different version (I'm on Blender 4.1), but I thought it was worth asking just in case. I don't know if I'm being too precious trying to make it sharp, but it bleeds a bit too much and I ended up having to increase the strength to make it work. Your brush was always at 0.5 if I'm not mistaken. Am I doing anything wrong?
- Secondly, smoothing feels WAY too strong. I went back to the smooth brush itself to make sure the strength and size were softer, but still I feel like I undo all my shaping, particularly on the skinnier, smaller fins. Enough that I felt like I couldn't touch the back fin anymore to smooth as I went and it looks jagged and rough. At this point do I remesh once again? Wait it out to refine later in the process? Sorry if it becomes obvious later on, but I haven't finished watching the whole course before starting this project. So any tips on smoothing are also appreciated!
Thanks!!
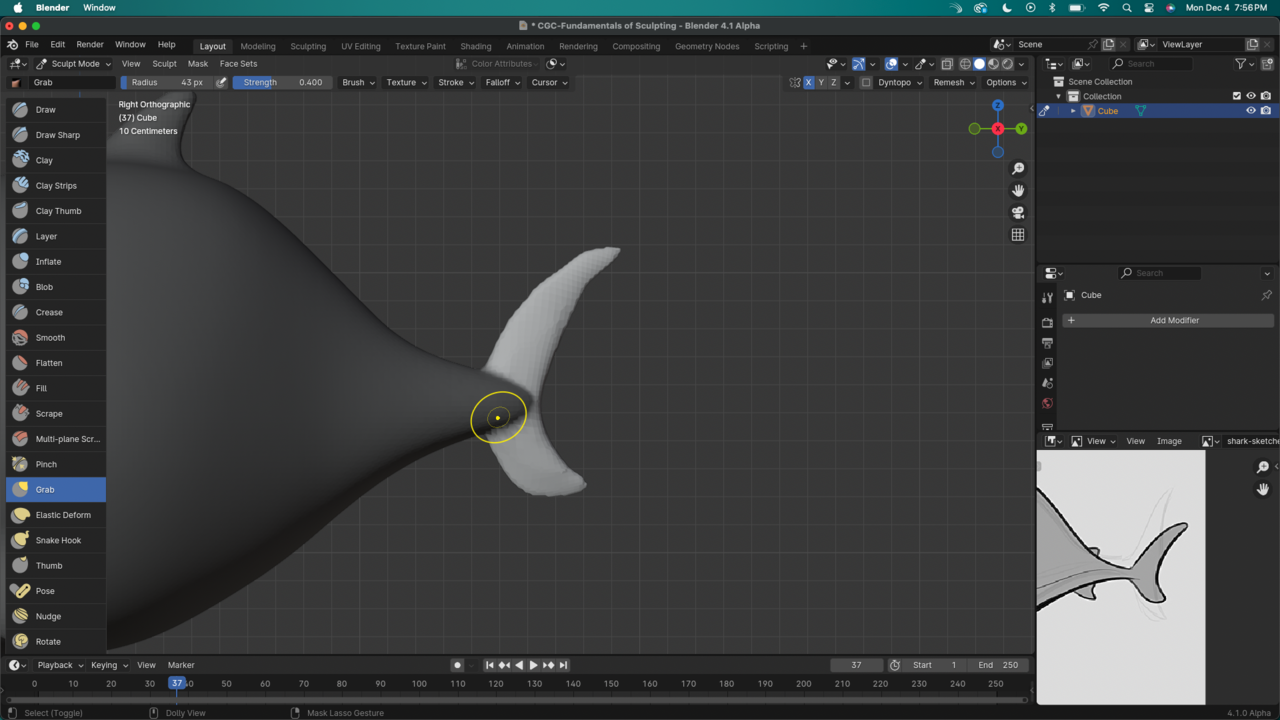
I tried smoothing out the bumps on the edges of these fins, but it ends up drastically changing the overall shape. Sharing an image just in case it's the size of the brush (at this point I was holding shift - smooth at 0.35 strength on its own if that makes a difference)

Hi ![]() nathitappan ,
nathitappan ,
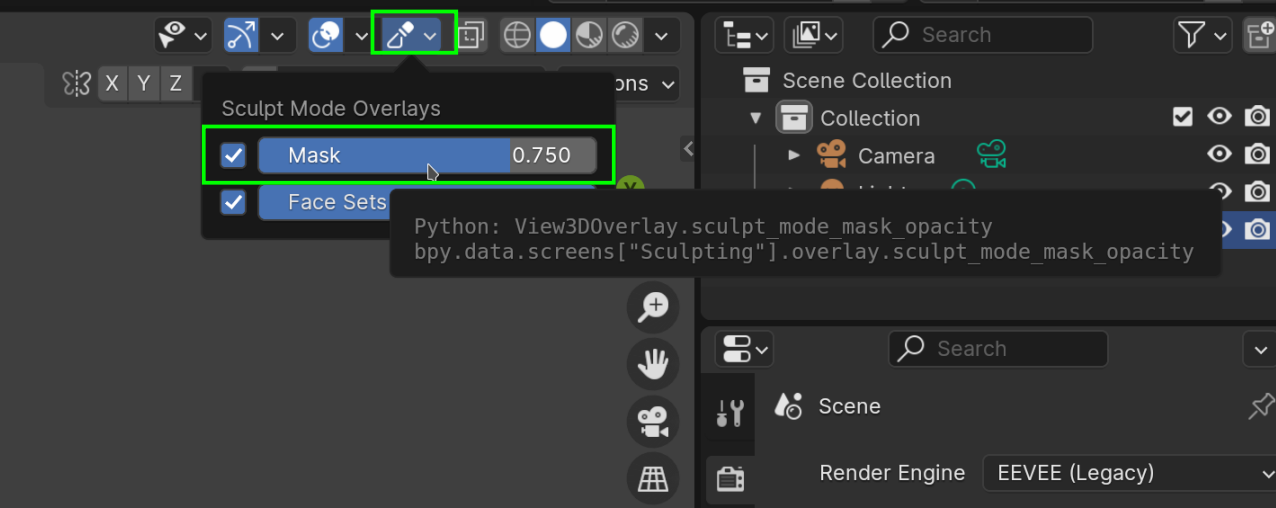
You can make the Mask darker, by changing the Overlay to 1:

And the effect of the Smooth Brush depends on the Mesh Density, as well as on the Brush Strength. Also, if you use the SHIFT shortcut, the Smoothing uses the Strength of the Brush you are using at that moment, not the Strength of the Smooth Brush.
Awesome, thank you! The mask overlay being full dark makes it so much easier to see where it starts and where it ends.
Yeah, I really have to get used to remembering what the settings were in comparison to what I have on my active brush. Practice, right?
Also, I decided to watch the remaining videos before tackling the rest of the project just to make sure things don't get mentioned before I ask them. Two videos ahead and I got some great tips for the relation between the inflate/smooth with dynamic topology to make my jagged look go away. So I guess I'll leave this here as a tip to anyone facing the same issues down the road: watch the rest first! :)
Thanks again Martin!
It's always great to watch the course first as a movie, just chilling taking it all in and then watching it again but this times hands on practicing, trying to do your own thing. And after you practice enough the sensitivity of the strokes and brushes will become second nature, it takes a while to get the hang on how the digital clay behaves, but you get hang of it pretty quick, it's all practice, practice, practice.
I'm glad the OP asked this question, as I'm getting a bit hung up on my masks as well. In comparison to Kent's, my mask stroke looks somewhat less defined, even though I'm using the same brush size and strength. It makes sense that the mask stroke fidelity would depend on the mesh density, but I'm following along closely, so it's not clear why my mesh density would differ from Kent's. I'm not gonna sweat it too much for now but it is a tad worrisome, in that my fins aren't quite as "robust" when I pull out the masked area with the snake hook. As a result, I can only smooth so much without completely collapsing the fin shape. I will note that, at about 13:50 in the video, Kent mentions that it's harder to get smaller details at the current voxel size (but he doesn't want to remesh the whole thing at this point). So, I'm going to go with that and hang on until we get to incorporating dynamic topology.
For the mask, as in the post above by Martin, you only need to set the overlay to 1, which will set the mask to full opacity. But then for the following alongside with Kent, that is a bit tricky, since sculpting is a lot like drawing, in that you may think you're doing the same as what you see on screen, but there's the art part that can't be copied like that. It's as watching someone hand draw a super realistic portrait, even if you follow along, you wont be able to paint the realistic portrait as he is doing, because that person knows how to make realistic portraits, he's had years and years of practice and experience. Same with Kent, he makes it look easy, but he knows how to sculpt, and we just can't copy his skills just by watching, we need to practice a lot before we get that good.