Happy I got the cookie onto the Shader. My OCD makes me want to tidy up all the unused parts by deleting them. Is it possible?

[btw. I've worked out the image linking issue in the forum. When you start a post you can't access your media library (only the image URL pop-up) but you can on any and every edit of this *first* post
For replies this logic is reversed... you can access your media library in the initial reply but any and every edit of the reply will only give you the image URL pop-up]
![]() thehomme ,
thehomme ,
As far as I know, you can't Delete them.
You can Move them out of the way, or Hide them (in the UV Editor: H to Hide Selected, SHIFT+H to Hide Unselected).
I don't know how I create a blank UV map once one is already created. If you hit + then it creates a copy of the previous one.
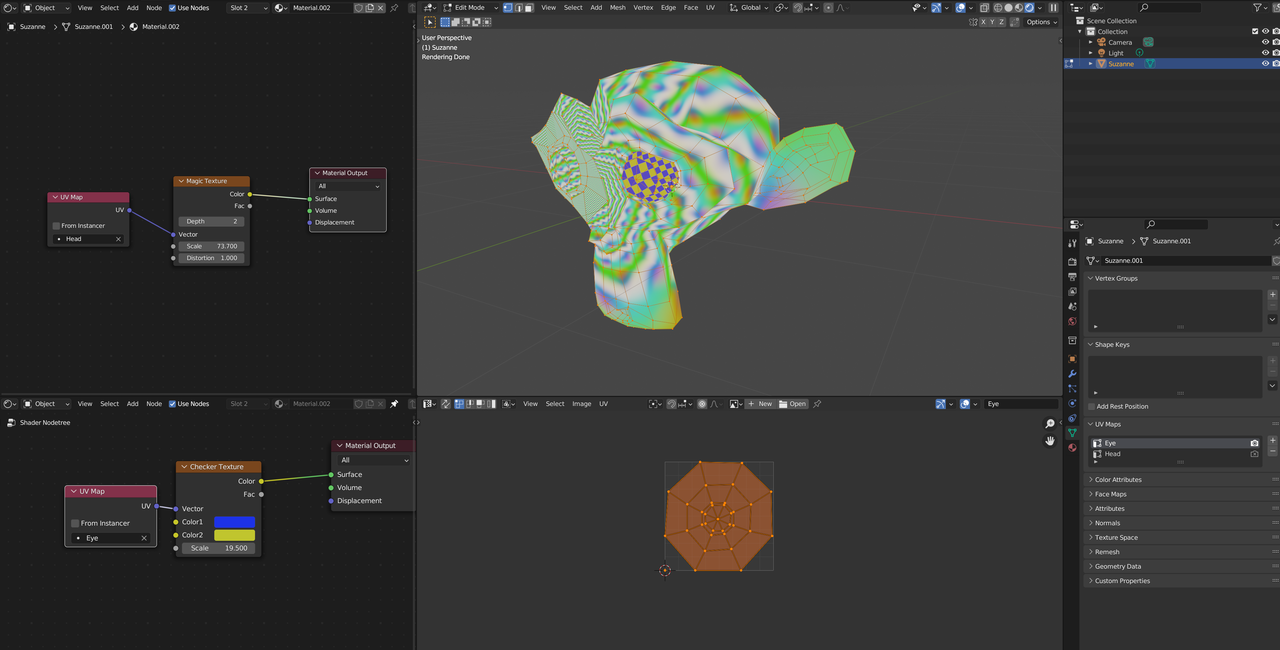
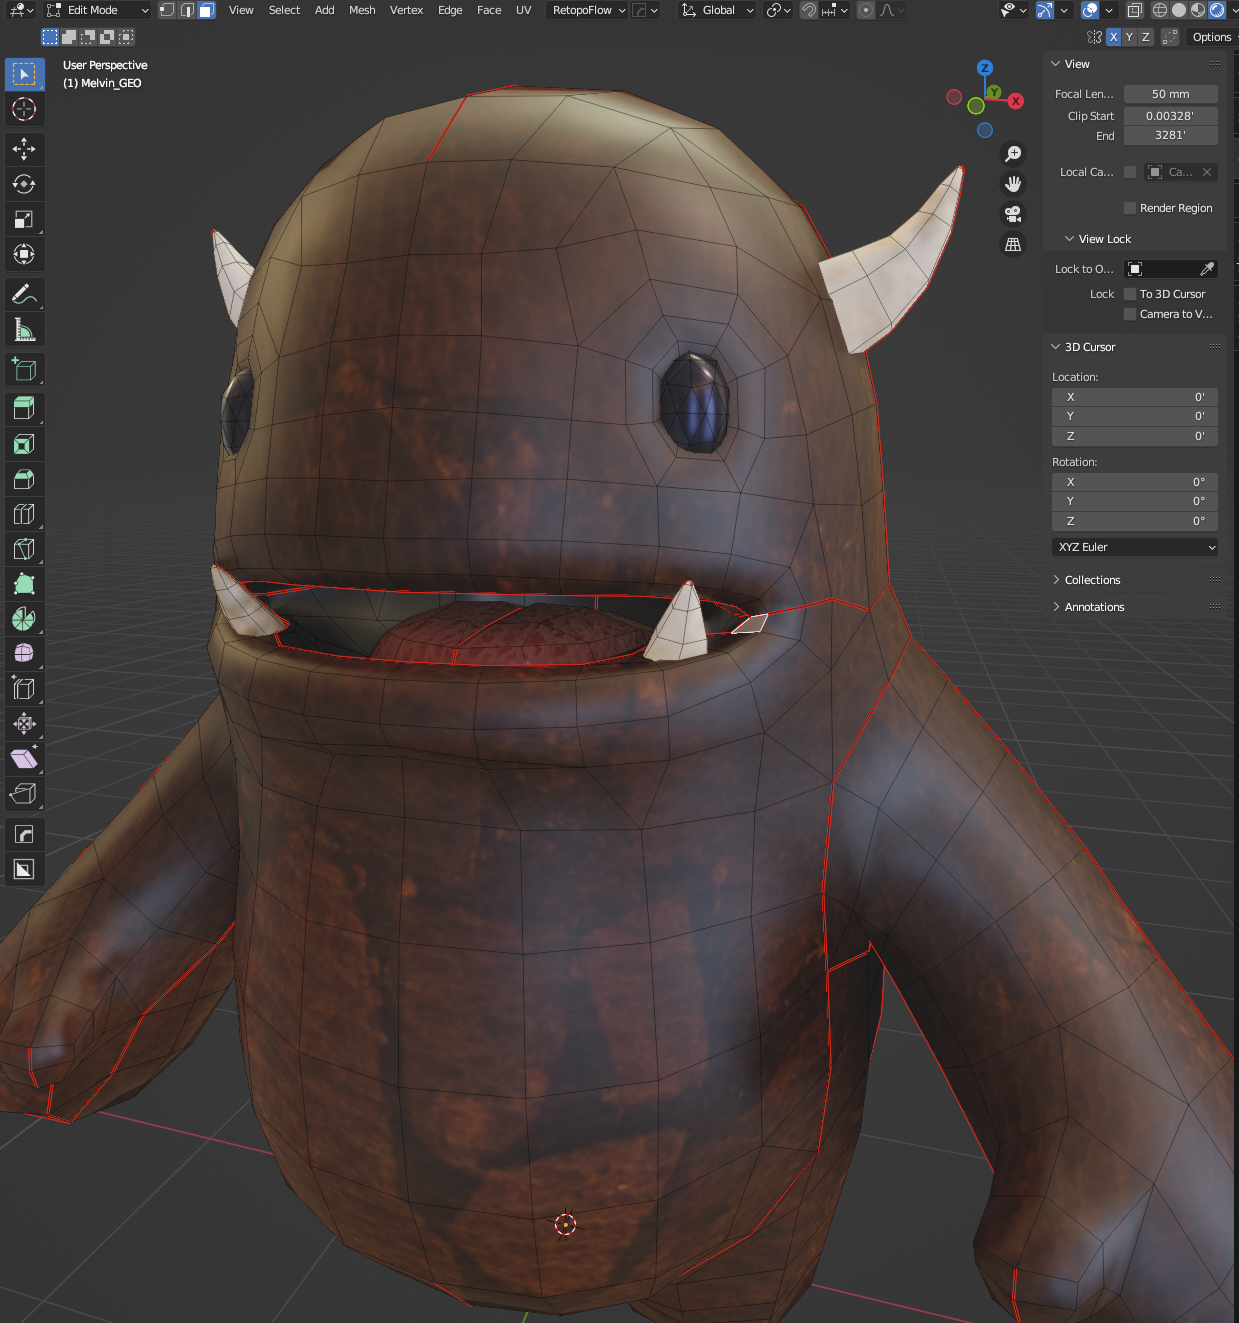
I unwrapped Melvin tonight and added a mixed texture to see how prominent the seams were.
Let's say I wanted to add another UV for his eyes. How could I unwrap just the eyes to a separate UV without creating all the other faces and moving them to one side?
There is no blank UV map. If you don't do anything, blender will do it. You can select the eyes in edit mode of the 3D viewport. Then in UV editor move them off to the side. Note: If they are attached to the rest of the mesh this is the same as selecting them in UV editor and pressing Y to separate them. If you want separate images to affect eye and body. Create 2 UV maps. One with eyes outside the bounding box area.(This is the UV you use for the body) The other will have the body outside of the bounding box area.(This is the one for the eyes.) If you want to do it all on one image then just move the islands around to make space for the eyes and move your eyes in that space. The UV editor works like 3D Viewport except it's 2D. X left/right and Y up/down. You can use G, R, and S.
Another option is to separate the eyes to another object and do the UV unwrap.
Thought process that works for me. The bounding area gets remapped to the image size. Thus the units of a UV Map are determined by the image. So on the x and y axis 0(Left side/bottom) to 1(Right side top) making 1 unit(Image). If you move your islands outside of the image you are just moving to the next unit(The image repeated). You can see this in UV Editor N-panel->View Tab->Check repeat image.(Only available if you have an image loaded in UV Editor) Also in image tab when you have a vertex selected you can see the coordinates using the 0-1. If you want to map to specific pixels then View tab->Check Pixel coordinates. This is default behavior of image node. When you add the image texture node you will see where it says repeat. If you click it you have the options extend and clip. Clip fills outside the image with nothing. If you use image alpha it will be alpha 0 outside. if you don't it will be black. Extend takes the last row of pixels and repeats those colors.
For your question about deleting: You can't delete them, but you can scale them to zero. Basically making them a dot(looking like a single vertex)
First, Sorry to spam your question, but there are so many things that can be done and my mind is moving faster than I can type.
Second, I'm going to go out into the weeds with this but stick with me, because I think this will work for your OCD. Instead of multiple UV Maps this technique uses multiple textures referred to as tiles. The setup. Select Melvin tab into edit mode. Then in UV Editor create an image. On the N-panel->Image Tab->Image panel->Change source(where it says generated) to UDIM Tiles. Scroll down to UDIM Tiles panel. click the Plus sign. Now you will see the 2 tiles in the UV Editor. Now you can put the eyes on one tile and the body on another. If you want to use existing images they will have to have the same name then period Tile number period file extention(jpg, png, etc). For example a name like test would be test.1001.png and test.1002.png Then set the source to the first image Blender will detect the others. The image source is under where you changed it to UDIM Tiles. To add to your material just use an image texture node. When you select the first image blender should detect that it's UDIM. If it doesn't just click where it says Single image and change it to UDIM.
Once again huge thanks to all for responding with so much detail. I appreciate it massively.
Monday was such a long, difficult, frustrating day but the benefits of all that pain to get to a flickering lightbulb of understanding has made the following days so much easier. I probably wouldn't have got there without that.
I think the things you are suggesting Dwayne are probably a little (a lot!) beyond me at this point but I will make a mental note to see if I can apply them when I get to actually doing the motorcycle.
What I realised playing with this is because I gave the eyes (and the teeth/horns) a different material it automatically removed those faces from the UV map.
For now, the takeout is you can't delete the unused UV faces and separate objects can have their own UV maps.
So for the eyes this is super easy to do. Select eyes, separate to a separate object, unwrap the eyes, create a new texture and paint them in.