This is driving me nuts, and the problem was hidden by the boolean modifier until I was well into the project, so I don't know when it started.
The curves in my 3 cutouts in the bottom right will not shade smooth while the bevel modifier is in place. They are not set to sharp, and no value for the auto smooth angle will make them smooth. I've checked that they don't have any bevel weight. I've checked for duplicate geometry, and there doesn't seem to be any. However, so long as the boolean modifier is in place beneath the bevel modifier, they end up smooth. Once I apply that modifier, they go back to flat. What could be causing this, why can't I get these faces to shade smooth with that bevel modifier
Hey ggeneresque ,
That is probably because when you apply the Boolean modifier, the Boolean object is not set to Shade Auto Smooth.
With the console selected, right click and choose Shade Auto Smooth to fix it.
Thanks for the suggestion. I've tried that, and it shades lots of things smooth, but it always excludes these faces and the faces around the buttons. It happens even when they boolean modifier is removed. i.e. it is how the mesh looks when just the bevel modifier is applied. For some reason, they boolean modifier fixes the problem, but only if it is not yet applied.
You have an interesting issue and sorry to chime in but it looks like you have a boolean on top of the modeled cutouts. When you disable the boolean the cutouts should disappear as the boolean should be making the cutouts so I wonder how are you using the boolean? The boolean looks like it is smoothing the modeled cutouts but if you delete the boolean and add shade smooth the console again, doesn't it smooth out the segments? A pic showing the vertices and boolean would show how things are working better. I hope you got your answer. The model is looking great! Cheers!
The boolean isn't the problem, it actually fixes the issue. Something about having the boolean modifier with Exact mode after the bevel in the modifier stack makes the smooth work again. The images I first posted were a little unclear, because I didn't hide the geometry for the button letters, so it wasn't clear the boolean was disabled.
Here's a link to the blend file: https://drive.google.com/file/d/1l2FtVvGfunowvM9RDtvnzg-GBQ-zbbZl/view?usp=sharing. It is a touch different because I finished the project, but it has the same problem. Just remove the boolean on the Console object and you will see.
To be more clear, I've removed the boolean entirely and took some more screenshots:
Bevel modifier active, shade smooth not working:
Bevel modifier removed, shade smooth working: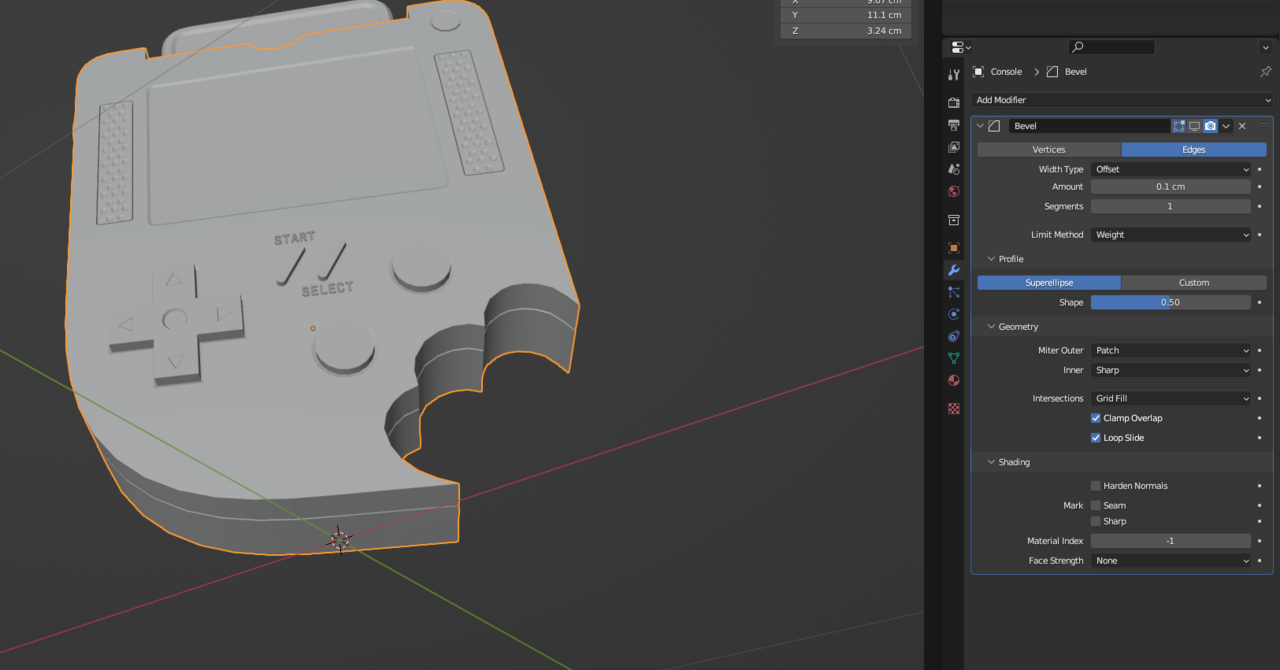
Bevel modifier active, auto smooth turned up to 180 degrees, the faces in the cutouts still aren't smoothed:
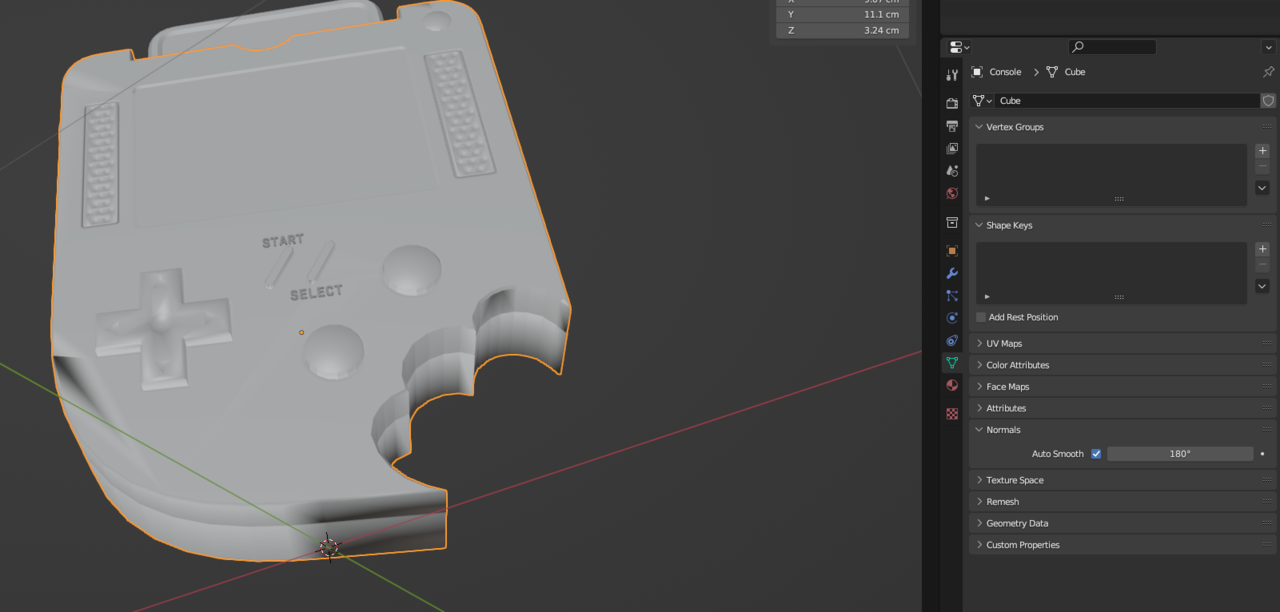
Edit Mode view showing the edges aren't marked sharp: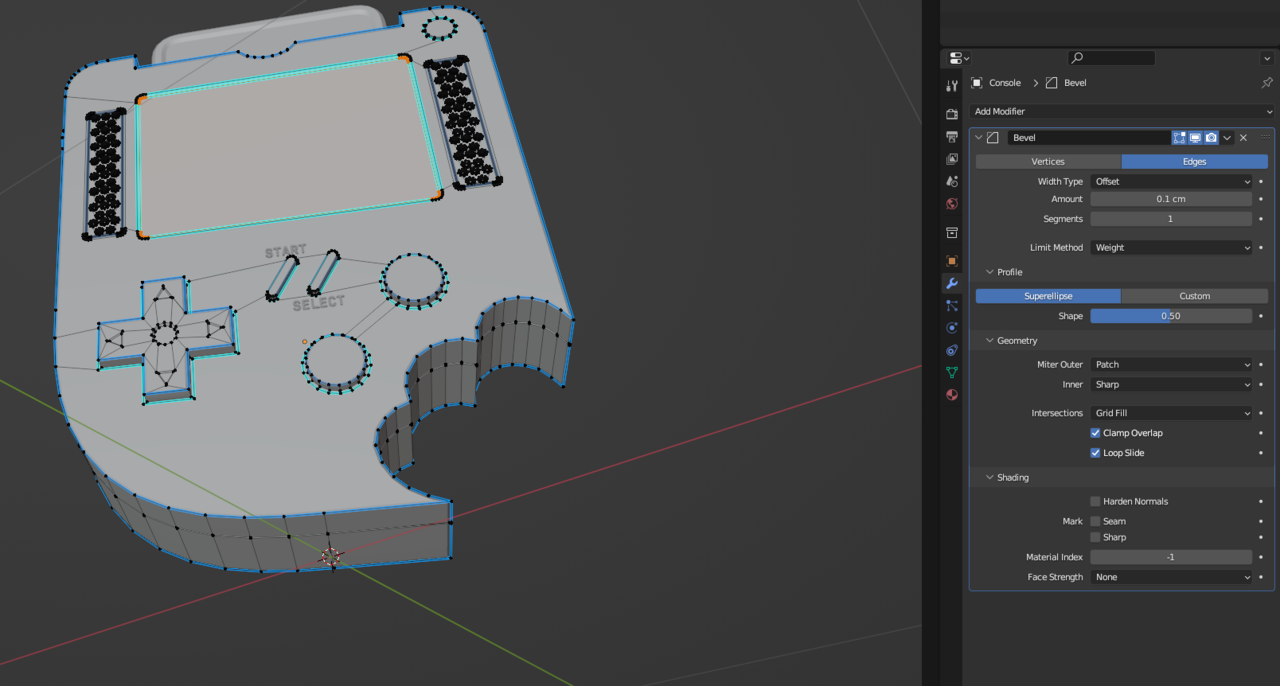
This drove me nuts for a long time. Eventually I gave up and just left the boolean modifier in the stack and finished the project, but I'd love to understand what was happening.
Hi Neale,.
You got me curios so I looked at the model and don't see the problem. The boolean in the stack is for the letters on the buttons and the segmented faces are all smooth. It's great you figured it out and it looks good. There are a few minor issues but overall you did great. Good job. As you progress you'll get many aha moments of why things worked the way they did and it gets frustrating at times. Enjoy the process as we all go through the WTF times. Keep up the good work and keep Blendering.
Hi Neale,
I don't know what you did exactly, but the problem is that your Mesh has a bunch of so-called Zero-Faces:
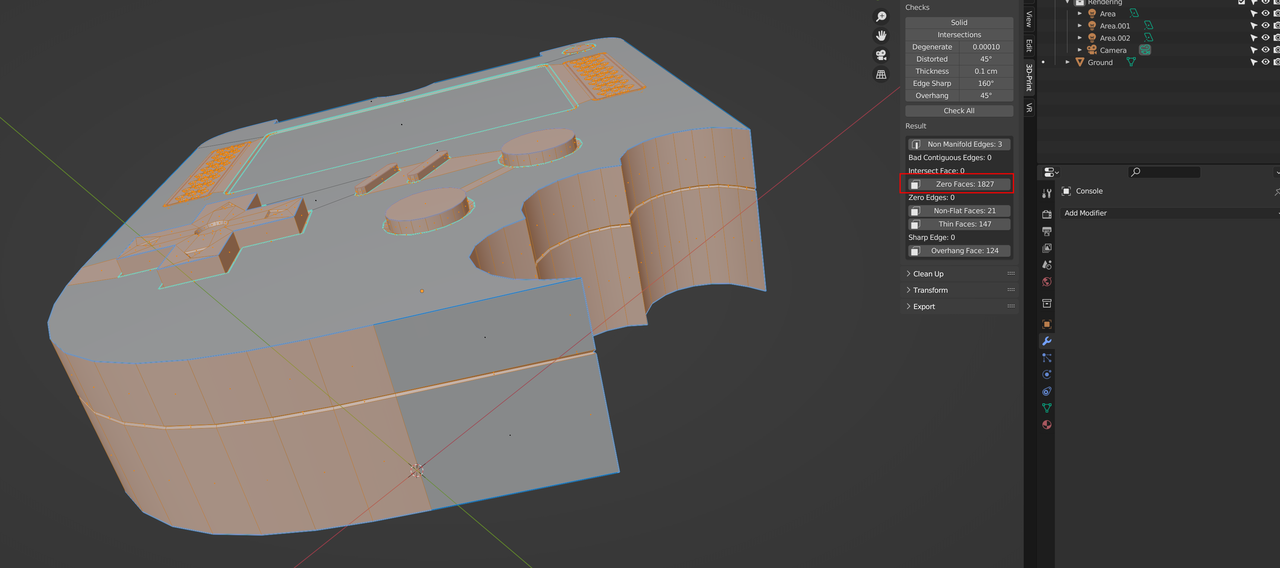
This is without the Modifiers.
But I can't really find them and M > Merge By Distance doesn't fix it...
When adding the Bevel Modifier and Applying it, we can actually see something I didn't select all, obviously):
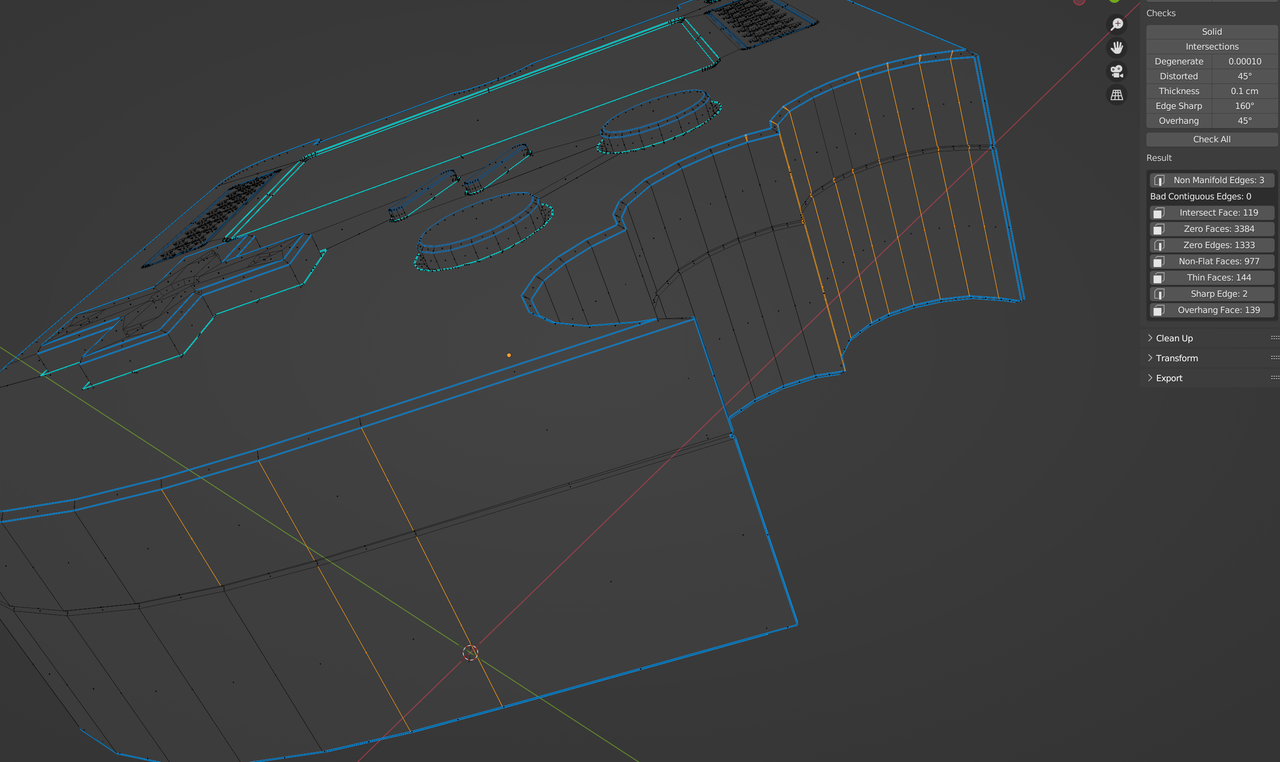
The solution to leave the Boolean Modifier in the stack works great. Alternativlely, you could Apply the Boolean and replace it with a Weld Modifier, but you have to be very careful how you set the Merge Distance then...(personally, I'd leave the Boolean.)
One more problem (that is easy to fix) is this (the 3 Non Manifold Edges):
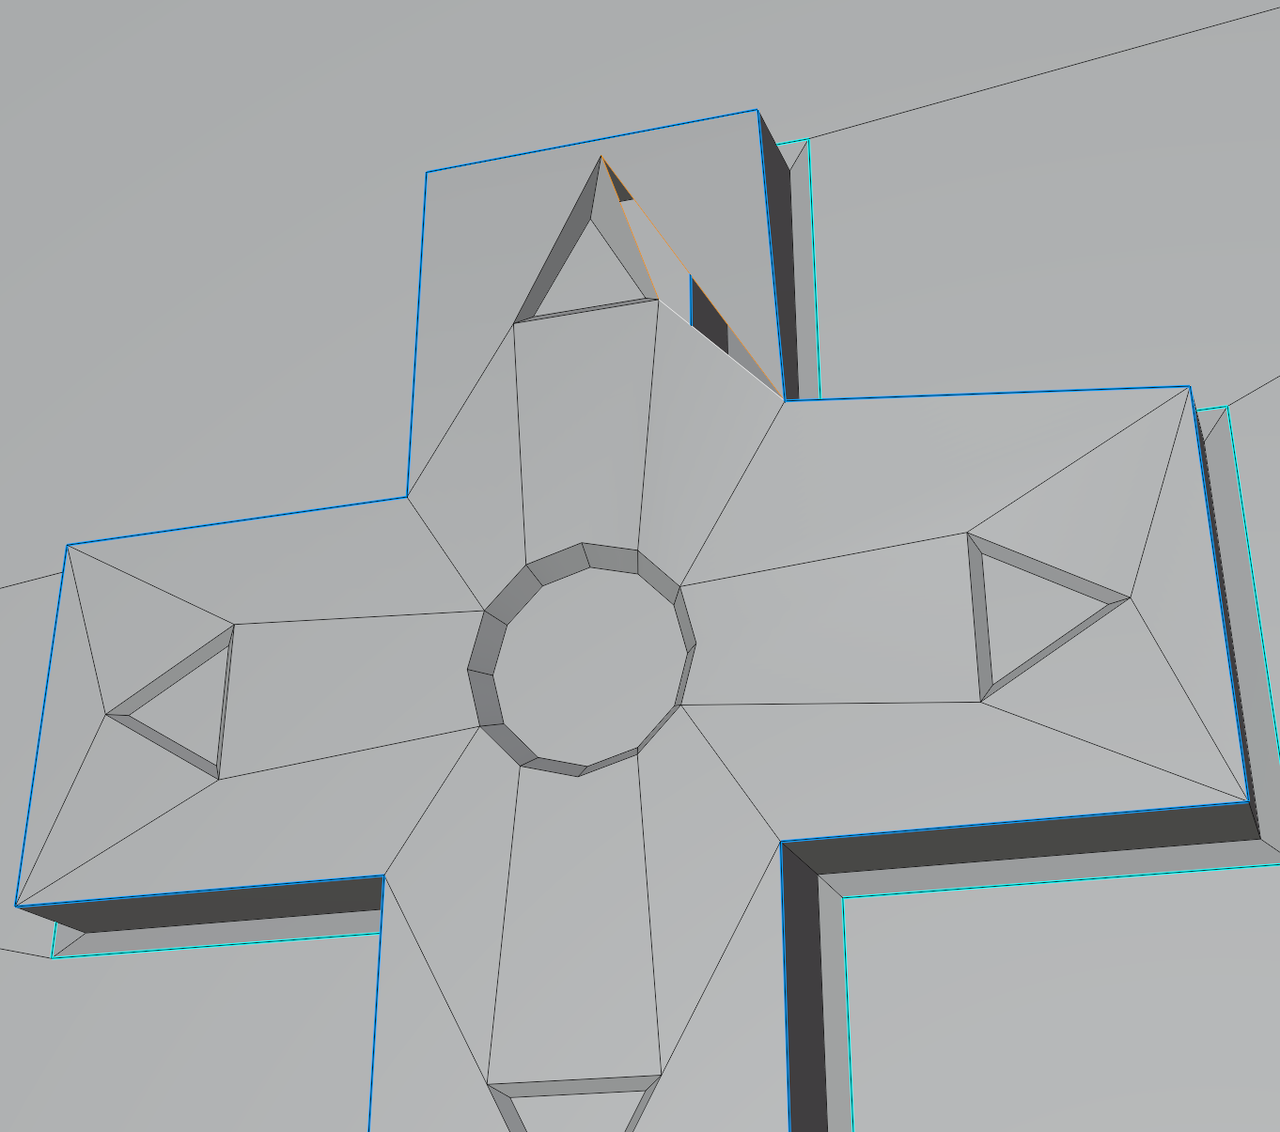
In the bevel modifier, turn off clamping. The beveling should go crazy. When I read Martin Bergwerf zero faces, it reminded me of a 2.93 problem where zero faces are created when using clamp. It also creates random normals. So now adjust the bevel amount until you have a nice bevel. Other option is to apply modifiers. Then in edit mode merge by distance. Exit edit mode set shading to flat then set to shade smooth. If that doesn't work you have to goto edit mode, select all, and sorry don't remember if it's shift+n or shift+Ctrl+n one of those recalculates normals outside.
Edit: No need to read this post, I misunderstood the problem
MMartin Bergwerf
I think I found a Way how to select all Zero-Faces.
As their one common thing should be that they have no Volume/Area, creating one and then select Similar Area should do the Trick. (To then delete them and merge Verts by Distance). Apparently "quad" Zero-Faces have a lower Volume/Area than "tri" Zero-Faces though so we need to play with the Threshhold a bit.
Add a Cube/Plane, extrude one Side but rightclick right away so there is no visible Extrusion but Verts laying on top of each other (connected by Zero-Faces).
Then go into Face-Mode + Xray-Mode to select the Zero-Face(s) just created. With the Face selected as Active press Shift + G and select Area. Change the Threshhold to 0.000001. That should select every Zero-Face.
It worked in my Tests but I don't really have a File which has those natively (afaik) so if someone could varify if that way works, that would be nice. Also see if the not mergable Verts even Merge afterwards. Because if not then it does not make sense to select and delete the Zero-Faces anyway.
Hi Thomas NNokota ,
I have no problem Selecting all Zero Faces; just click on Zero Faces in the 3D Print Toolbox.
The problem in Neale's file, is that Merge by Distance doesn't seem to work.
Dwayne ![]() dillenbata3 ,
dillenbata3 ,
The fact that Clamp Overlap creates Zero Faces is something that sounds very likely. I might not have tried Applying the Bevel and then Merging...That should actually work, because the Weld Modifier (after the Bevel) does the same thing, basically...
Thanks Dwayne ![]() dillenbata3 ,
dillenbata3 ,
unfortunately, for some reason, that doesn't work in Neale's file. That is one of the things that make it weird. Although it does work after Applying the Bevel Modifier (as you suggested). But the 3D Print Toolbox already gives us loads of Zero Faces even before the Bevel...