ok, First: is this an issue to have 2 island over each other? I think yes cause if you paint one, it will also paint the other island.
2: How to move the bigger island if all those island are the same mesh? I don't want to create 2 meshes out of them. I tried to pin one island but when I try to change the resolution for one island, it doesn't work cause all the island are moving at the same time. pic
The first question - if your intent is to have a unique texture for the faces, then yes, that's an issue.
Having overlapping UVs can be done on purpose. Let's say you have at detailed photo of a concrete wall, and your concrete mesh is a relatively complex shape. You might have a bunch of rectangles overlapping each other, and that might not be a bad thing. (Particularly if they're layered instead of fully one on top of the other.)
It's less likely that this is something you'd want in an organic model.
You can try pressing "L" for linked, if it's the same object but not attached.
You can turn off "sync selection with mesh" so that the selection in the UV map doesn't try to sync vertexes between the UV map and the model.
So if it's all the same object and it's overlapping, it's bad?
And I thought sync selection was just to visualize...
If we press U and unwrap, is Blender going to make it not overlapping? I'm kinda mixed up.
I missed the picture the first time around.
There are a few issues with the UV in your picture, assuming you're doing pothead.
1 - The vertexes extend past the boundaries of your image
2 - You don't really want overlapping edges with this UV map
3 - One of the goals of using the grid is to get the grid to be about the same size.
The UVs on the "bolt" in the image are much denser than the UVs on the rest of the handle.
I don't recall the exact steps to getting the UVs aligned properly.
I'd have to review the tutorial on all the steps to get things properly aligned, but you'll probably want to review them again.
At the least you'll want to select all the verts and either to uv->unwrap and/or uv->uv project.
In this example you don't want the UVs to overlap.
Edit: There may be more ways to move only the verts that you want to move, but you can select the faces you want, press ctrl-i to invert the selection, press h to hide the other vents, then move the ones that are left. Press alt-h and you'll see you just moved those face(s), and none of the other verts.
Hi ![]() maxcady ,
maxcady ,
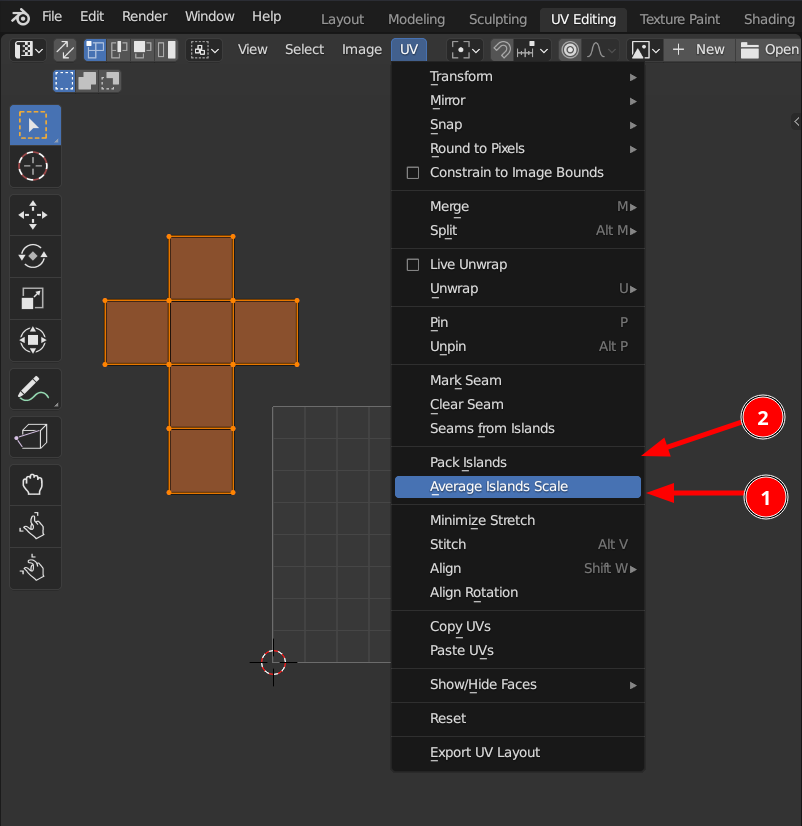
I'm sure Jonathan tells this in the tutorial somewhere, but, in the UV Editor, select all and then go to View and click:

You'll do this with the whole model selected, but you can use this as a temporary measure for singular parts as well.
You can learn all about UV's in JL's Fundamentals of texturing, if you haven't seen it:
https://cgcookie.com/courses/fundamentals-of-texturing-in-blender
I say pause Pothead and go watch that one, then come back a UV king and conquer all UV's.
![]() spikeyxxx - Thanks. Those were the things I wasn't remembering right off hand.
spikeyxxx - Thanks. Those were the things I wasn't remembering right off hand.
Note to self/others. It's always good to take notes of some of the things taught in the tutorials. I tend to be bad about it, but writing down how a particular thing was done can save you from trying to find it in the video.
(Then there's organizing one's notes, but that's a different issue.)
I dont need to. I remember everything. It's just that he didnt talk about it. It is maybe in the last video but I was ahead of the teacher and I had this problem. Nice advice though.
Yes I will watch the video Omar.