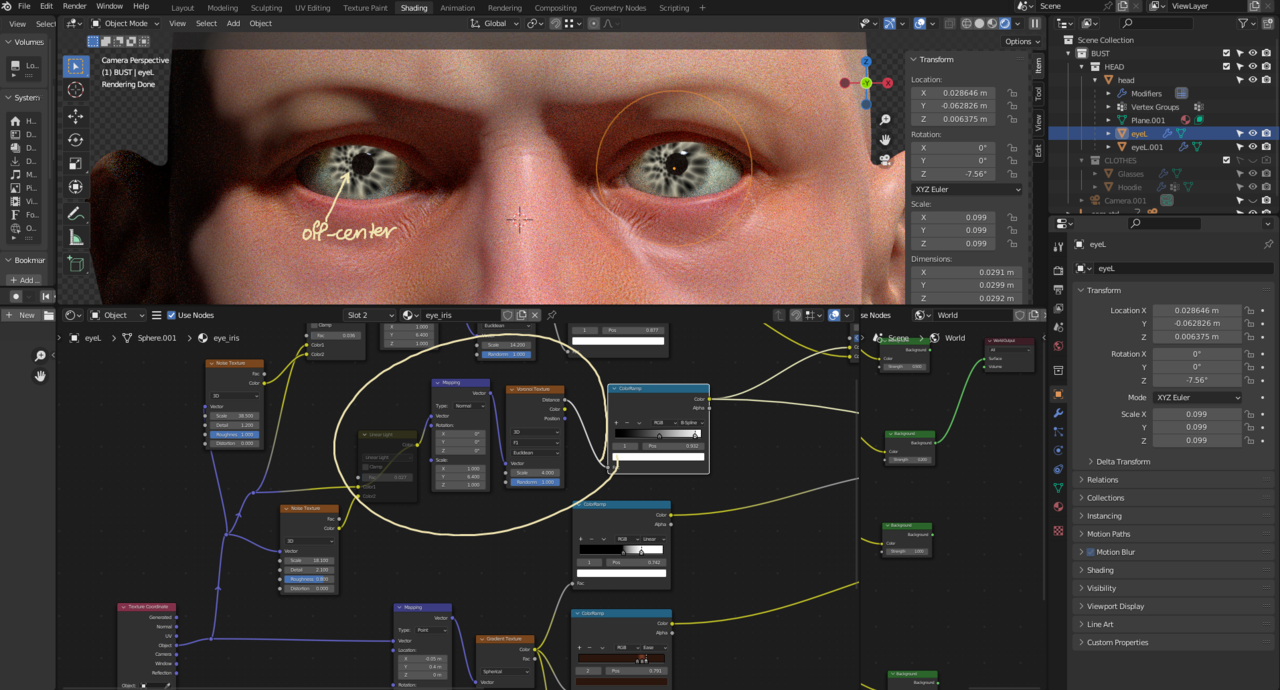
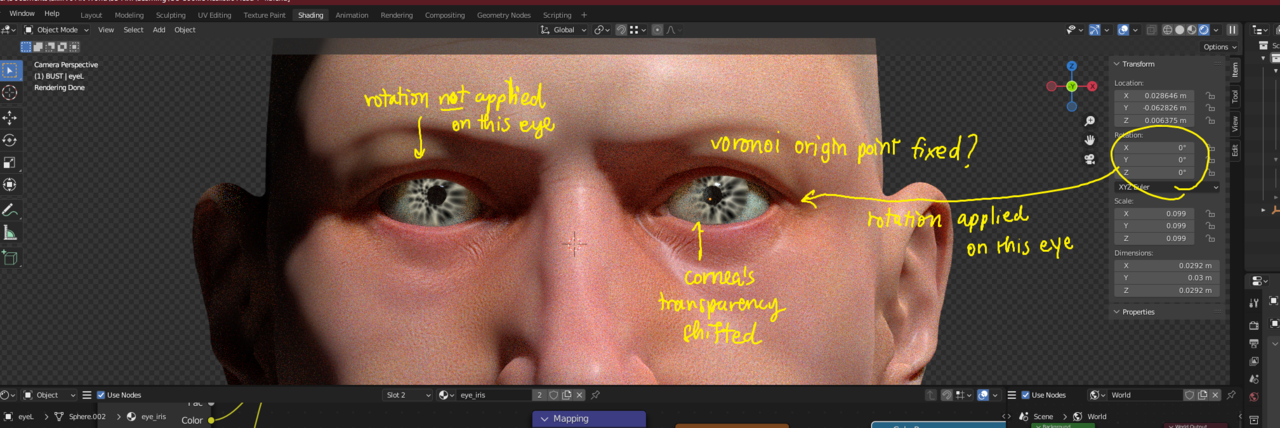
I've been trying to reposition the generated iris's pattern for hours. Its origin is not within the pupil. I've been meddling with Mapping nodes and trying to find a solution on the web, but nothing has worked.
The sclera and the iris are of the same object. The sclera mapping seems fine. The transparency of the cornea, veins, redness, etc. are where they should be. The mapping for the iris's colors is good too.
I also tried applying the rotation of the eye, but that messed up the mapping for everything else. So I wonder if there's any simpler solution that doesn't require redoing everything.
Thank you in advance for your help.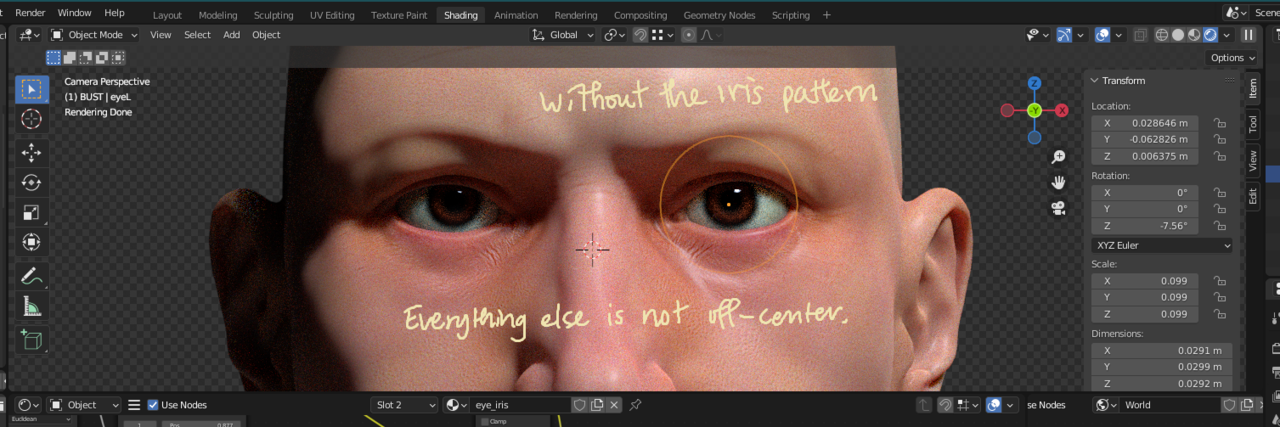
Hi ![]() UNIQASPERMA
UNIQASPERMA
My guess would be that it has to do with your Z-Rotation:
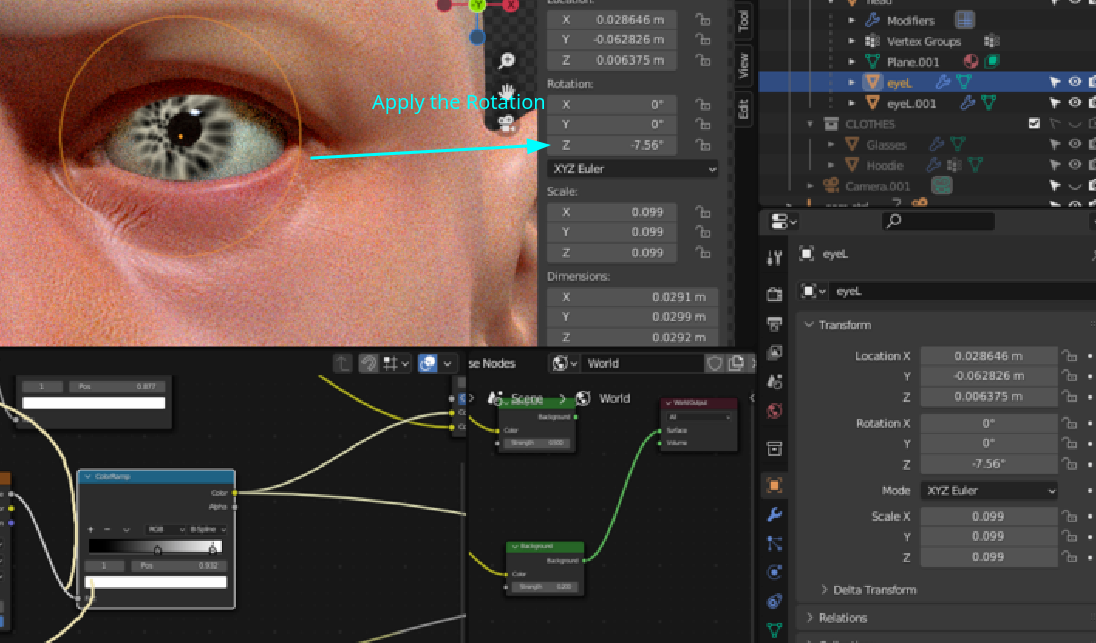
CTRL+A > Apply > Rotation. (Try to avoid Applying Rotation in general...)
WARNING: You are using Object Coordinates (which is great!), this is one of the 0.01% of the cases where you should not Apply the Scale!
Martin, thank you for your quick response.
I have tried applying the rotation for the eye (sclera + iris). That seemed to fix the origin point for the Voronoi texture for the iris, but that also messed up something else's coordinate, for example, where the cornea's transparency should be.
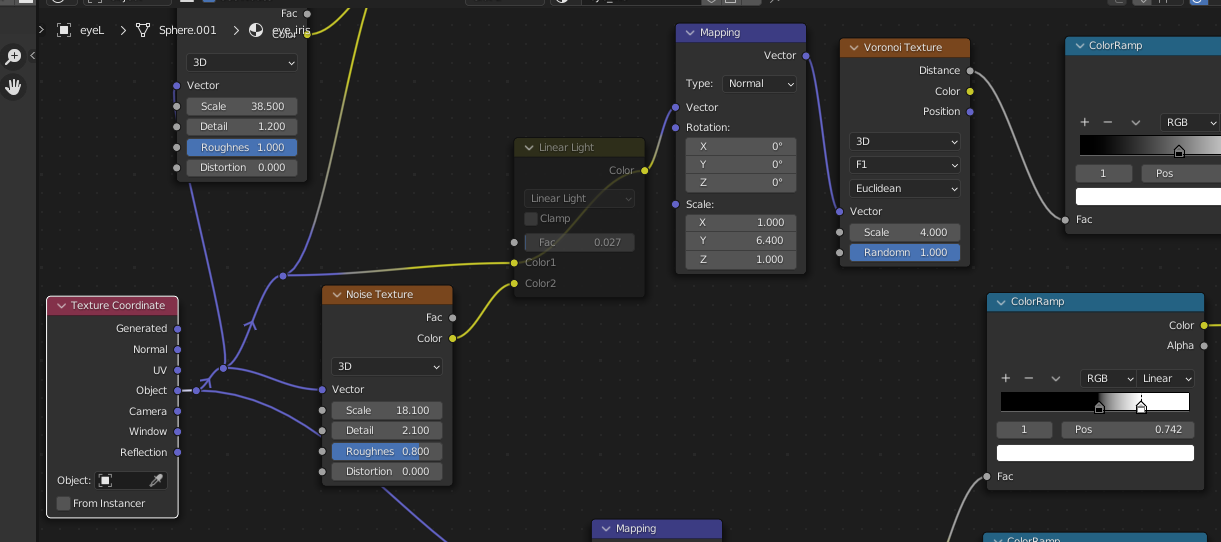
I was wondering if there was a node or some trick that I can use to shift only the iris's radiating pattern. I tried adding a mapping node here and there around the group which controlled this pattern, but I couldn't move the origin point for the pattern.
Thank you for your help.

Here's the file. Thank you very much, Martin!
https://1drv.ms/u/s!AtvDLj0kkrr0hAX4iRQ011tDKR6A?e=8h1f9h
Hey, great model!
So, I am sorry, but I haven't figured out exactly what is happening and why, but, if you add an extra Mapping Node Also set to Normal) before the one you already have, and enter the rotation of the Eyeball (set Scale to 1!), you get what you want, I exagerated the Scaling of the Voronoi and rotated the other eye to see if it behaves okay and it looks fine:
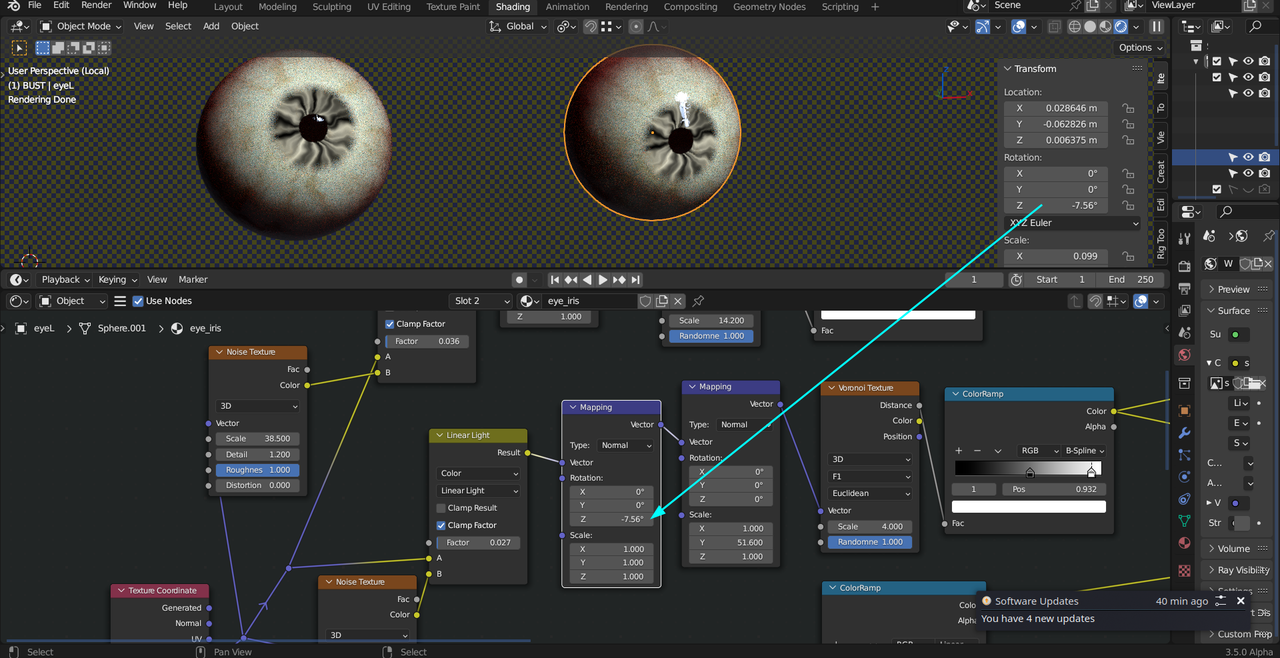
I will have another look tomorrow, I am curious as to why this is, but I hope you can proceed for now.
You da man Spikey. Those things with nodes and coordinate system are always a pain. I mostly just fiddle around until I brute force the result I am after. Not the best way of doings things but I always tell myself, I'll learn the underlying technicality behind all this one day, and I never do.
Ah, after some coffee it all looks a lot simpler 😊
Select both Eyes and Apply the Rotation.
I don't know where that Rotation came from in the first place, but it shouldn't be there. You have compensated for that Rotation inside your Eye Materials, so you'll have to undo that compensation:
In both your Sclera and Iris Materials, you should zero out the X-Location (it's at - 0.05 at the moment) in the Mapping Node before the Gradient Texture:
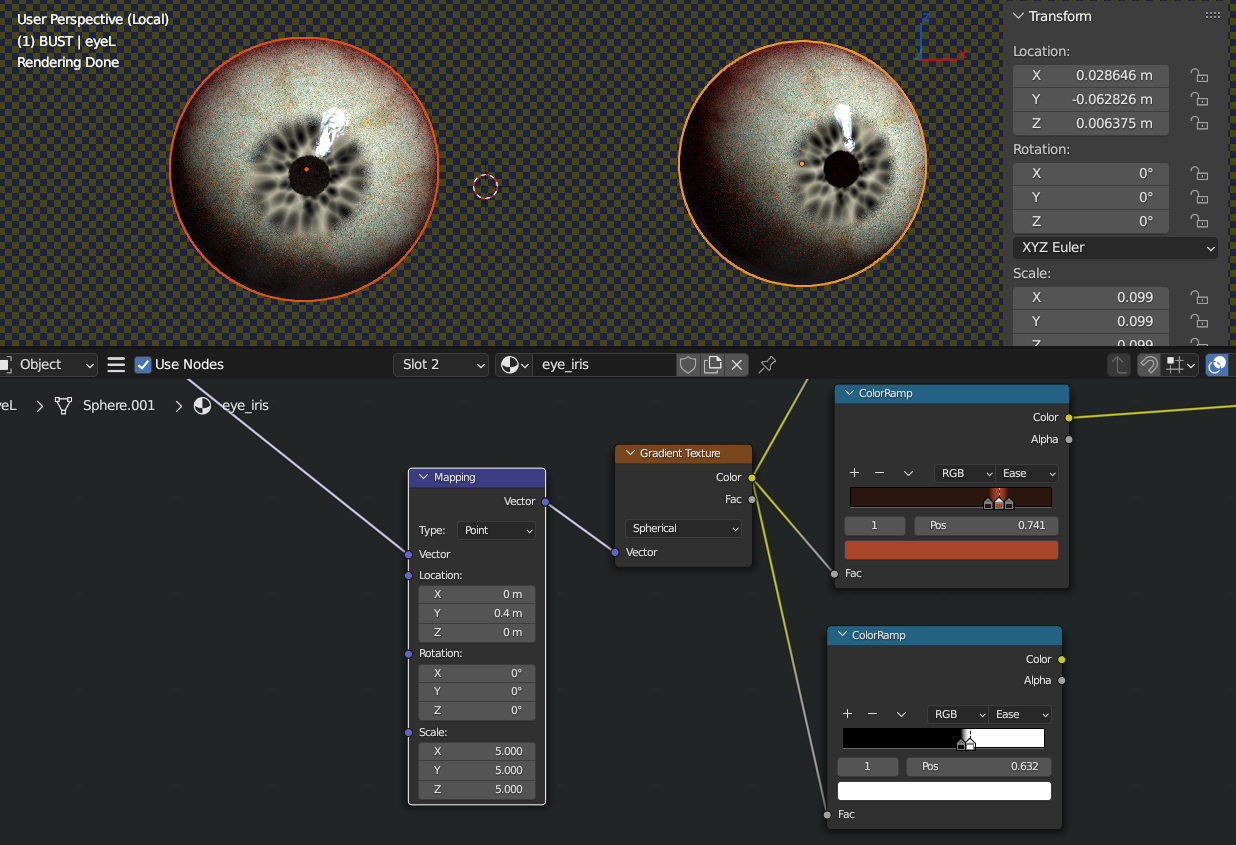
That should fix it.
If not, just ask again!
Have fun with the rest of the course (as I'm sure you will).
(Oh and don't forget to get rid of that extra Mapping Node I proposed in the temporary fix in above post.)
O... Thank you so much Martin! I must admit that it is mainly because I just started learning Blender early this year, so all the principles and concepts are still a bit fuzzy in my mind. I'll be sure to keep learning about Blender's technicalities and to pass on such kindness. Wish you all the wonderful things!