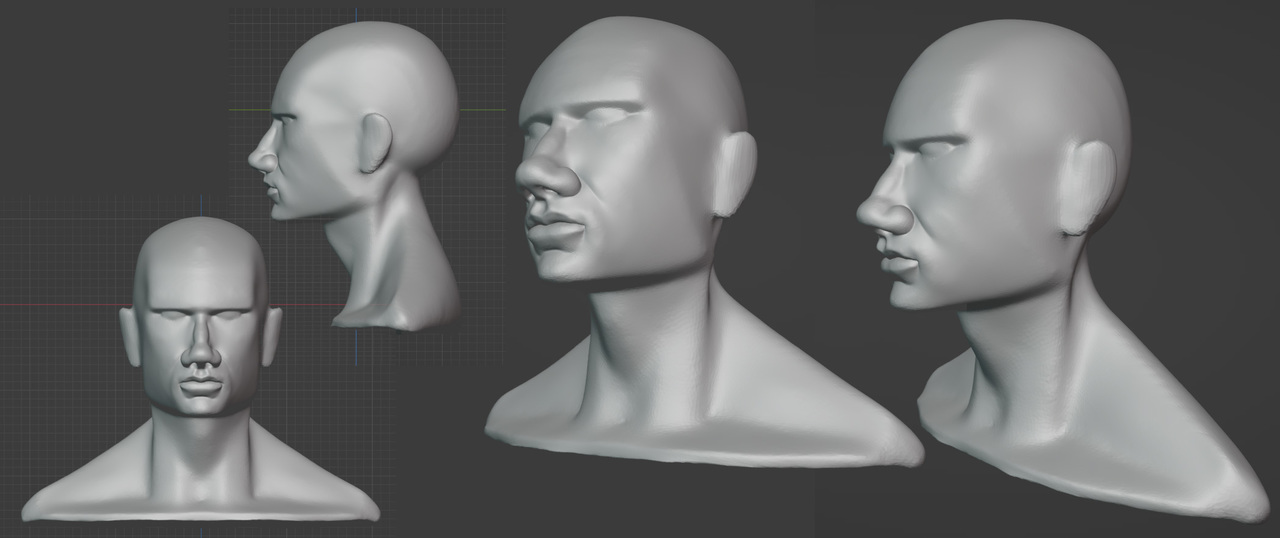
I got through the lessons up to this point, and then saw that my nose is way too big. I think I've learned a lot to get to this point. And my next step is to start from the beginning again, if nothing more than just for the practice, and maybe I can figure out along the way how to make the nose a more appropriate size. Also, I just discovered the source materials, and I can go poking through those as well. I will post my screenshots next because it seems I can't add images to an original question here.

I really am quite amazed at what I have been able to create. (A month ago, I had not done any scupting.) I like the nose a lot, it is just too big. I tried masking it off and scaling it down in the x axis, but the part of the face it is connected to comes along and the whole thing looks awful. Using the grab brush also made a mess of things. This is where I jettison and try again.
Looking really good!
Maybe the shoulders connect a bit too high at the neck (angle looks too steep to me).
I was also amazed at what I could do with hardly any sculpting practice...I did do the 'Planes of the face' lessons a few times and that really helped the model and my confidence.
Your model is looking great Gail, looks like someone I know.
I think there's no straight forward way to reduce the nose and have everything stay perfect, something will break or need adjustment. The trick is what approach to take that does the less amount of damage. You can use masking, scale, the smooth brush, grab brush, go into edit mode, etc. Try a few things and re-adjust the areas that break, it's how the workflow goes. So keep on moving, you're doing great!
Thank you Martin. Yes I also think the shoulders connect too high. I'll try to remember the next time around. I got started in a direction and I got taken here, and then I'm too much of a scaredy cat to take it apart and fix it.
Thank you Omar. I may go back and try plunging in with a fix. After a few pokes at corrections to see what would happen I was afraid I would mess everything else too much, but what do I have to lose?
Thank you both for responding and making me feel I have some support out there.
ggailgongster You're making great progress and your attitude of repetition is going to be a huge asset in your creative journey! Omar and Martin have given great advice which I fully endorse.
I also wanted to share my thoughts about proportional changes when sculpting. Often I will use sculpt mode's transform tools (scale, rotate) or a large pinch brush for scaling down. But transforming in sculpt mode is never precise in my experience. When I want precision I will tab into edit mode to use traditional scale/rotate/move. This allows me to exactly place a pivot point (3D cursor) and transform with specific values if need be. Enabling proportional editing allows for smooth fall-off in these changes which is great for an organic sculpt mesh.
I employ this method a little later in the course which you can watch as a demonstration.
Thank you Kent. I'm so happy that you had a look at my work. Thank you for telling me about going into edit mode to fix stuff like a big nose. And thank you for the link to later in the course.