I am on the mateials light fixtures portion. When I attach the gradient texture I only get a tiny white section. I have tried moving all of the dials on the Mapping node. I have checked to see that my normals are facing the correct direction. I have deleted and restarted this section over and over, but I get the same results. I am at a loss.
Thanks,
Ang

PS If I change the texture coordinates from Object to Generated I do get the light back, but I am unable to correctly create the darkened edges.
I have tried moving all of the dials on the Mapping node.
Don't do that lol.
The Gradient Texture Node can easily be 'lost'.
When using Object Coordinates, the center is at the Origin of the Object. This is what you want, so keep the Location of the Mapping Node at (0, 0, 0). Also don"t rotate in this case.
Now, first fix the Scale of your Object by Applying it. (It is (1.5, 0.15, 0.15) at the moment!).
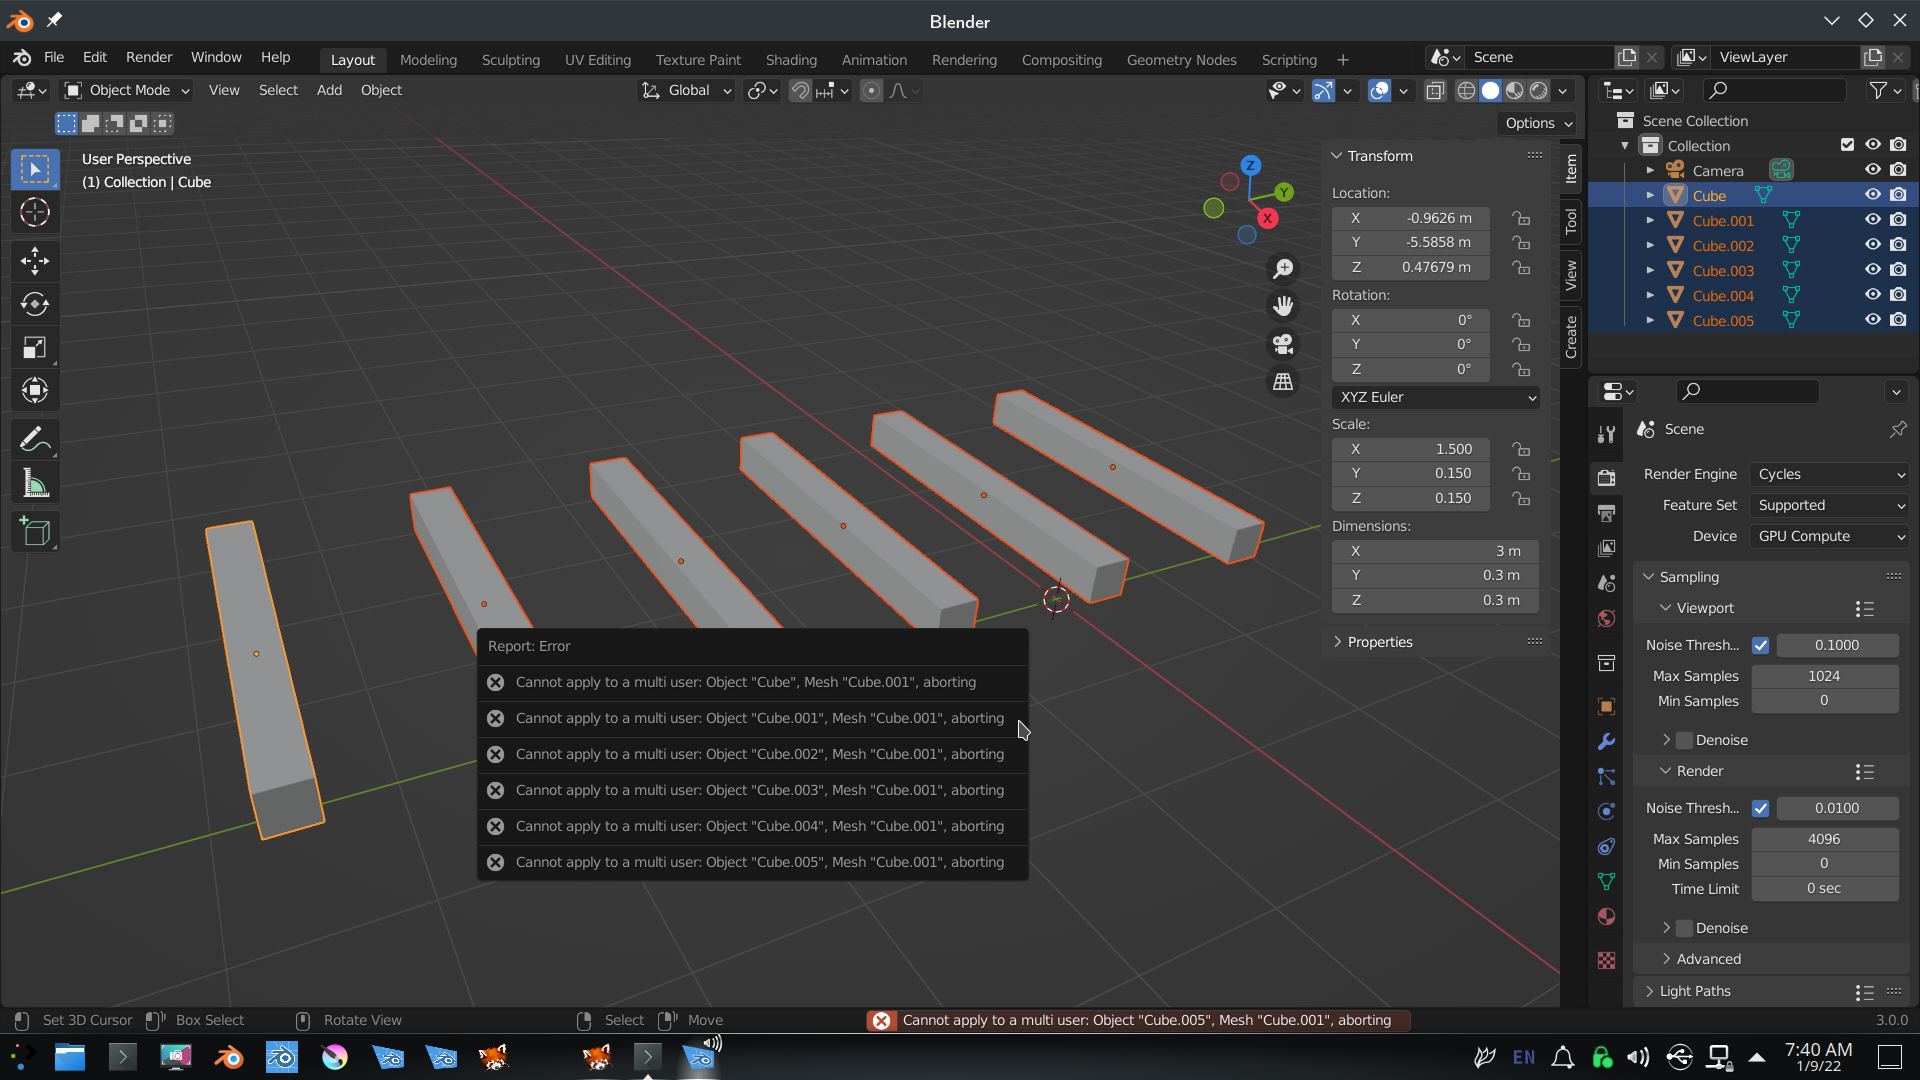
You probably can't do that right now, because your Lights are linked. So, select all your Lights.
If you try CTRL+A now, you get an error like this:
 You first need to 'separate' them:
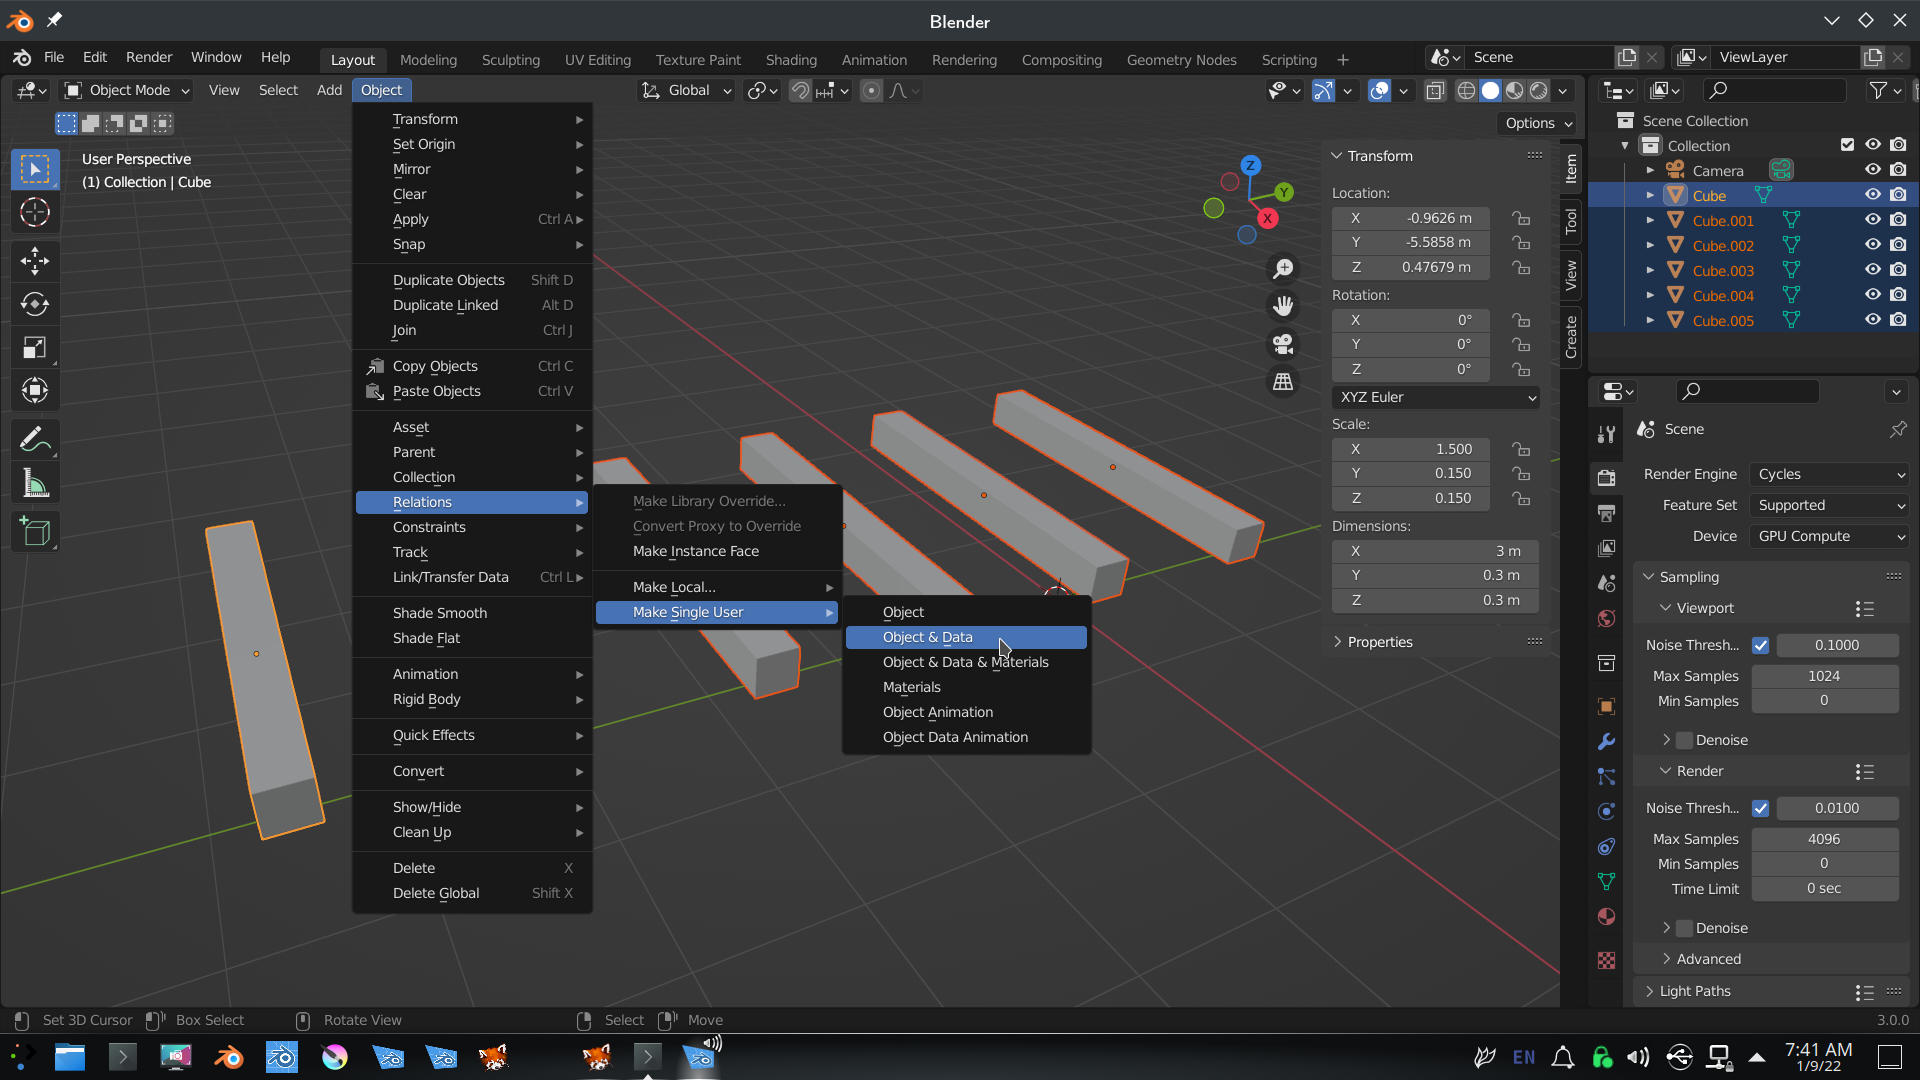 Then CTRL+A > Apply the Scale (keep all the Lights selected!) and then CTRL+L > Link Object Data:
 Now try the Material again, only touch the Scale in the Mapping Node:

PS: make sure, that when you select all your Lights, that one of them is Active (light orange outline).
Thank you so much. Worked like a charm. I really appreciate all of your help.