I hope I understand this challenge correctly and you can do a static image of something that will make you scream. I personally find stuff more scary if it can really happen, like rats invading your home by swimming up the sewage system, which it appears they can really do. The rats are entering the house at night from the toilet. I am going to change the camera to look in from the door, as if you are entering. I assume I'll have to add a couple more rats and change positions, etc. The lighting will be moonlight, hall light and nightlight in the bathroom. I will definitely have to learn more about lighting and compositing, definitely will be a stretch for me to model realistic rats.
Changed the x and y resolution around to better focus on the rats. There wasn't much to model, since I want the rats to stand out. The fixtures and tile are white and clean again to contrast with the rats.
Questions?
1. Should I render in cycles, I am guessing yes because of the lighting and shadows.
2. The colors and brightness vary if I view it on my laptop or the cheap tv I use as monitor. How do I know which are correct?
3. The lighting so far is a night hdri and moonlight coming in the window. Need more lights.
4. I added a vignette in the compositor, which about exhausts my knowledge of compositing, does anyone know any good tutorials.
5. Going to spend the next couple weeks learning to sculpt more than a blob hopefully. Am I better off sculpting one rat and then moving the limbs with an armature or the armature in sculpt mode or doing several different rats. I know they will all have to look slightly different.
Any help, advice, or comments would be greatly appreciated. Thanks!
Ad 2. Don't worry...there is no correct! Theoretically you could calibrate your monitor (buying a colorimeter), but even then, the colors on your monitor depends on the lighting in your room and therefore vary during the day...and even if you'd get the perfect calibration, everybody else will see it differently on thee own monitors...If you can make it look good on both screens, you are probably safe.
Looking good already! Have fun sculpting :)
Hey ttanya53 ,
Looks great already, the porcelain especially.
Not so much answers, but perhaps an option to each question.
1. Cycles will give you a more realistic look to your render. Eevee is all about faking it, you can get good results, but it will need extra work to get it right.
2. You can adjust the brightness, contrast and color settings on your monitor/TV. When setting my monitor, I have a series of greyscale images on screen, to aid the brightness and contrast settings, and a color image when adjusting the color settings. You probably won't have that on your TV, but I am sure you could find something online to assist you. Then use the same images on each screen. You will find the settings will vary between each monitor/tv.
3. I would leave the lighting until last, stick with what you got for now. When the time comes, you can always add an area light in the window, the same size and shape, and in the setting select portal.
4. A vignette is a good move. There is the Final Touches and Compositing lesson in the Sand Dunes Course , Kent uses a film grain and distortion look, which may be a good look for a scary scene.
5. Rats generally look the same, I would go with sculpting one rat with a rig and use duplicates and pose each one differently.
I'm looking forward to seeing your awesome sculpting. 👍
Thanks for asking @adrian2301. This one is definitely more discouraging and difficult for me to do, but that is the point of a challenge.
This is how far I am currently am and the numerous places I am confused and stuck.
I am using cycles to render, which is a pain. I am used to the speed of EVEE, this takes 10 plus minutes to render one frame vs a couple of seconds. The shadows worked better and it is what is covered first in the lighting course.
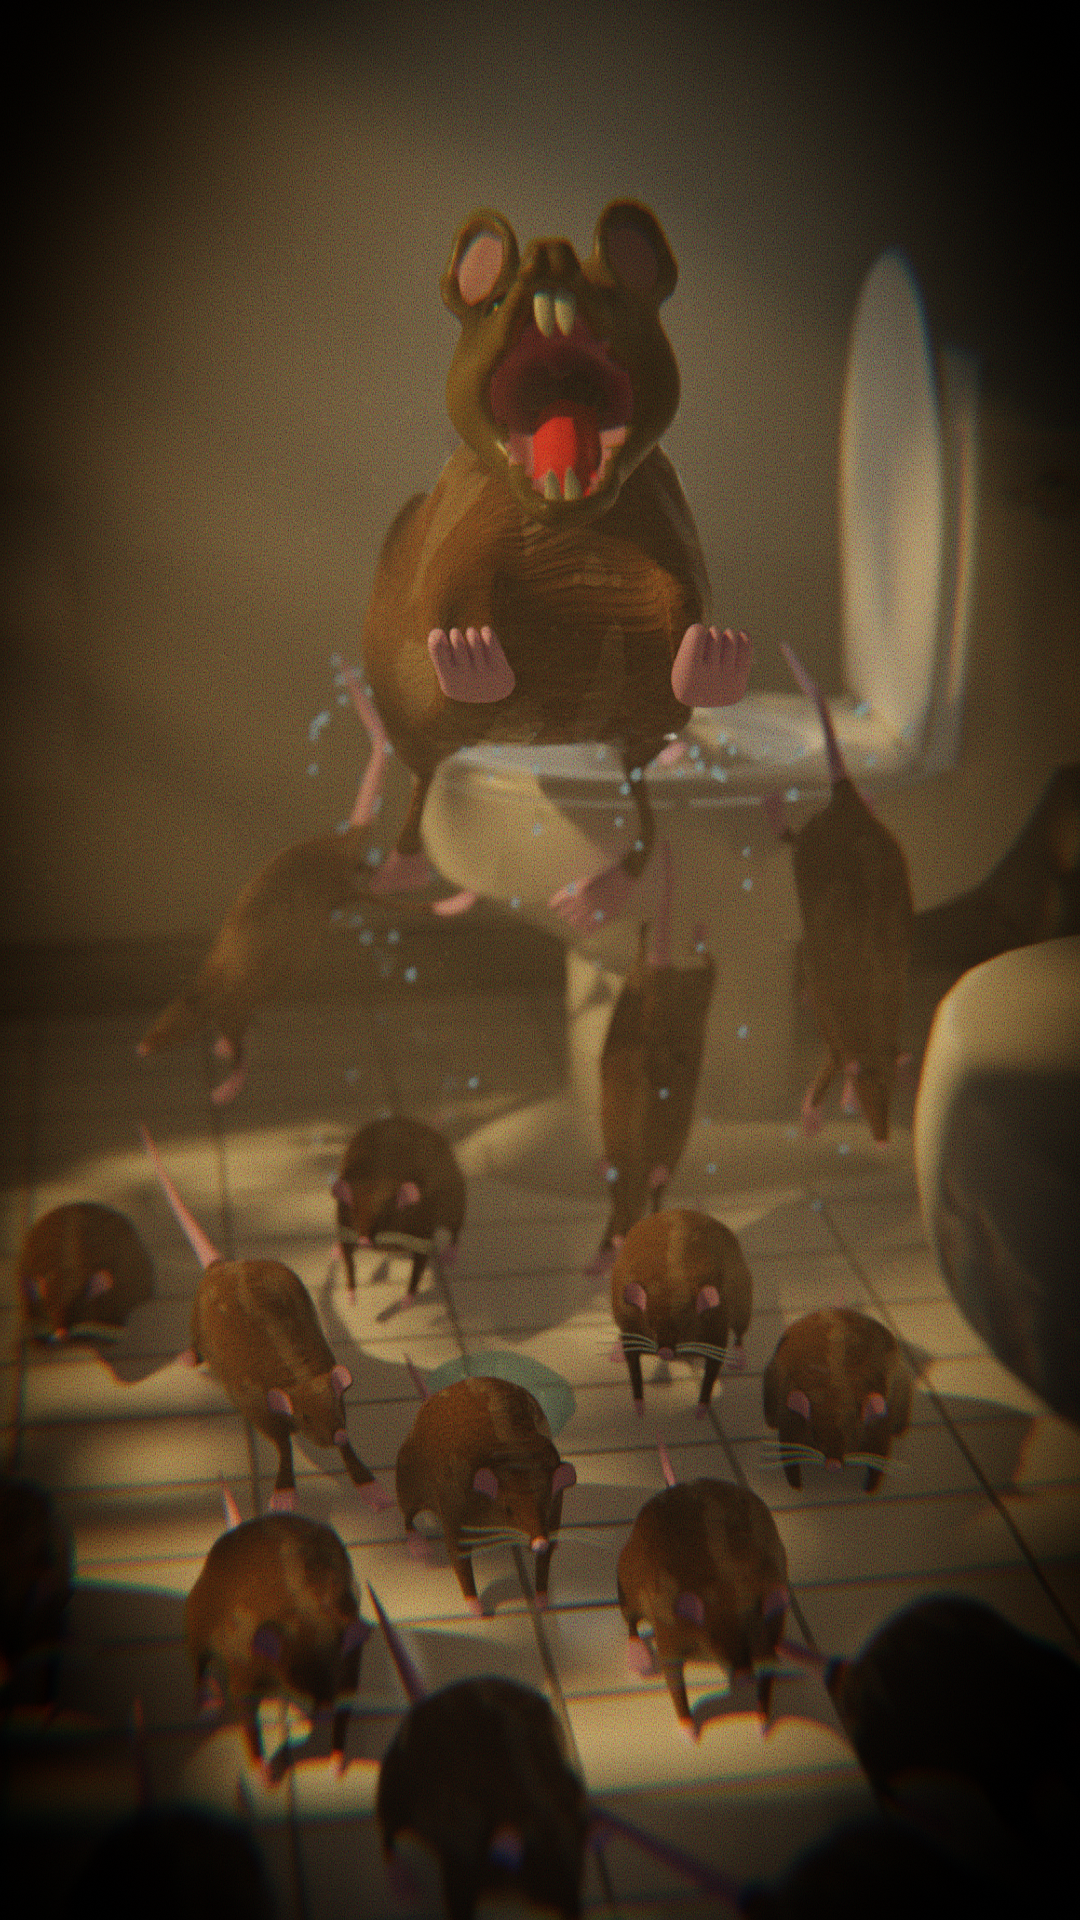
I read some about compositing an image, have absolutely no art or photography background. This is my takeaway from that, viewer will first look the larger rat, due to its size and motion. The red tongue teeth also stand out. From there the eye should be drawn down to the other rats. Going to add more water droplets around the large rat to attract the eye to the large rat also.
The large rat is set up as depth of field, I like the way it blurs some of the things in the image.
The world is set up as a volume in and attempt to set up god rays, only worked so so. There is a plane in the window with random sections deleted to do this and to add some more shadows.
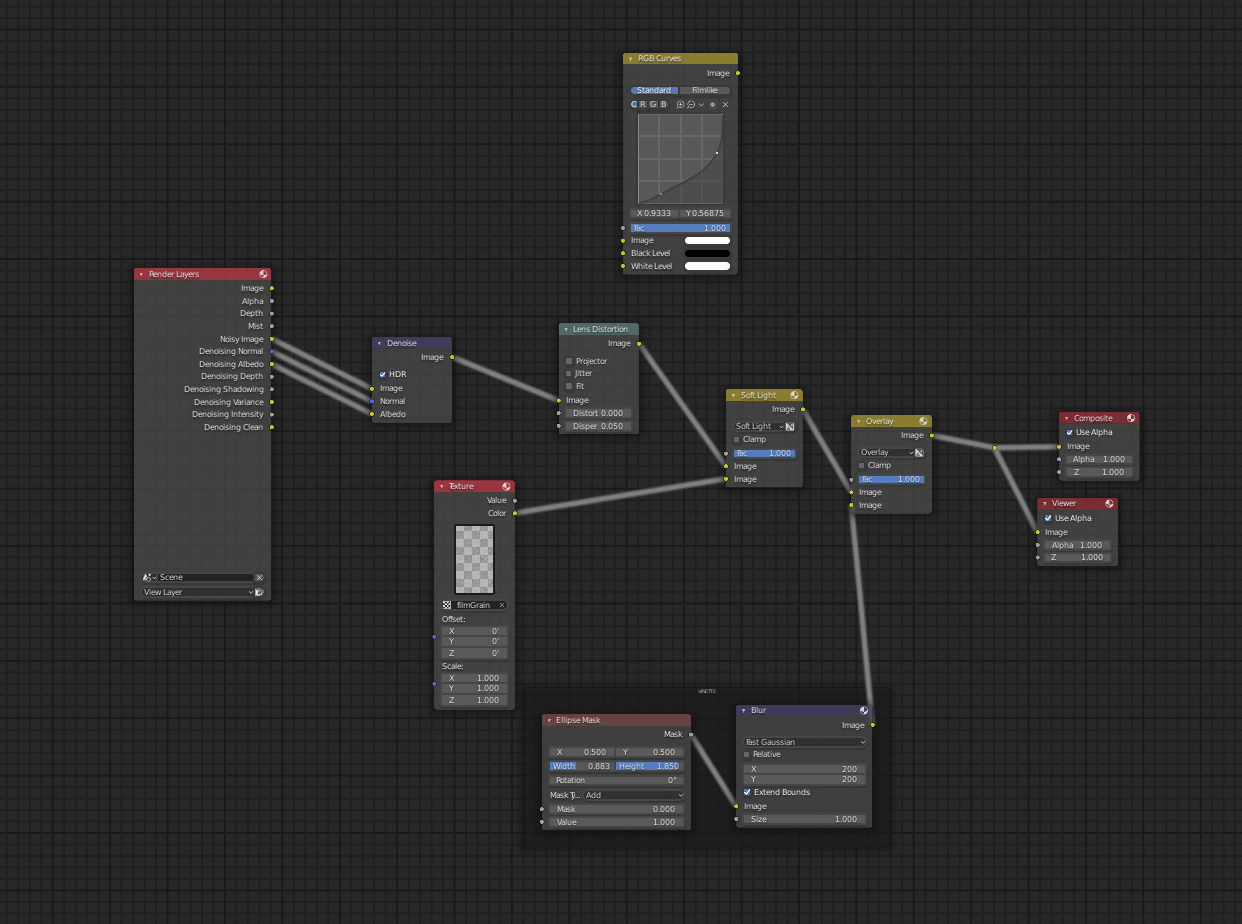
There is a small amount of compositing done, sort of stuck on what else to add here. I know that I can do a lot of color correction, really bad at colors and color differences
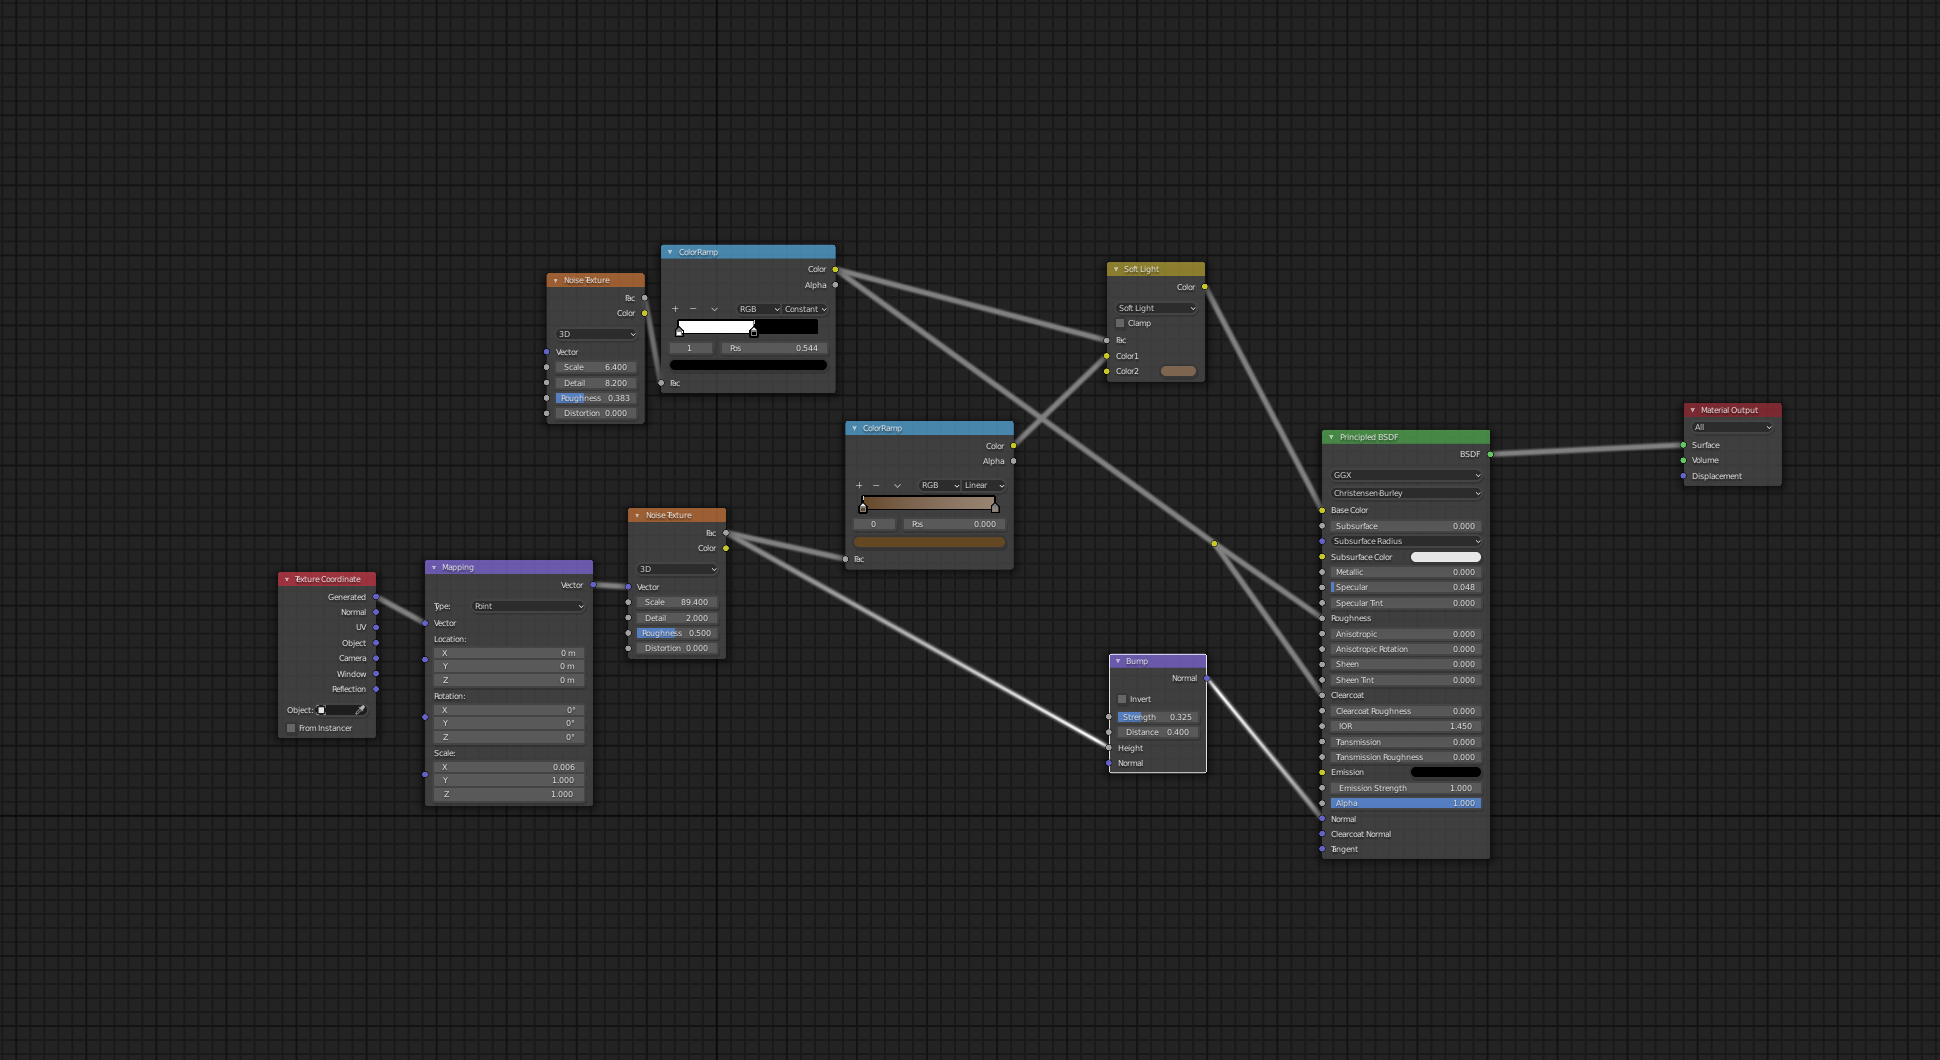
I started out using hair on the rats, a disaster. I am currently using the node layout below. I wanted to make some of fur look shiny and wet, but not all of it. I also still need to UV unwrap a rat, but I hope to get a better looking rat so it’’s not worth the time now. I may add some hair to the large rat to add detail to it.
There is an armature in some of the rats, needs to get refined, but close to good enough for just positioning . Will change the position of the others, when it is better.
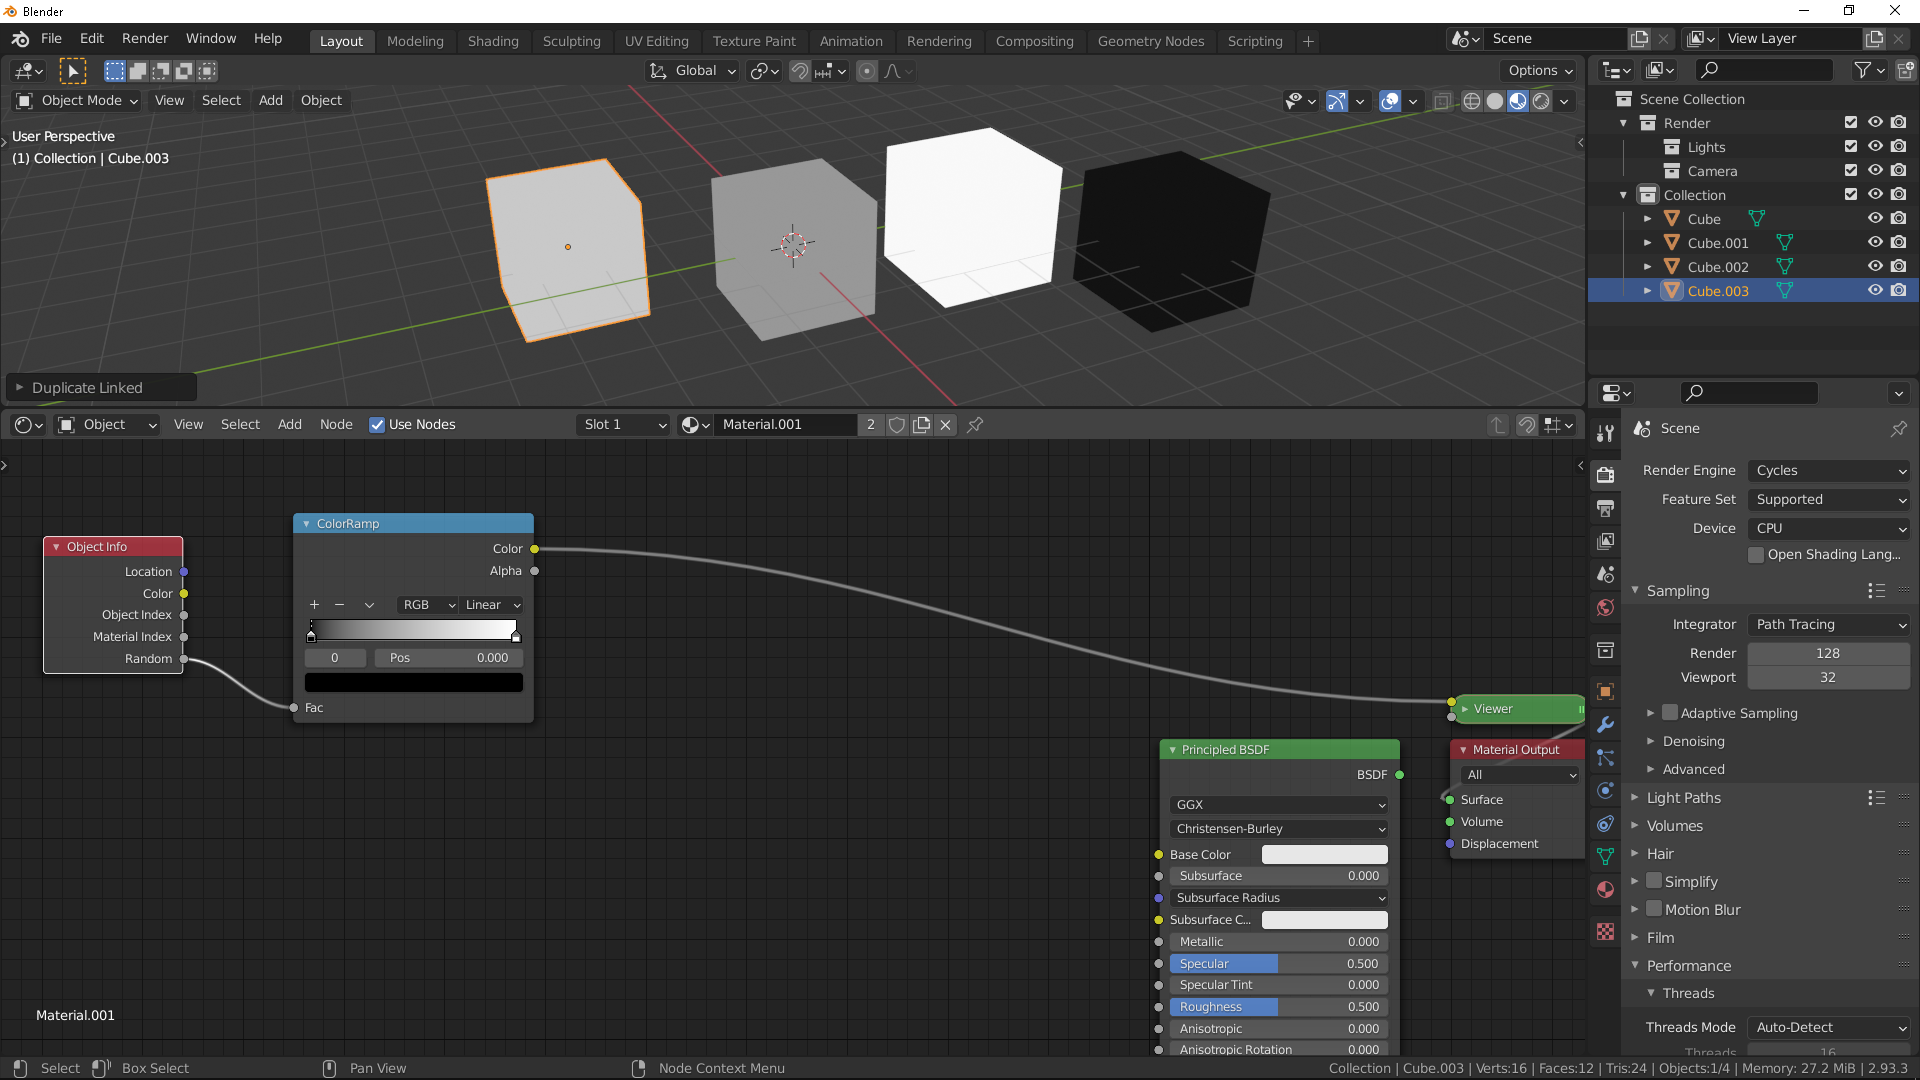
I need to change the appearance of the rats, ie color. Currently the mesh, armature and material are all linked in. Is it possible to like in just the mesh and armature and then set up a colorRamp to assign a random color. I can do the random color, don’t know about the material on a linked mesh.
Last issue, lighting. There is a nighttime hdri and a spotlight for the moon. The only other light is a small area light behind the large rat. I have no idea where to put other lights and how to make them not look strange, I have yet watch the video about lighting the bedroom, hoping that will help some.
To me it looks more funny than scary to me, but at least the things look more like rats and less like teddy bears that they did a few renders ago.
Last question, in the last two of these I ended up adding detail that you never really saw, so how do you know how much detail to put in, ie. Image on my phone less detail than on my lap top, but more if the image is on a tv screen, and what about if is VR or AR ?
This is one is definitely harder for me than the other two I did, but still learning a lot, now if I could just remember all of it and how to use it correctly.
Perhaps you don't need hair, except for some whiskers. Wet rats you could achieve procedural with some bump using a wave texture. A few clumps of hair on the large rat would be good.
You could use an Object Info node and use the random socket into a Color Ramp node. Here I used default black to white, but you can use dark to light shade of rat. This will pick a random position on the color ramp for each object using the same material.
The level of detail is you choice, and dependant on time. The larger rat is the only one I would spend any real amount of time on, as it is the focus. The feet could probably do with some more detail, claws for example.
The lighting looks good.
Great work so far ttanya53
Looks a lot better than you think @tanja53 !
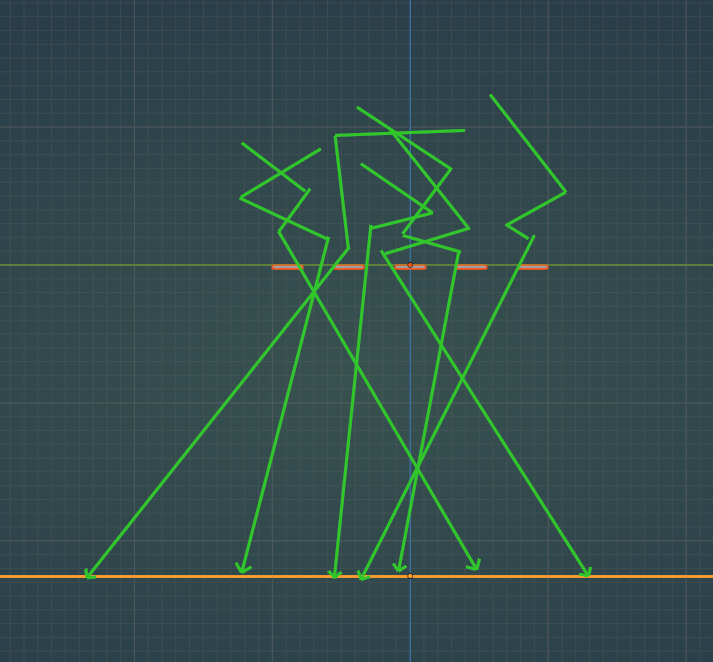
For the god rays, it is better to make a cube that fits in the room as the Volume. When you make the World a Volume, the light that comes in through the window is already scattered and enters the window from all directions, so the Plane with the cut outs doesn't have the impact you'd like on the light...I hope that is a bit clear...
Something like this (the light will also be scattered inside the room, but I didn't draw that):
This is coming together quite well! As far as lighting, you might consider tinting the light towards blue to imply moonlight. However, I think the current lighting feels like nighttime with a streetlight outside a window which works convincingly.
![]() spikeyxxx thanks for the advice on the god rays. I changed the volume from the world and added one on the room, and like it a lot better. The explanation made perfect sense, like usual. @adrian2301 the texture advice also helped, would have taken forever for me to get there with my trial and error approach. I have also switched back to EVEE, just don't have the patience and that's what I use when I try to animate stuff. Again thanks for the help.
spikeyxxx thanks for the advice on the god rays. I changed the volume from the world and added one on the room, and like it a lot better. The explanation made perfect sense, like usual. @adrian2301 the texture advice also helped, would have taken forever for me to get there with my trial and error approach. I have also switched back to EVEE, just don't have the patience and that's what I use when I try to animate stuff. Again thanks for the help.
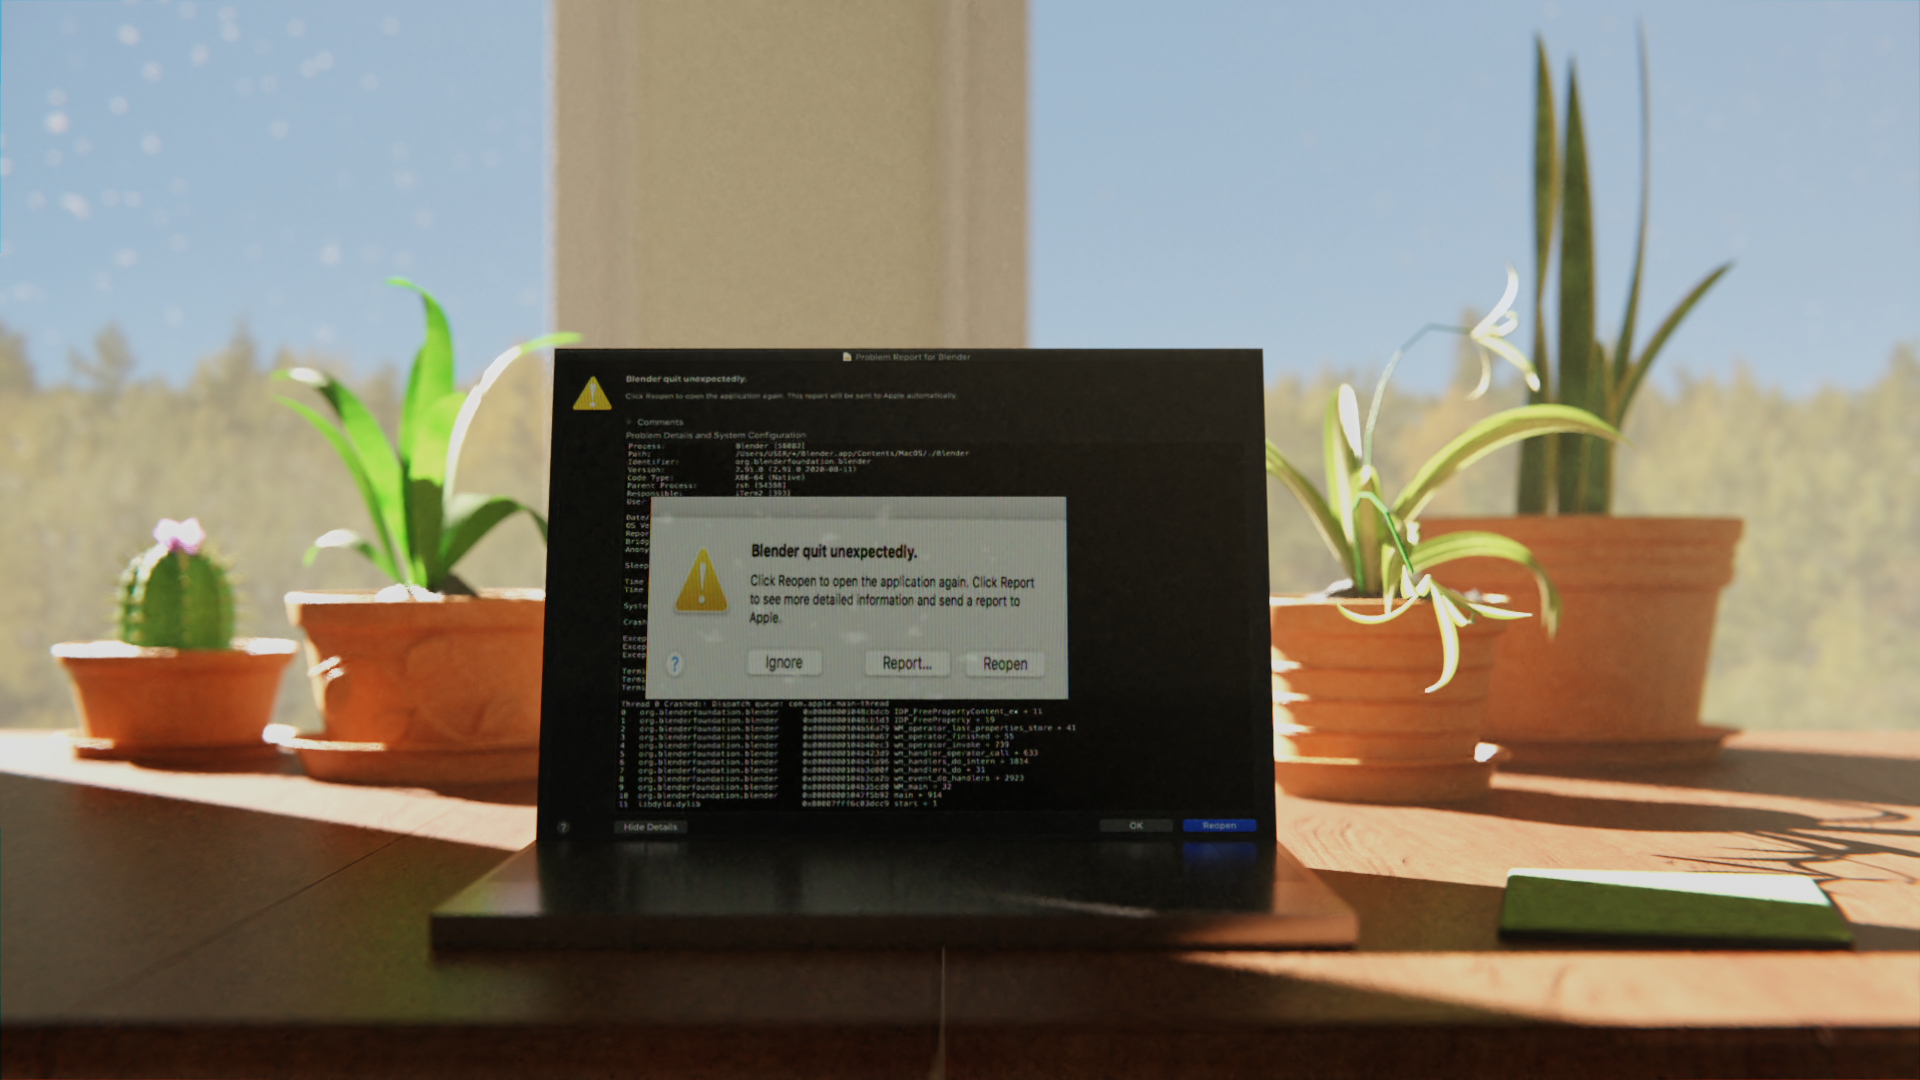
Well I have moved on to idea E or F, either due to a poor idea or poor execution. Still need to add several things and model the lap top. This is a screen I have seen a couple of times in the last several weeks and has produced some screams, especially when I have not saved frequently enough. You would think that the autosave would save right before it crashes. Even though this has proved to be very frustrating, I have learned a fair amount.
thanks, I do know where to find the autosave, usually works for me, but once in awhile I have made more changes than I thought. I thought this idea was something most people could relate to and made me laugh a little. I was also getting desperate for an idea that I could both do and sort of liked. Anyway thanks for your great assistance ass usual. Hope yours is going well.
,,,this idea was something most people could relate to,,
certainly! I rarely have Blender crashing on me these days, but I can remember the feeling of losing hours of work! I was definitely screaming then!
And yes, a crash never comes 'at the right moment',of course...
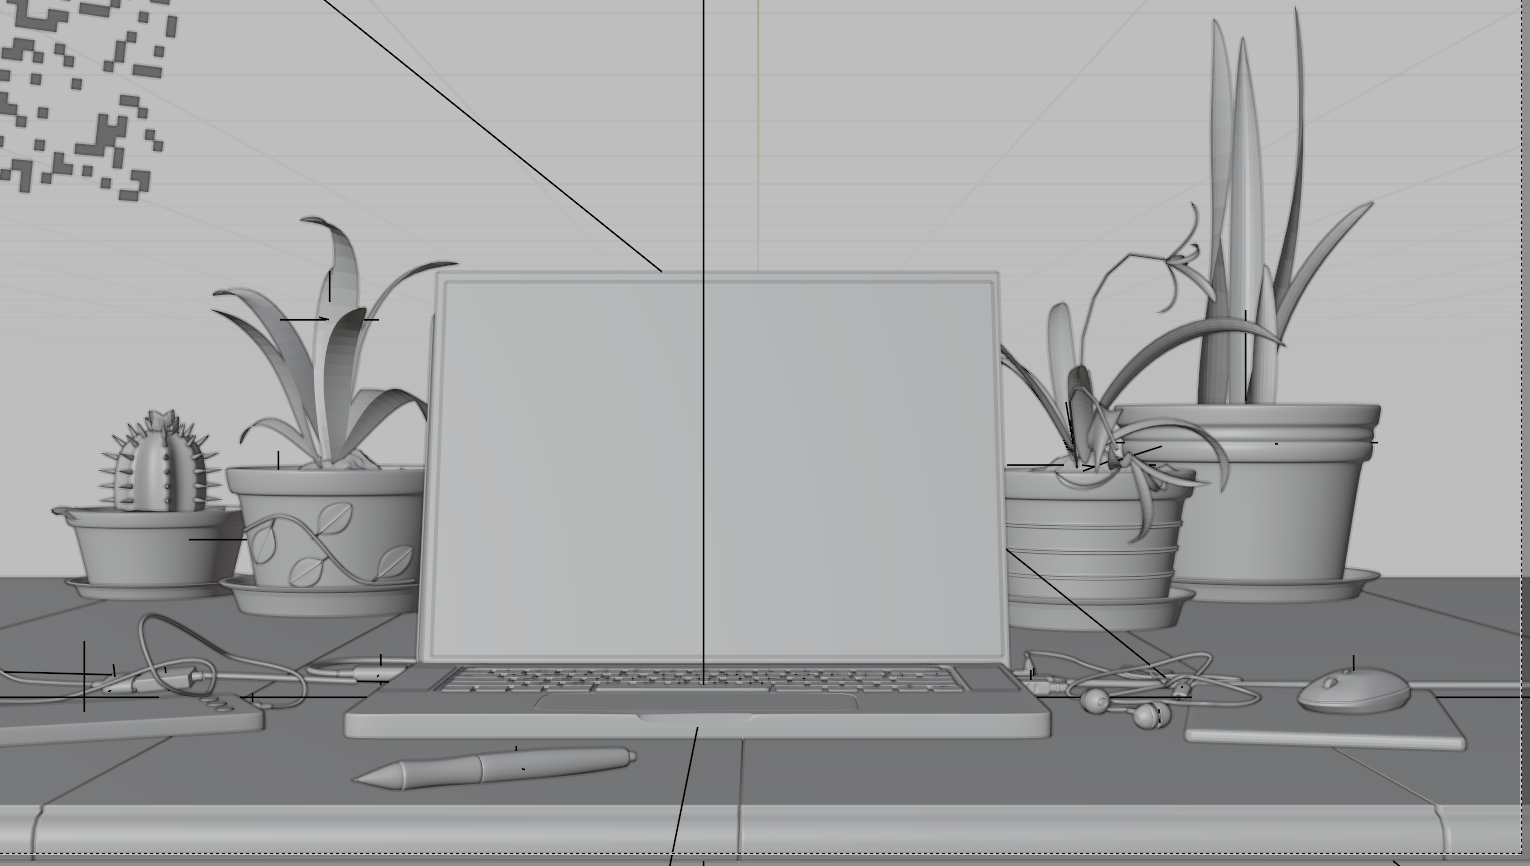
I have learned a lot from this one, still like making stuff move best. It is amazing what you can do with the compositor, wish I understood more about it and lighting. A hard thing for me to tell is how detailed an object needs to be, especially when I end up blurring it, again need to plan better. For example the cactus spikes. I like the coffee cup, really looks like the one I use.
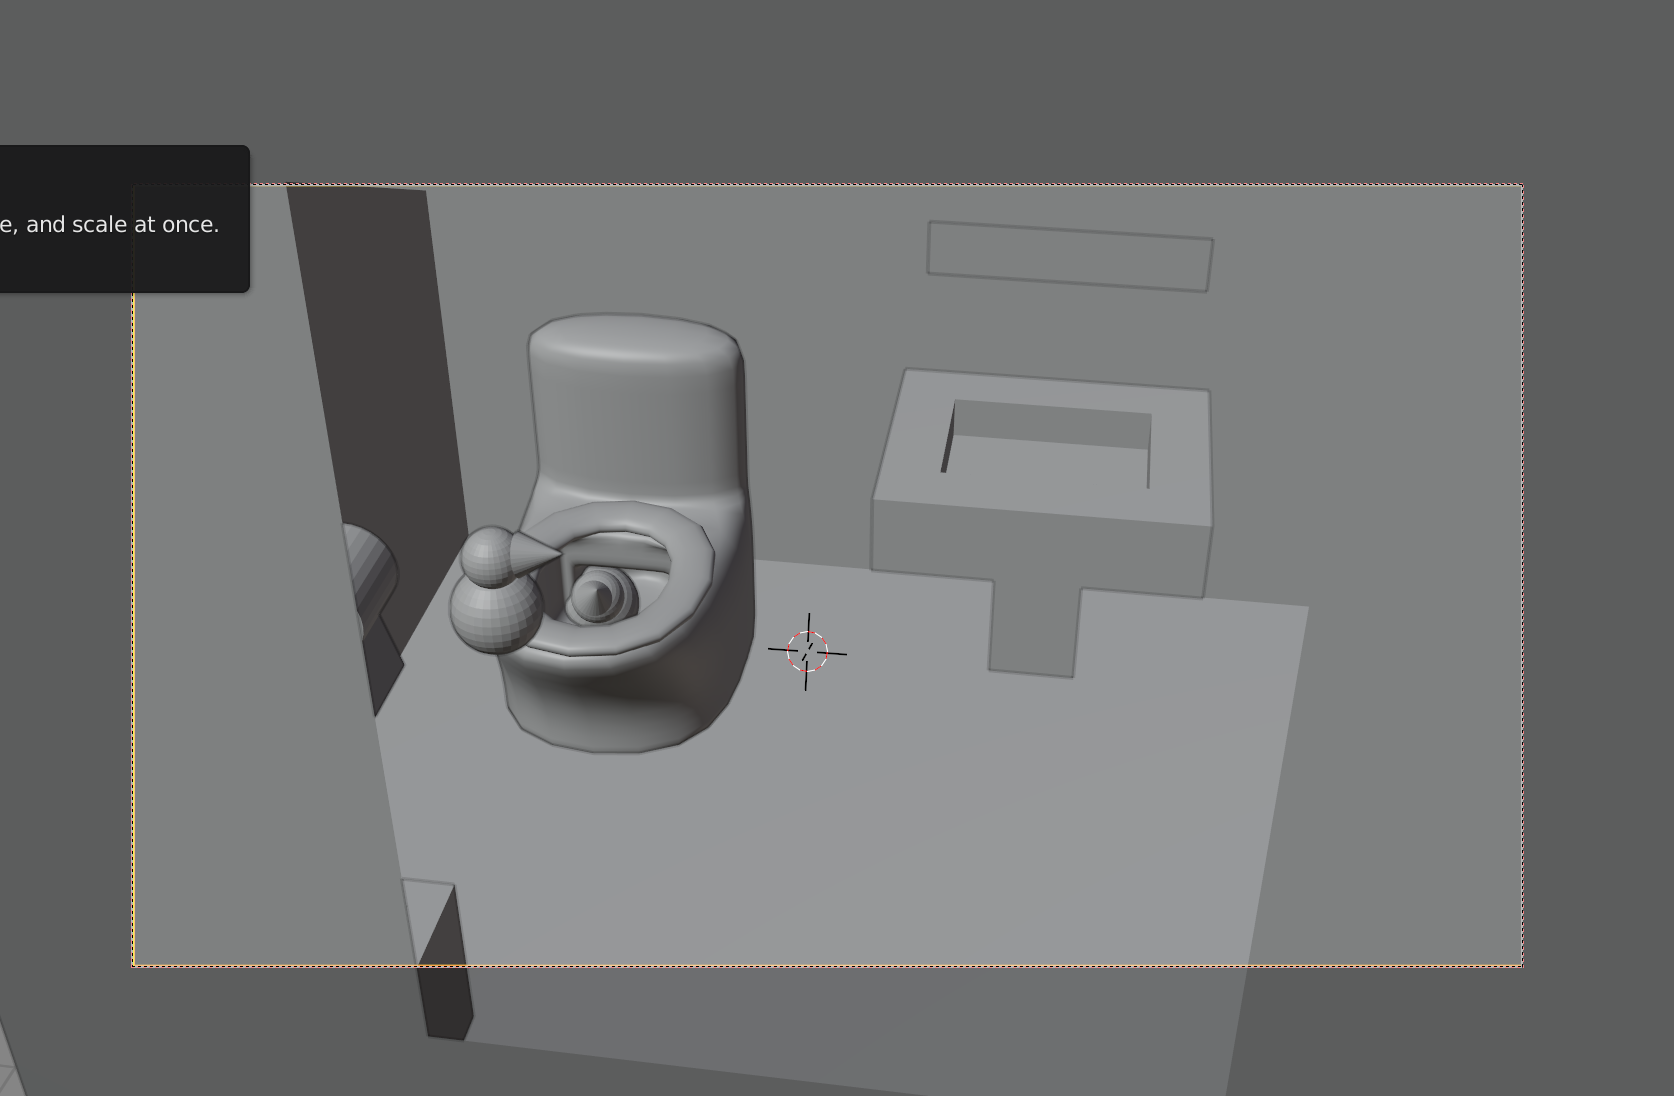
this is what the meshes look like
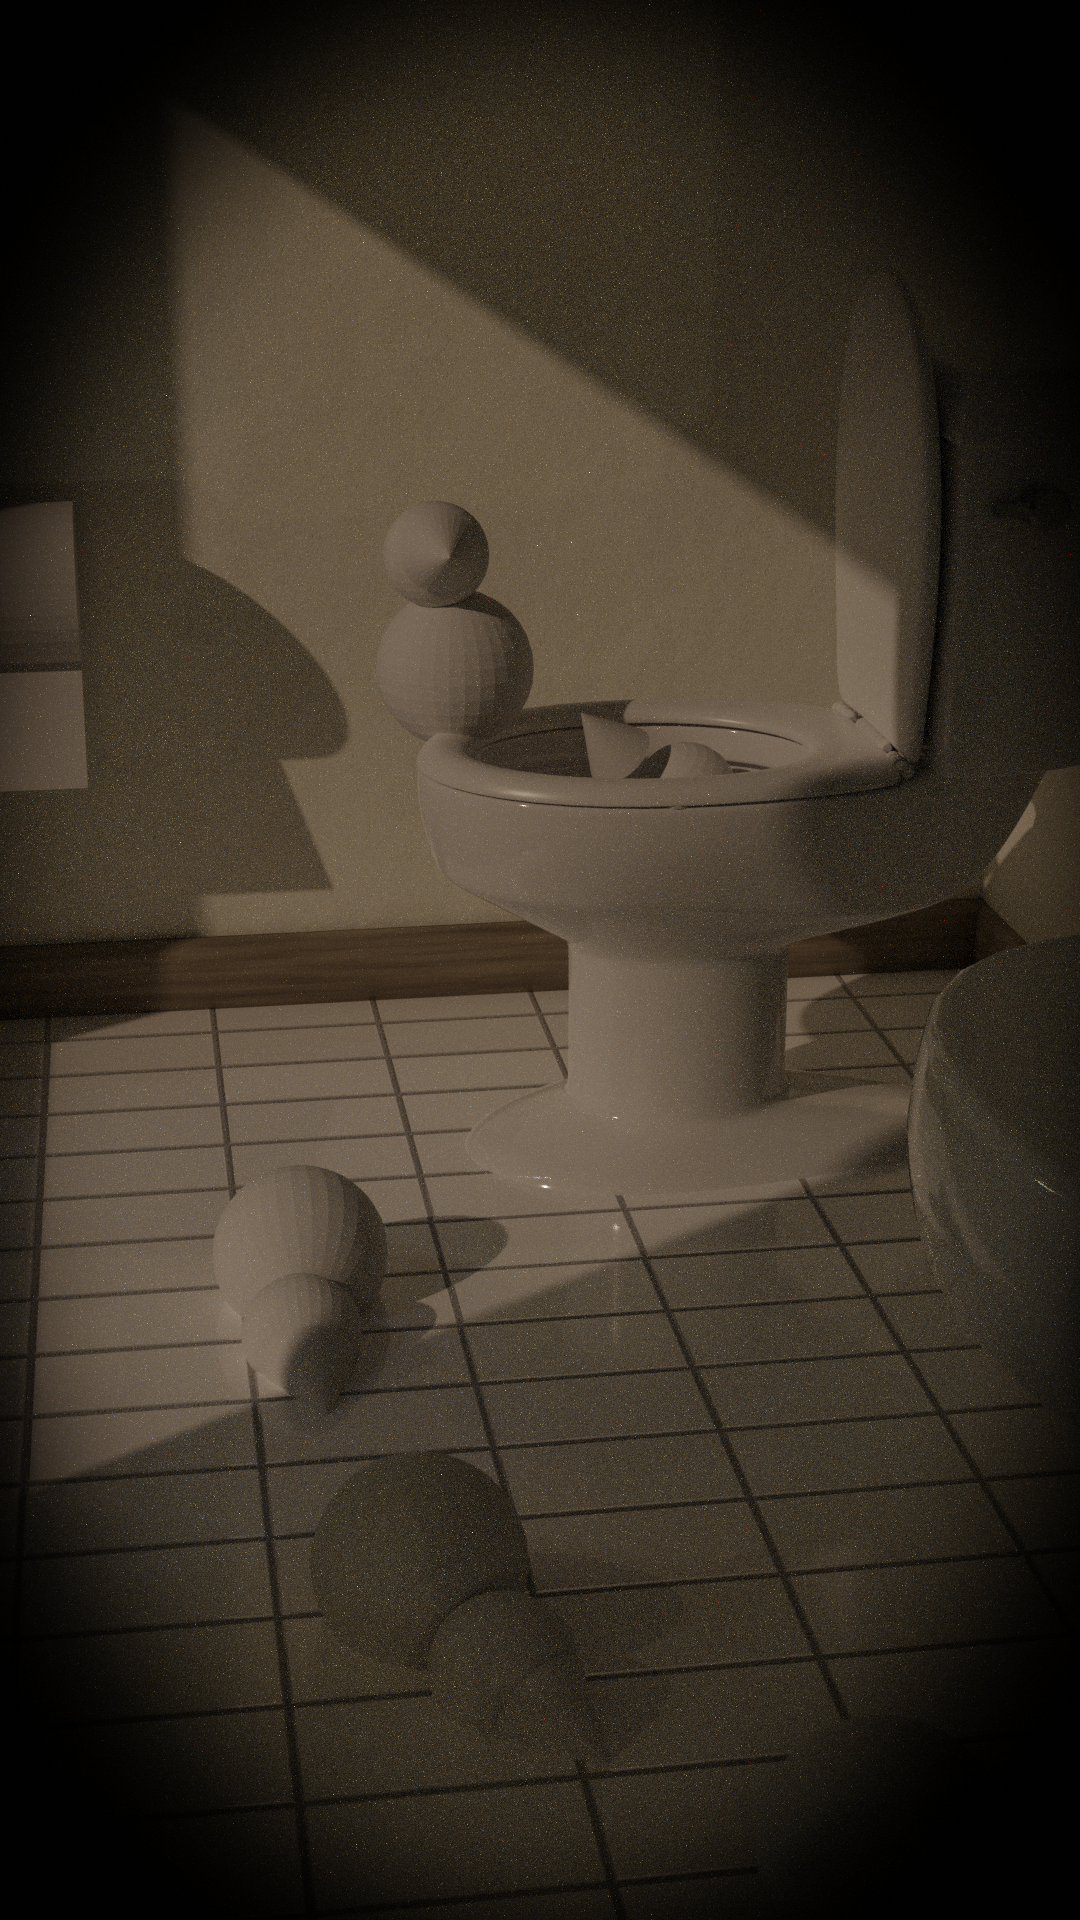
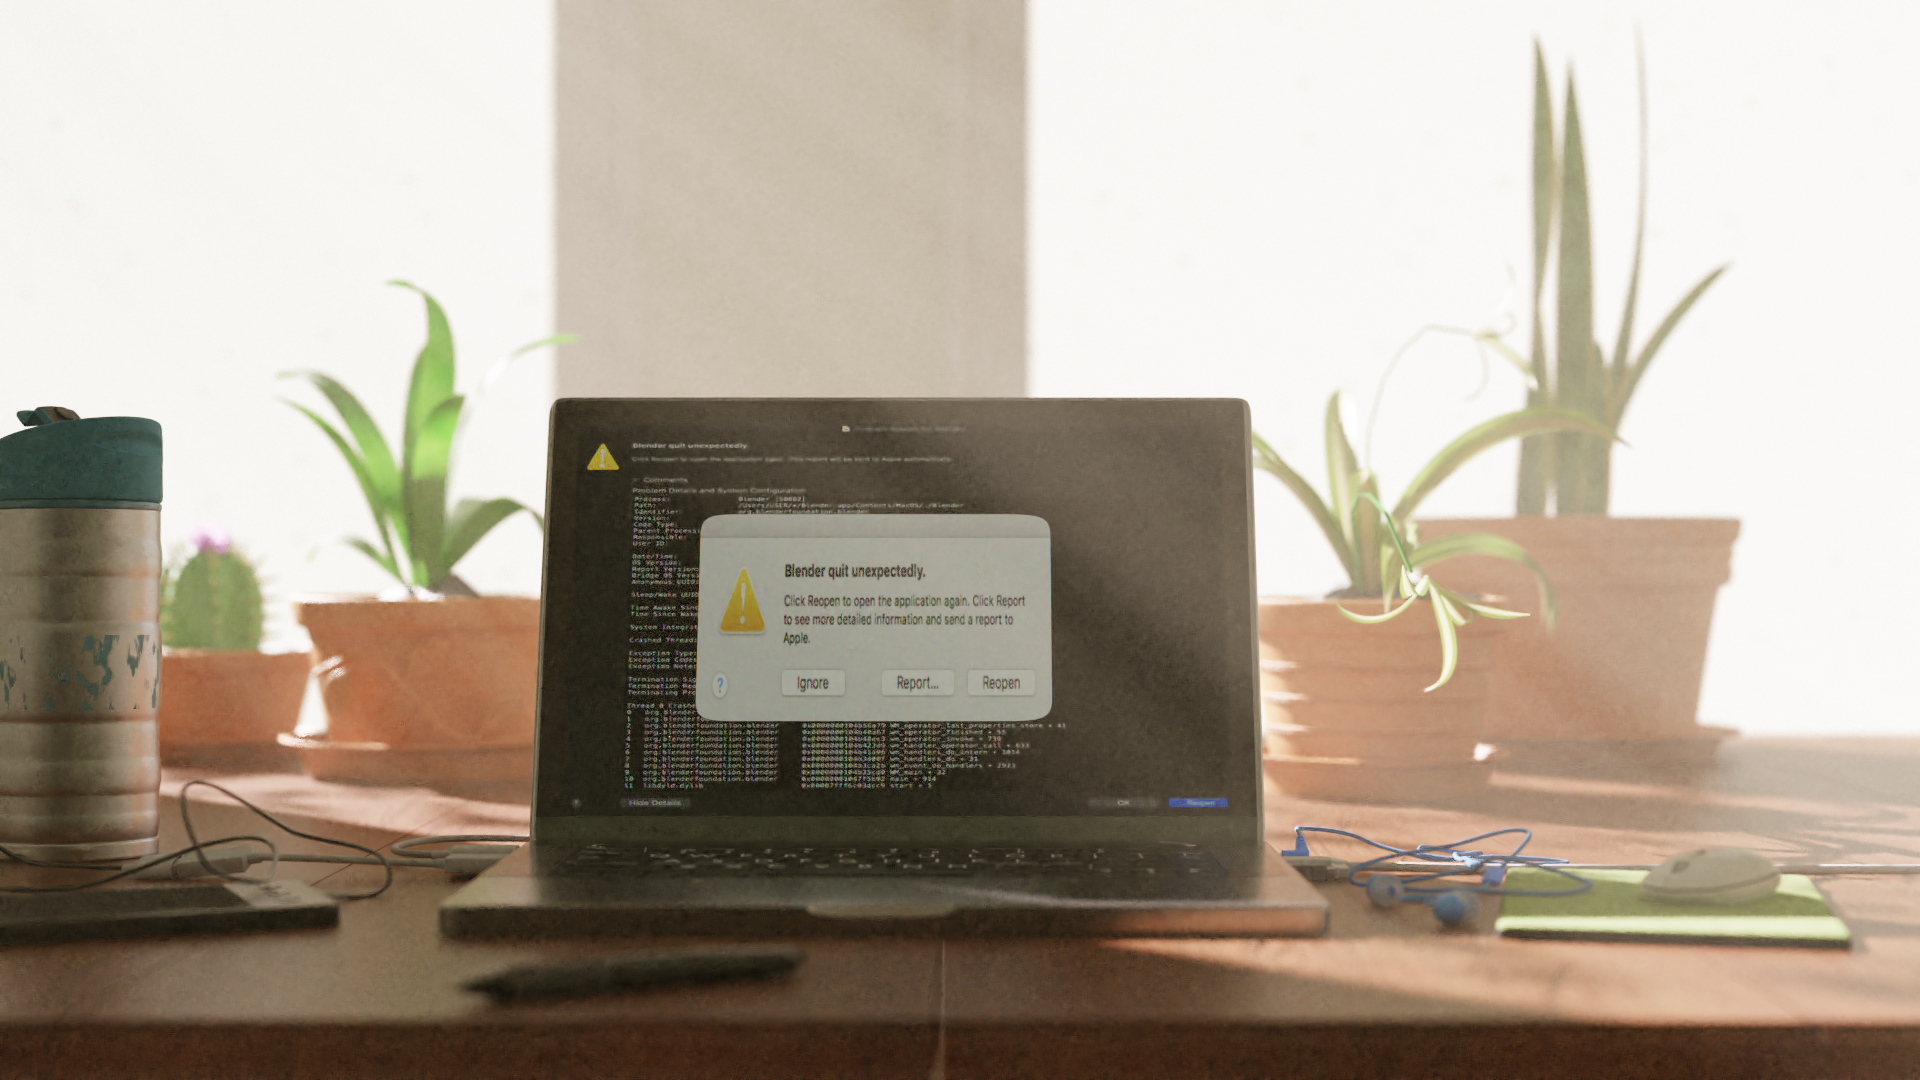
this is what is currently coming out of the render, pre composit
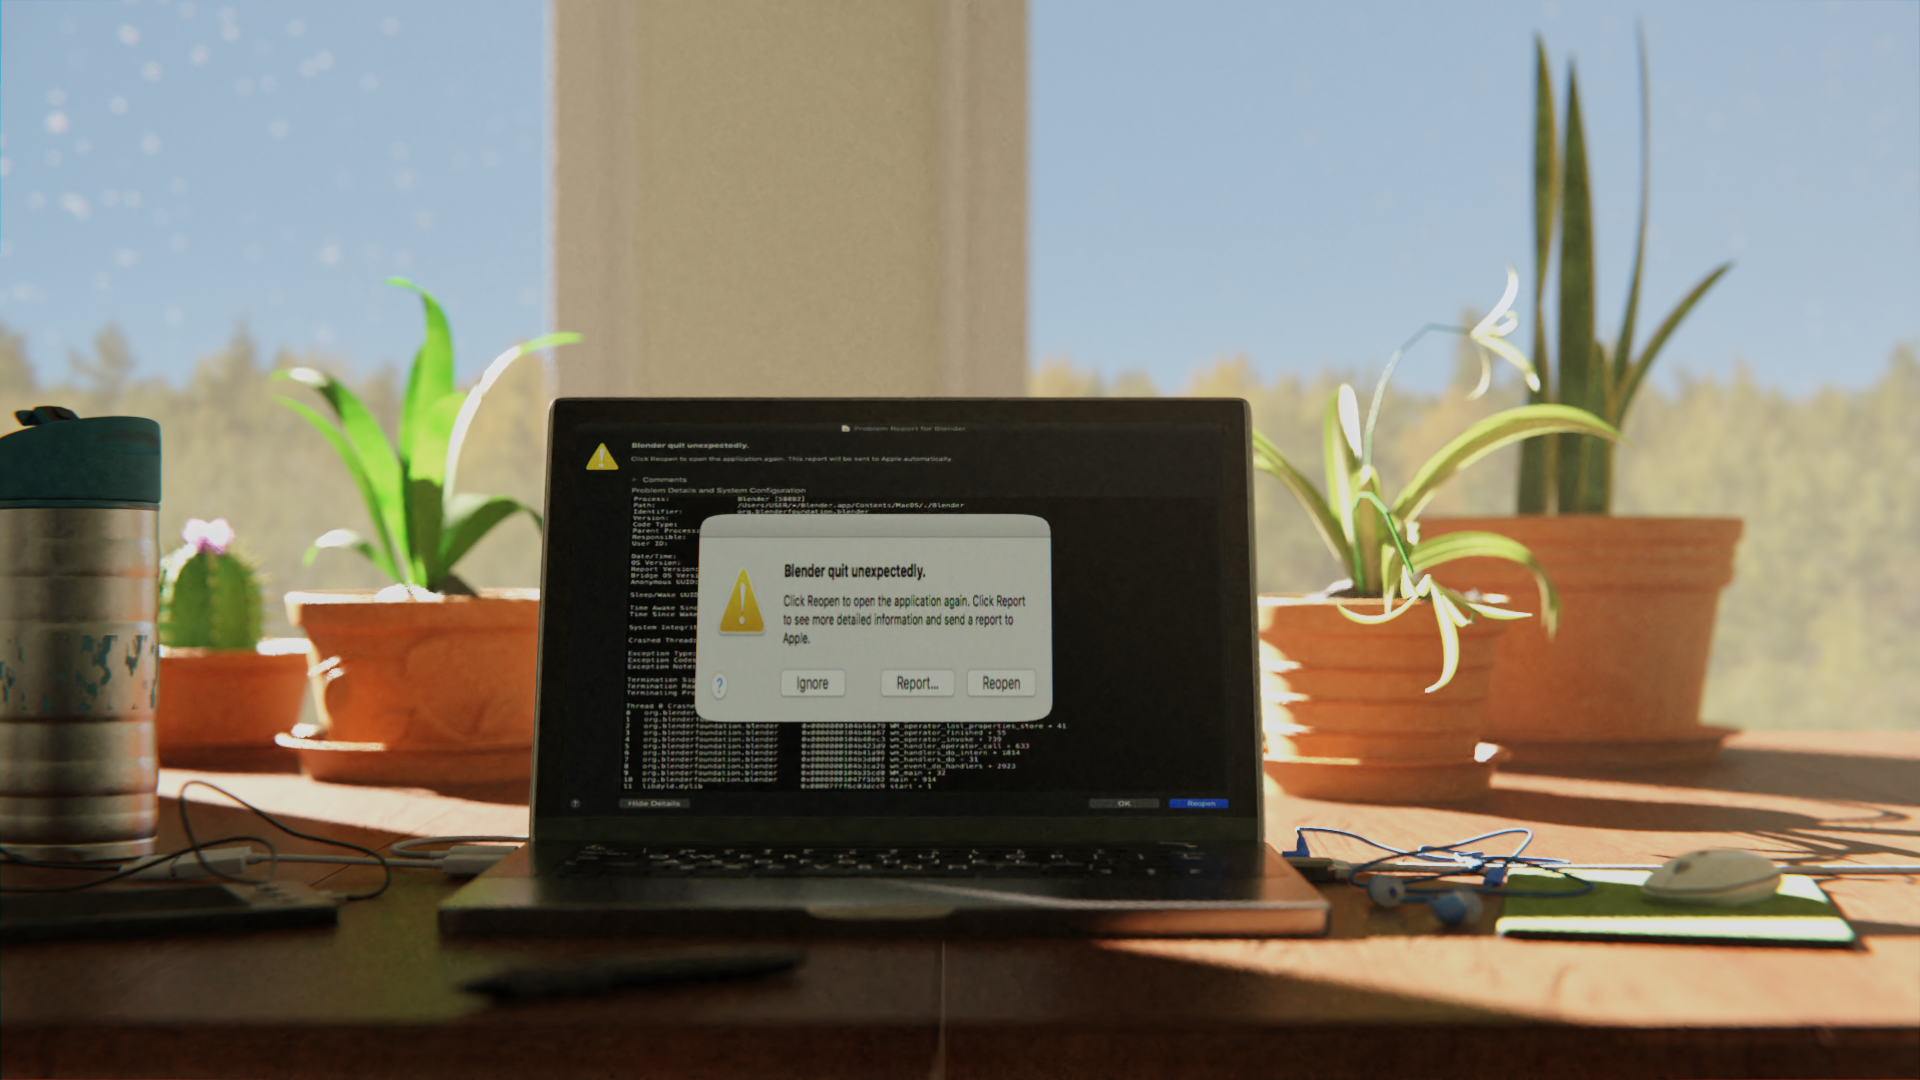
this is the final image
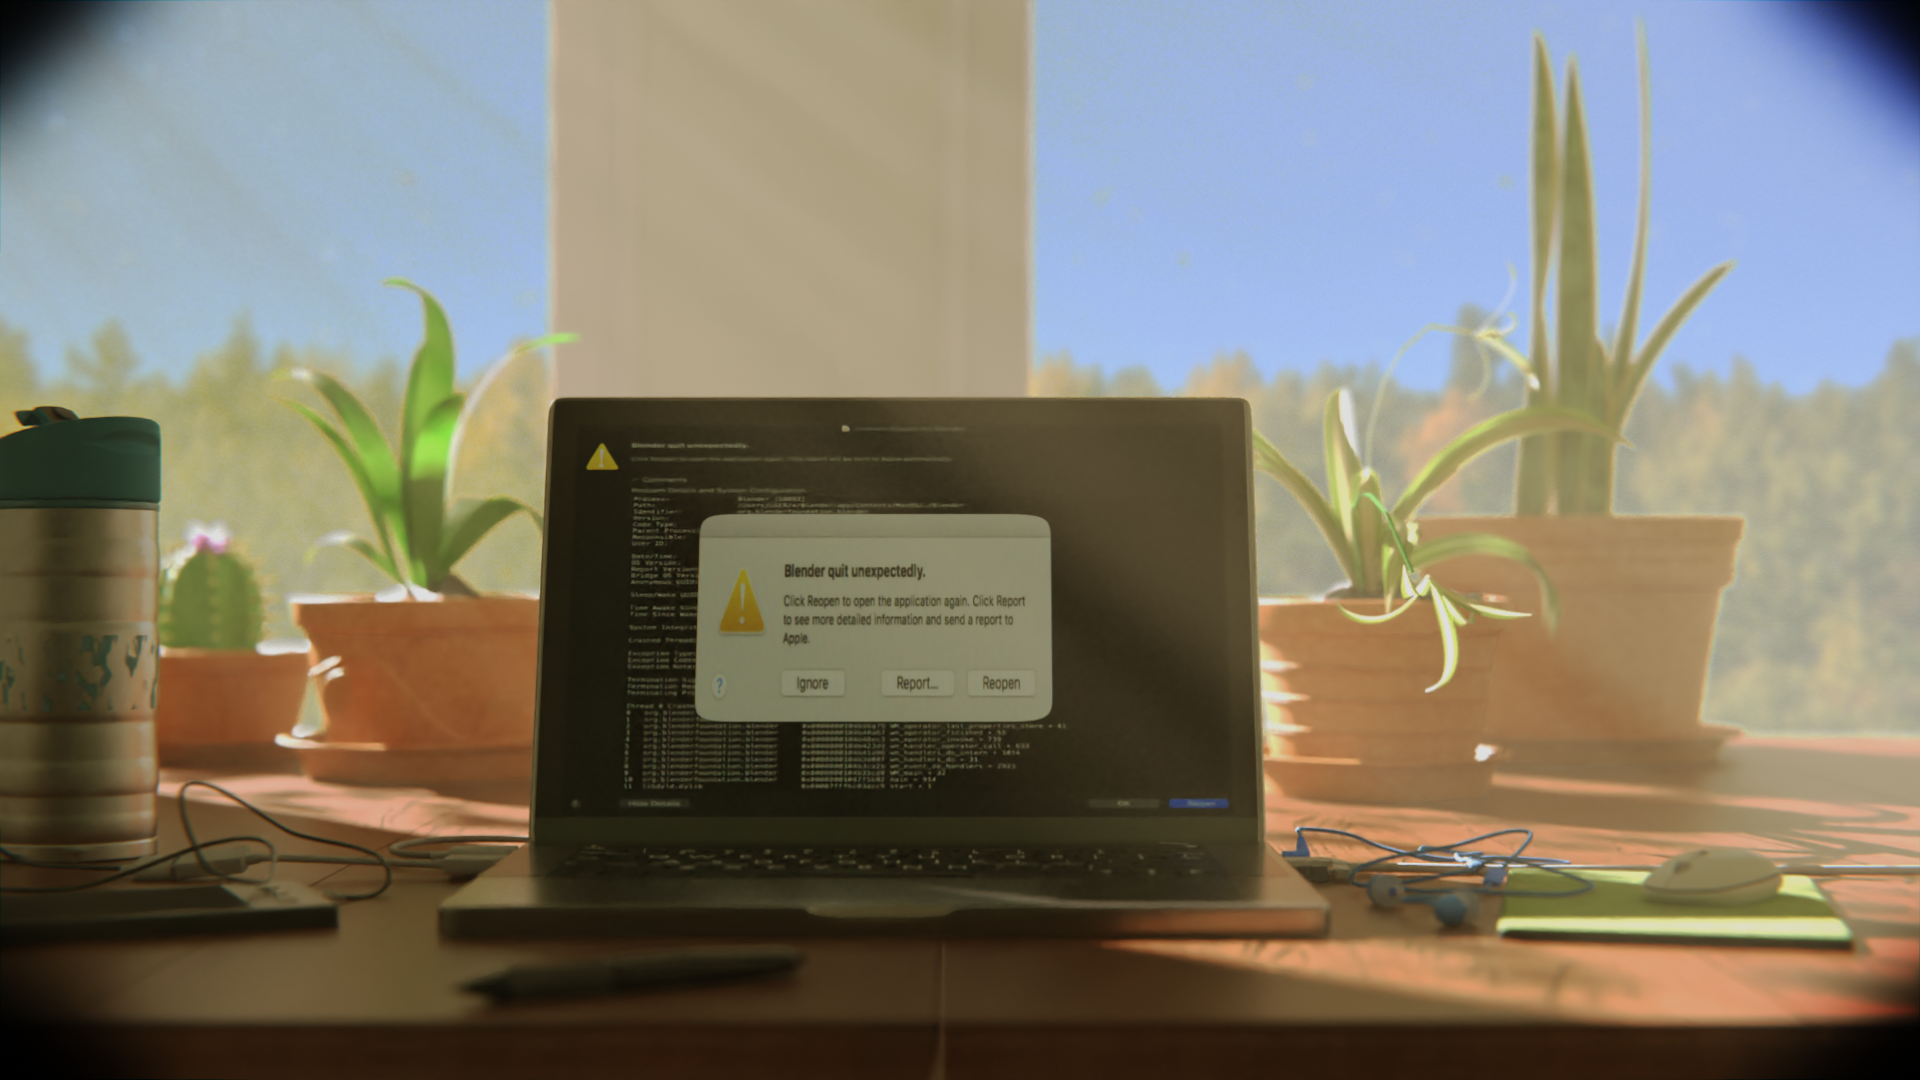
I have had many problems with the sun rays, below is what it looked like before I added them in, don't know which I like better. I would like less fog (volume) and have the rays have a yellow tint. I am sure this is something that could be done, but still pretty clueless, but guessing it is some small tweaks from a choice of many.
Again thanks for doing this, learned lots, actually developed somewhat of a work flow. Hope everyone else has enjoyed it as much as I have.

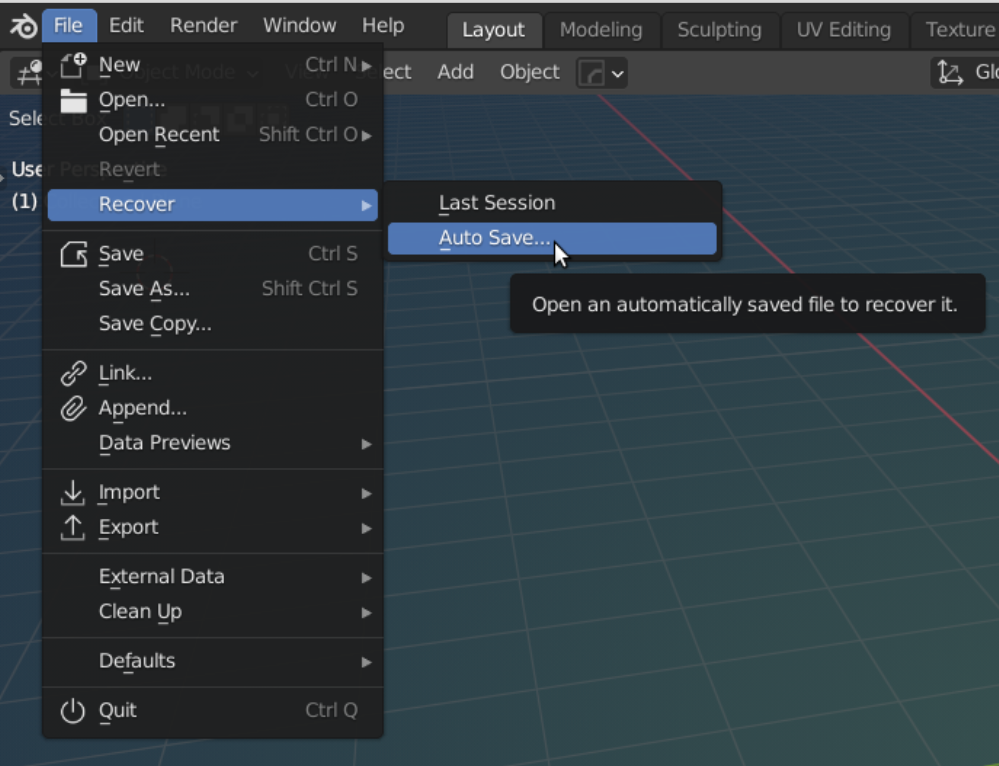 which should open a File Browser with your Auto saved files:
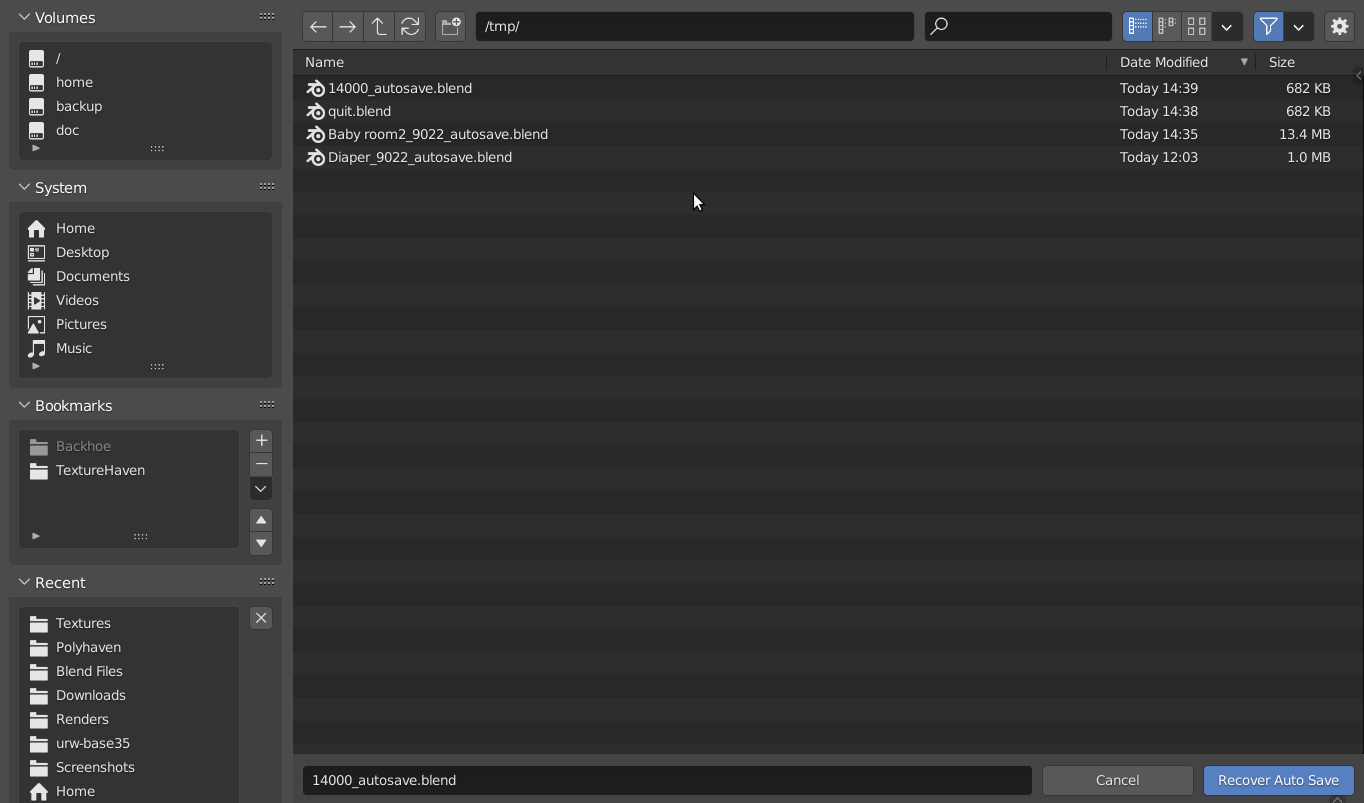 I only save incremental versions, when necessary...Auto Save does the rest and has not failed me yet (the last few years)...