Notice how nice it is to easily toggle x-ray mode and see the background image through your mesh.
2.8+ got rid of the background images, so now how do you make it to where you're working on the mesh in edit mode and can toggle face-transparency for active mesh ONLY & can still see the background image objects you're trying to align it to?
Basically, I want to toggle x-ray mode, but want the faces to still be slightly tinted (not disappear). In your tutorial, whenever you toggle x-ray, the mesh faces are lightly grey or blue tinted, so it's easy to see the relationship between different planes from side view as you move parts of the mesh behind itself.
Would it help to select the nearing vertices in addition to the part of the mesh you are working on, invert the selection and press h to hide the rest. Then you keep your main object and the nearest neighbours and all the clutter is out of the way. Not sure if that would help?
Really appreciate the feedback ![]() euv
euv ![]() slenaerts @adrian2301
slenaerts @adrian2301
Will probably have to resort to some blender preferences UI setting or chopping the source image in half to import seperately.
I tried changing the mesh material to a transparent color, but the shifting grain from changes in lighting is so annoying I can't work.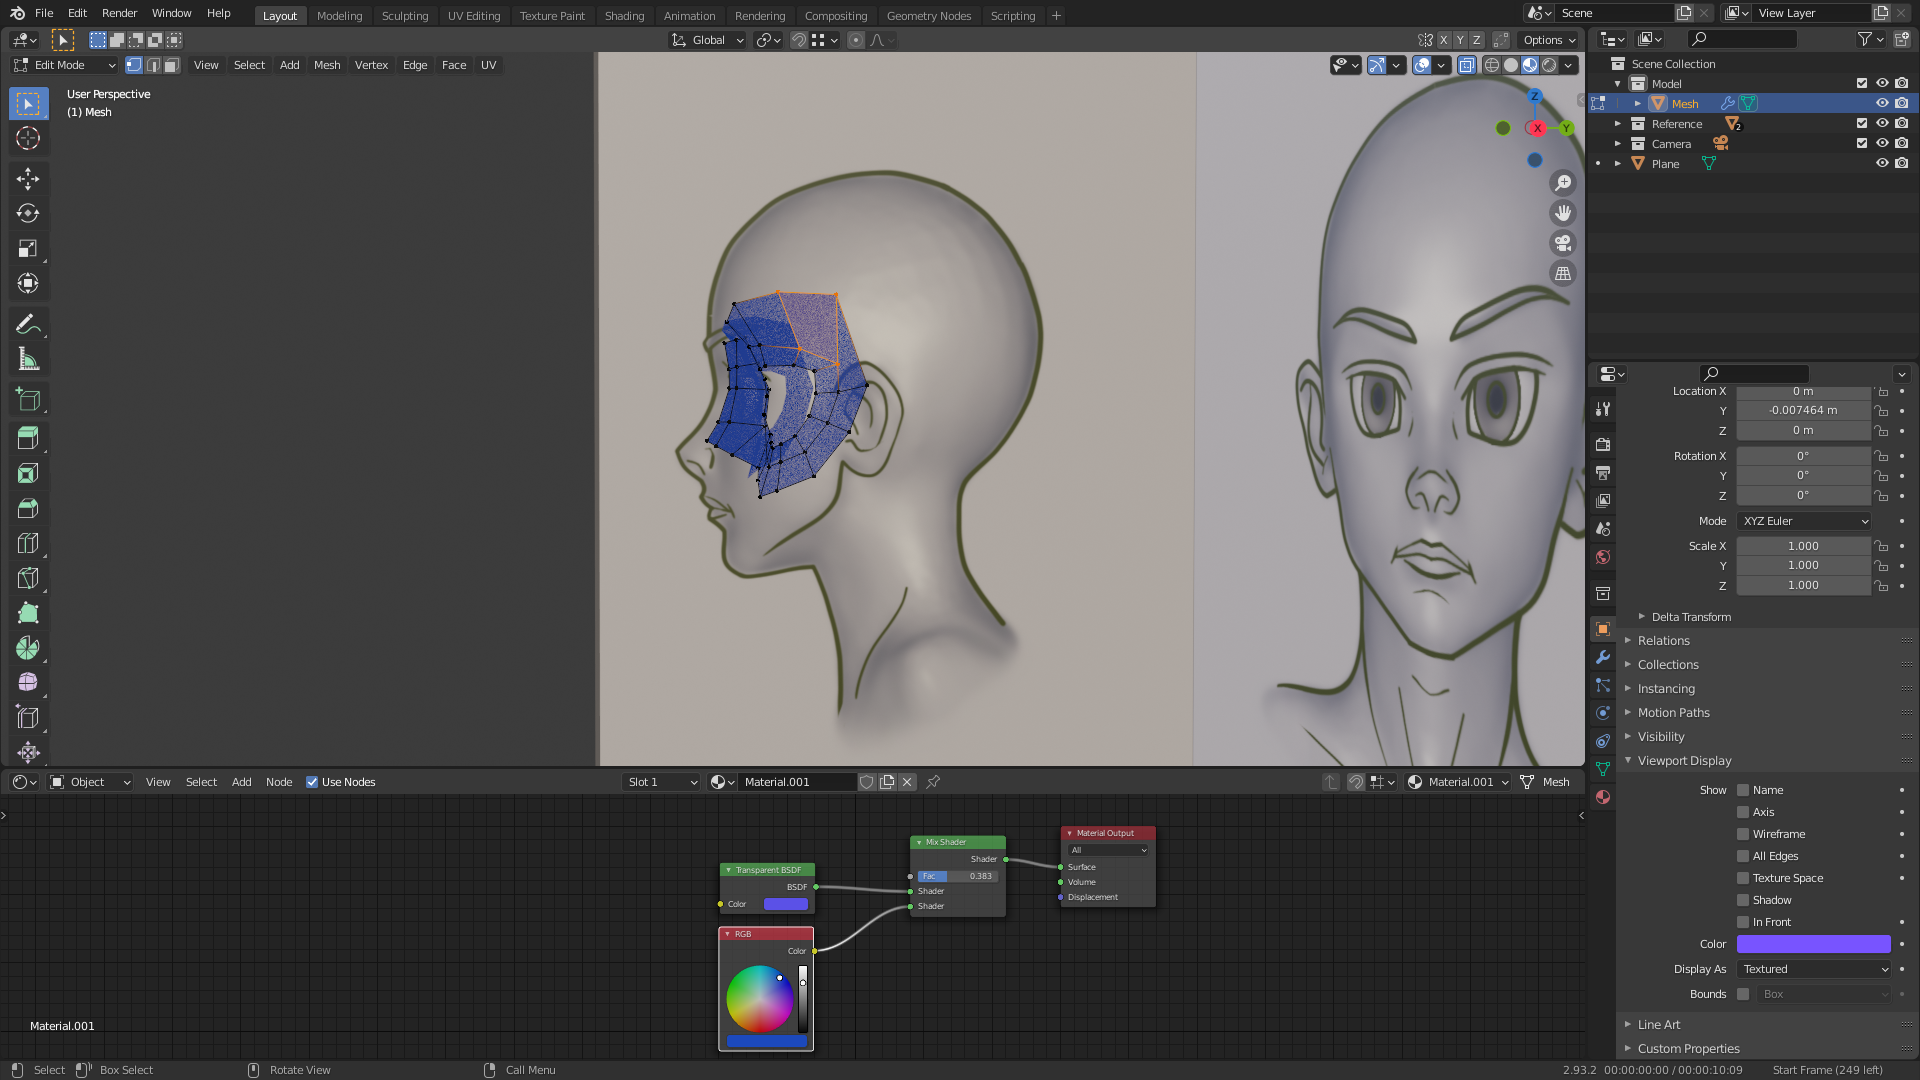
The reason I'm trying to use material preview is because I wanted to mask the duplicate parts so they don't distract.
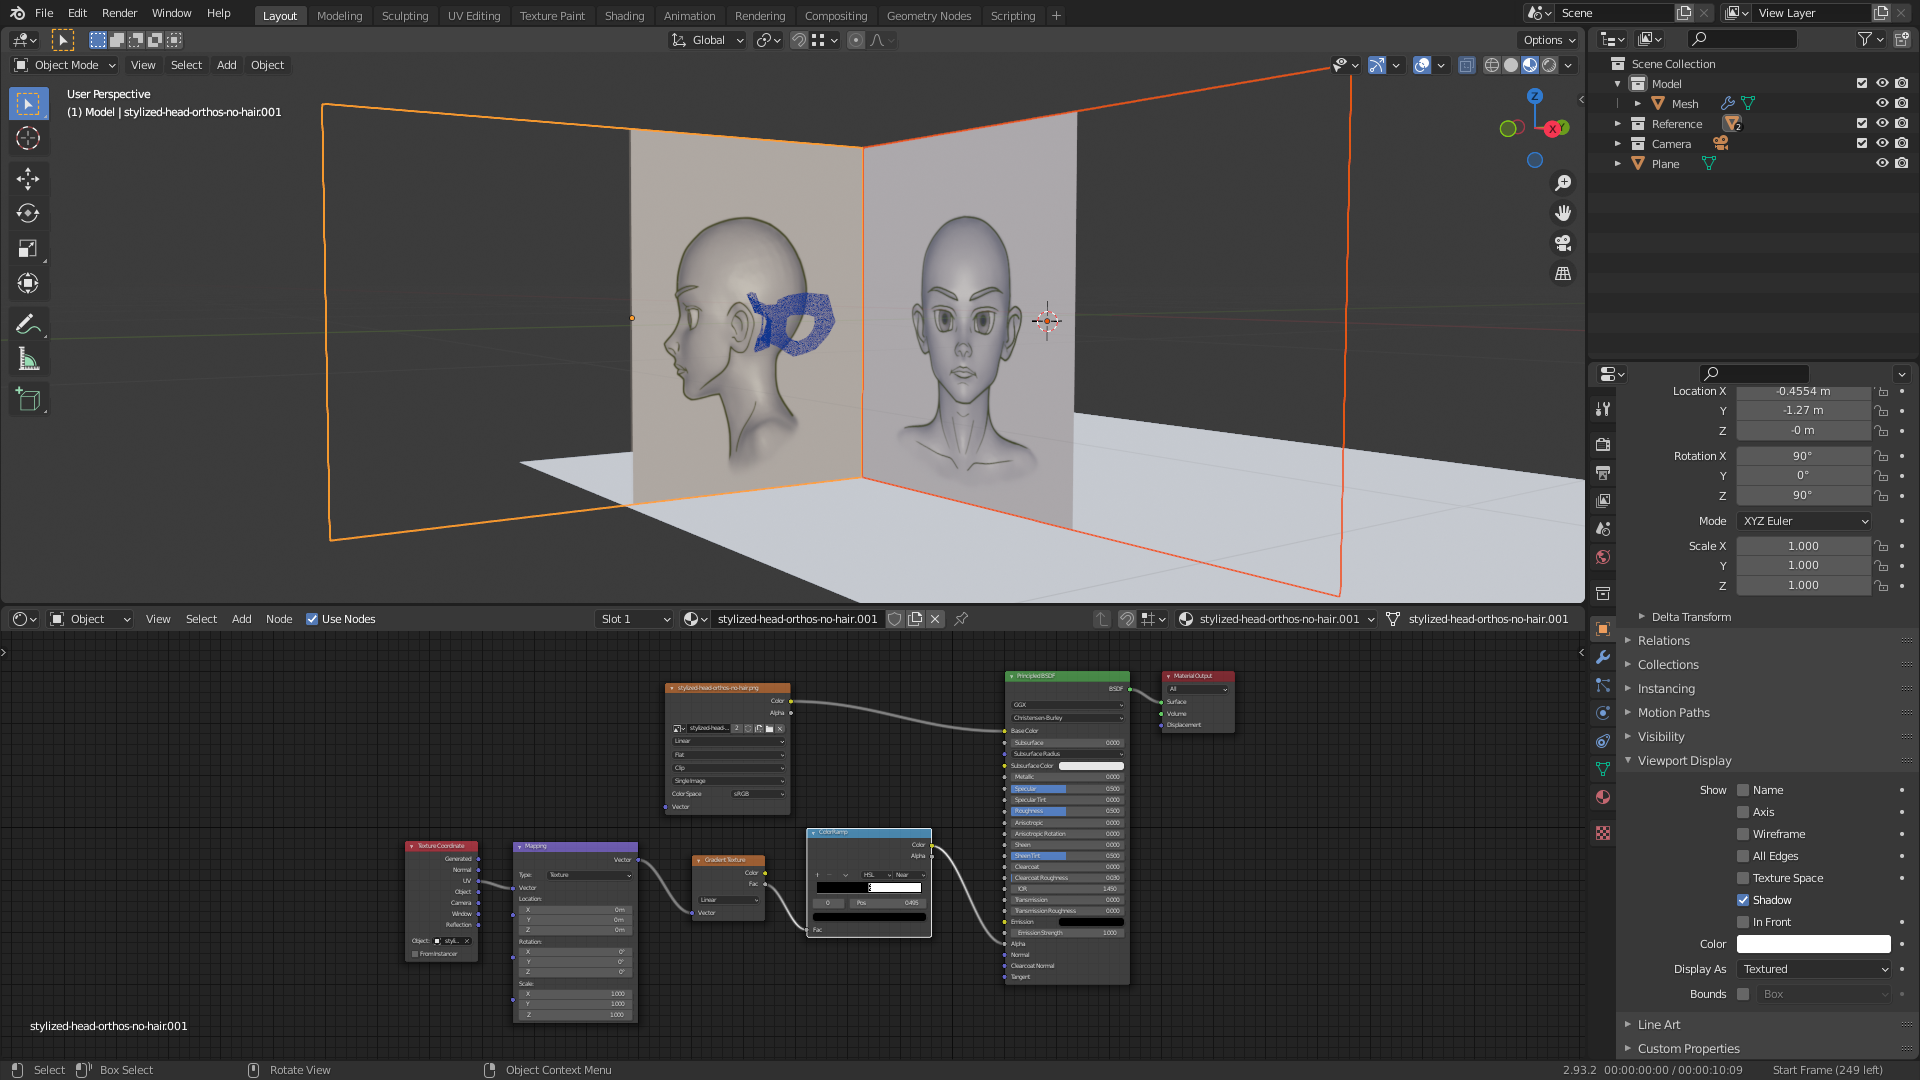
Could just rotate a loop-cut in the image 90 degrees to get about the same effect, but there's no way to go into edit mode with a reference picture selected.
Thanks!
Could just rotate a loop-cut in the image 90 degrees to get about the same effect, but there's no way to go into edit mode with a reference picture selected.
You could enable the Import Images as Planes Addon and then you can:
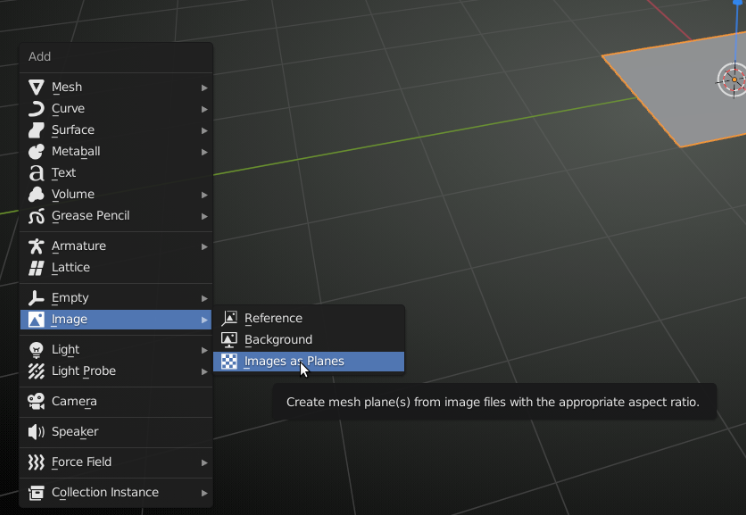 So that the image is a Mesh and you can go into Edit Mode.
So, for your images did you add an image as a plane?
An image as plane is only visible in rendered view or lookdev, not in viewport shading mode, which is where you want to be when modelling.
This would normally be used for adding distant detail in a scene, far off trees, clouds, a skyline for example.
Why not SHIFT + A > IMAGE > BACKGROUND. This will add your image aligned with view. Select the view, 1 - front, 3 - side etc. then add the image.
You will then have the control of the opacity of the image in the properties panel, as well as the position, depth (usually set to back), side (usually set to front). And you can see your image in viewport shading mode, which is I believe your issue.
Basically, I want to toggle x-ray mode, but want the faces to still be slightly tinted
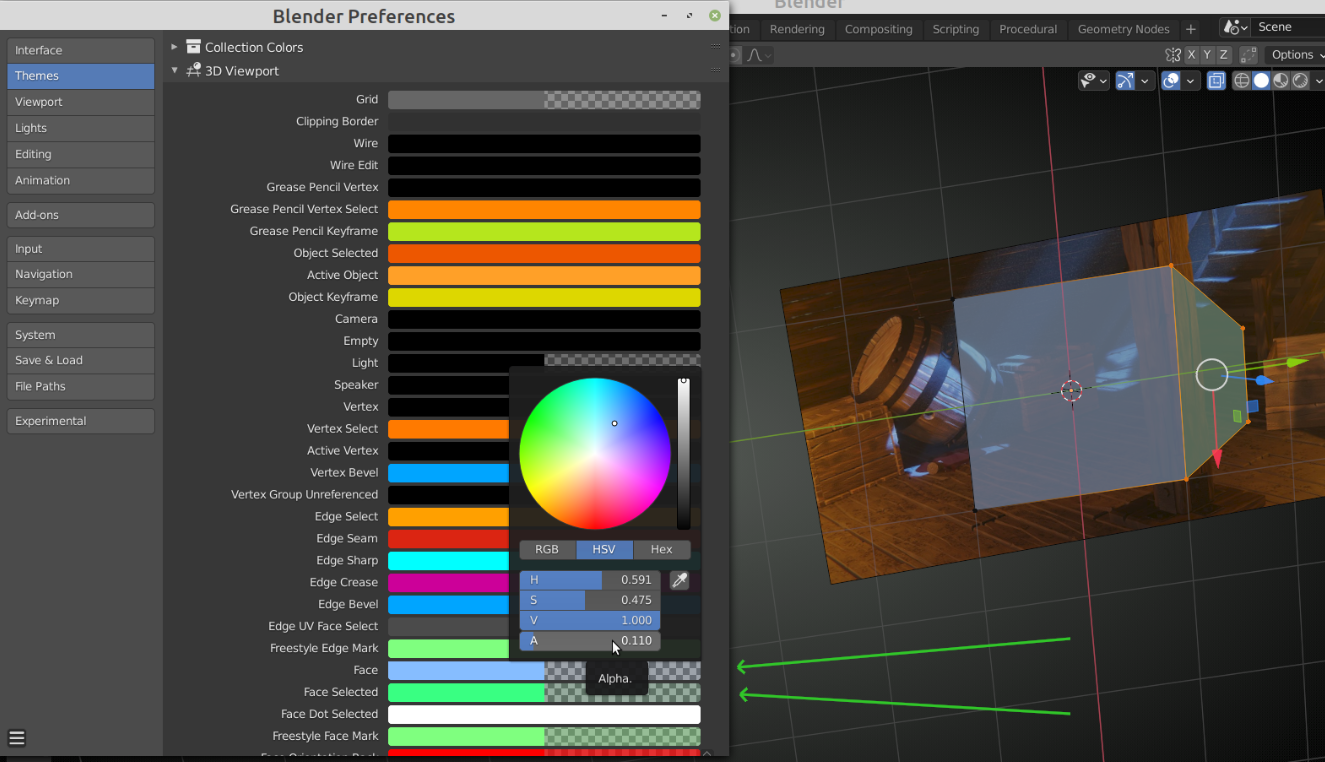
You can control color and transparancy (when in X-ray Mode) of your Faces in your Preferences:
I was using "images as planes",don't want to have to use background or reference images.
The problem I'm having is that you can't see through the mesh you're working on in edit mode while in Material Preview. Sorry, thought there would be an easy "on/off' setting in overlays or matcap.
Surprised there's so many options in solid shading & not many in material preview. Just wanted the mesh to look like this in edit mode in material preview viewport.
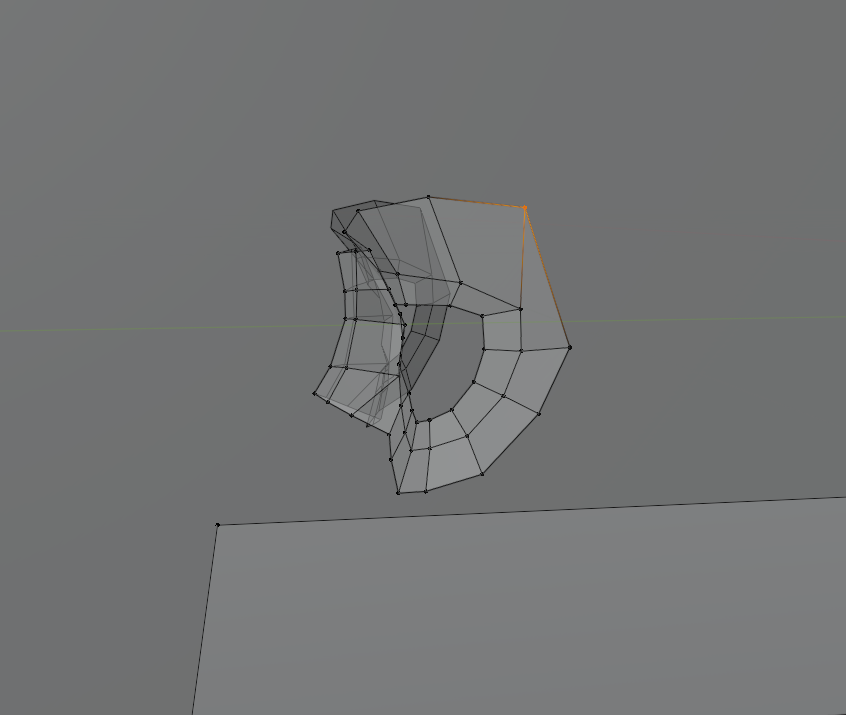
Initially, I thought there was a difference between the old & new versions of Blender viewport, I thought it was a setting used in overlays (like shadow or cavity in solid view), but it was really because I was in material preview mode & not in solid mode.
Thought you could toggle the mesh appearance in material preview, but apparently not the case.
Exactly!
Was able to adjust it, thank you!!!
Thought it was a check-box in the matcap menu like shadow or cavity.
Thought you could toggle the mesh appearance in material preview, but apparently not the case.
You can use the same trick I showed earlier, just give the Mesh a Material and set the Blend Mode to Alpha Blend:
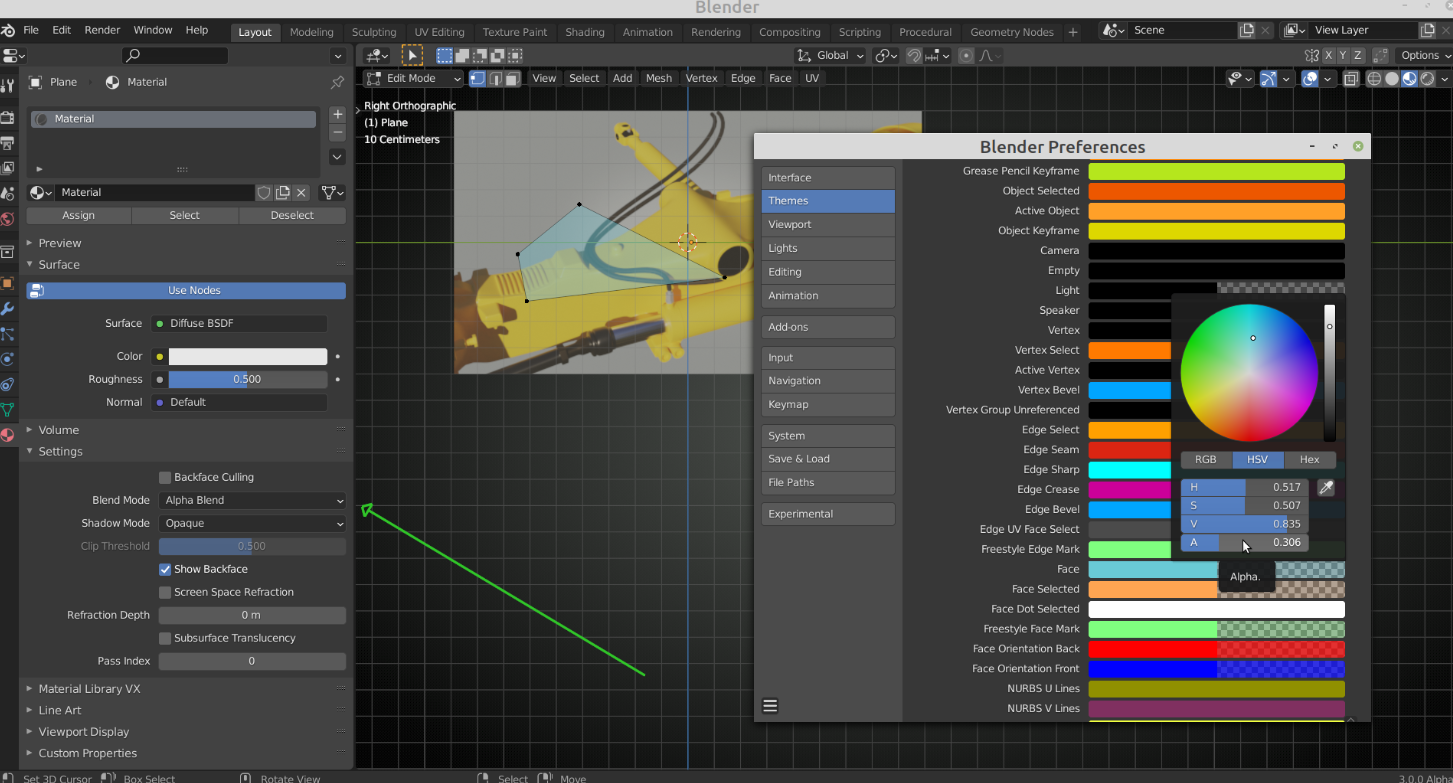
Is that sort of what you wanted?
Oh yes, that's exactly what I needed, I didn't get your response until after my last comment, thank you!