Here's a few takes on the projects I'm working on.
Currently: pothead: https://cgcookie.mavenseed.com/community/11484-seb-s-progress?page=2#answer-54455
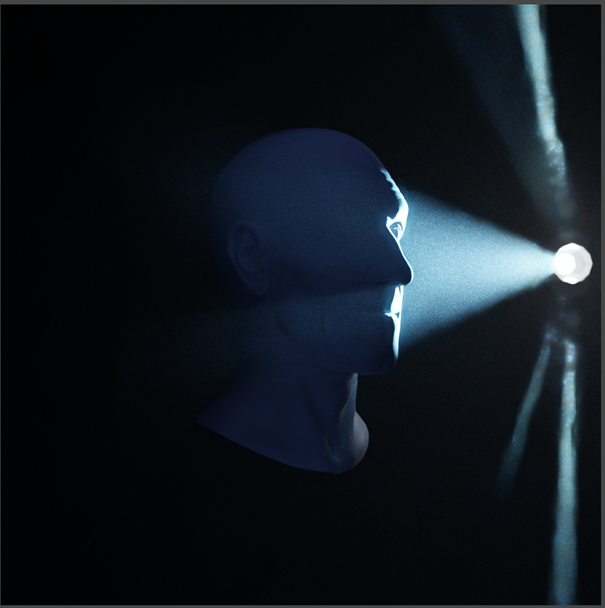
So I tried to tackle the lightning course and selected for the exercise this picture
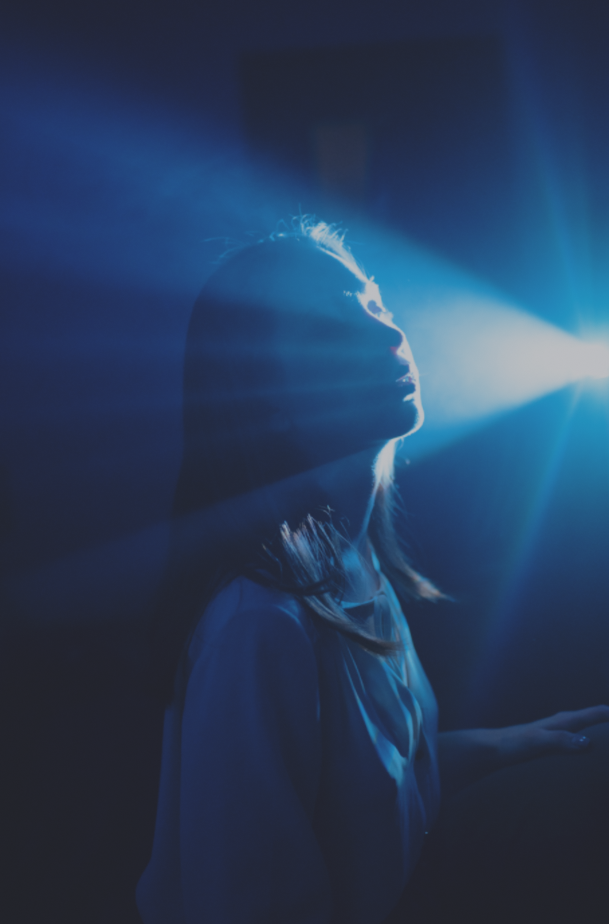
and the paths to reproduce are many and filled with challenges :)
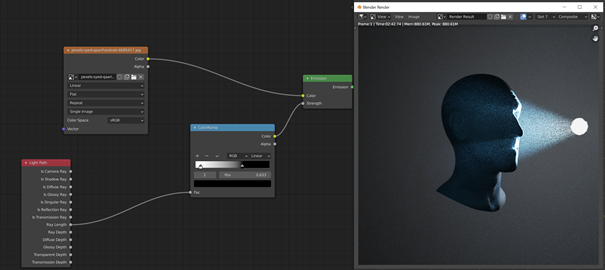
During the tweaking fase I discovered I could combine a colorramp with a light ray lenght node to soften the effect of the ray in the volume:
I'm nearing the original image, but it is still not yet ok. I'd like to reproduce the projector rays the same way, but I can't seem to find a "standard" way to do so. I feel like it is necessary to cheat in this case. I'm still looking... so it will be a while before I can submit the exercise.
![]() slenaerts This salesman is obviously sufficiently qualified for that work when it comes to knowing everything about ice 😉! I just fear that he'll have some problems selling his ice cream on a sunny beach 😉: ⛄ + 🌞 = 💧 . However, great work, Sébastien 👍!
slenaerts This salesman is obviously sufficiently qualified for that work when it comes to knowing everything about ice 😉! I just fear that he'll have some problems selling his ice cream on a sunny beach 😉: ⛄ + 🌞 = 💧 . However, great work, Sébastien 👍!
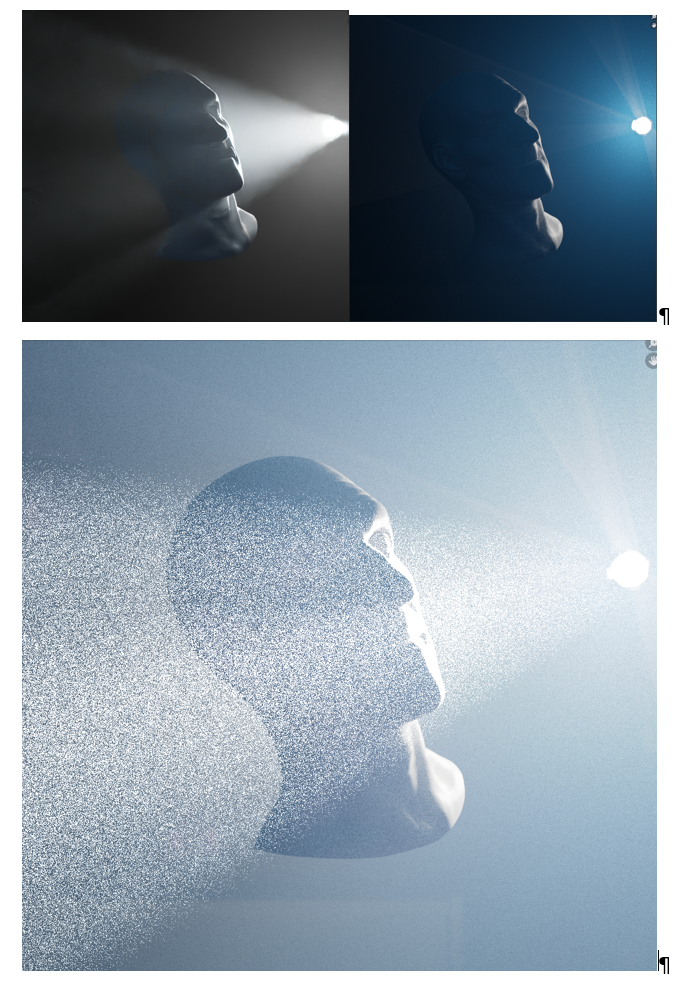
advancing with the exercise for lighting fundamentals: Getting ever slighty closer:
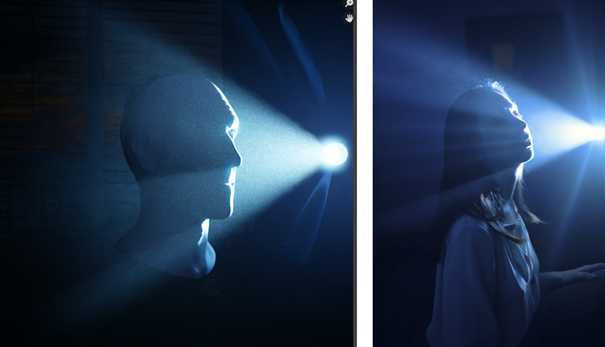
To fix:
still those vertical rays, now I tried with cones that have a colorramp for opacity layer to fake flares with a slight emission. Doesn't look natural.
Color of the blue should be more purple
The glare is too much on the face, yet nice on the projection light, not sure if this can be fixed with a color ramp and transparancy node in compositing. To check.
add some smokey texture to the light.
The last one is getting closer, even though the rays are too fake (they are :) ) and the smoke is a bit too dirty (texture was not high of quality.) I'm getting to image 2. Any feedback from you guys would be welcome before I can submit. cheers!
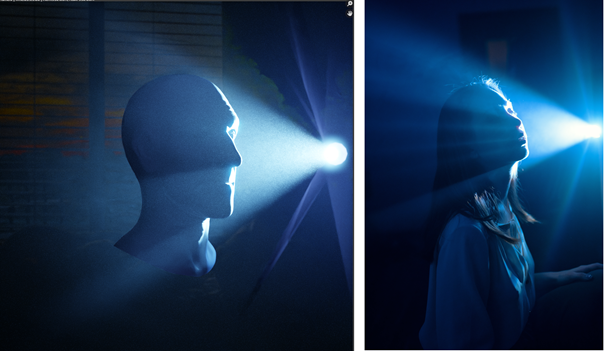
I woke up this morning with the simplest insight ever... instead of working on creating light beams, I should have created shadows...! to fix my issue with those light beams, I now created a point light emitting the same light as the projector light and I created an invisible cone with holes in to cast shadows. I kep big holes so the "light beams " are broad, but as the holes get smaller, you get more beams like on the original, have a look, pretty happy with the final result!: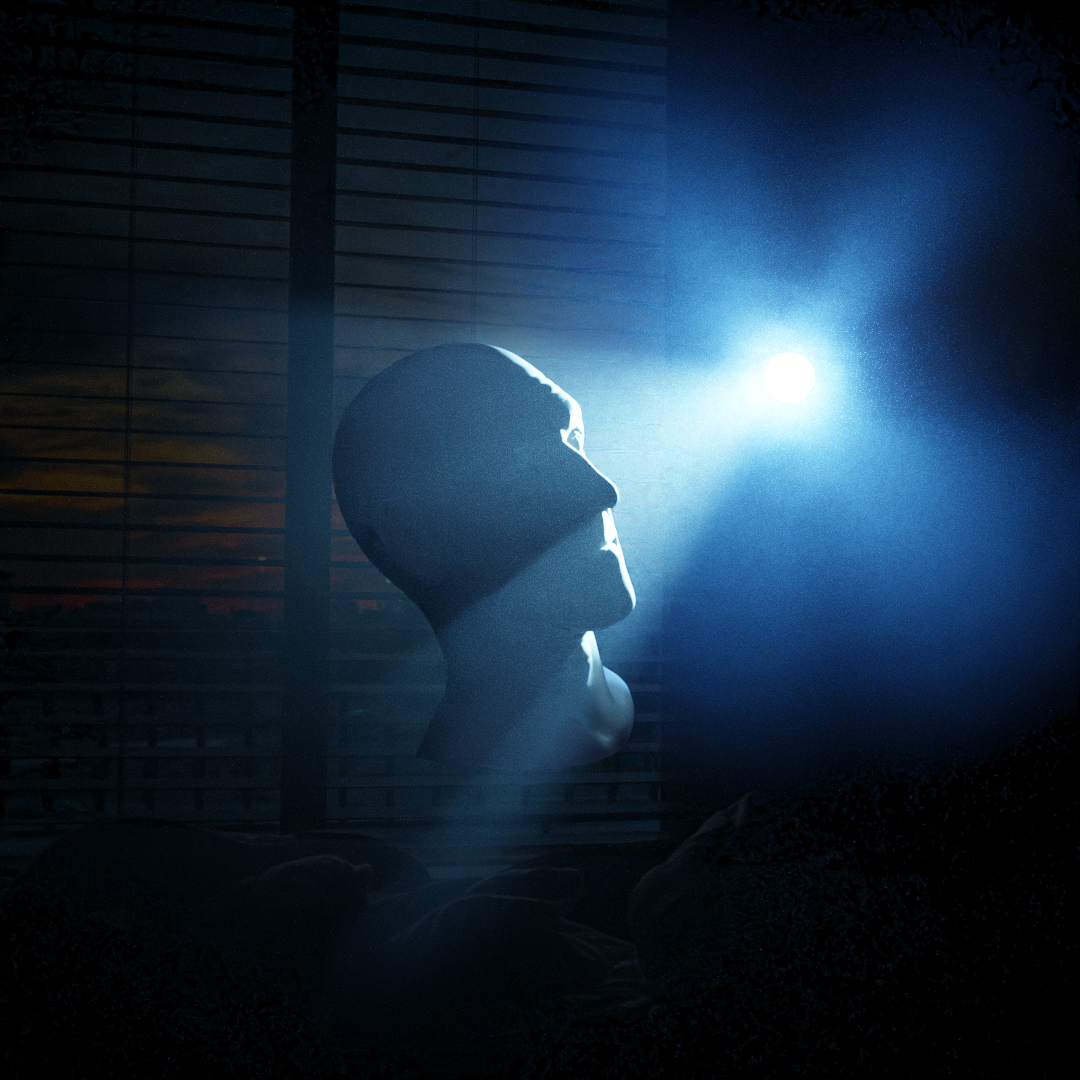
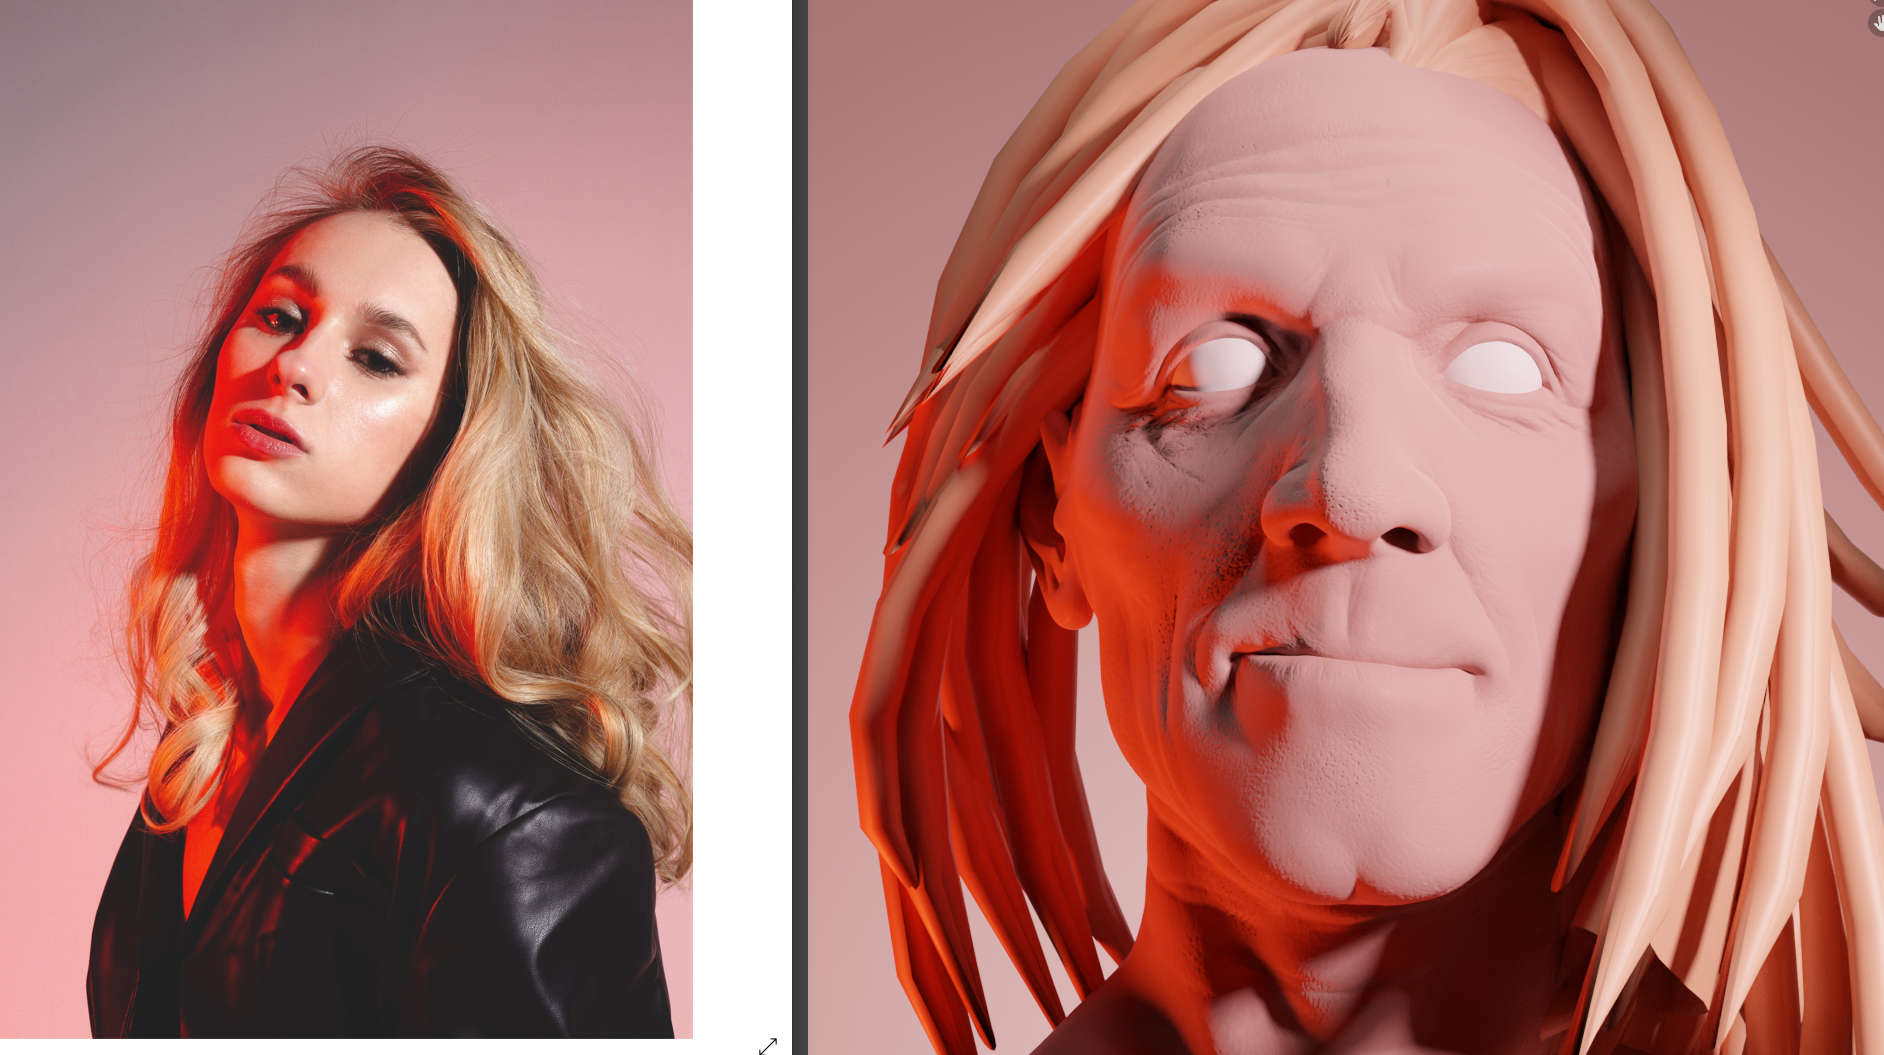
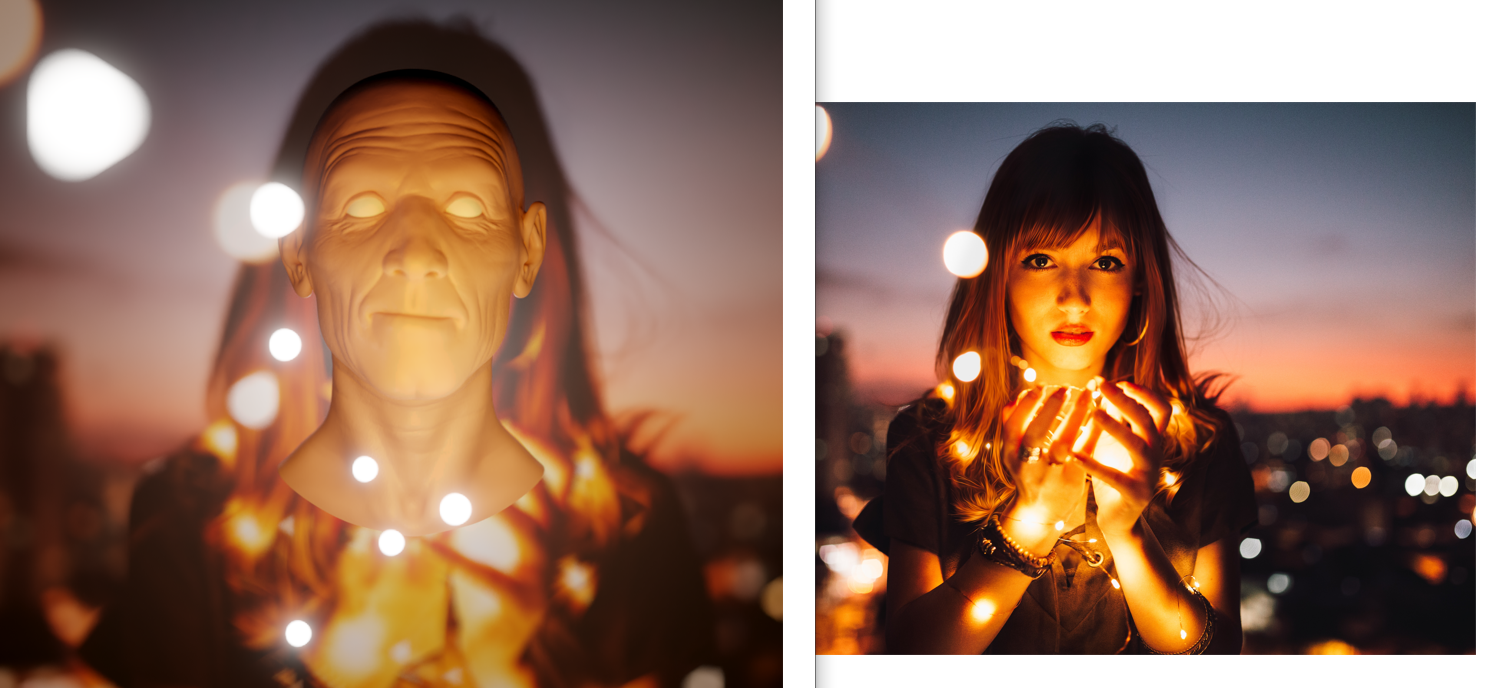
Work in progress for image 2: So I have had to give him hair and I discovered the compositing edits based on masked circles, giving you control on what part of the image you want to edit! Only missing part is the "Burn" effect from photoshop I'm trying to emulate on this one.
Still to do:
more reds in the image and the skintone should be a bit different as well.
The burn effect I'm also looking to find a solution to.
Thx @adrian2301 , Here are my two last ones. Pretty proud of the laser effect even though the laser itself can be tweaked with more textures. Here I adapted the head shader to include an emission shader through texture coordinates -> I learned how to generate the lines and cross them as well as how to make them fade away. Really cool stuff. I wasn't able to touch the eyes though, every time I touched those textures, it turned purple and I could do just about nothing.
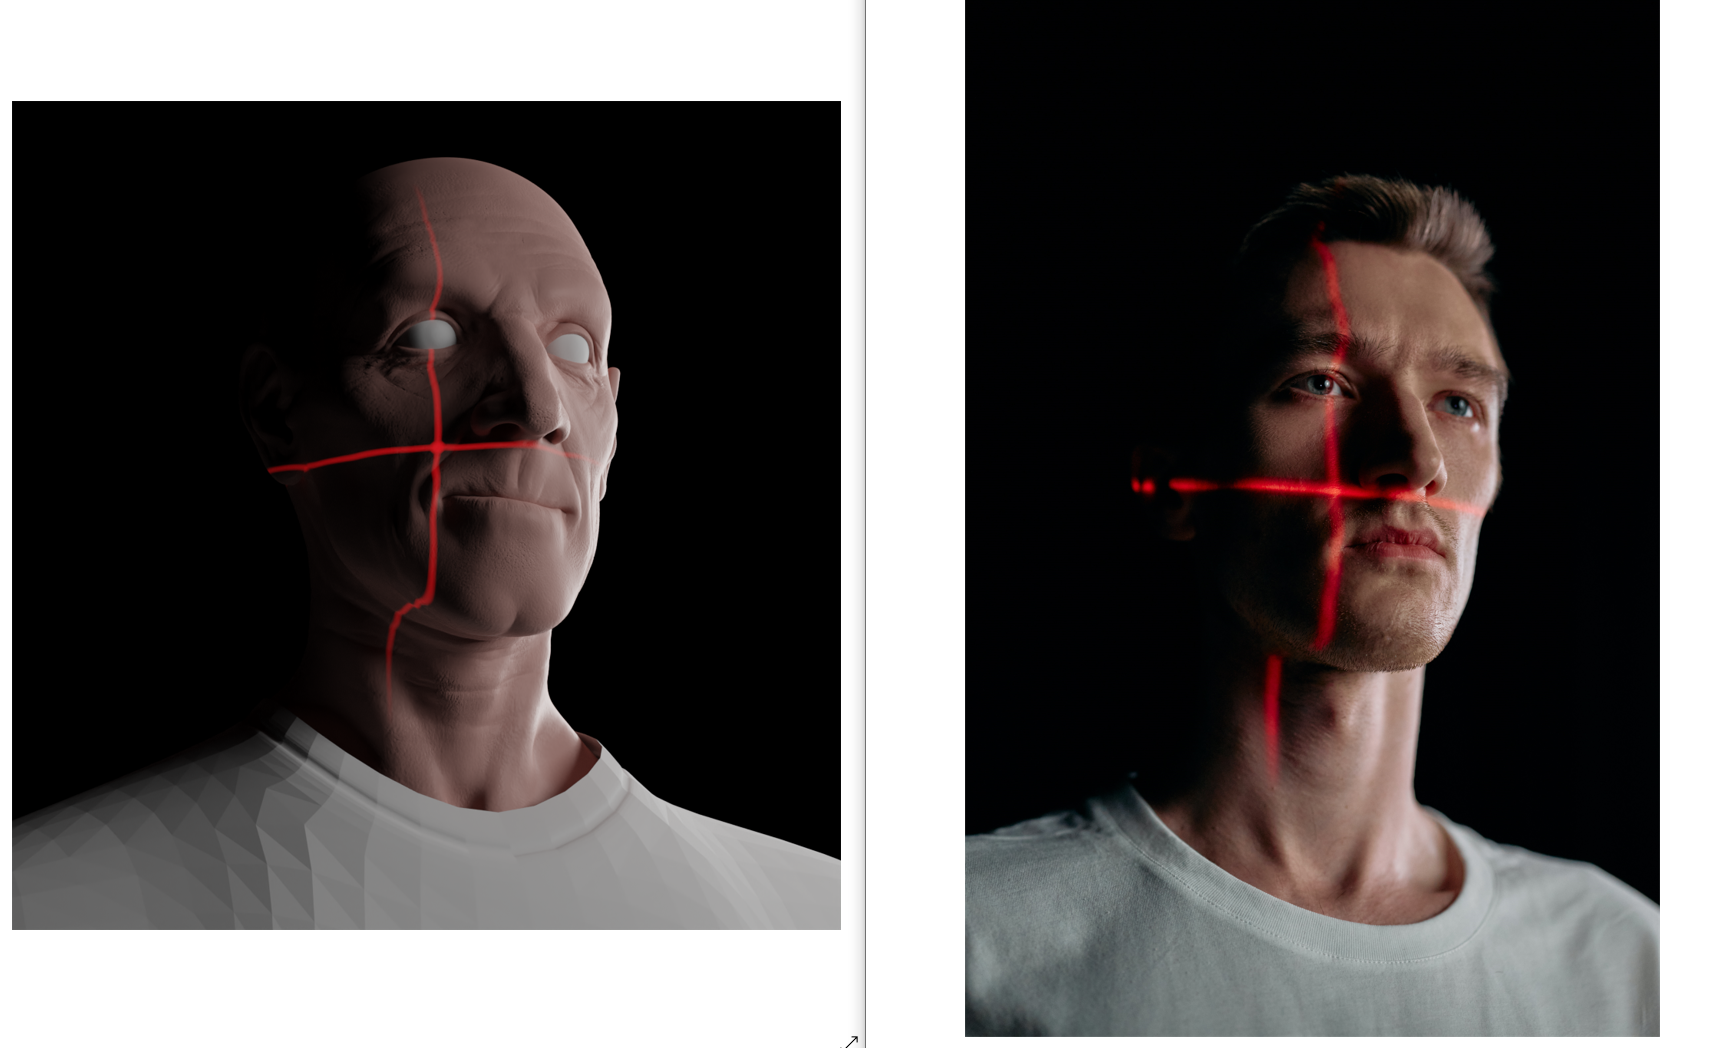
And the last one:
All iimages were sourced from pexels:
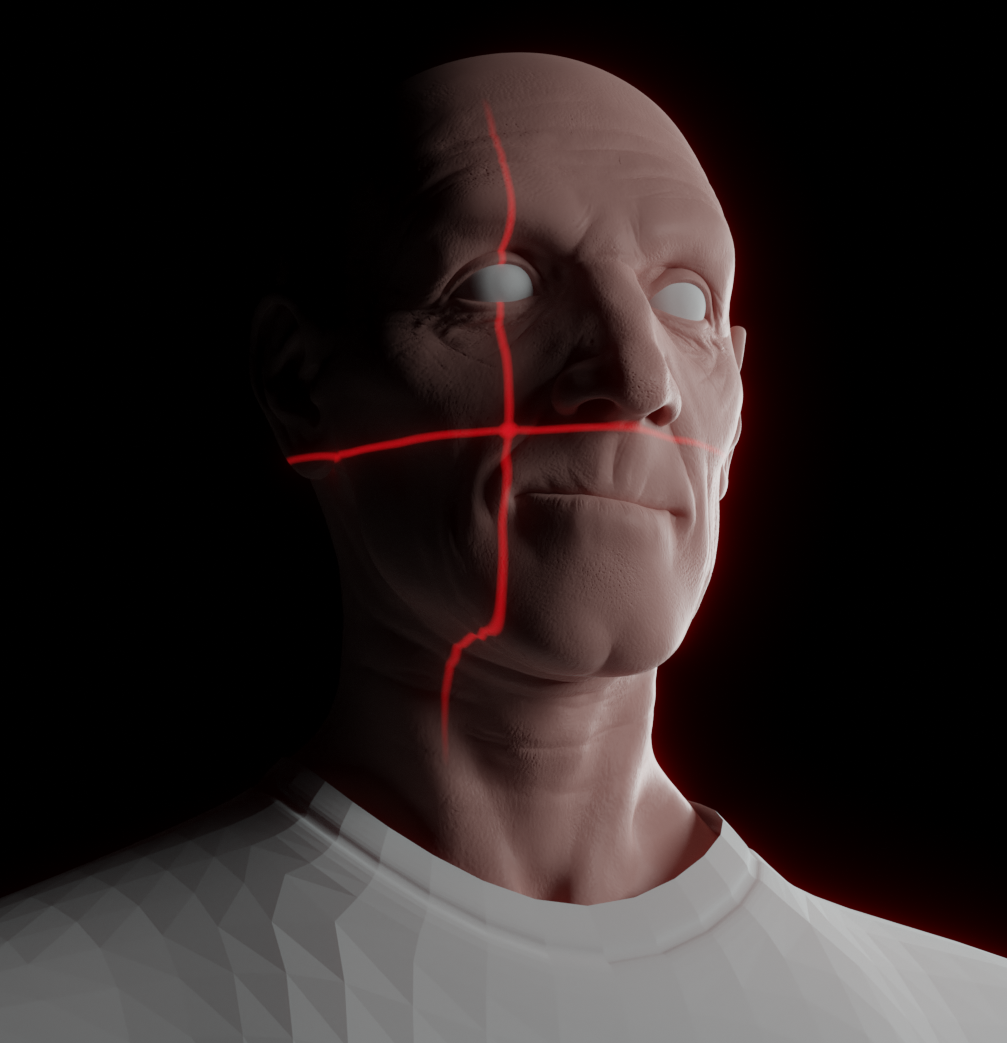
And here my laser guy with some post process glare:
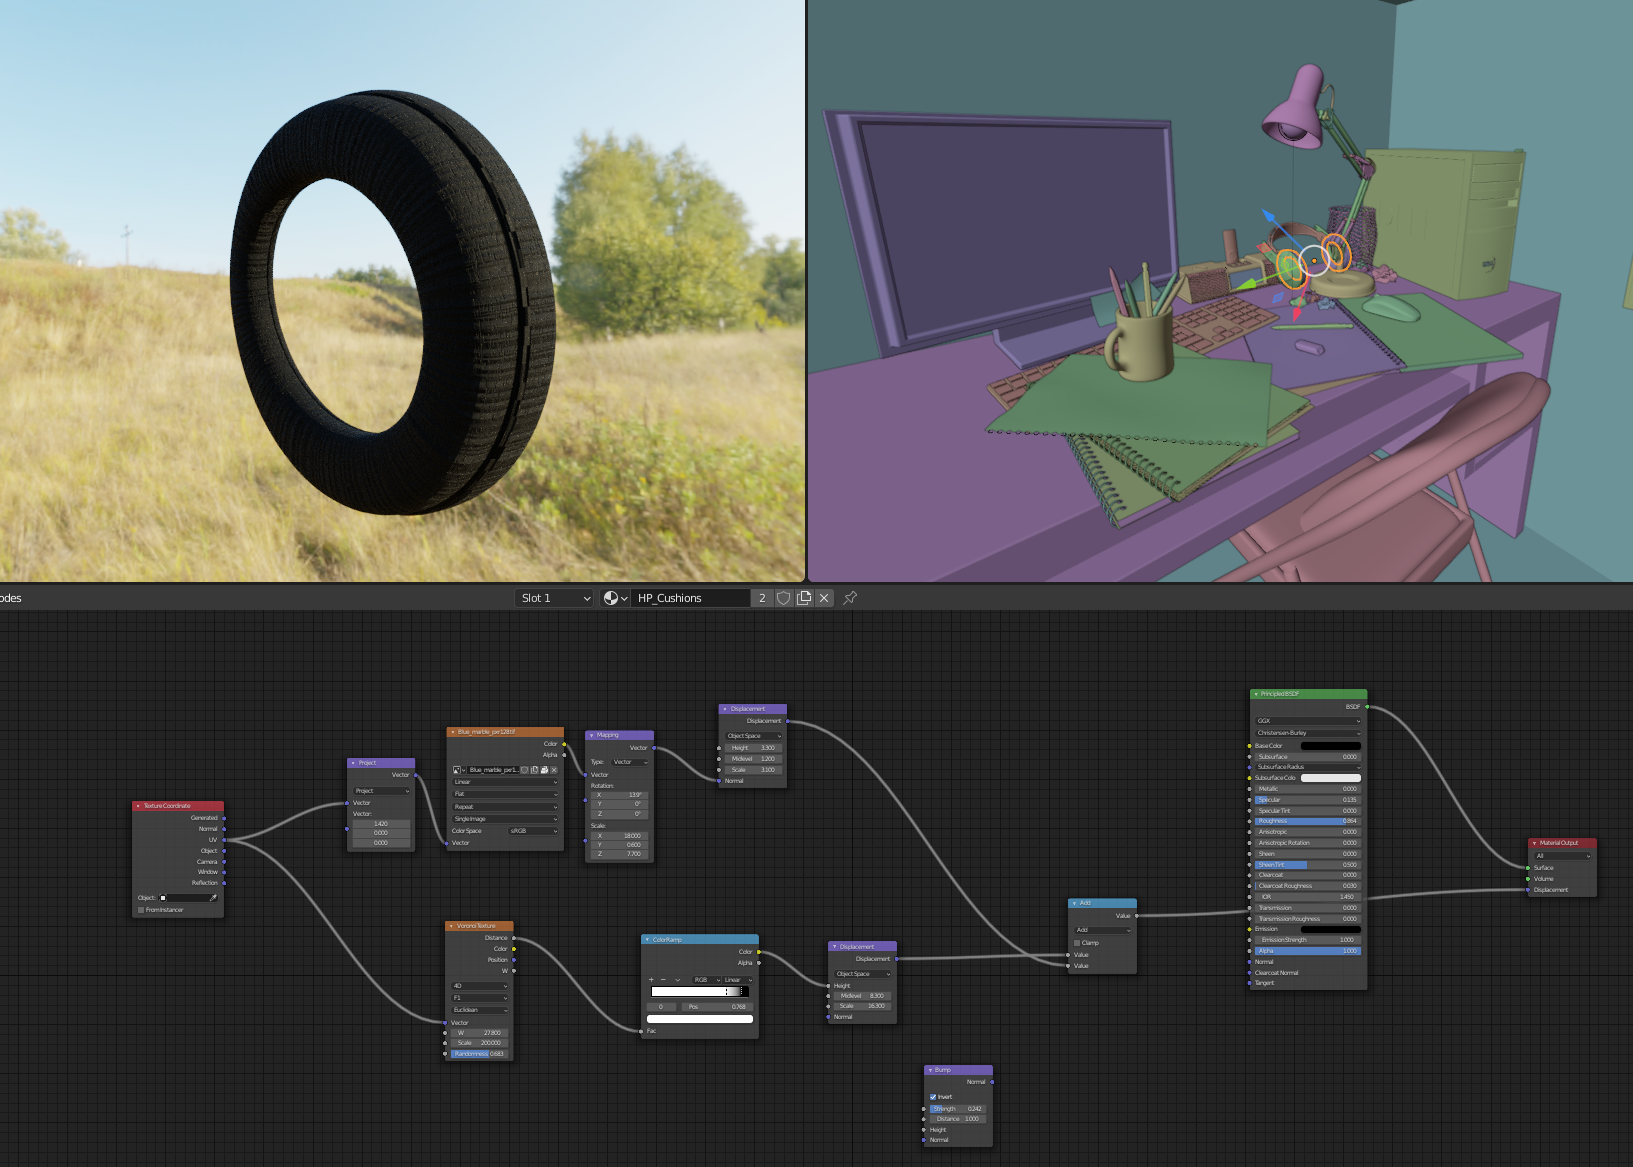
WIP thread for the shaders and textures fundamentals:
-headphone earcufss - mixxing the leather tension and adding some cracks to it - they have been used.
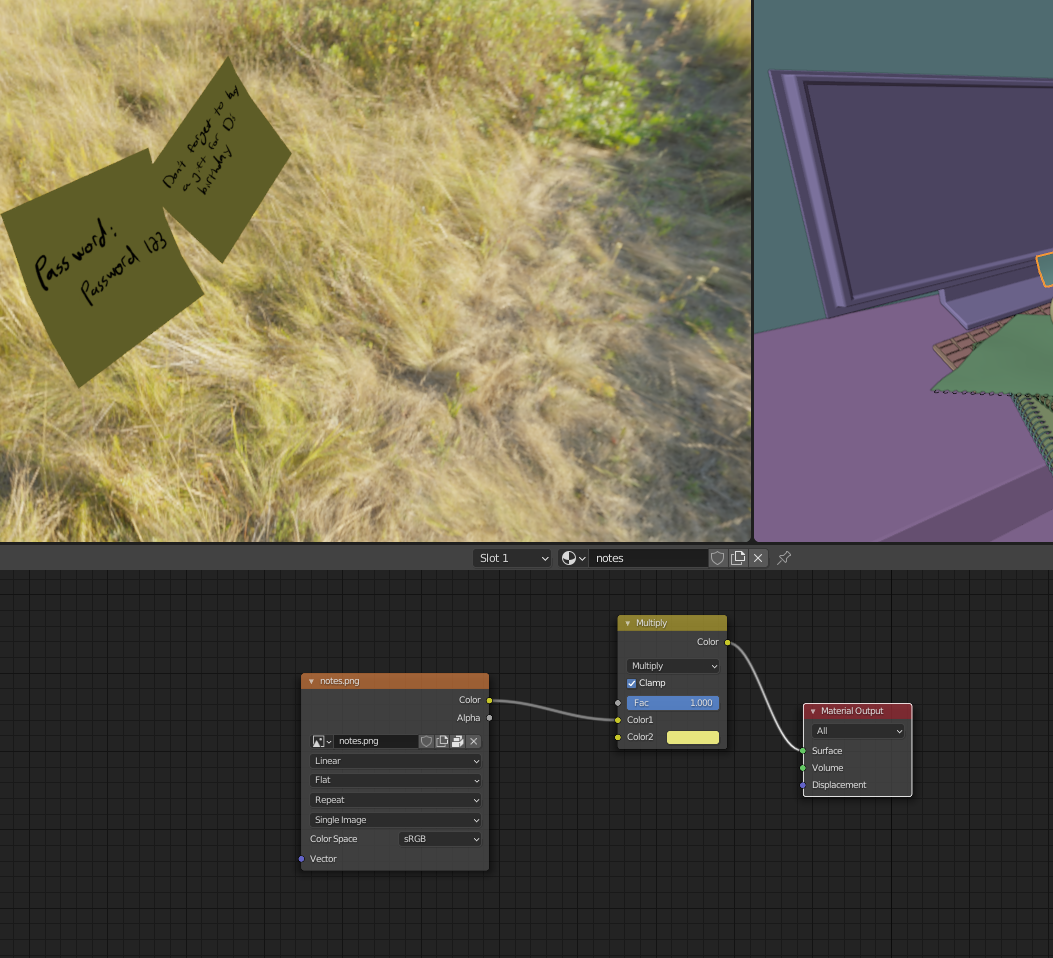
Adding the notes now and changing the notes bg color:
Starting out with the pothead tutorial:
Step 1 blocking it out

Another kid is getting out of the block:

You might notice the shading issue. I have to figure out what I did, when finishing the top it worked ok with the data transfer, smooth as a baby. But then I started with the portion underneath and suddenly the data transfer get me this output... beware , mister hyde is scary to look at. I suppose i did move one of the objects by mistake, I'll try to fix it tomorrow and continue this hotheaded metal beast!

cheers!
![]() adrian, he's block 'n ball ! He's got that potishead attitude... Ok sorry, I'm leaving ... :)
adrian, he's block 'n ball ! He's got that potishead attitude... Ok sorry, I'm leaving ... :)
I managed to get rid of the shading issue. The reason was... I created a vertex group that went top to bottom, but obviously the top part was later modified to accept the handle. thus having different origin forms to transfer data from... working at the legs.

advancing one finger at a time. since the source material is a bit hard to decode I went for a free interpretation :) next is the hand and thumb

this part was demanding, so much interpretation, repeat, redo undo, repeat, undo,.... I'll leave it up to this and go to the next part otherwise in a month I'll still be doing the hands :)