This is an on-going thread documenting my progress through the 2021 Collab Project.
😉
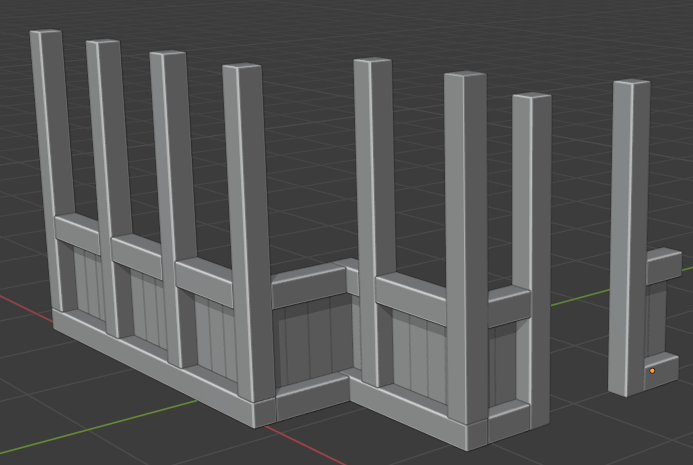
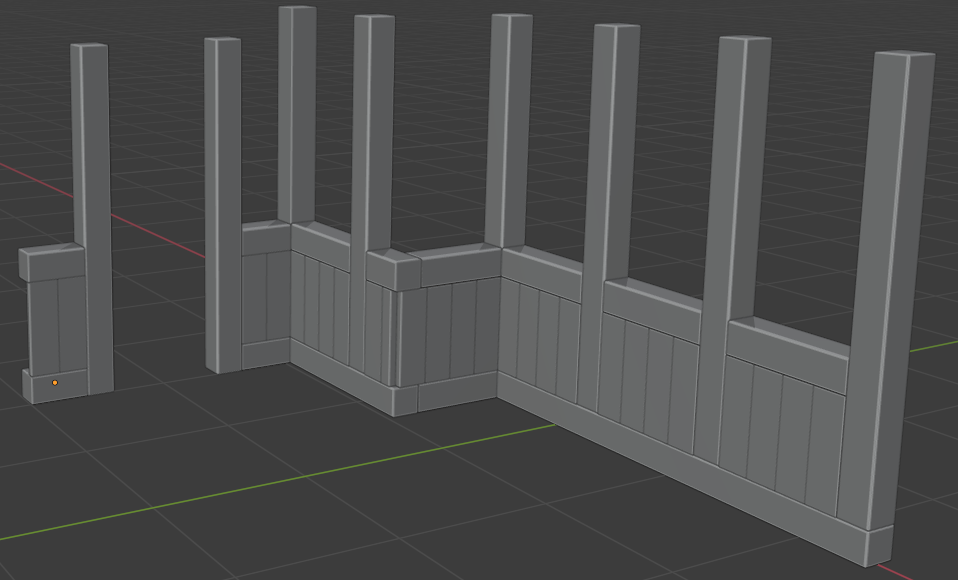
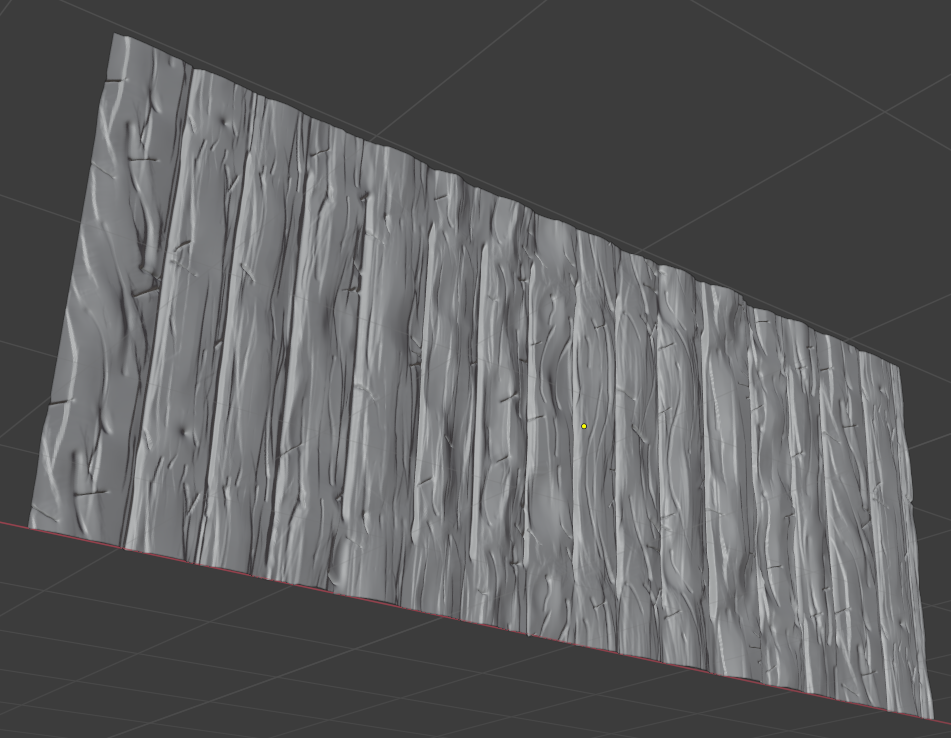
Homework Submission - Week 1 - House External Wainscotting
@theluthier
Submission comments: We're not sure yet exactly how the wainscotting work and the wall beams work will intersect, so I had some fun with the wall beams as well. As you can see from the third screenshot it doesn't really line up, but I wasn't really sure how to block it out to proportion with the current resources, and when I checked in with my team it seems like it'll be fine to do that next week. You can also see here that there's no, well, character. No cracks, dents, dings, splits. I understand that this will also be for next week, but I can also do some of that for this week if desired? Apologies for the uncertainty, just feeling a teensy bit overwhelmed. :) The bevels are all linked data modifiers. A fun trick I learned earlier this week from the very germane treasure chest tutorial series.
I think for a basic block-out you nailed it ![]() zackwhy
zackwhy
Fine details can be defined on the next steps.
I really appreciate how you went about your week 1 homework. You could have arguably submitted a flat plane and I would have accepted 😅 But since you put some serious effort into a simple blockout, I must give you some extra points and an emoji handshake 🤝
That's what I expect will likely be your final model. Some bevels between wood at the most, but even that probably won't be necessary. As you've pointed out the wall beams will frame your wainscoting entirely...
Week 2 will be way more interesting for you. Sculpt some interesting boards with character side by side and you'll be in great shape for baking such detail to a texture map. I'll be sculpting at least one wooden plank during tomorrow's stream to hopefully clarify any questions about what this detail can look like.
Homework Submission - Week 2 - House External Wainscotting
@theluthier
Submission comments: Definitely stretched a new part of my brain here. I'd done the shark sculpting course, but this was my first time sculpting not following a video. I feel okay with how it came out? Anyway, it's exactly (almost) as you set up your stream (which I did watch as archived, so thank you for showing the wainscotting trim sheet example), which means it's on a plane with multires, not yet baked or applied to any models or anything like that. I will say that, looking at it now, it may not really entirely fit the intended art-style? It almost looks too high-poly. As opposed to a hard-surface modeled distressed wood like you see in the treasure chest tutorial. Regardless. Here it is, and I am absolutely here for any critical/constructive feedback you may have. :)
Thanks!
Nice job ![]() zackwhy! You really went for it and the result is very promising 👍
zackwhy! You really went for it and the result is very promising 👍
All the right components are there but some could be refinement in their application:
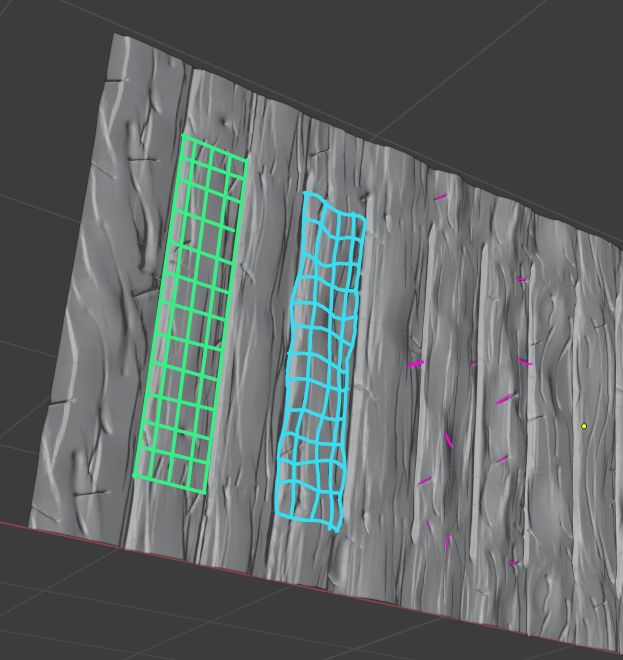
With the green wireframe I want to illustrate that the boards should maintain a mostly planar face. Despite being rough up with crevices, wood grain, scratches, etc it ultimately maintains a flat surface.
On the contrary your surface (cyan wireframe) has wobbled the surface so much that it's lost the planar surface and starts too look less like planks of wood. Diminishing the surface wobble intensity would be a notable improvement.
Lastly the little horizontal scratch marks (magenta) feel more like staple marks or something. I think this is due to a uniform depth to your stroke. Instead the center of each mark should be deeper than the ends. The effect tends to fade at the ends
I hate suggesting a redo but I'm afraid that's probably the best approach...Unless Blender gets sculpting layers that can be turned off or lessened non-destructively, it's a better option to go at it fresh rather than trying to change what's there 😕 Again though, you have all the right components! They just need a couple refinements.
Also could you copy + paste your sculpture into the WIP placeholder I made for you? SPICE-VENDORS-HOUSE/SCENES/MODELS/WIP/HOUSE/EXTERIOR/ WIP_house_wainscoting_zackwhy_00.blend. If you're confused about that process, blanchsb made a great tutorial about it: https://youtu.be/EgYtk72tDsc
Hi @theluthier , thanks so much for the feedback! I took another stab at it, attempting to keep it much flatter. I also redid the scratches using a lower strength brush at multiple passes. I think it works well? Anyway, both sculpts are in the WIP file. If you can't see them please do let me know. I tried download the file manually from the web view (as a separate file than the one on my own hard drive) and it reflects the changes, so they should be there for you...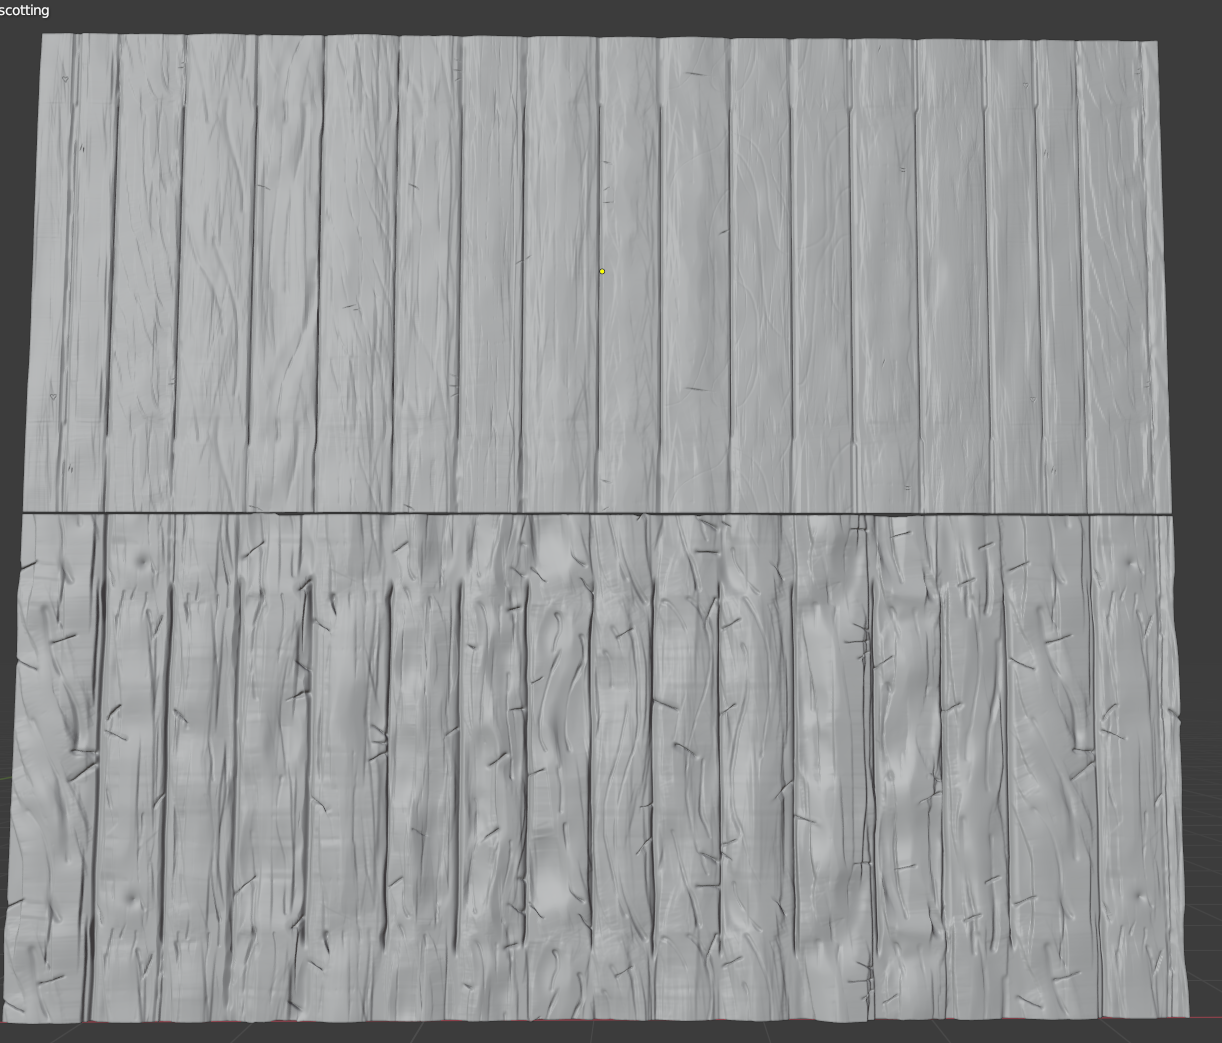
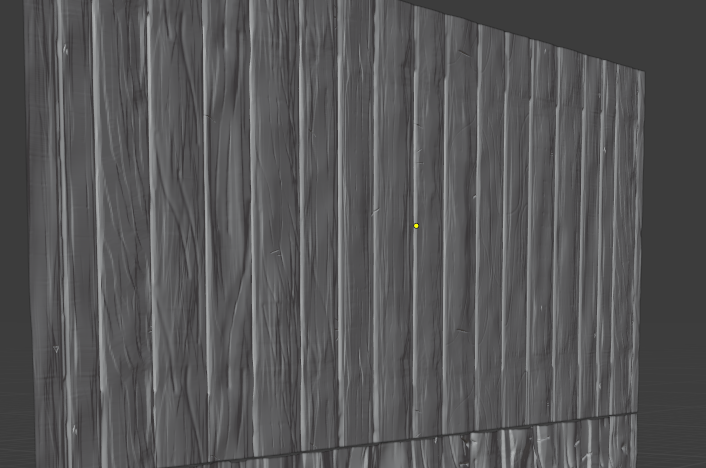
![]() zackwhy That's it!! Perfect execution of the feedback. This is fantastic wainscoting 👏
zackwhy That's it!! Perfect execution of the feedback. This is fantastic wainscoting 👏
Homework Submission - Week 3 - House External Wainscotting
@theluthier
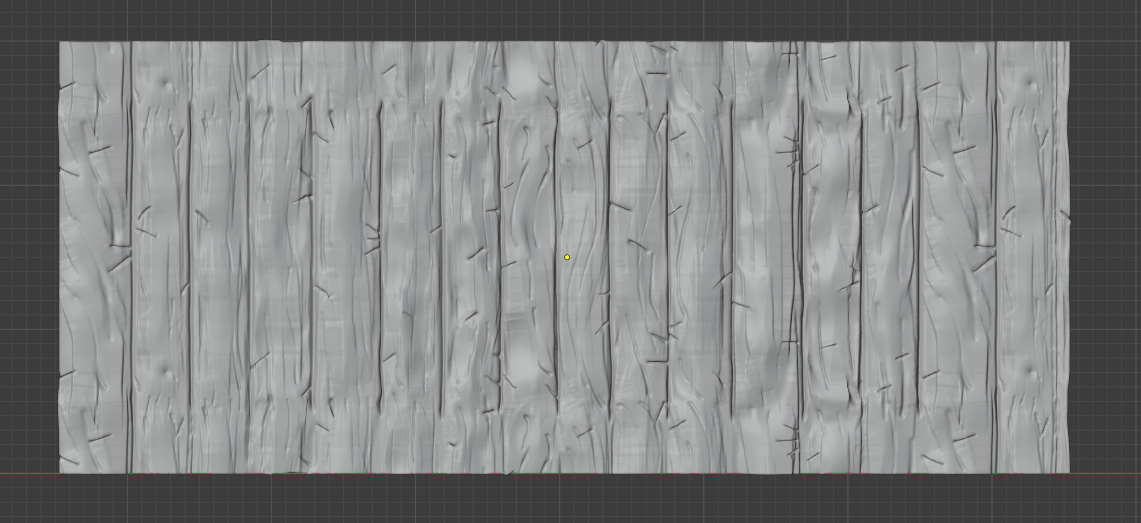
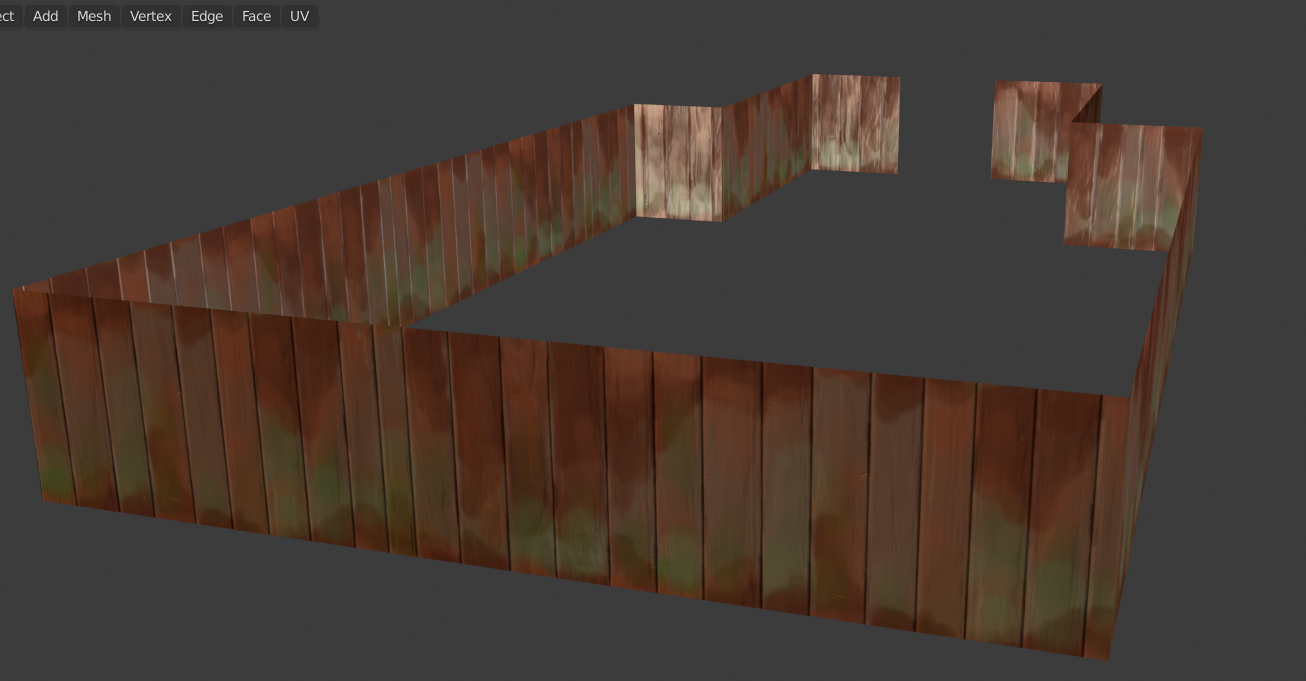
Submission comments: I was really happy to see this used as an example in the stream! It was quite helpful. I ended up bumping the resolution on everything to 2048x682. I forgot to turn off overlays the first time I generated my normal + cavity maps, so when I was done with everything I saw these weird lines and had to go back and do that again. Lesson learned. Otherwise, I think everything came out OK? I'm not a great painter but ... 🤷♂️ Everything should be there in the right files!
Finished product: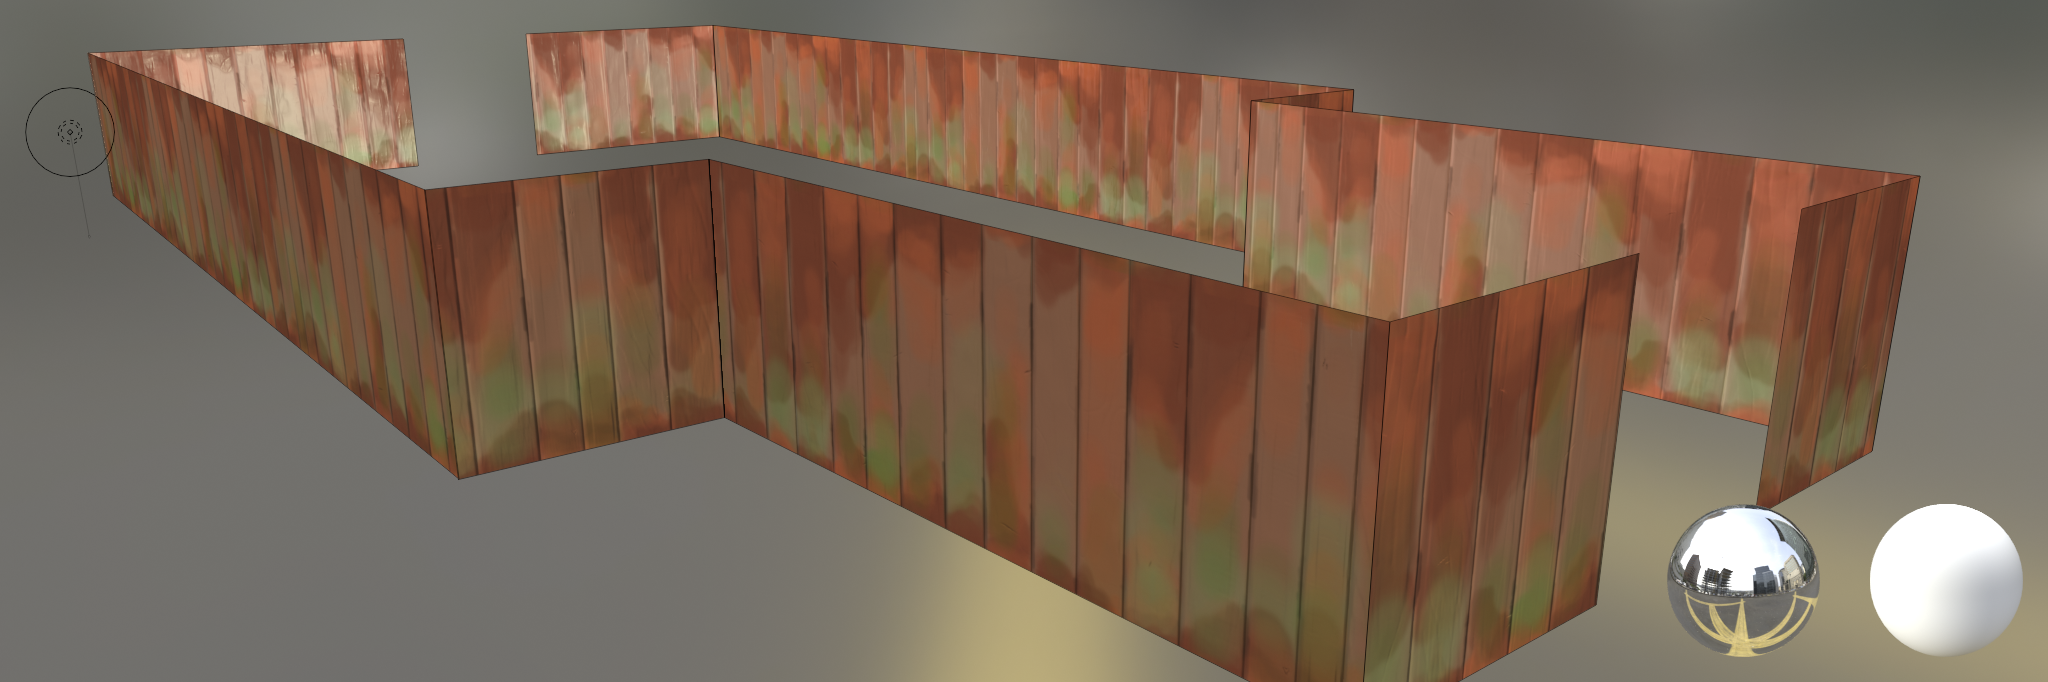 Normals:
 Cavity:
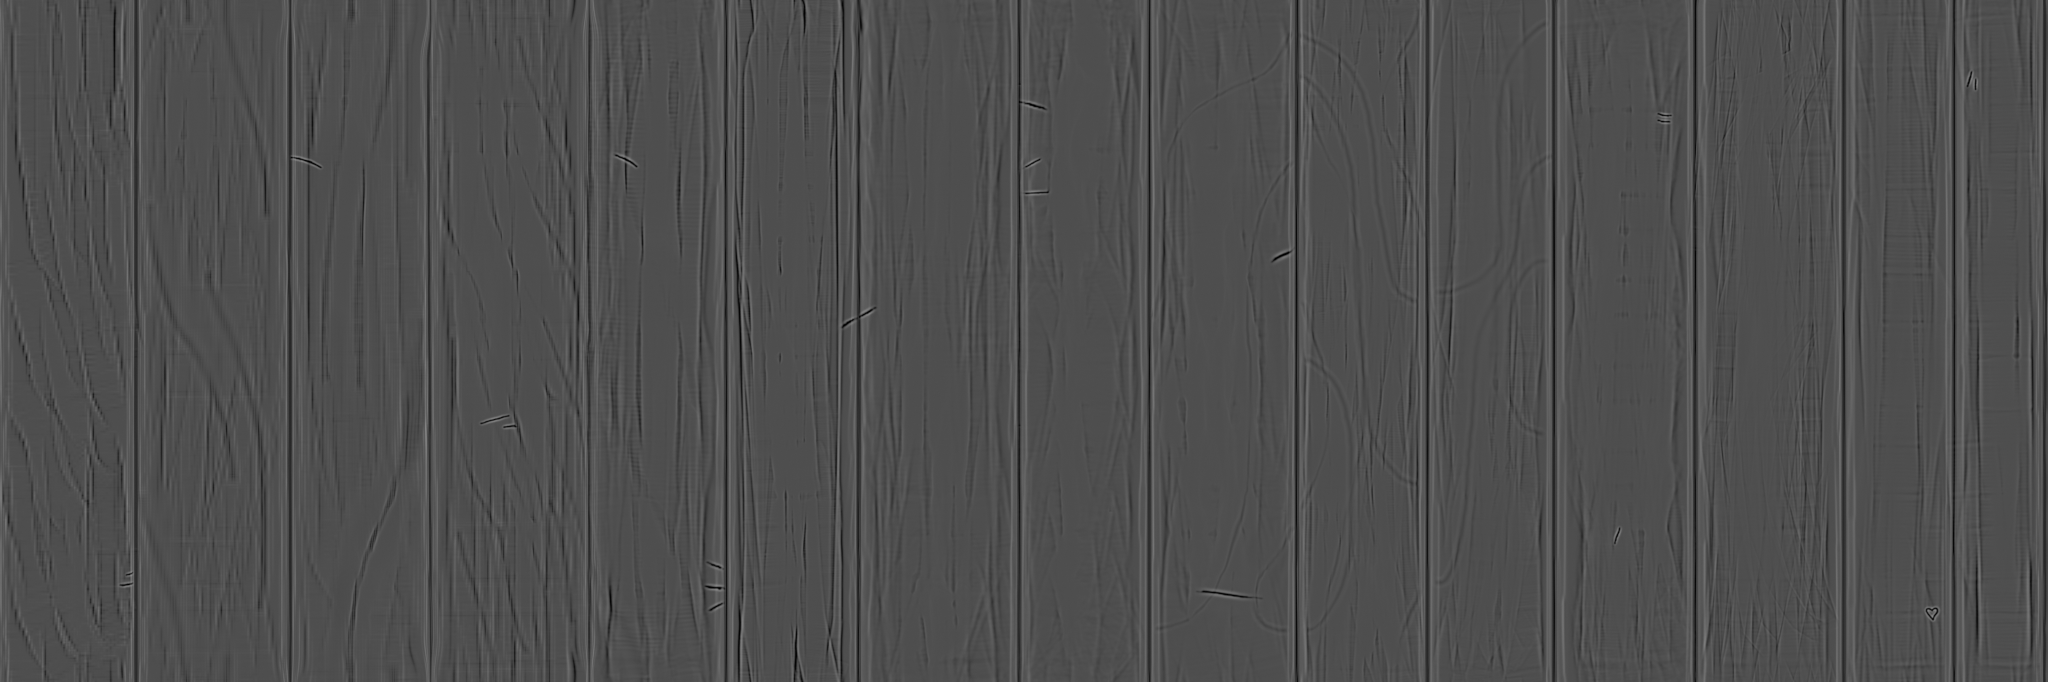 Color:
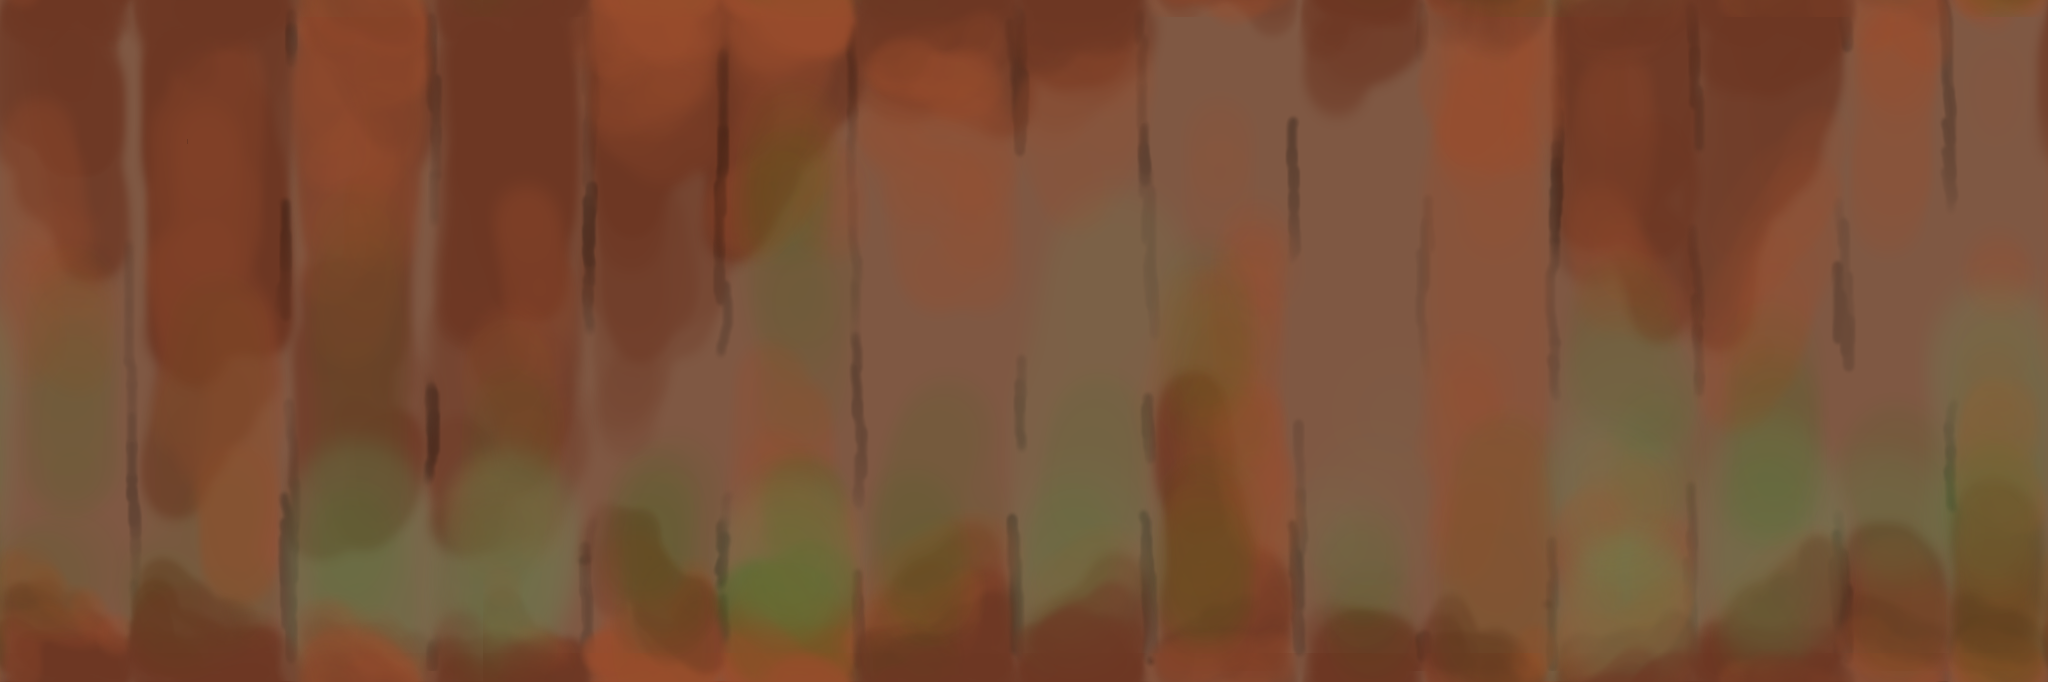
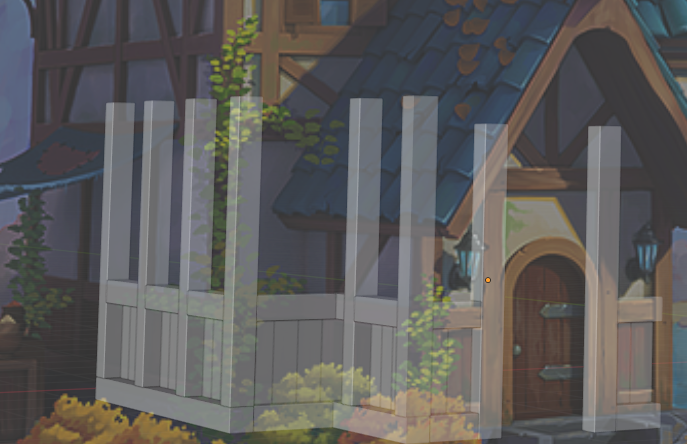
Testing scene placement: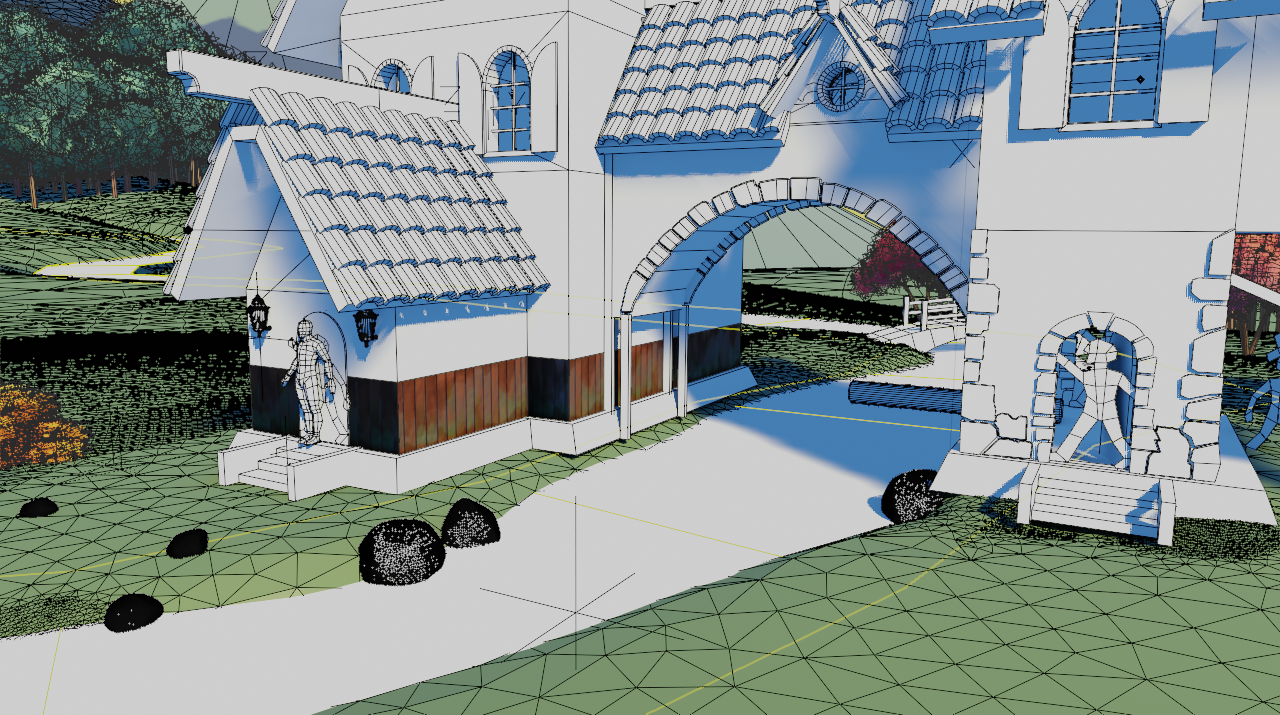
Updated the wainscotting to get rid of the space at the back of the house for the door. Saved this change to the MASTER file.
Excellent work ![]() zackwhy! You're done and your wainscoting looks great in the assembly:
zackwhy! You're done and your wainscoting looks great in the assembly:
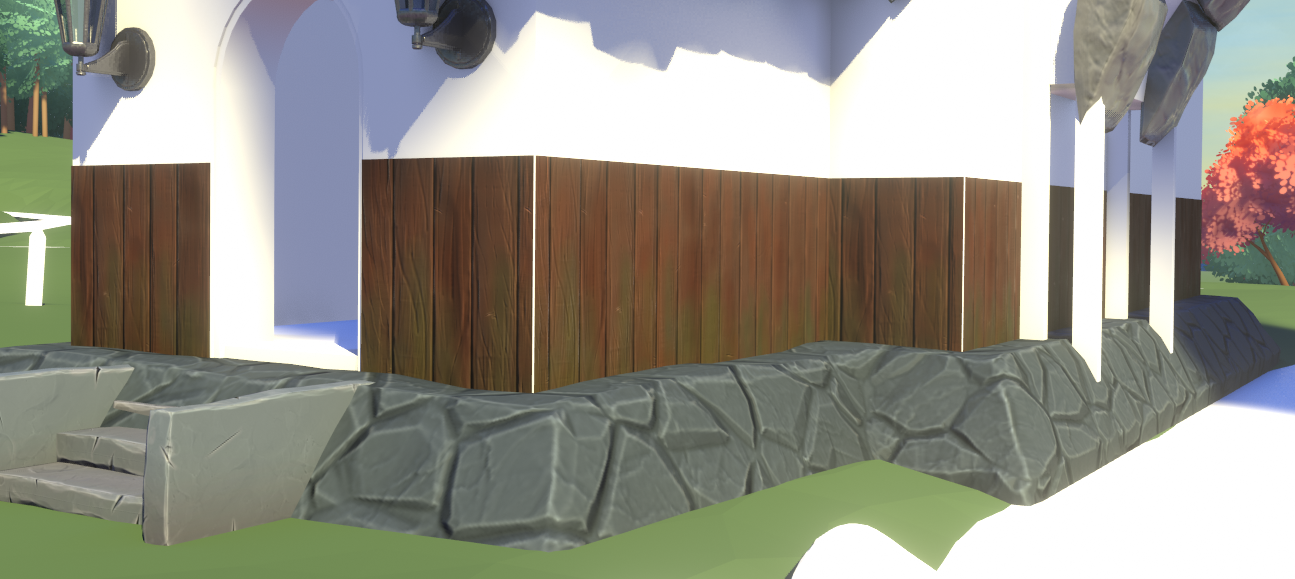
A couple house-keeping notes: Those white lines you see are where I slightly pushed each section away from the walls so they're not directly on top of each other. The lines will be covered when the wall beams are in place.
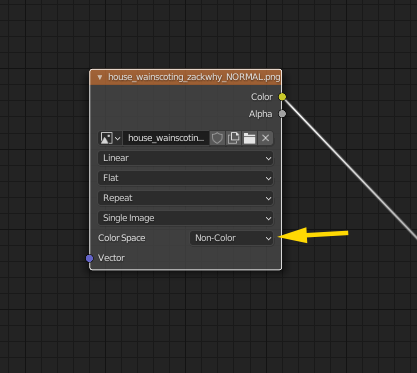
Also I noticed your normal map texture wasn't set to the proper color space. Always make sure you use Non Color for normal maps. Just something to keep in mind for the future!
You've done a great job this month. It's been a pleasure working with you 🤝