This is my homework submission for the Nature_FGTreeB. Happy “Blendering” everyone!
Homework Submission - Week 1 - FG Tree B
Homework Submission - Week 2 - FG Tree B
Homework Submission - Week 3 - FG Tree B
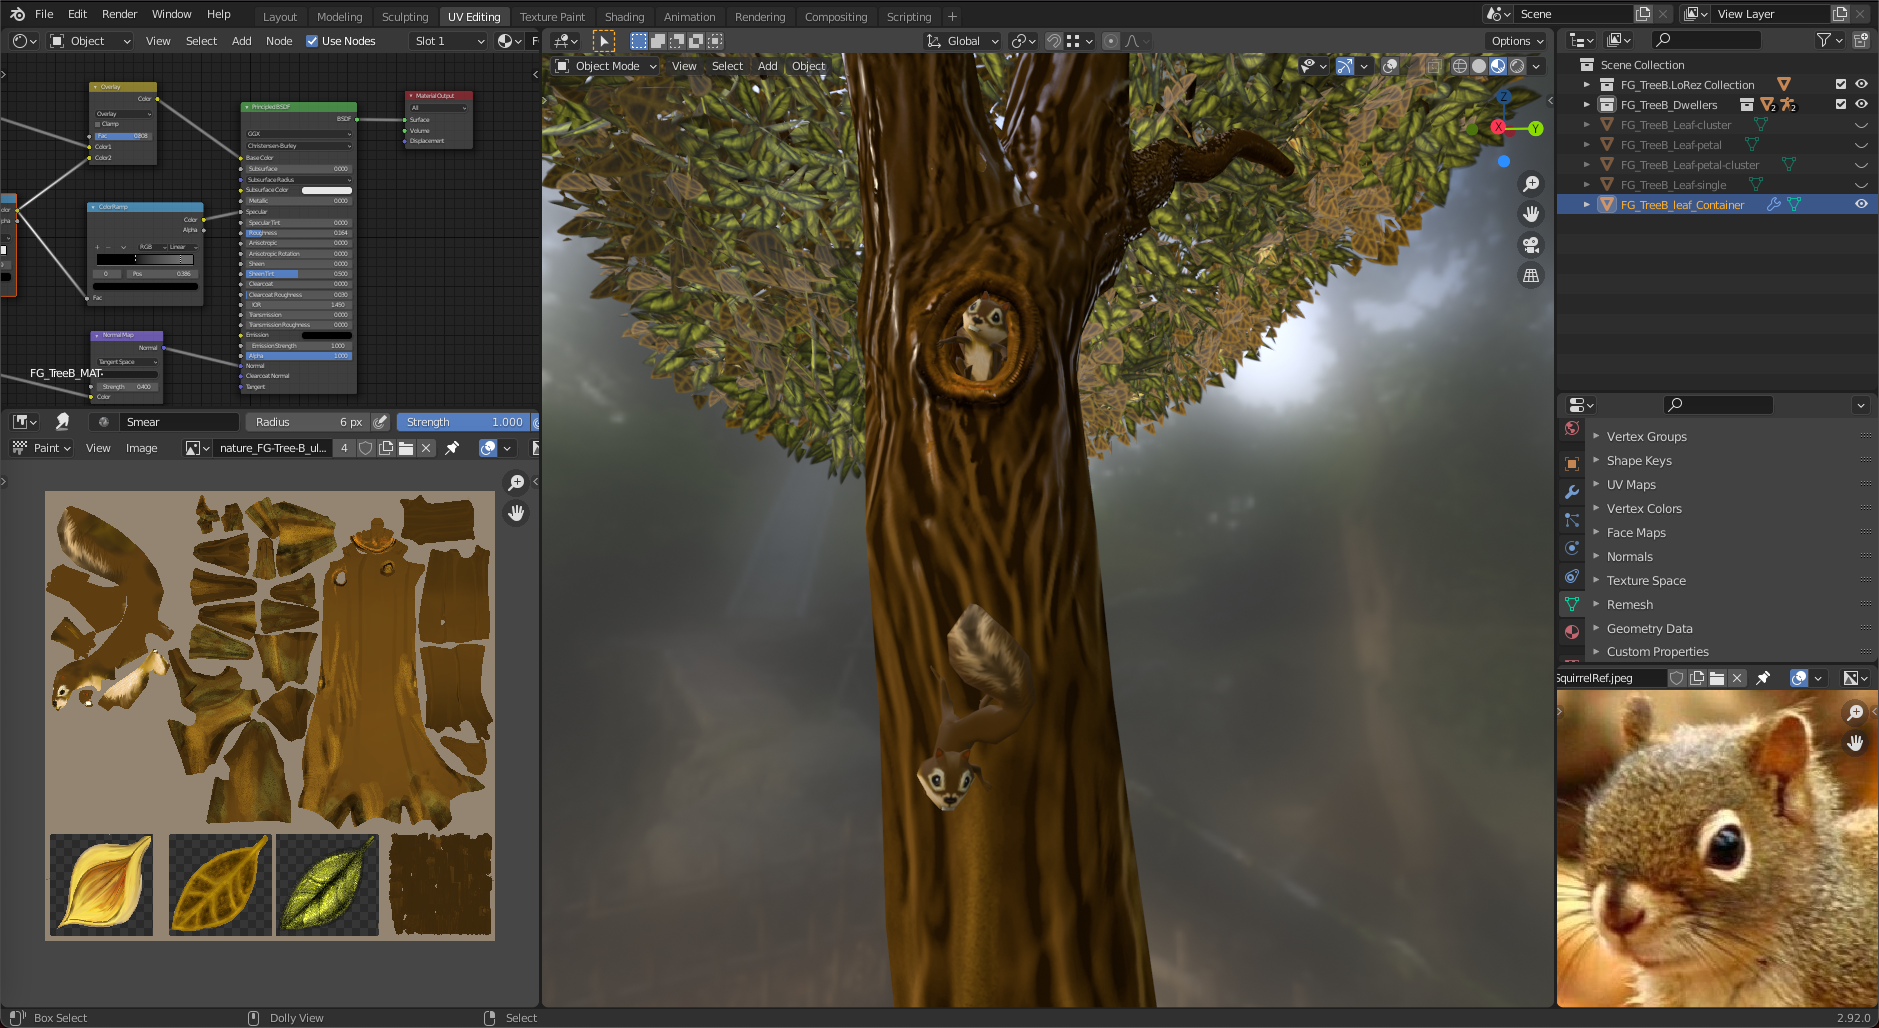
The hole in the trunk is so realistic. Well done! I love the squirrel too! He's soo cute!
Homework Submission - Week 3 - FG Tree B
@theluthier and @jlampel
Assets: Nature E: FG Tree B My Work in Progress
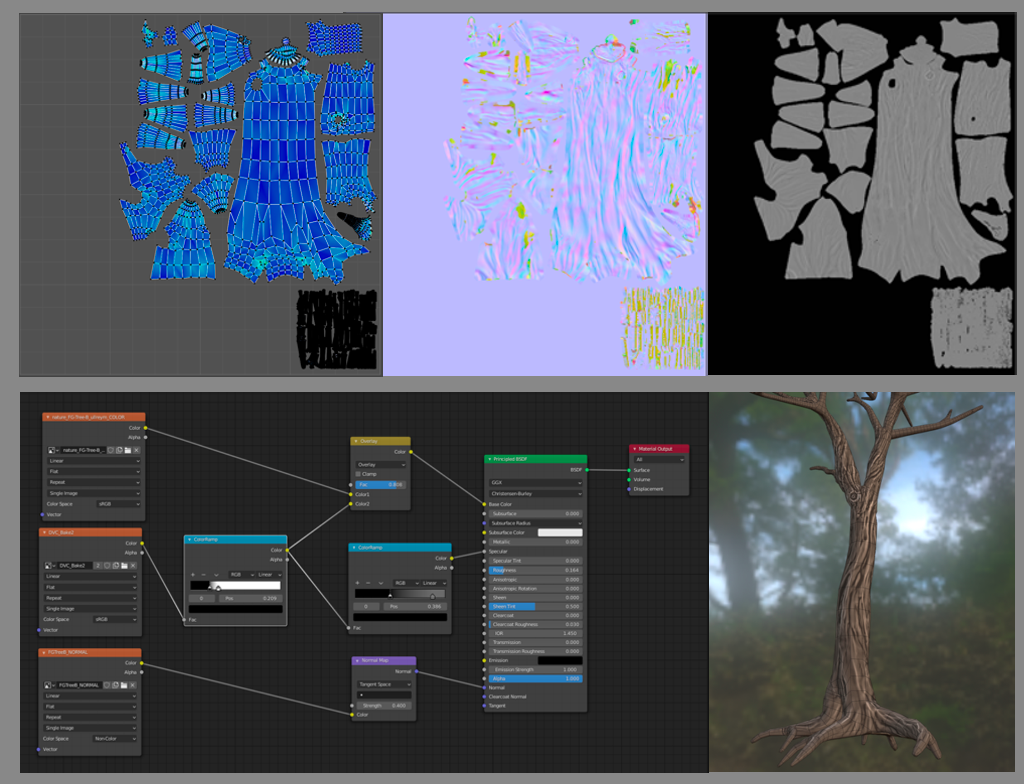
Long story: I had to do some time traveling this week. 🤨 After the week 2 live stream I was so eager to start the sculpting process I skipped a vital step in the production of the Dirty Vertex Map. Yes, the UV map is a necessary step in the process. I had to go back through my saved revisions of Tree B and collect the pre-applied Mulitres high-res model and go back and try to find the base model that had a matching vertex count. I could not, unfortunately.
To produce the Normal Map I needed the UVs on the lo-res model, but I made those after I had decimated the base model the high-res was based on. Because the high-res model didn't need its own UVs for the baking process, all was well.
To produce the Dirty Vertex Map all was not well. The high-res detail needed to carry with it the UVs so the baking process could know where to put the images. Ugh! No UVs on the high-res model. I could not copy the UVs because the decimated lo-res tree and the Base model of the Multires tree had mismatched vertex counts.
Short story: I had to recut the UVs of my base model, duplicate and up-res it, append a high-res tree, and use a shrinkwrap modifier to capture my lost high-res detail. The blend file swelled to over 11GB with the different duplicated high-res trees in it. My computer crawled for many hours and took long breaks while trying to accomplish what I was demanding of it.
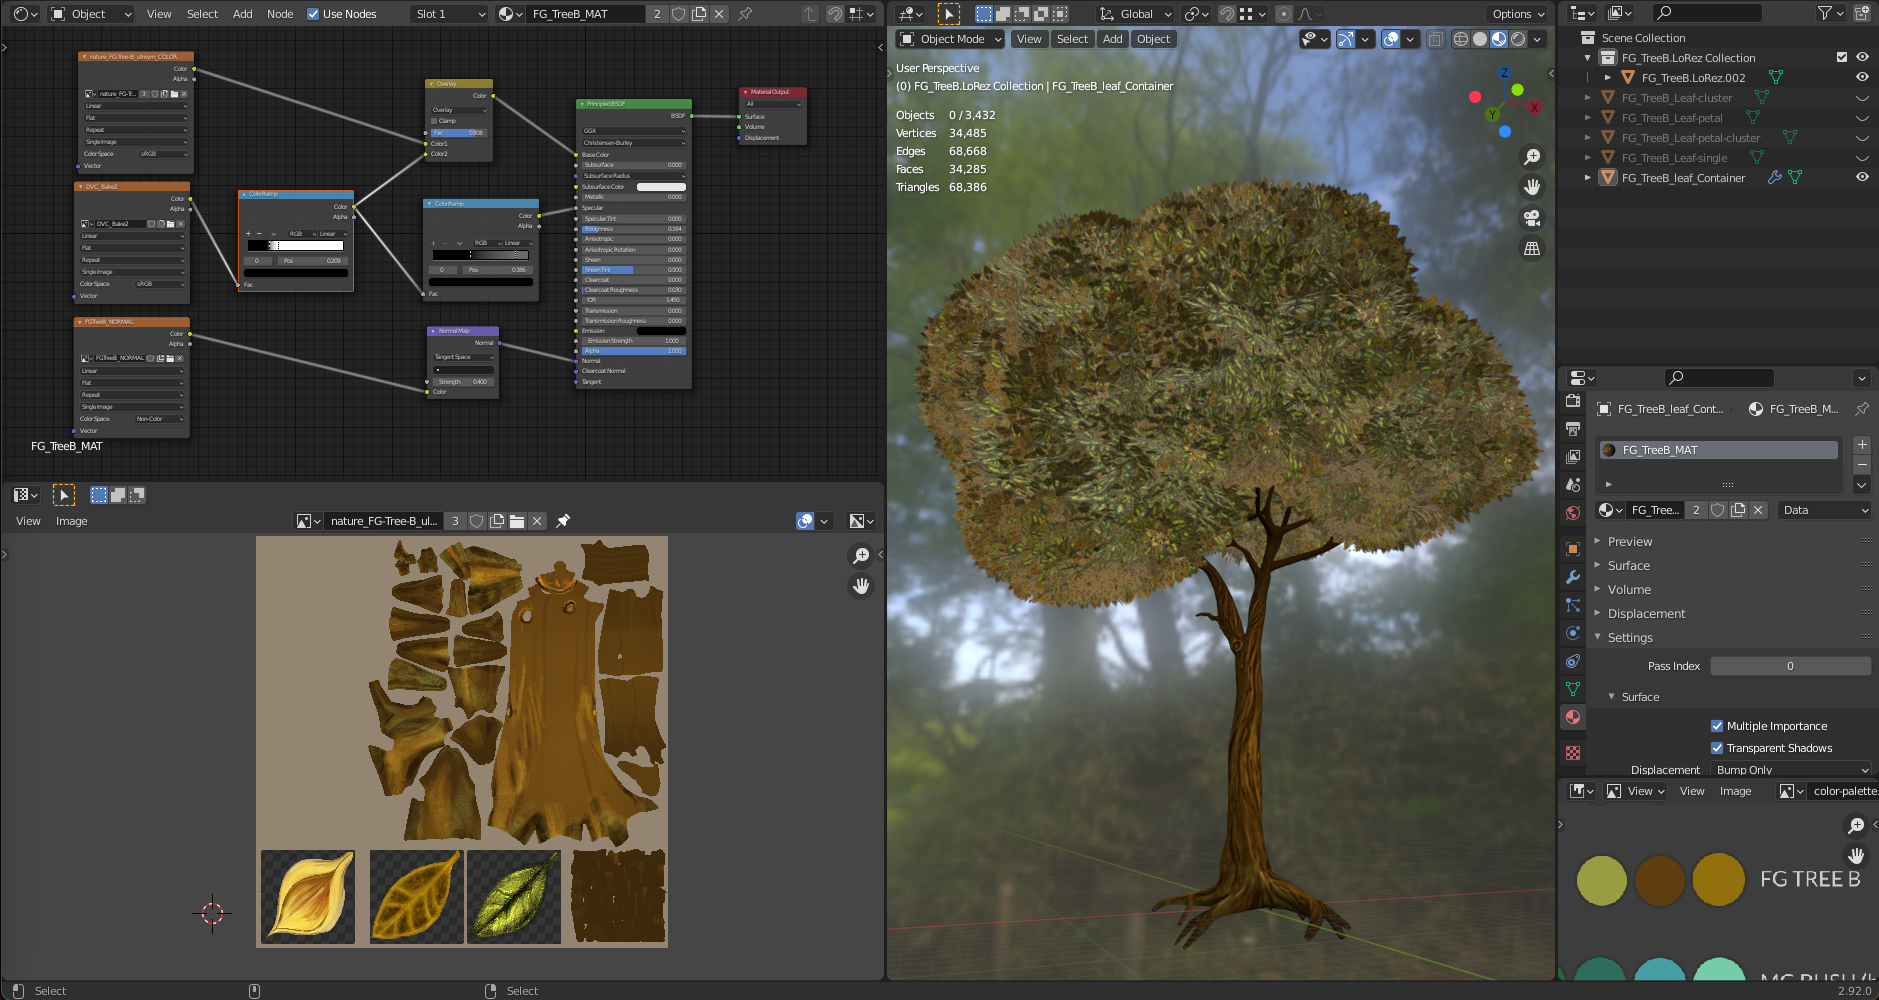
Leaves: I had made an attempt to use instanced collections as particles, but I was making instanced collections of collections and it didn't work for me. I had to join the collection as one object and that made the difference. I used the color swatch for the texture painting process. I used the three colors provided and added variety with blending modes with the paintbrush. I made a top and bottom part of the leaf as well as a blossom. This is loosely based on the Magnolia tree in my front yard.
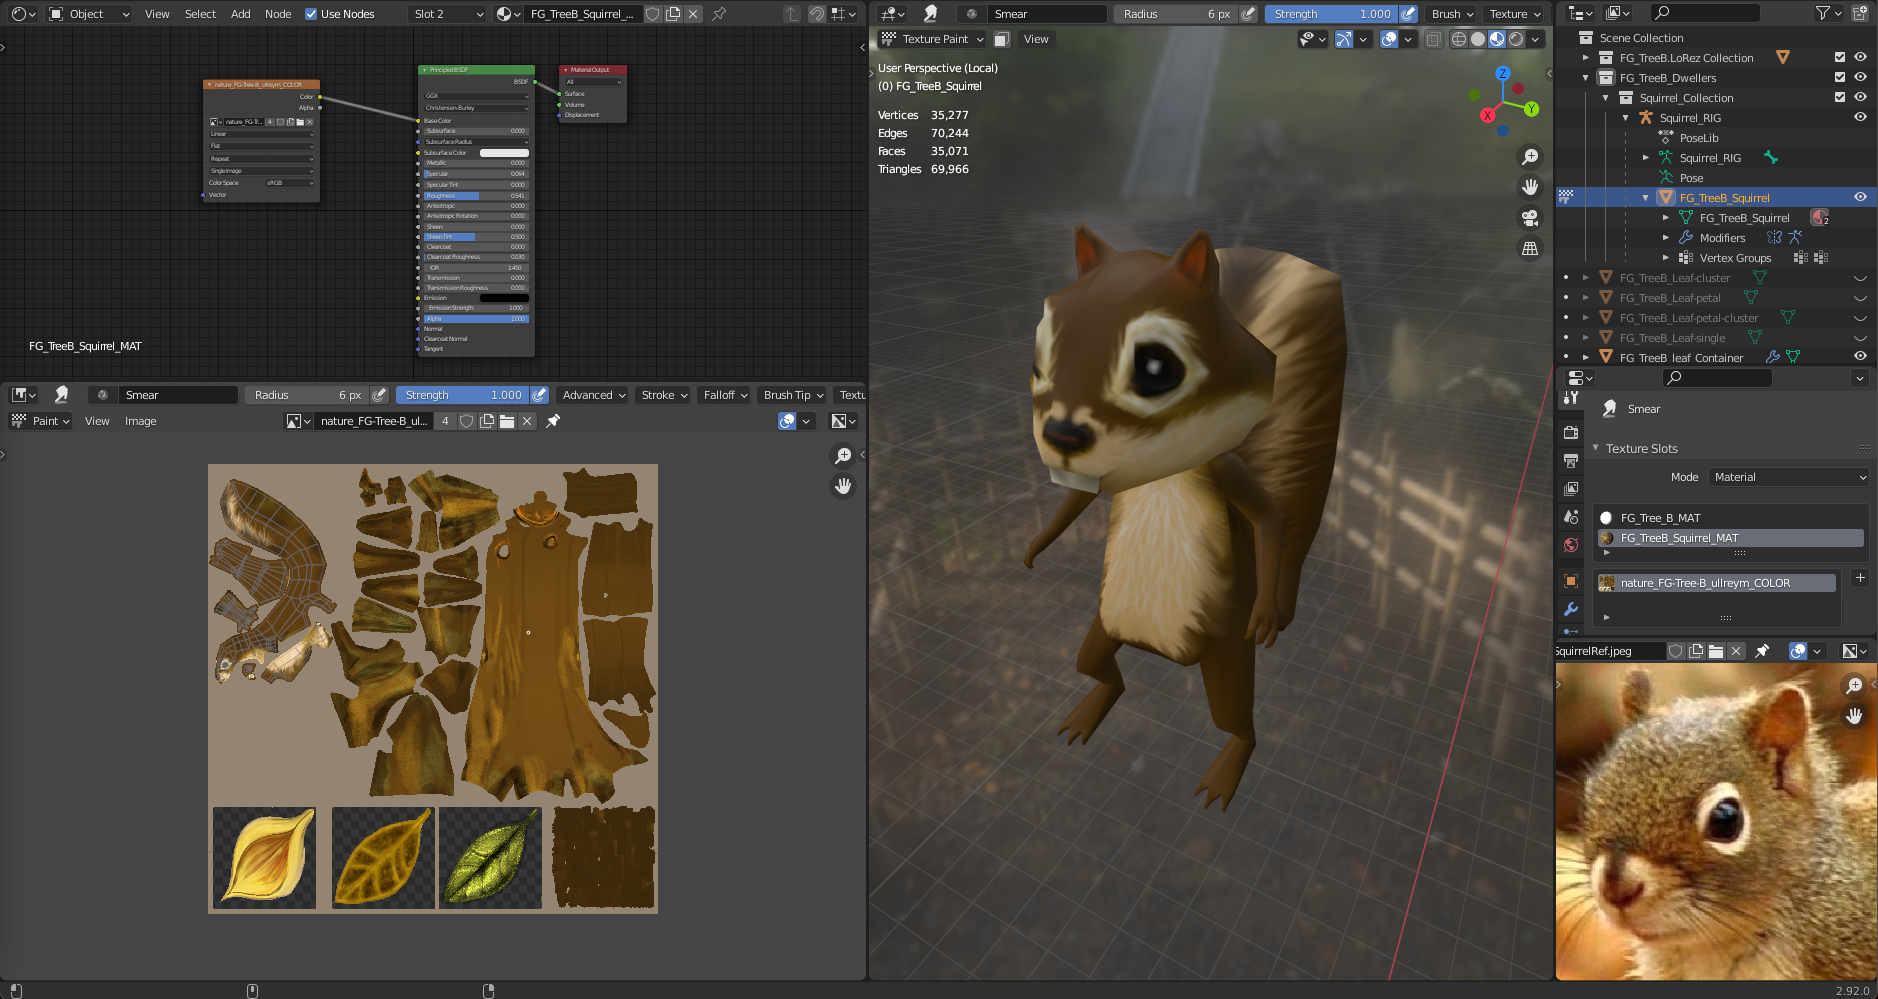
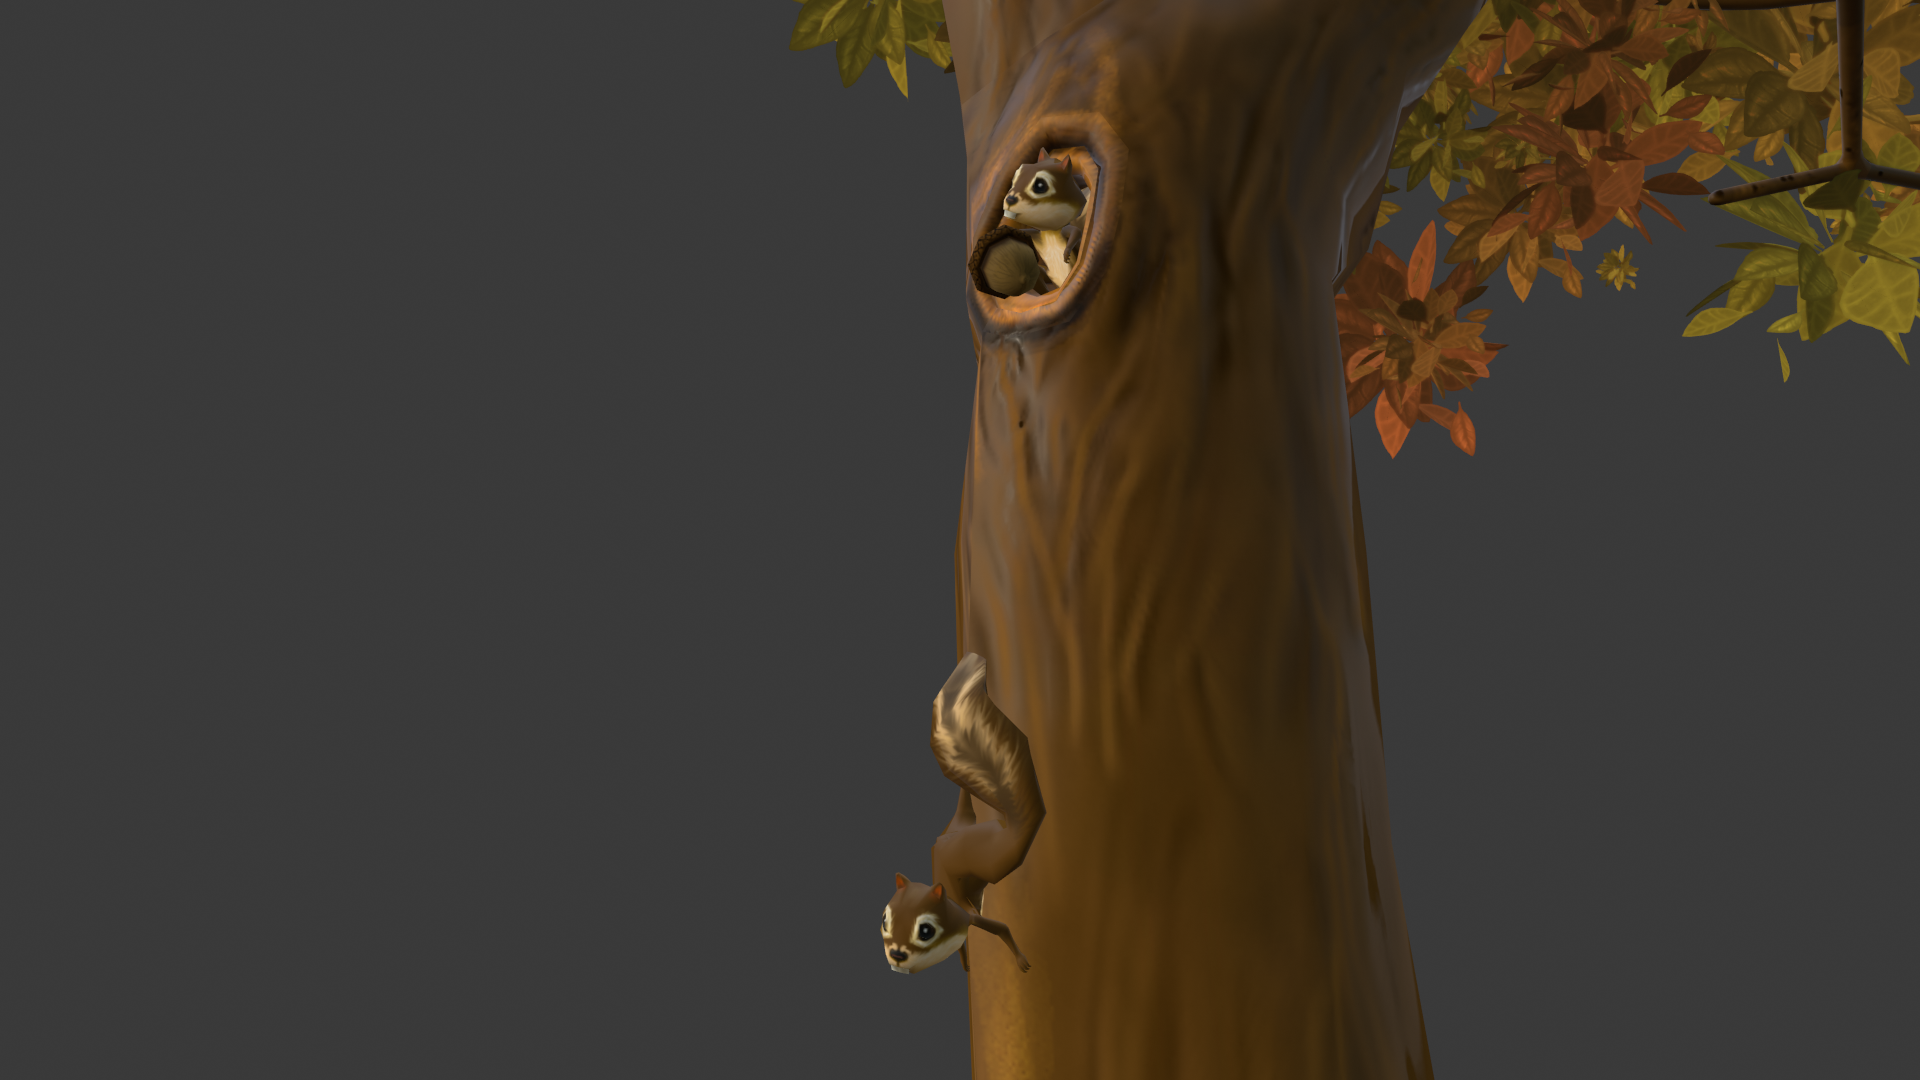
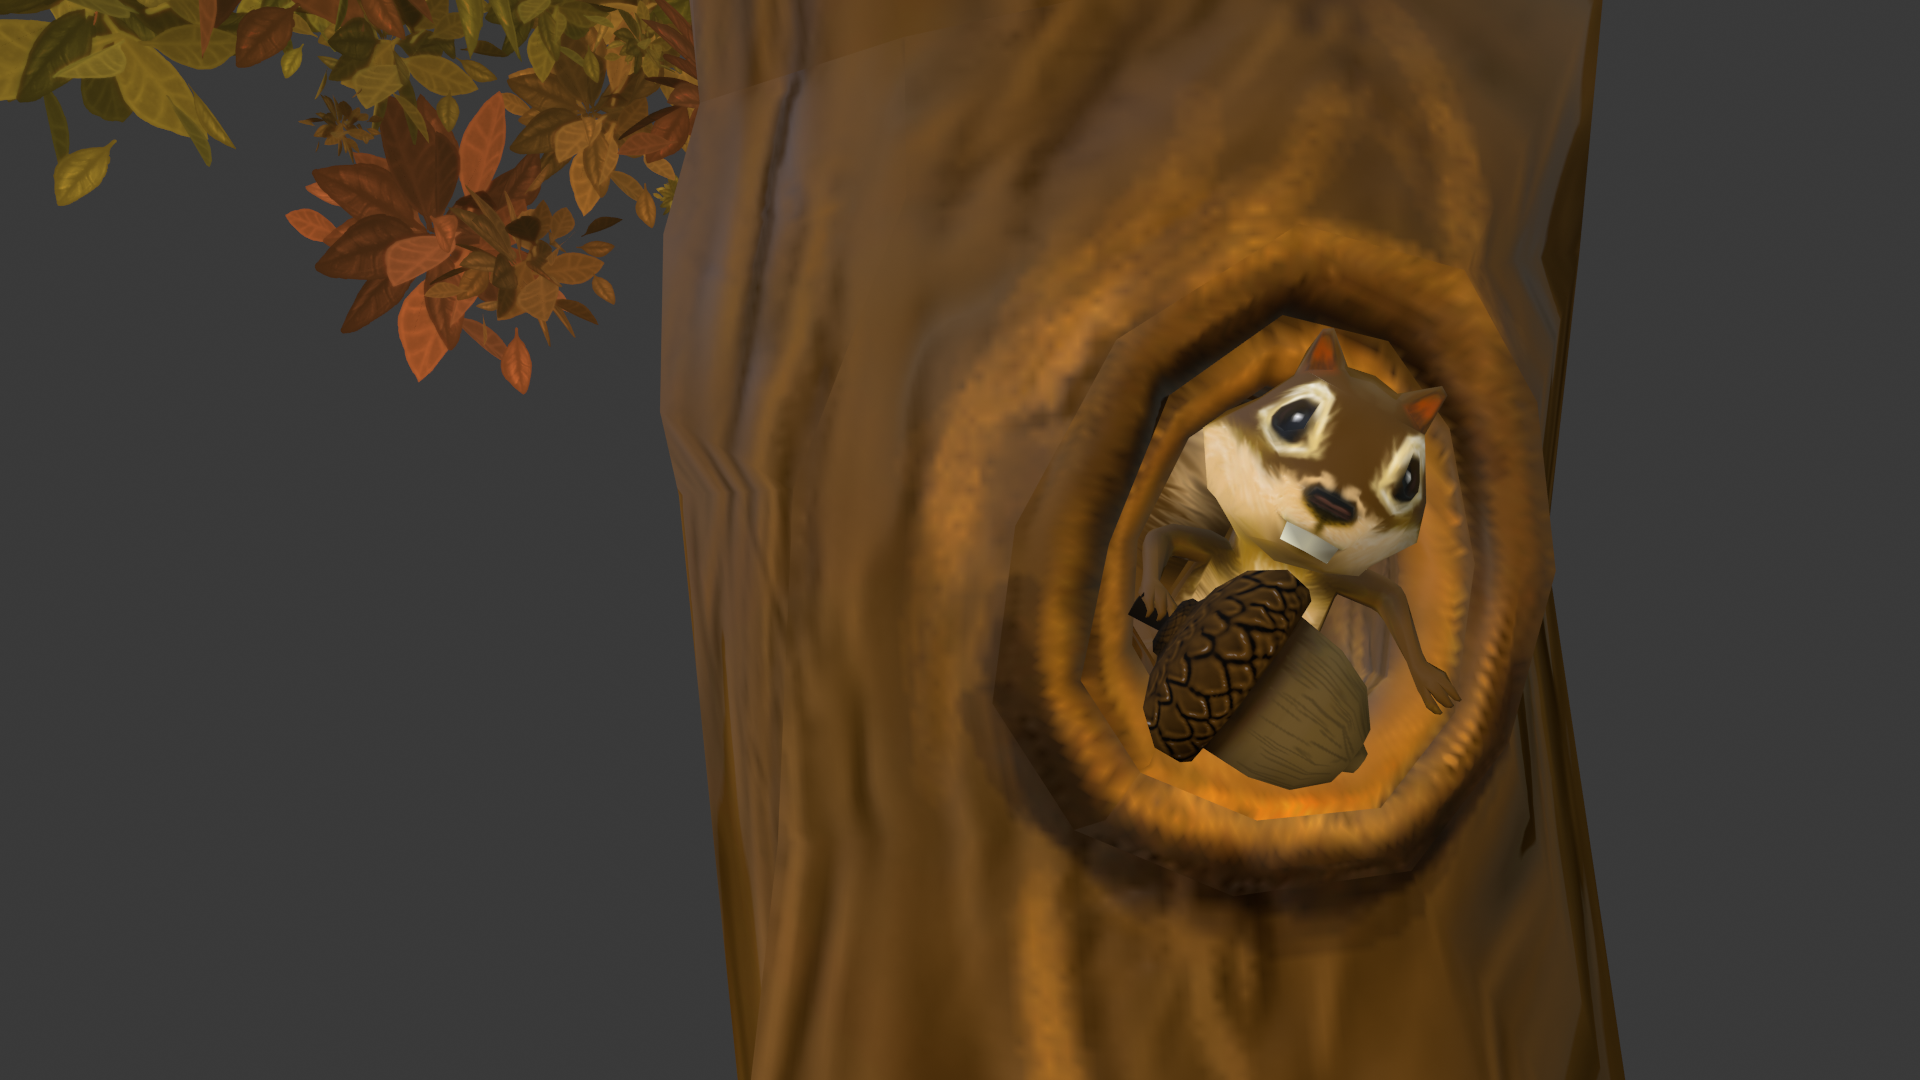
Arboreal Dwellers: I thought that if there was time I could add some squirrels to the tree just out of view of the render camera. The texture painting part was so fun. I enjoyed using the smudge tool to blend the furry effect. I created a simple rig for the creatures and posed them as best as I could with just forward kinematics.
What a fantastic asset ![]() ullreym! The addition of the squirrels - come on! Such a nice touch. Honestly I think you can call this one done 👏
ullreym! The addition of the squirrels - come on! Such a nice touch. Honestly I think you can call this one done 👏
After linking it into the assembly file, I tweaked the tree a little bit. Namely I dialed down the contrast in the leaves to fit better with the existing trees. With the contrast of each leaf so strong it was hard to visually understand the leaves as a whole. So I mixed them with a randomized color to lessen the effect while maintaining its charm.
Also I changed how the leaves were populated and the shape of the population source. Instead of populating the surface I changed it to populate the internal volume of the mesh. This gives a fuller, slightly more random population pattern. Likewise moving around the individual leaf islands made for a fuller, less repetitive pattern.
A couple questions I have for you:
![]() ullreym Those squirrels are great! 👍 It's probably beyond the remit of the Collab, but I think if we could say have some of them strategically place around the scene popping in and out, like the non-playable characters in Mario Kart, it would give the scene just a little bit more life to it. 🦉 And maybe a stray low poly owl sweeping passed the camera at some point?
ullreym Those squirrels are great! 👍 It's probably beyond the remit of the Collab, but I think if we could say have some of them strategically place around the scene popping in and out, like the non-playable characters in Mario Kart, it would give the scene just a little bit more life to it. 🦉 And maybe a stray low poly owl sweeping passed the camera at some point?
Sorry, my inner Cecil B. DeMille is showing again.
Also I changed how the leaves were populated and the shape of the population source.
@theluthier I would love to see these steps. Some of the particle settings are still a mystery to me. I knew I wanted the leaf clusters to point in a certain direction, but I could only find 'random' settings. I will also seek out why the file is yet so large and tweak the normal map and alleviate those artifacts.
looks like road kill in the texture map
@adrian2301 It does! Poor little fella. I'll name him Rodney RoadKill and his friend Peapod.
🦉 And maybe a stray low poly owl sweeping passed the camera at some point
![]() vincav81 The broom would definitely help him keep his balance whilst riding his unicycle. Haha!
vincav81 The broom would definitely help him keep his balance whilst riding his unicycle. Haha!
Homework Submission - Week 4 - FG Tree B
@theluthier and @jlampel
Assets: Nature E: FG Tree B My Work in Progress
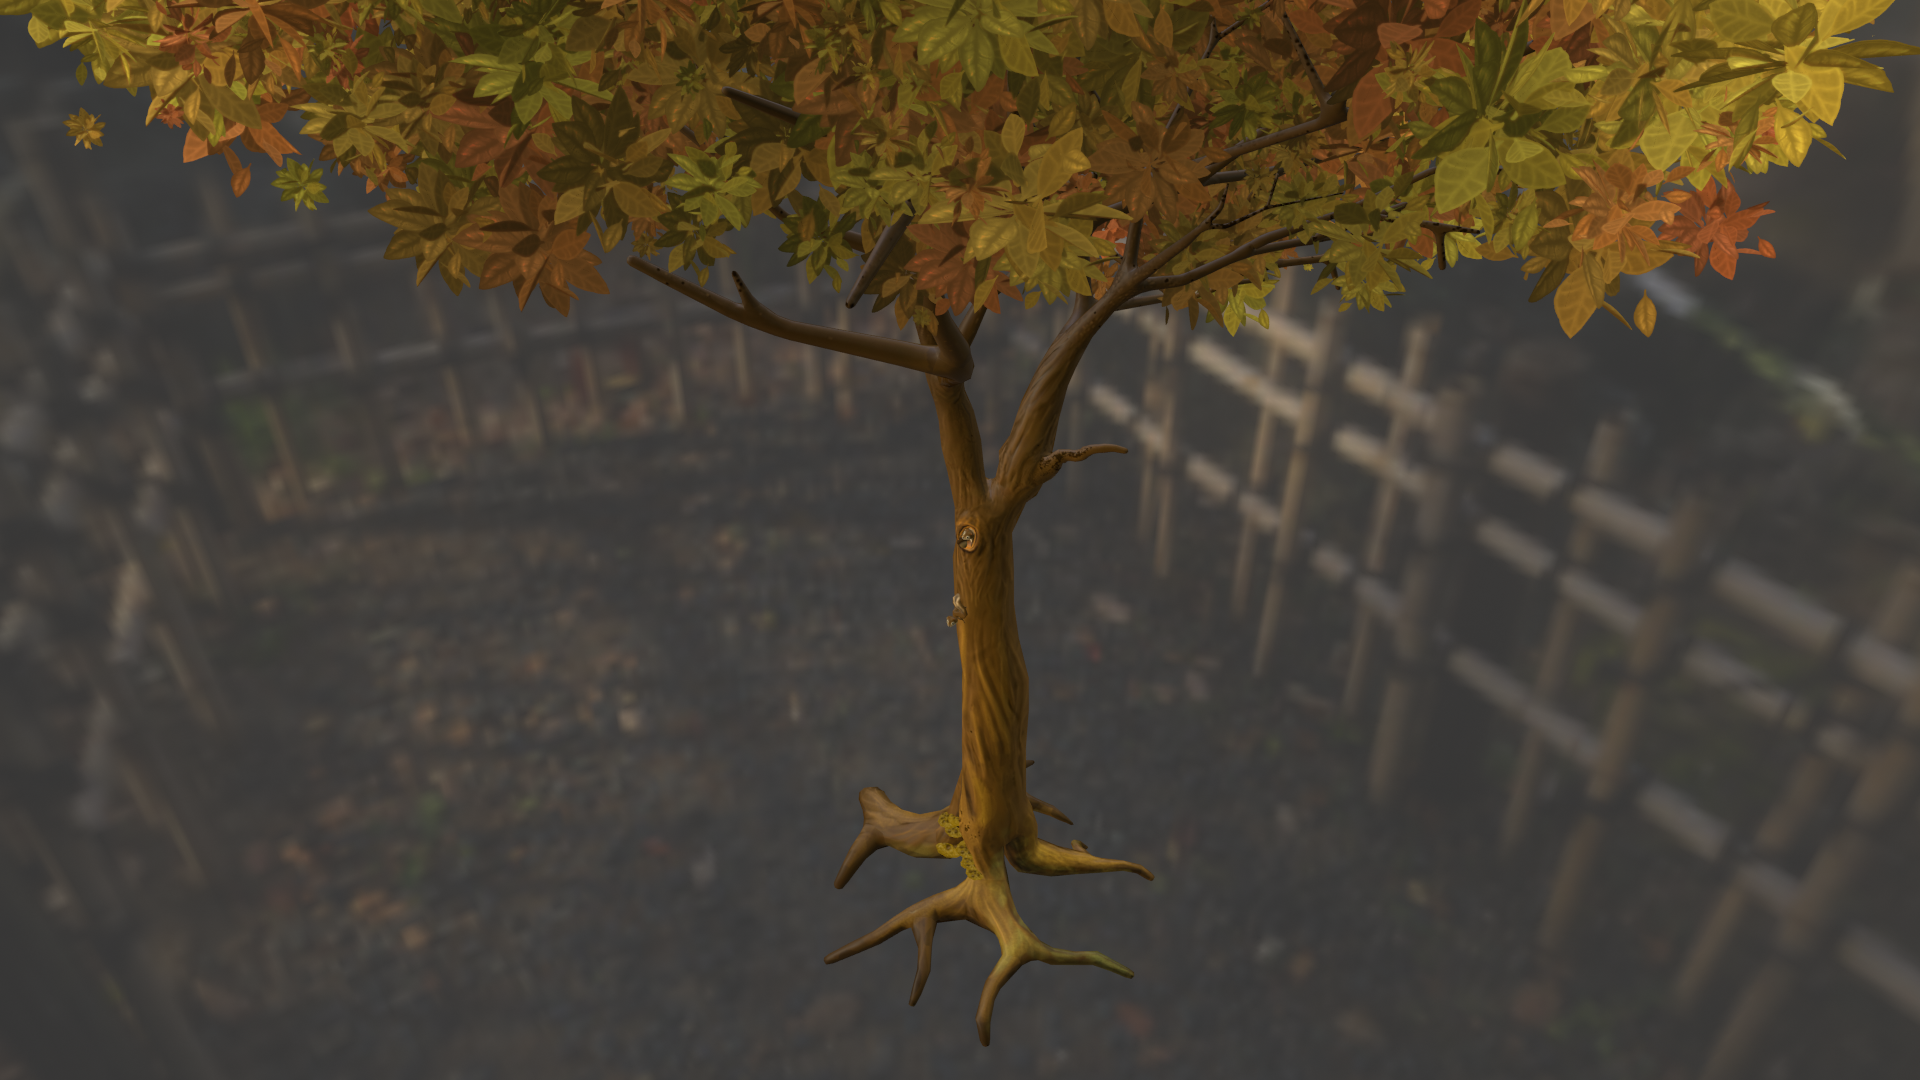
The new Tree B base mesh that helped restore the UV's still retained its unusually high vertex count. Once I knew that I didn't need the Mulitres modifier anymore I was able to create a vertex group that contained the upper branches and twigs of the tree. I used the Decimate modifier with the vertex group and significantly lowered the vertex count where detail was not needed.
Because the sculpt version of the tree bark was so dynamic parts of it did not stay inside the target Low res copy. This overlap caused lots of large and small artifacts. I took the Normal map into Krita and used the clone stamp tool like a spot remover and tidied up the image.
I gave an acorn to Peapod the Squirrel 🌰🐿 and added strange chocolate chip cookie-like mushrooms to the base of the tree. 🍪🌳🍄 I visited a botanical garden recently I took lots of photos of the plants and trees. One really cool arboreal specimen's bark had these half-disc-like growths that looked like cookies. So I made a plan that if there was time that I would include this detail. Look out for the chocolatey morsels, they may be trippy.

![]() ullreym , this tree is incredible! Top notch work sir, and that would be the case even if the squirrels weren't a fun surprise on the other side. Full points for week 4 and then some!
ullreym , this tree is incredible! Top notch work sir, and that would be the case even if the squirrels weren't a fun surprise on the other side. Full points for week 4 and then some!
One minor issue I see is a pretty clear seam where the trunk forks right above Peapod. My guess is that it was caused by some of the manual fixing in Krita, and it should be fairly easy to fix in Blender. You can just grab the smudge tool and smear each texture across the seam:
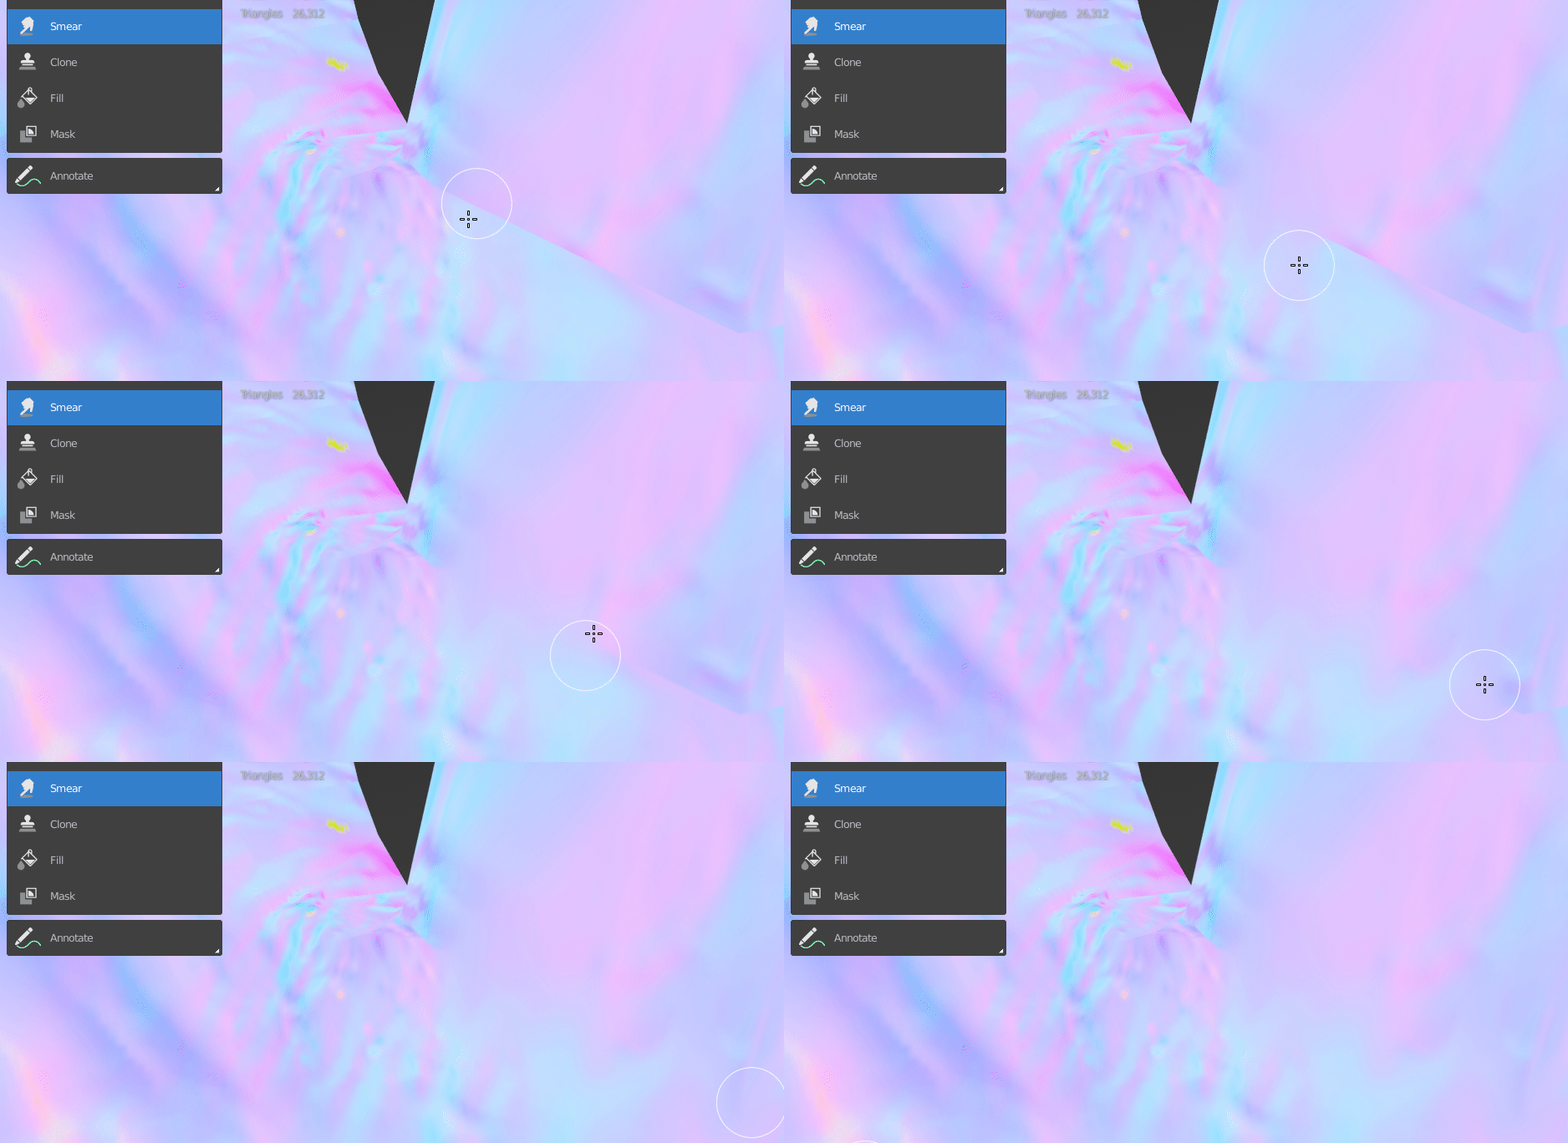
Once that's sorted I think you are golden. Nicely done!
@jlampel What a cool technique! Smoothin' the UVs is so fun! I went through and found other seams that I could even out as well. Thanks!
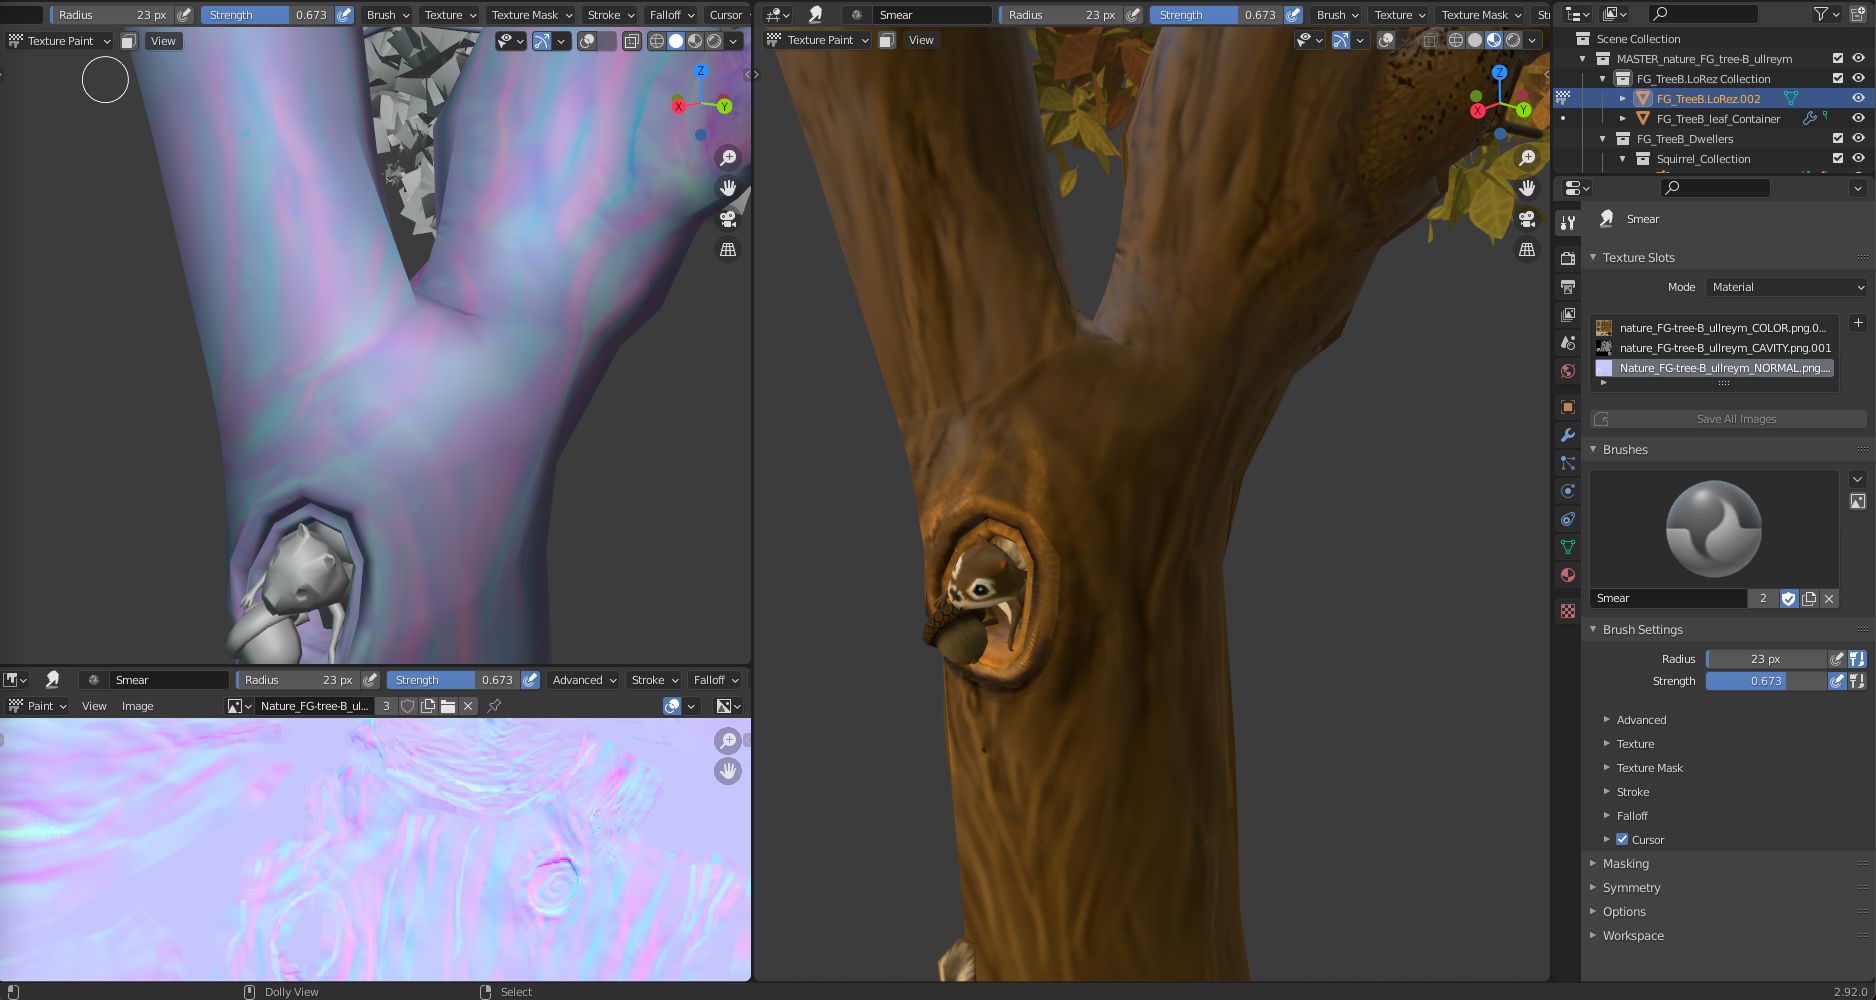
I have sync'd the new updated files to Google Drive and connected the textures to the geo.
Homework Submission - Week 4 - FG Tree B - Turnaround
@theluthier and @jlampel
Assets: Nature E: FG Tree B My Work in Progress
It has been a marvelous month working with everyone and having an excuse to dig into Blender some more. I certainly do learn better by putting the knowledge into action with these projects. Thanks, CG Cookie!