Hello everyone.
I coming here for help.
I want to model this mask, but im stuck i dont know how to blocking out.
I tried to make it from poly extrude with the images in from, right, back and bottom, but i can not make it perfect rounded shape :/
How you will blocking out that mask? Just the base shape of the mask not the details.
Thank you.
Rob.
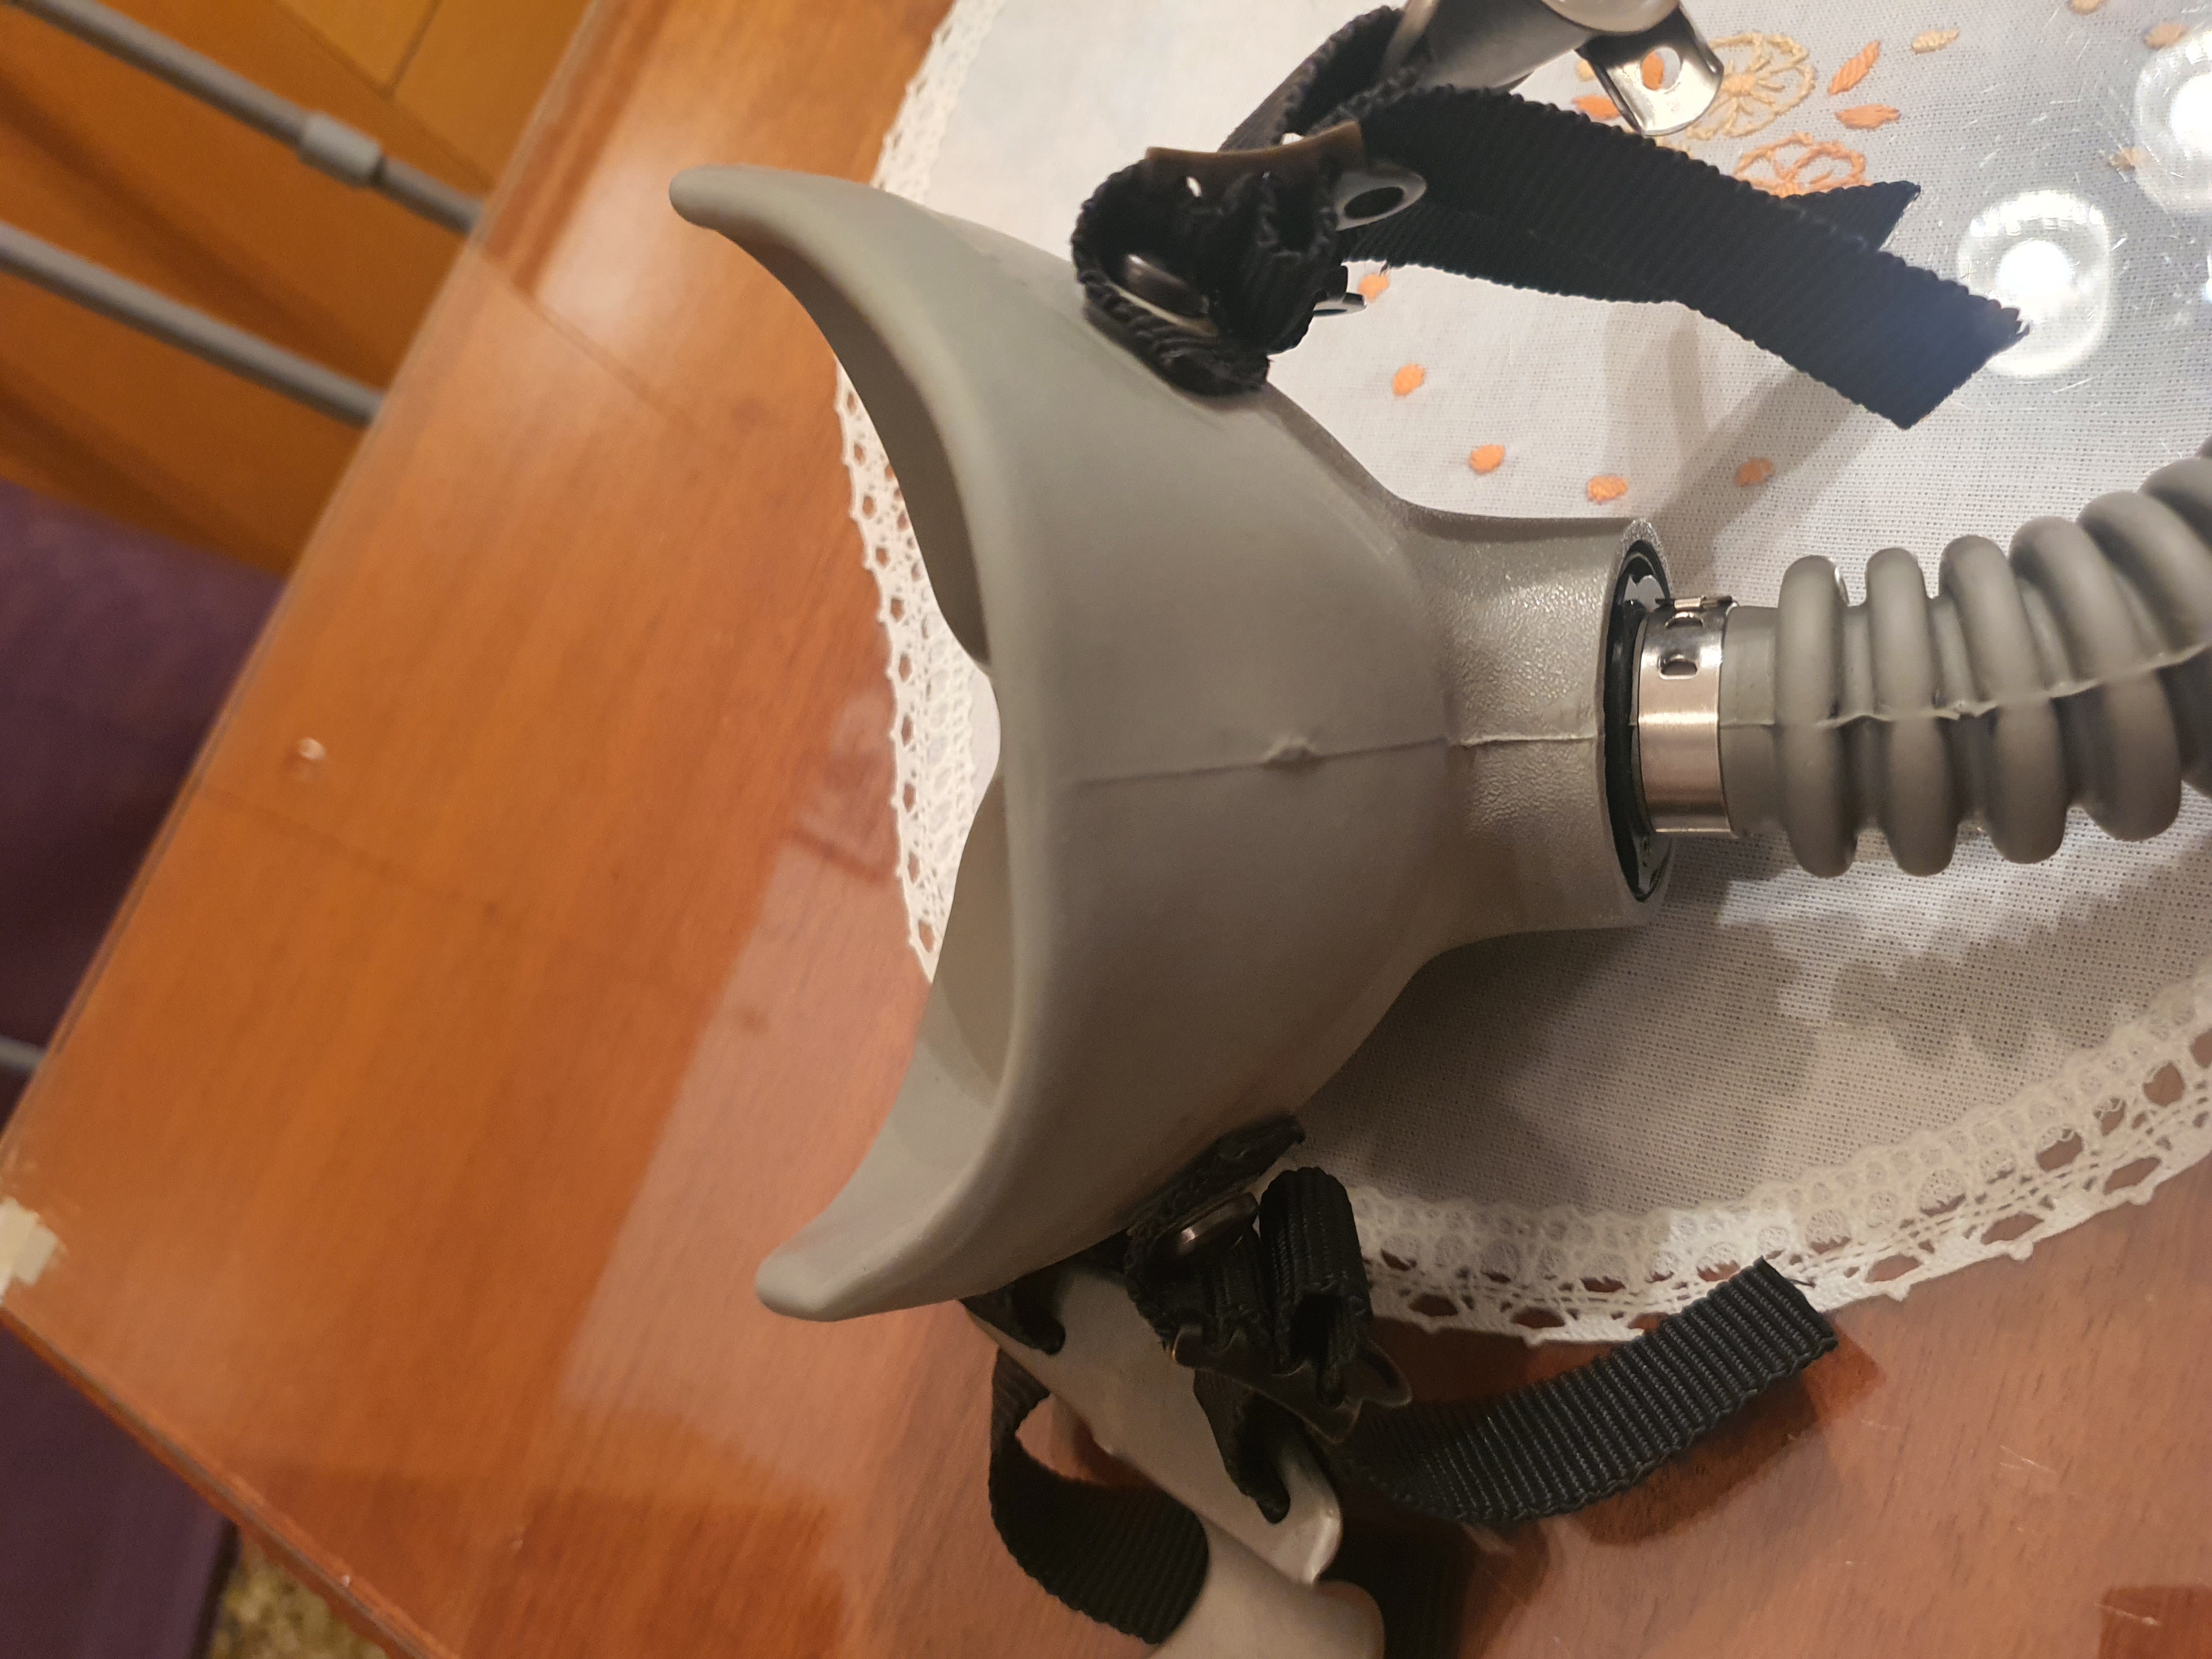
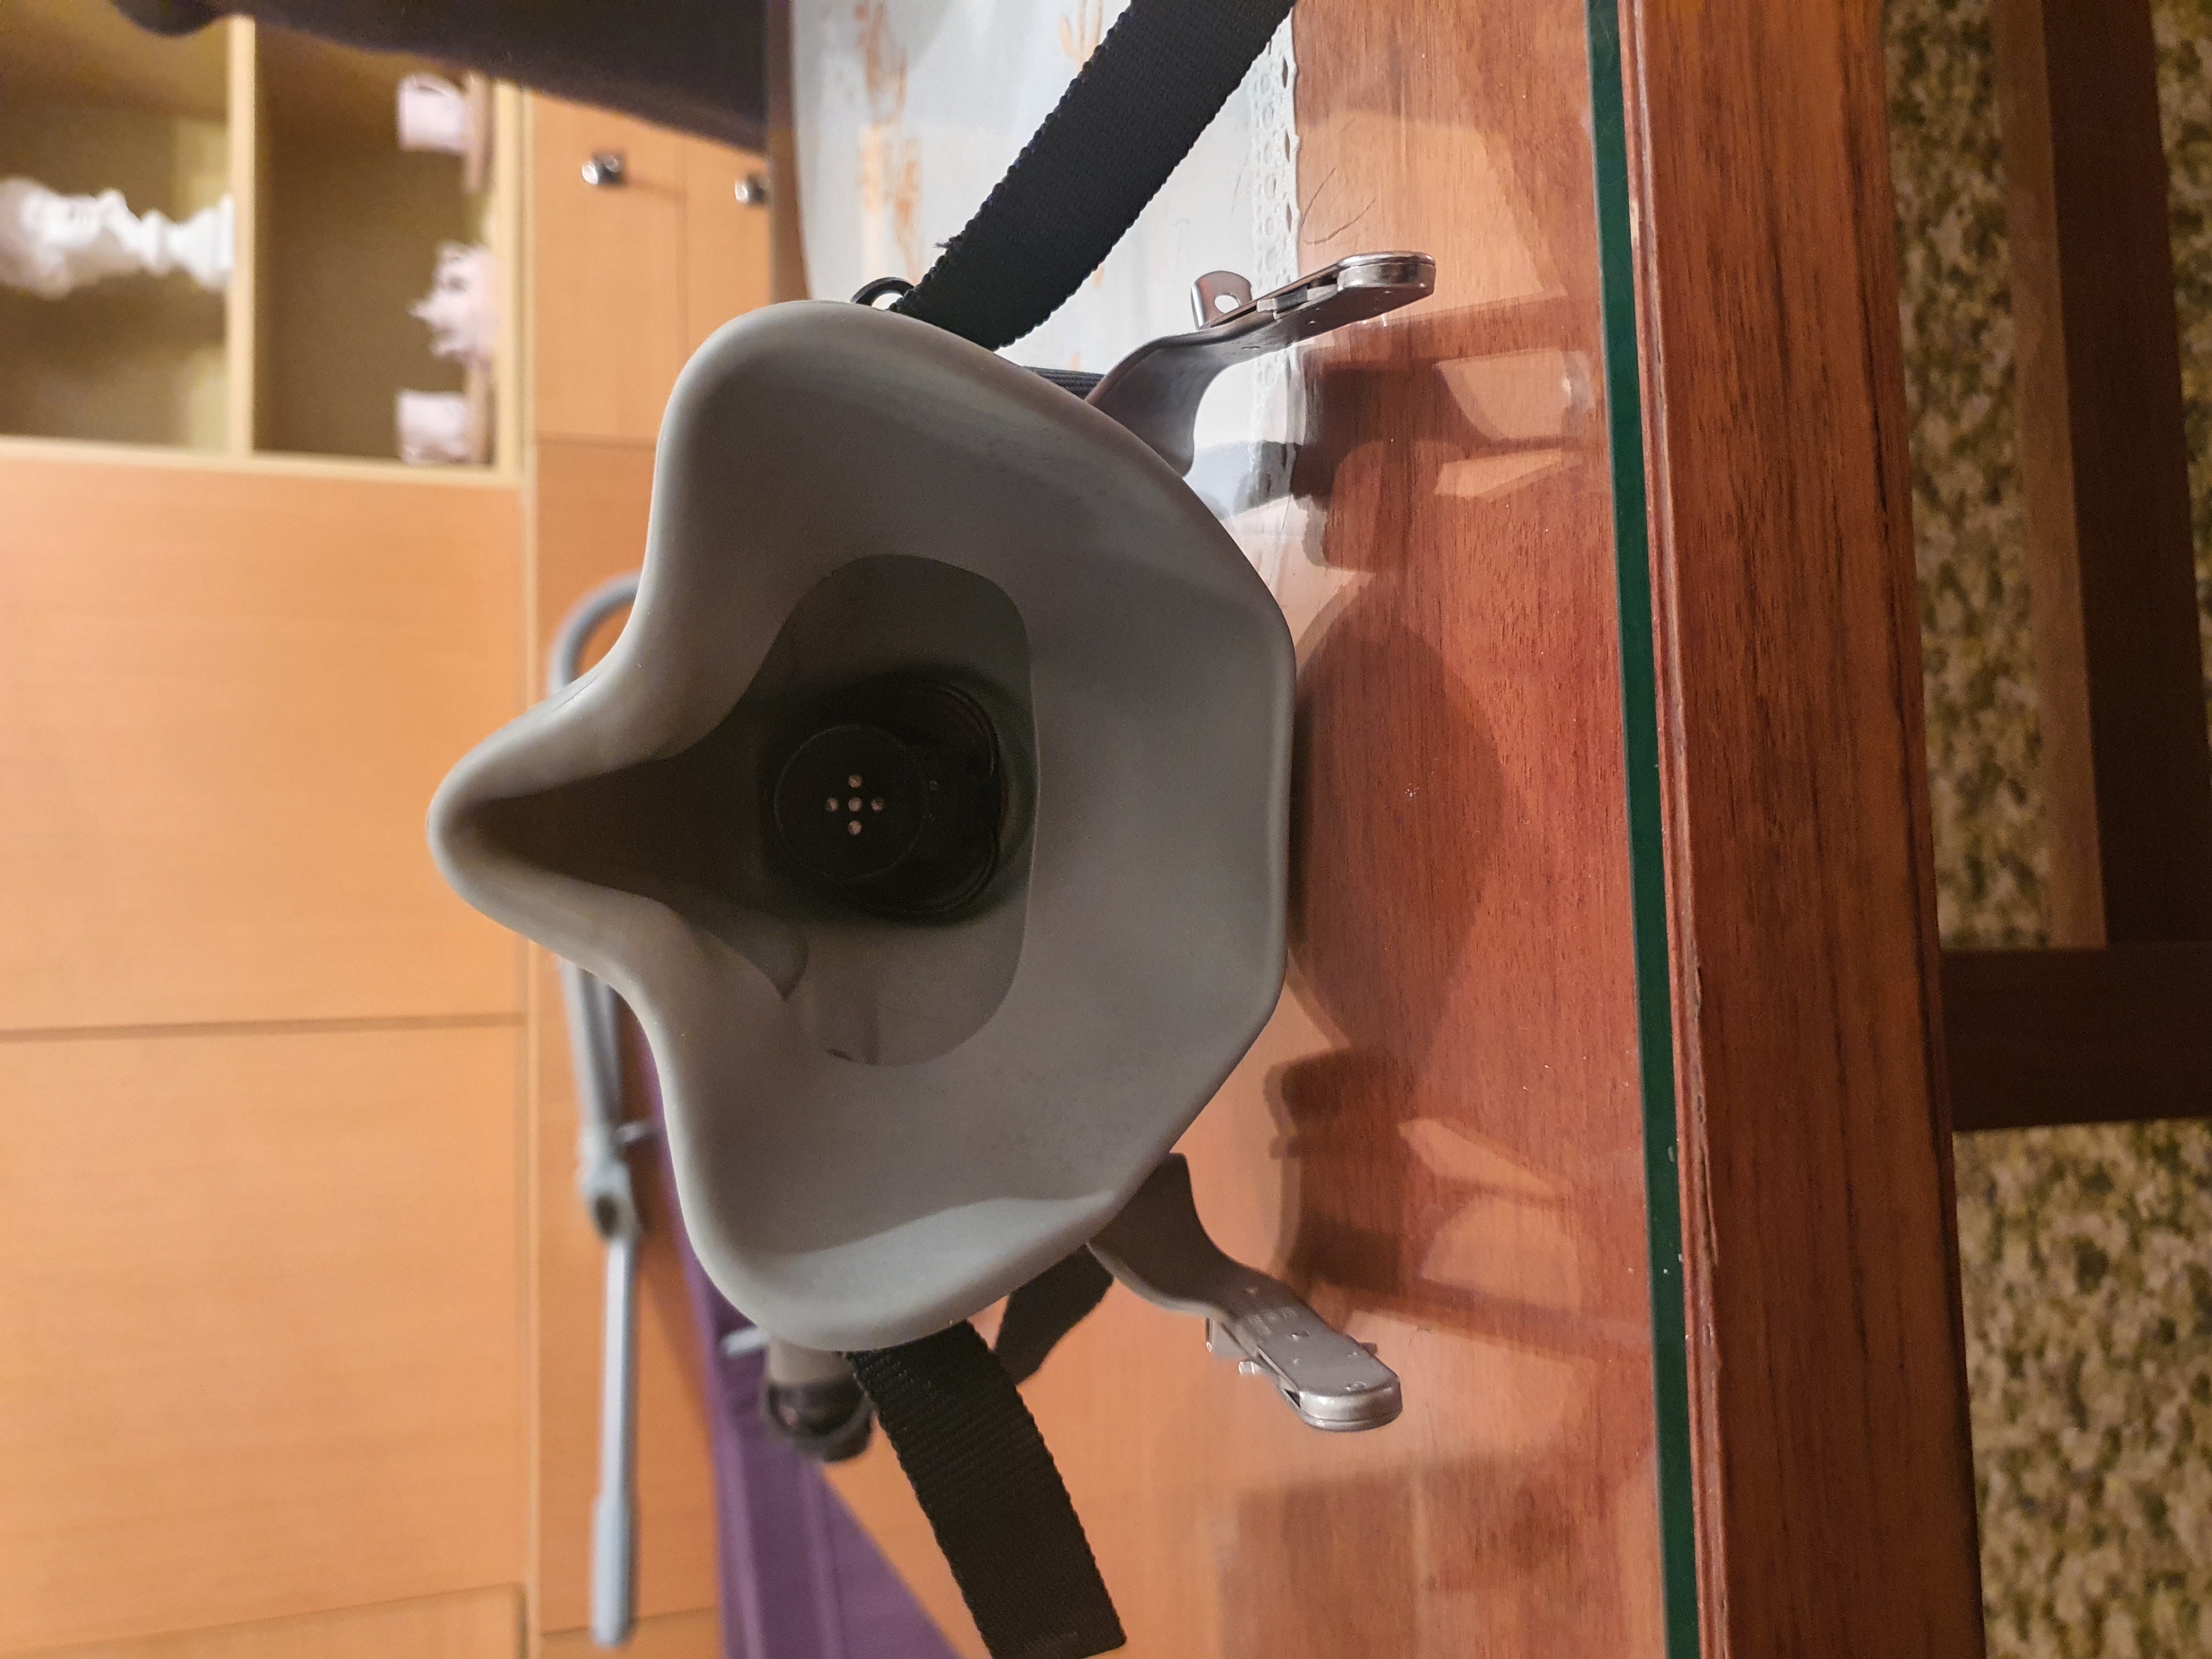
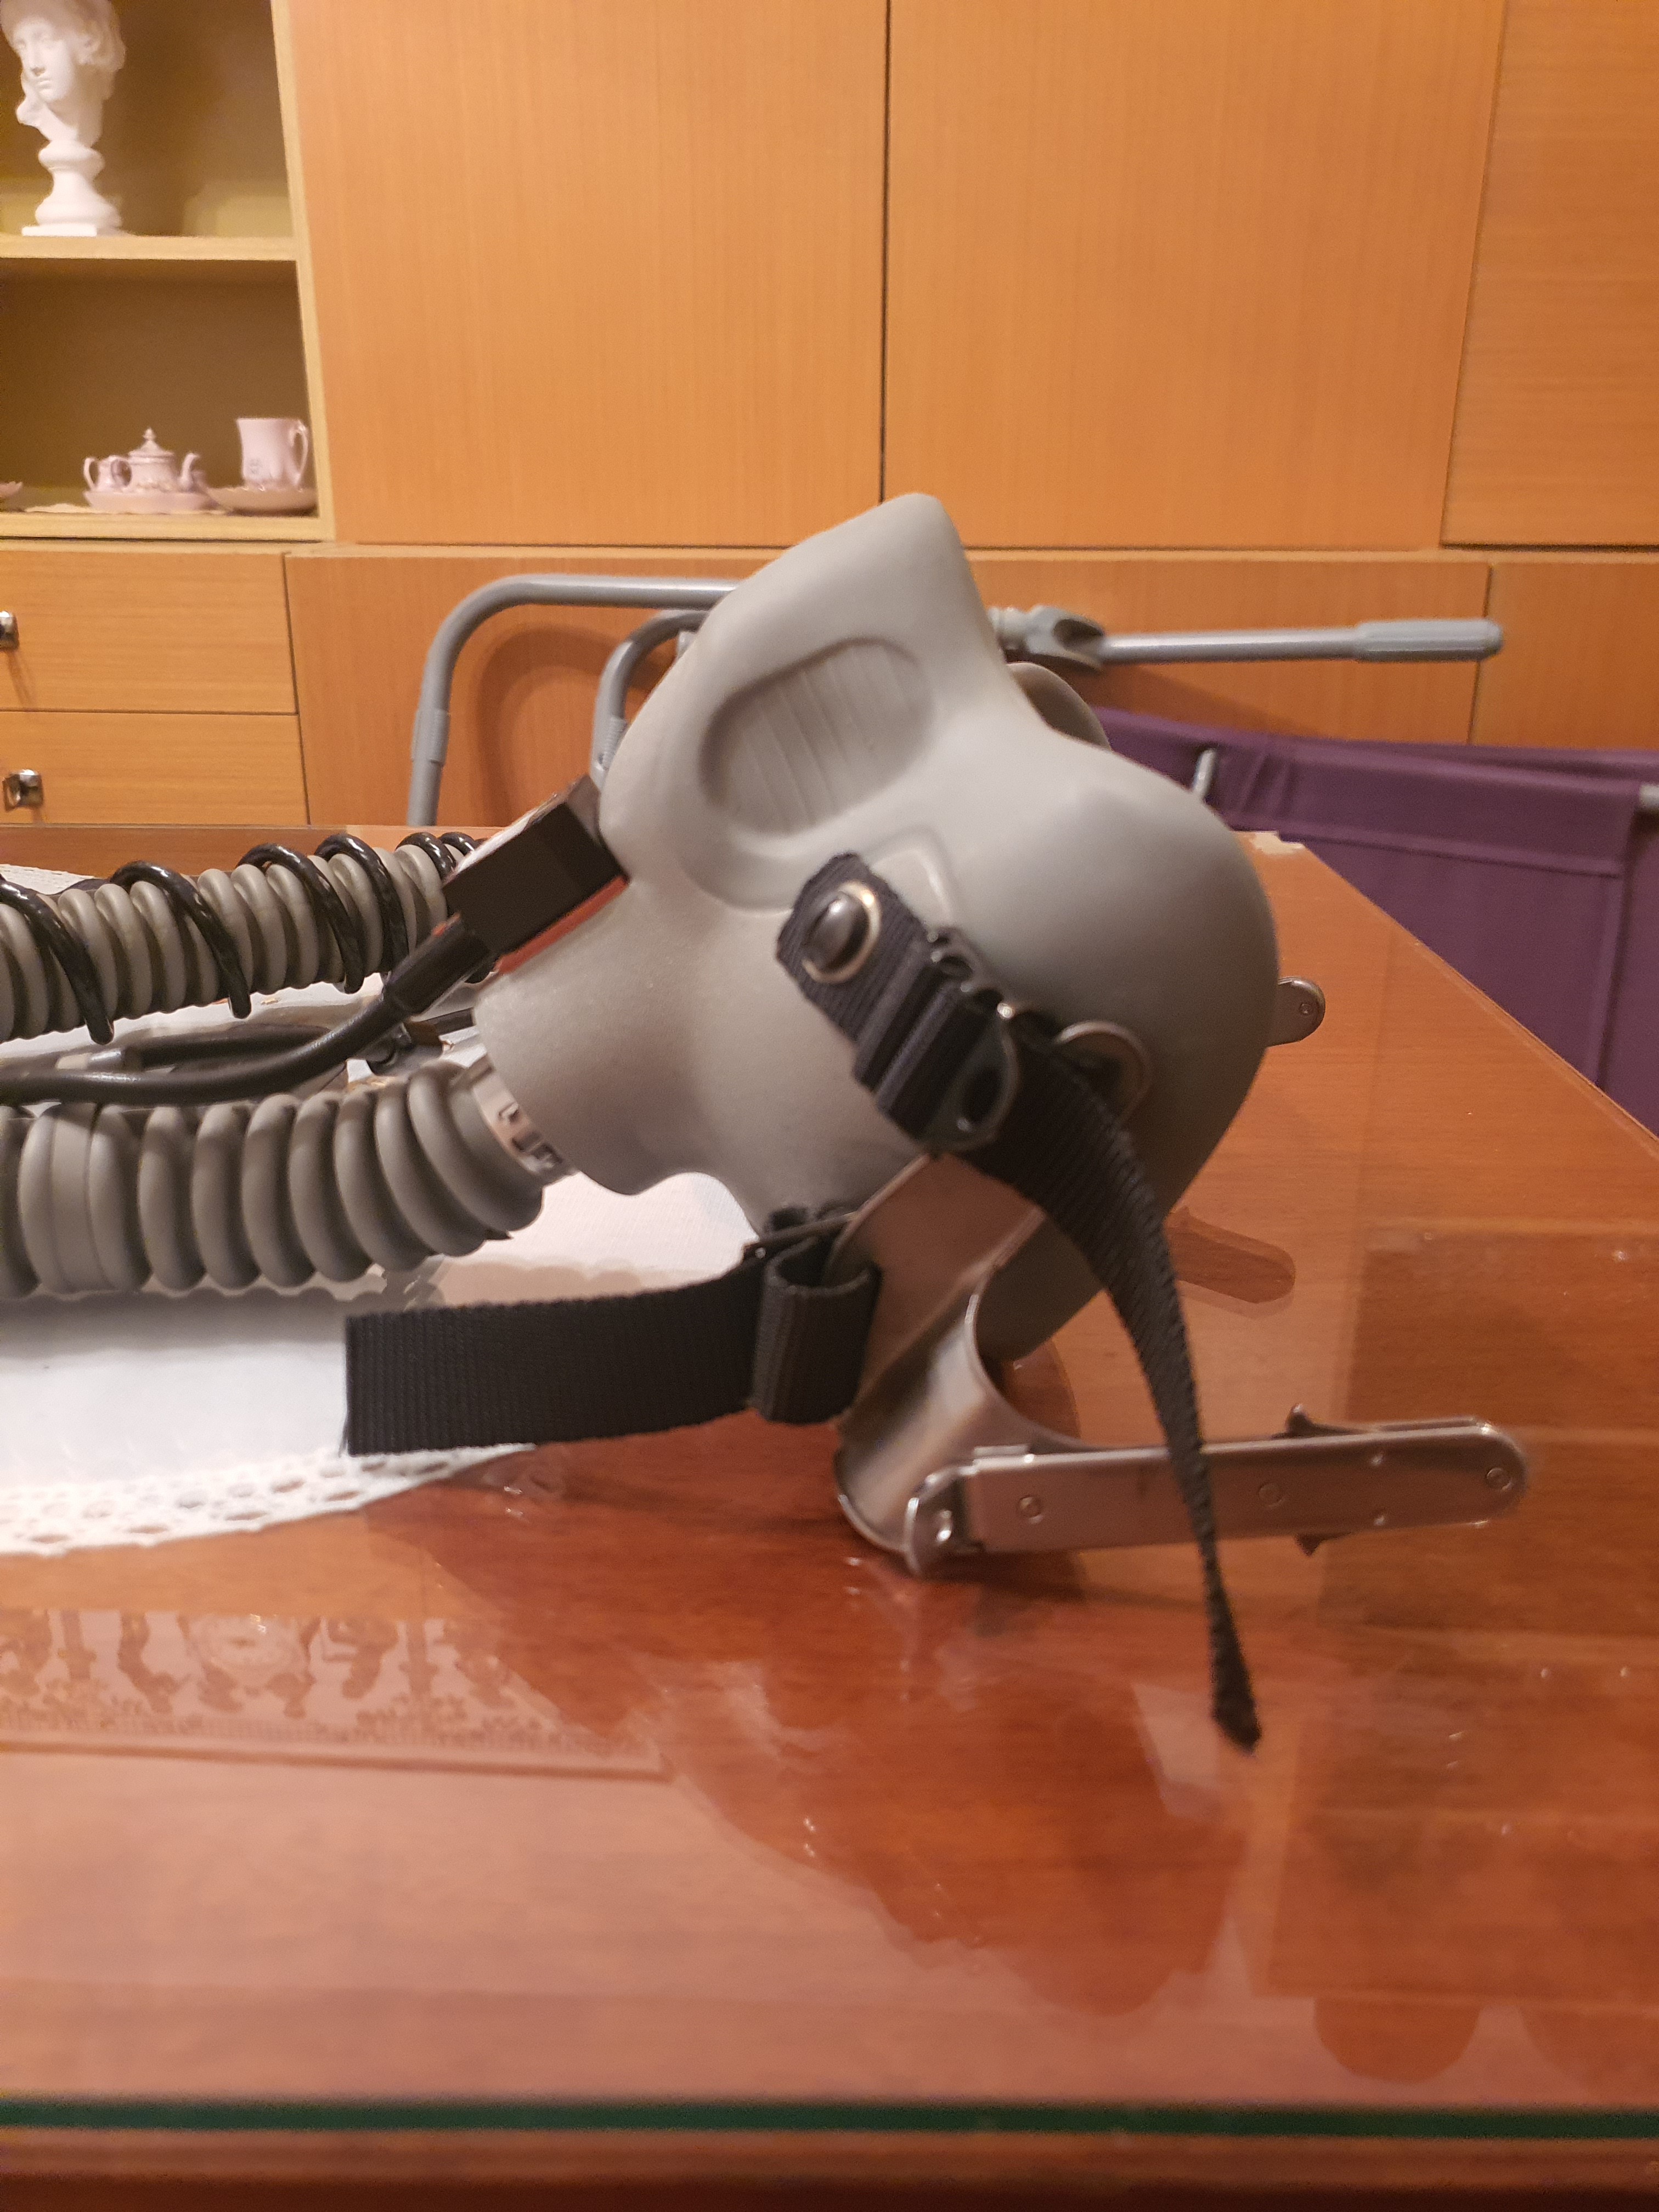
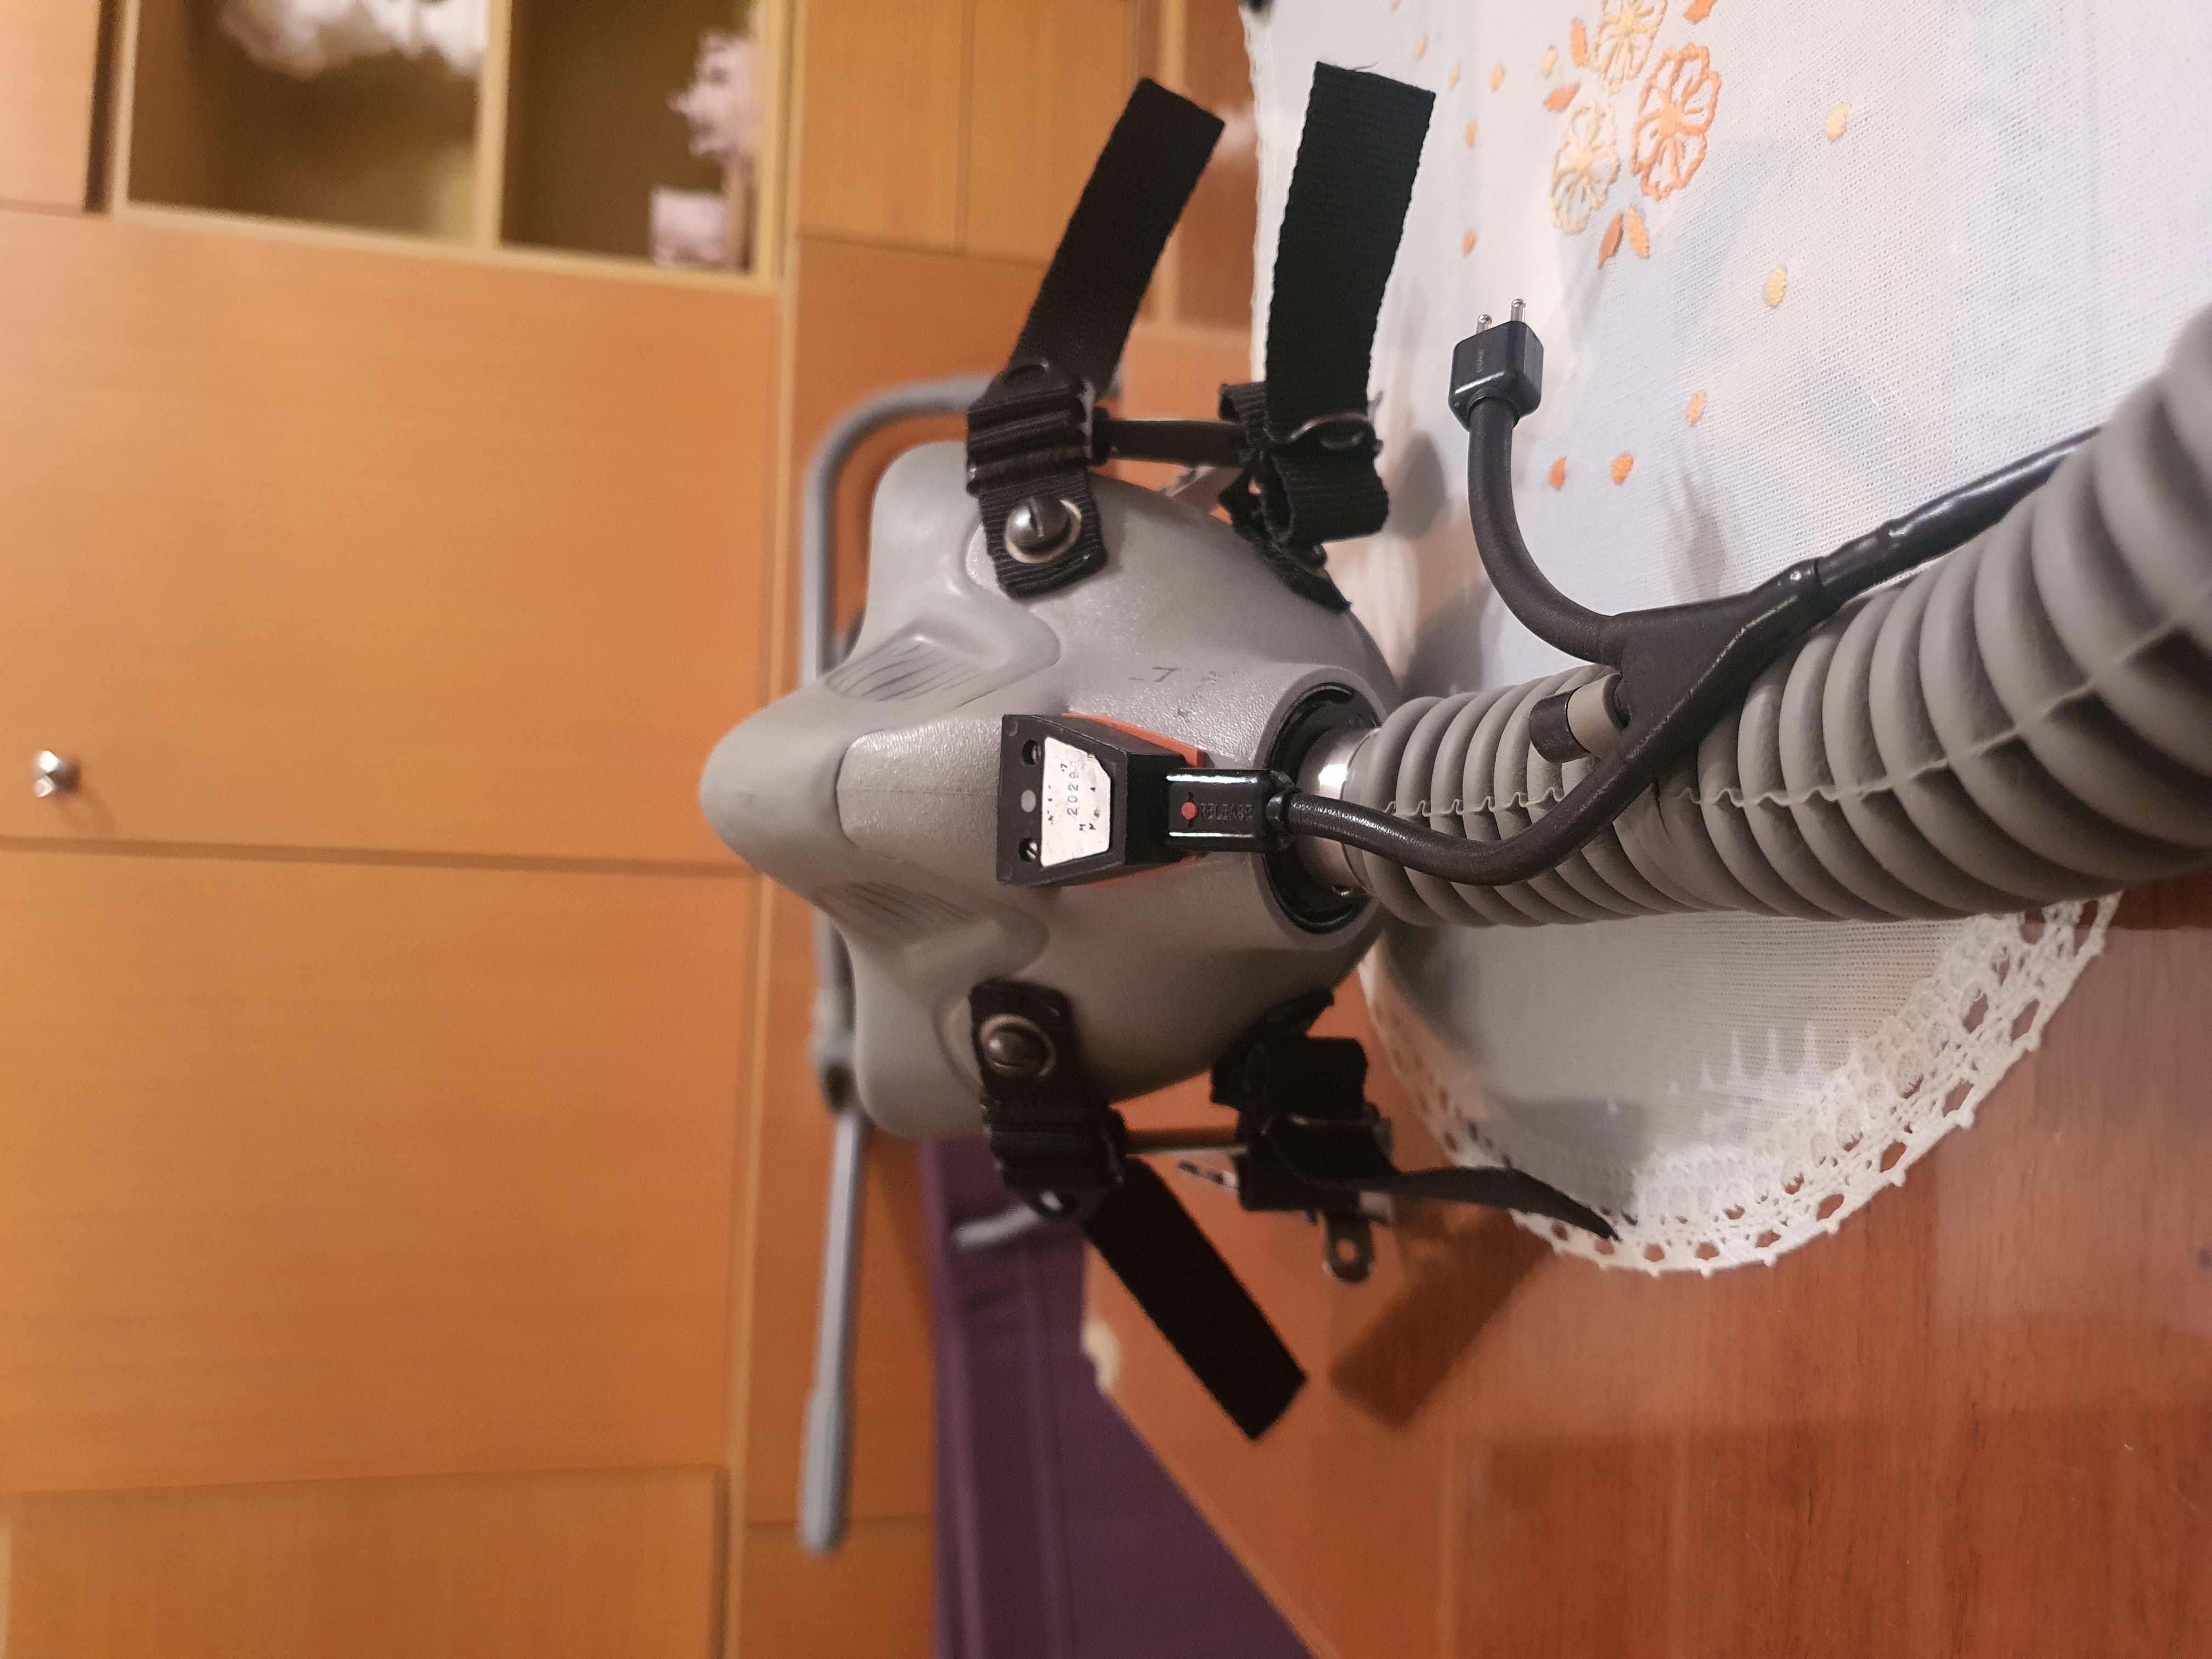
@rogi92 Hi Rob, my first thought was to take a sphere into sculpt mode and turn on Dynamic Topology and just have fun carving and building up the shapes and surfaces. Once you are close to the finished product, use retopology techniques to bring it back to its hard surface glory. There is an older course that touches on these topics. The theory is there, but the version of Blender is a little out of date. https://cgcookie.com/course/modeling-a-sci-fi-helmet
The other thought is similar, but using primitive shapes like spheres, cones, cylinders and place them together so that you get the overall shape you want, combine them into one object, and then retopologize that combined object.
I hope that helps. Great photo references, by the way!
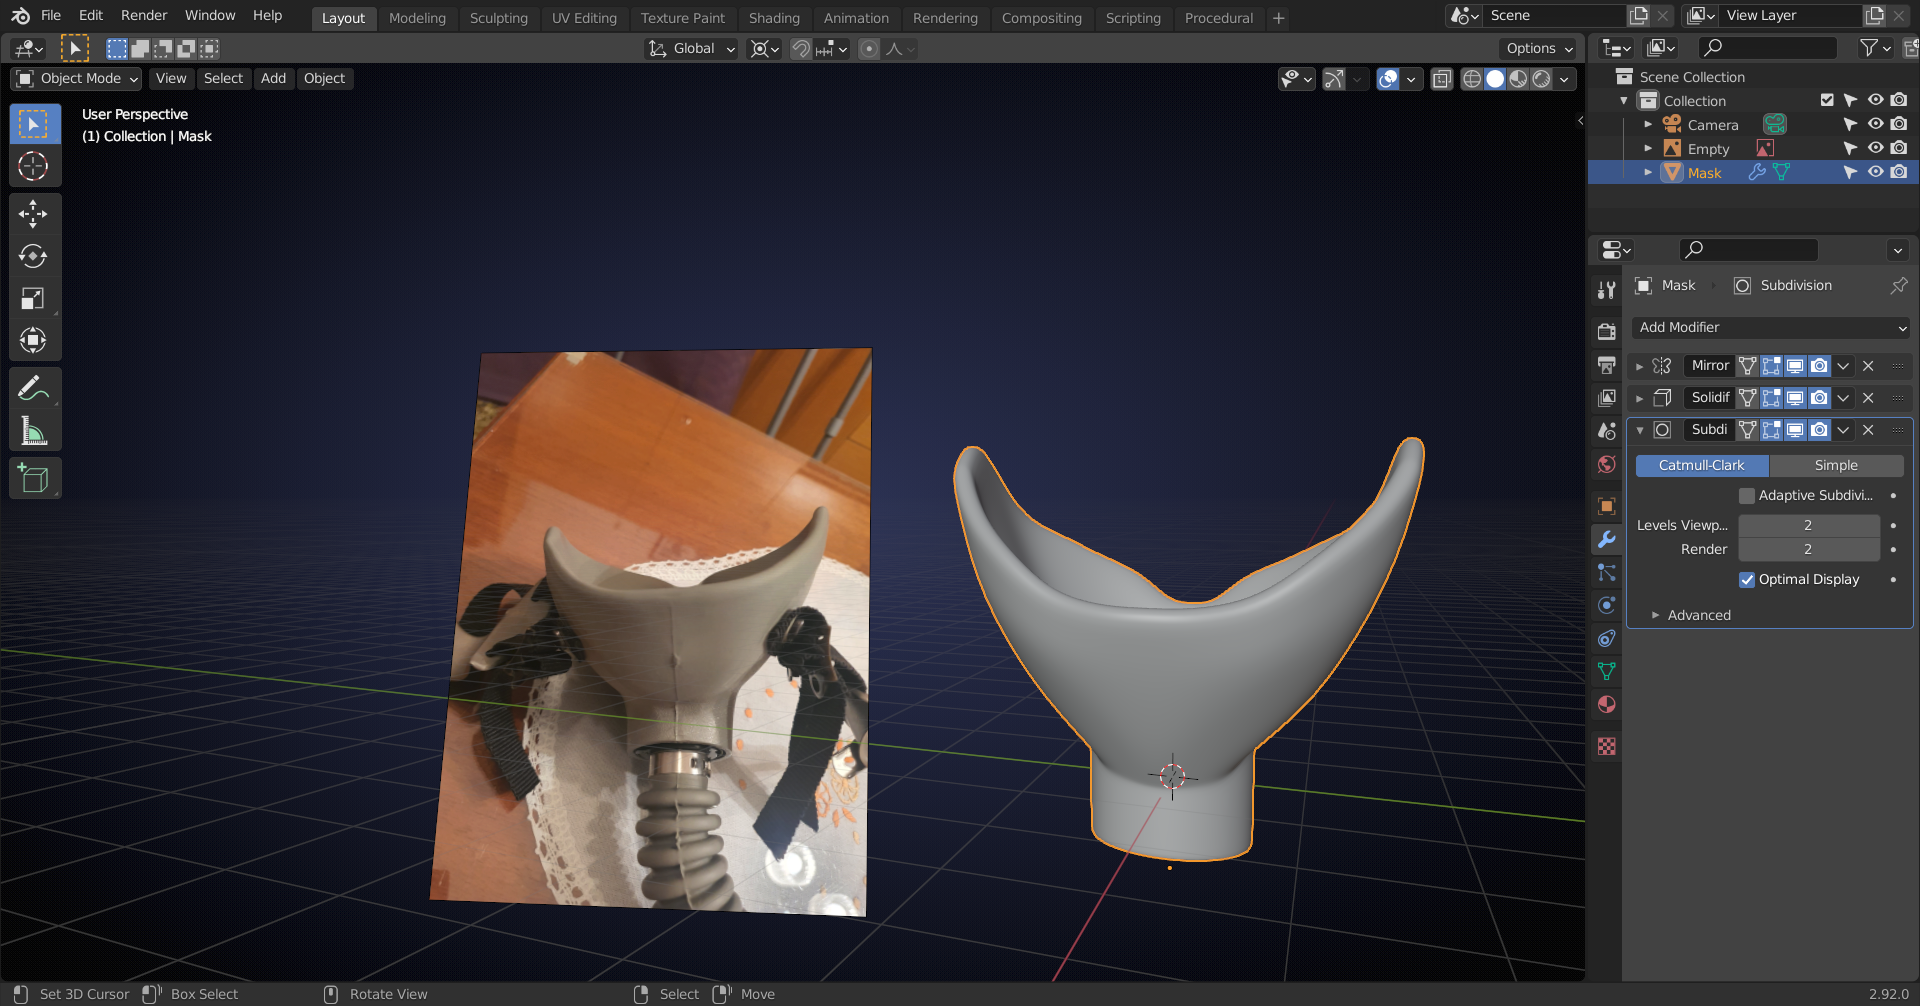
I would use your method, probably and then use proximity loops and Subsurf Modifier to get those round edges. Something like this (although this is not the correct shape, because I only used the first reference, didn't see the other ones...):
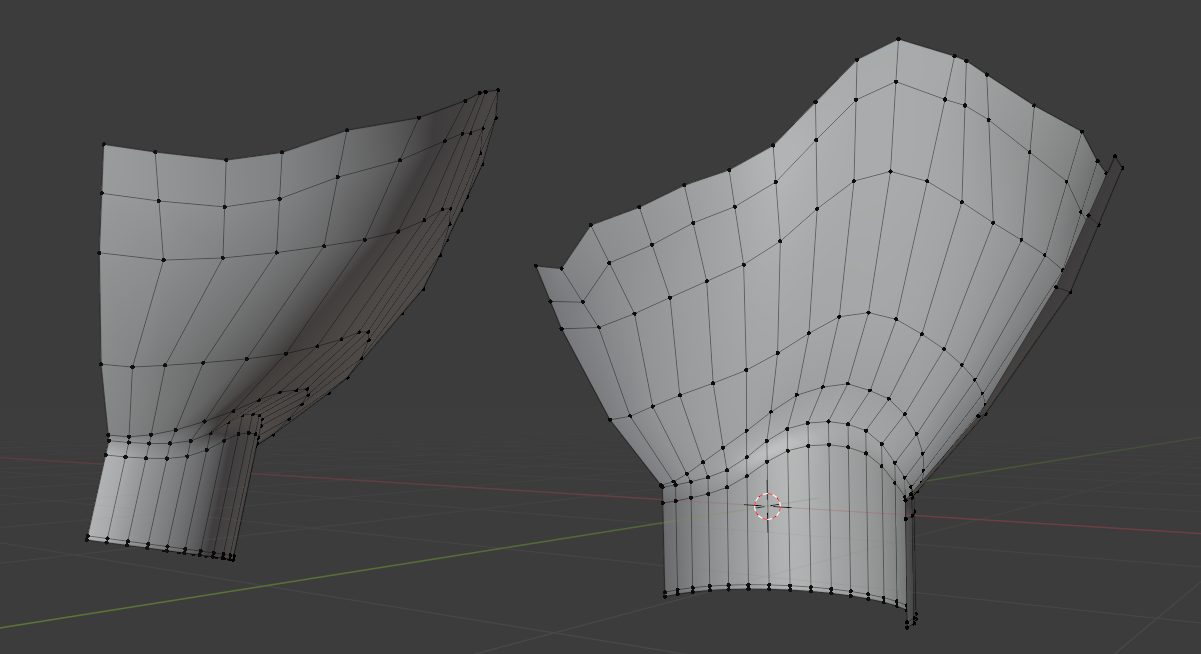
In Edit mode, without Modifiers:
But what ![]() ullreym proposed are also great ways to do this.
ullreym proposed are also great ways to do this.
The details will be a lot harder than the basic shape!
My advice is to try and break down the object into basic shapes and go from there.
A base mesh in my opinion is basic shapes (or primitives, cube, sphere, cylinder, etc. etc.)
My first thought when I saw this would be to sculpt from primitives as ![]() ullreym mentioned.
ullreym mentioned.
When starting a model of anything I normally ask myself 'which primitive object can I use as a base'
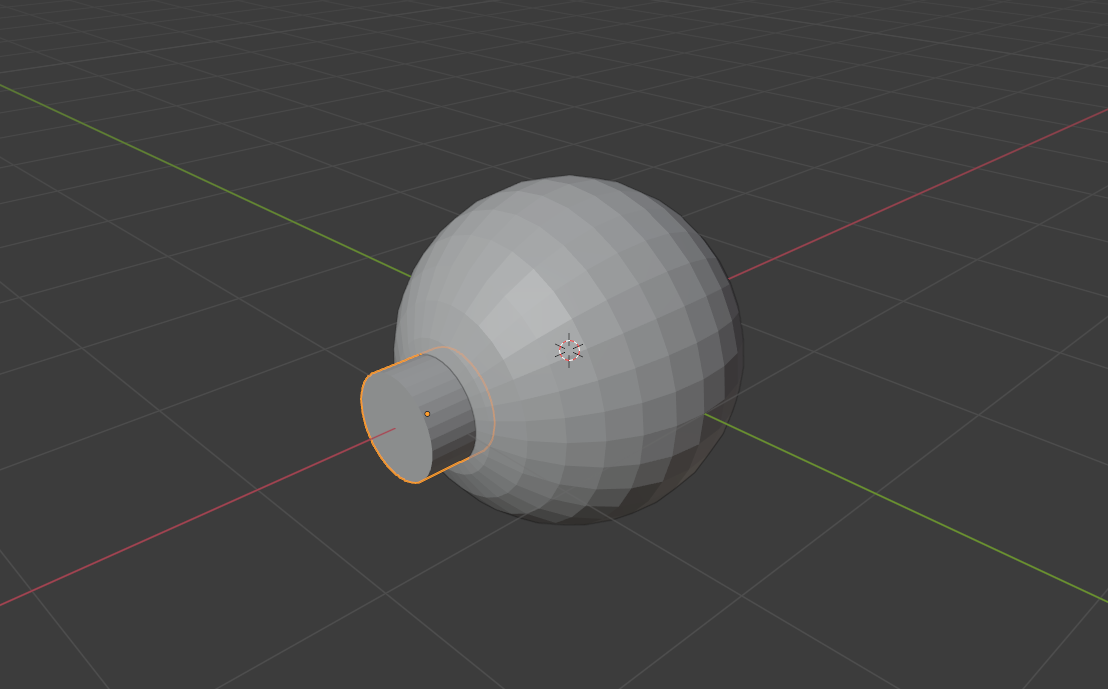
Here I added a sphere, rotated 90d on the Y axis so the topology flows towards the cylinder I added next (these are with the default of 32 verts, if it's too many or too few for your purpose change it to suit your needs in the pop up window when you add the objects, but use the same for the both objects to easily join the two, if mesh modelling and not sculpting, but I would advise make it a habit in case you change your mind later). After this I would delete the rear of the sphere and adjust some verts to get a closer shape to the reference.
That's a tricky shape! There are a lot of different ways you could approach it, and good ones are mentioned above, but I would probably start with the parameter of the back of the mask. Get that shape fleshed out with just edges, then extrude forward to make that first loop. Then, add a circle to define the front. From there you can connect the top, bottom, left, and right sides. Once you have that it's just a game of finding how to connect the pieces.