I have an uneven Surface where I would like to apply a Text. I tried boolean, snap, nothing seems to work. any idea how to apply text on an uneven surface?
thnak you for your help
Martin
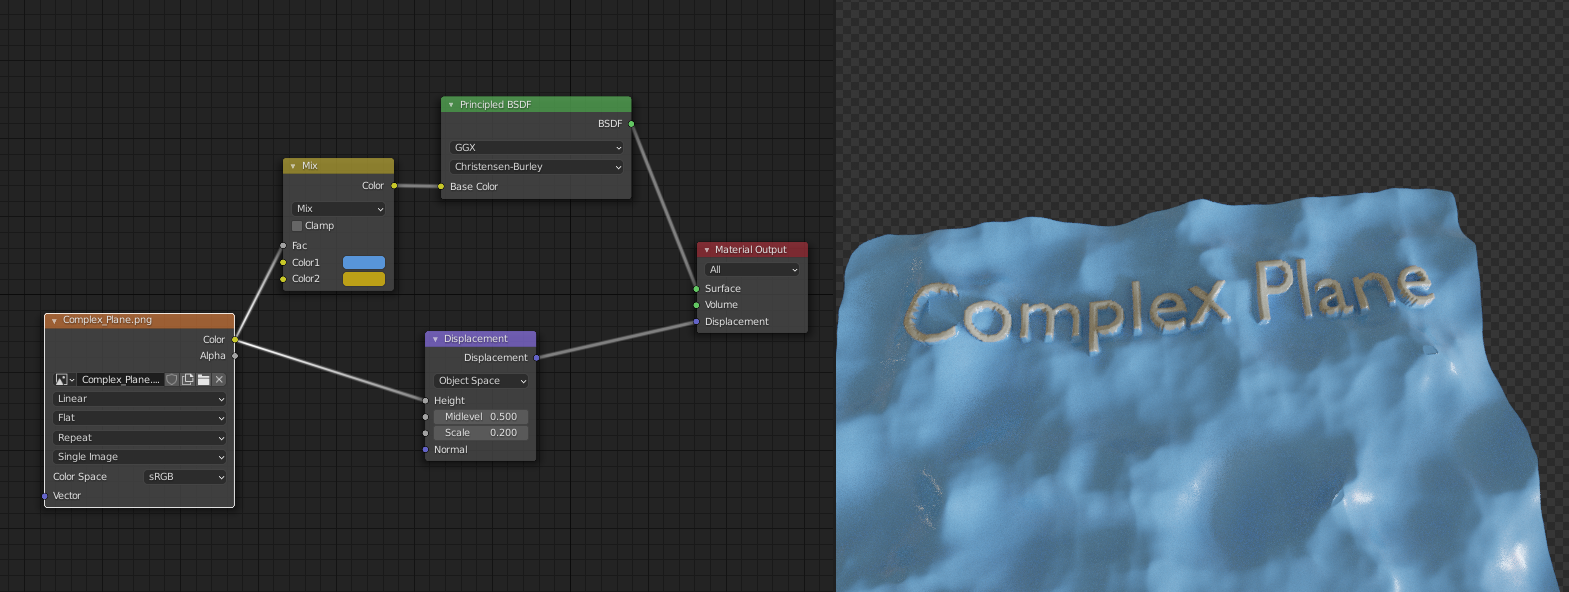
Totally depends on the exact situation, but maybe you could make an Image of the Text and then use that as the Height of a real Displacement:

The success depends on the amount of geometry of the surface. Here I used a Black and white image, but you can blur that a bit of necessary.
Sounds great, I will def give it a try. Thank you so far.... just have to figue out how to make an image...
Regards
Martin
I just use an Orthographic Camera with a square output (higher resolutions are better for the result). ALT+G and ALT+R and then move it up a bit. Set the World Background to black and remove all lights and give the Text an Emission Shader, pure white. Then render (I use Cycles with 1 Sample...).
Sir!!! You are indeed a Champion.
thank you very much, you saved me a lot of headache...
god bless you
Martin
The problem with trying to deform a Text in general, is the topological nightmare that forms the Text.
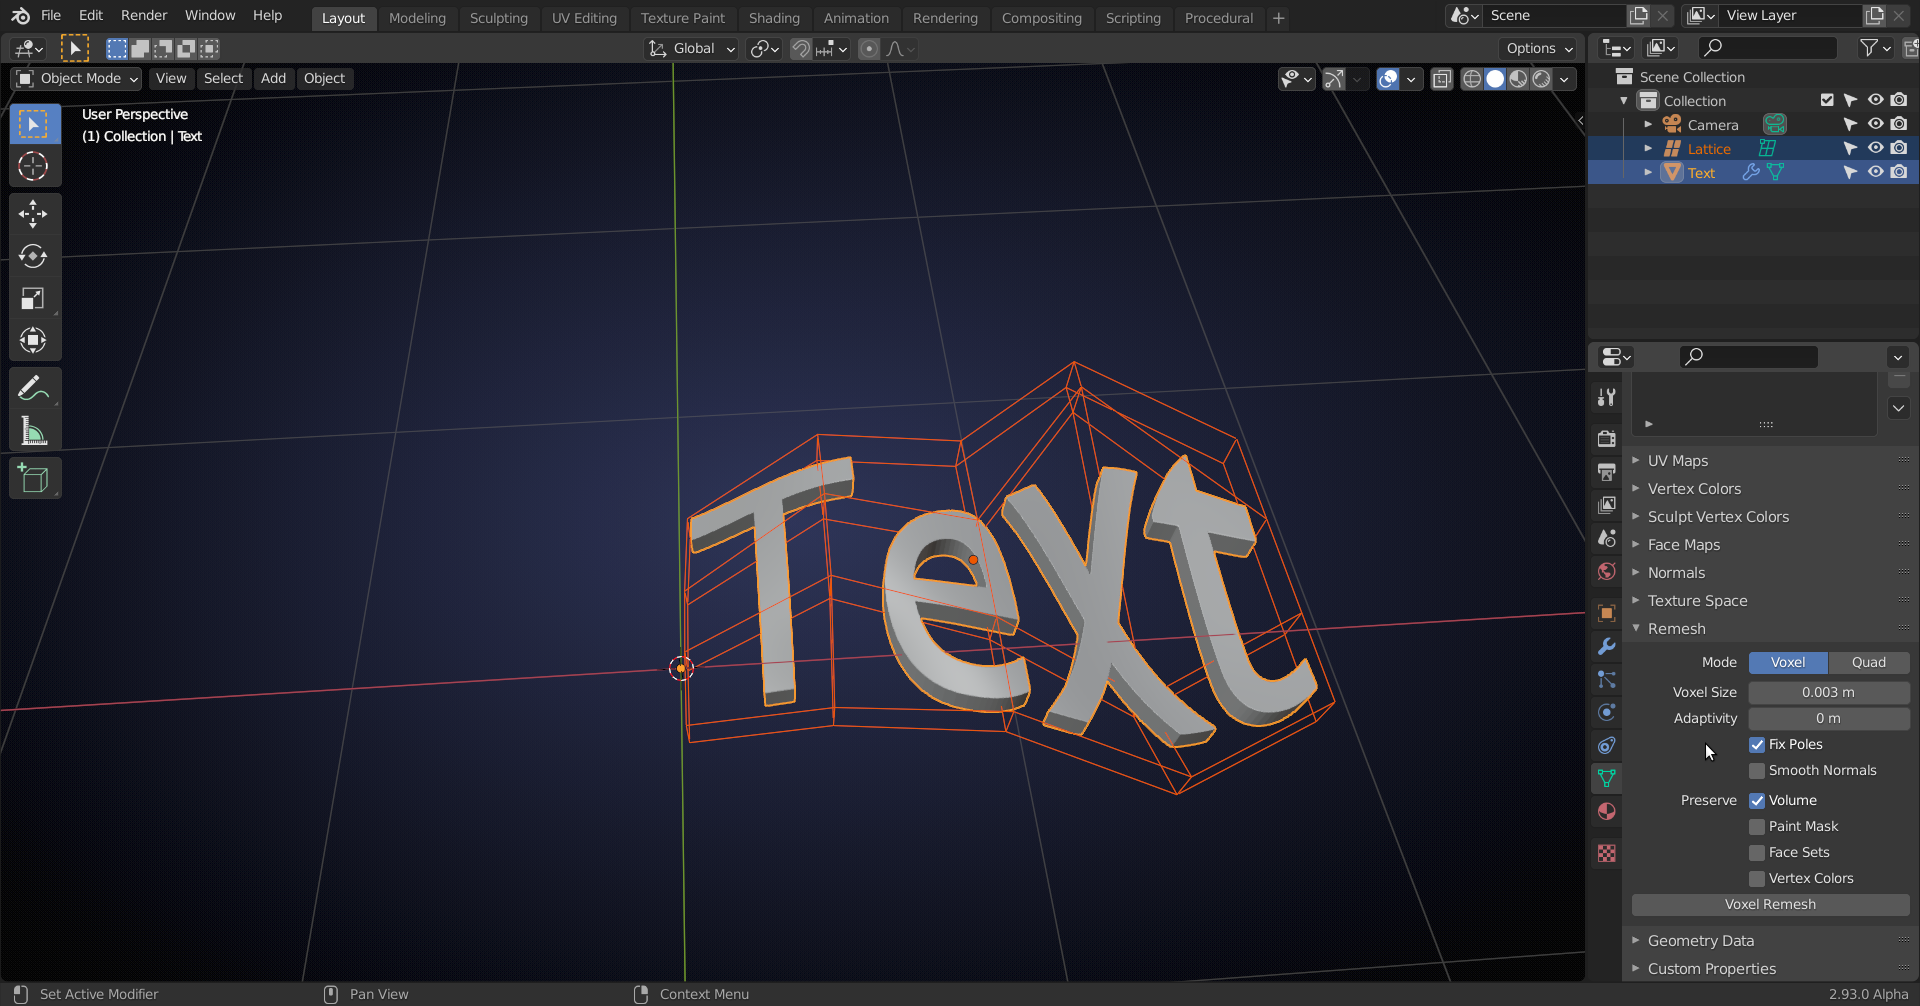
So a completely different approach would be (Convert to Mesh first) to retopologize every letter by hand, or use the Voxel Remesher with small enough Voxel size:

This is however not ideal when 'conforming' a text to an uneven surface. In that case, you'd want a flat Text mesh, Shrinkwrap it to the Surface and then add a Solidify Modifier. I tried using the Quadriflow remesher for that, but couldn't get anywhere near a desired retopo.
This looks very complexe, no clue what you have done there. What would be in the Group Outputs...? But it looks more promising then the other...
this seems to scream for a tutorial... ;-)
Hi Martin,
Just playing around with the new Geometry Nodes system (newest home build version of Blender).
It's a promising, but very unintuitive system; I try to get a grasp on it before it gets too complicated :)
There are already a few tutorials and demos around, but I found Erindale's Livestream: https://www.youtube.com/watch?v=g7EGSCo1YBI the most useful so far.
Going from left to right, I subdivided a Plane ten(!) times (this makes more than a million Vertices!). Not a very practical solution..
Then deformed the subdivided Plane with a Clouds Texture (taking a 'random' value between 0 and 1, using the Clouds (sort of Noise)Texture, and multiplying that value by 0.259 (more or less arbitrary number) and then adding that result to the Z-value of each Vertex...).
Then used the B&W Image Texture of the text and multiplied those values (zero (black) and one(white)) by 0.01 and added those to the Z-position of the Vertices of thew deformed Plane.
You won't be much wiser now probably, but the whole Attributes workflow is a bit complicated.
Definitely needs a good tutorial!