I have been at it for many days and countless tries. I must have played the video several dozen times. I tried every combination for keying; keying in Pose mode and keying in Object mode; keying different sequences; I even tried using multiple parents. In the end, after I successfully executed the "hack", every frame behind that goes haywire.
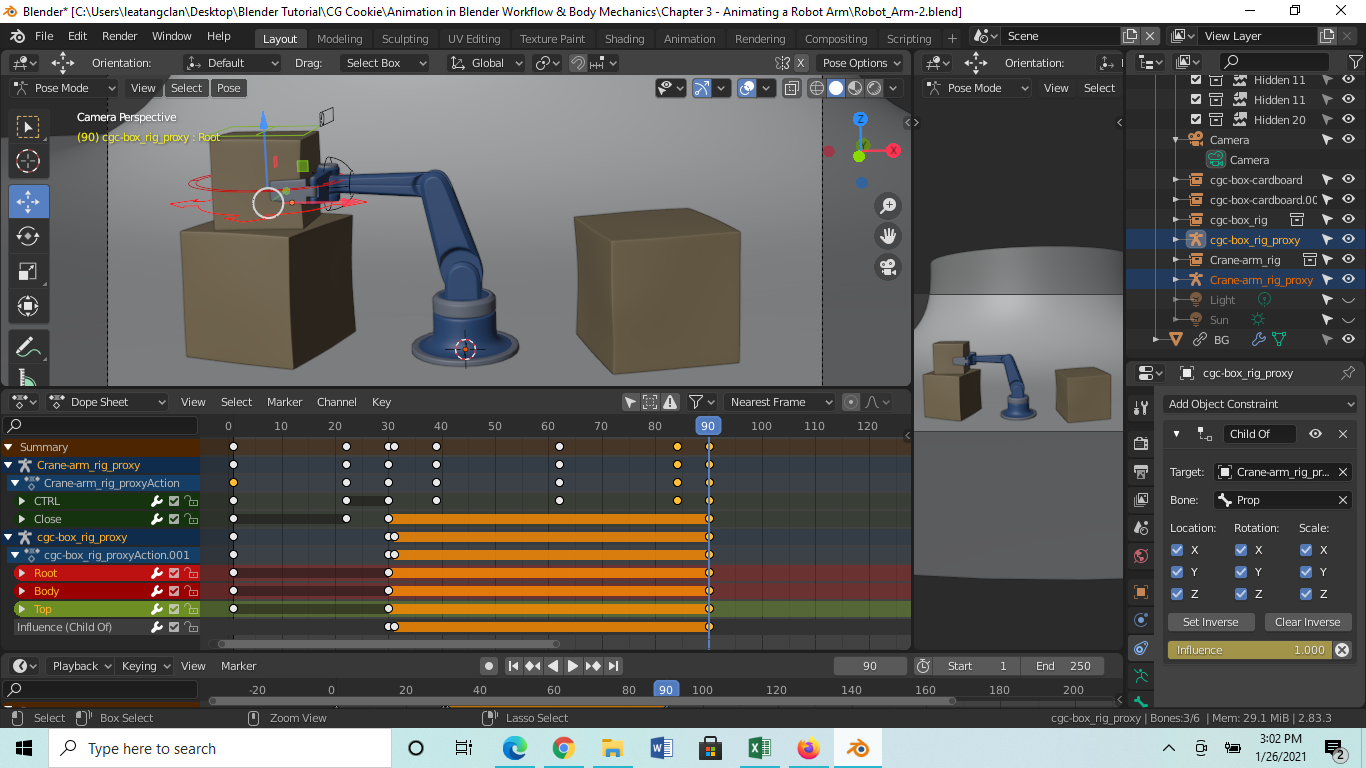
Here is frame 90, where everything worked fine. This is the frame where the cgc-box-rig-proxy is finally put in place by the robot arm. The cgc-box-rig-proxy is moved from right to left - as was shown in the lesson.
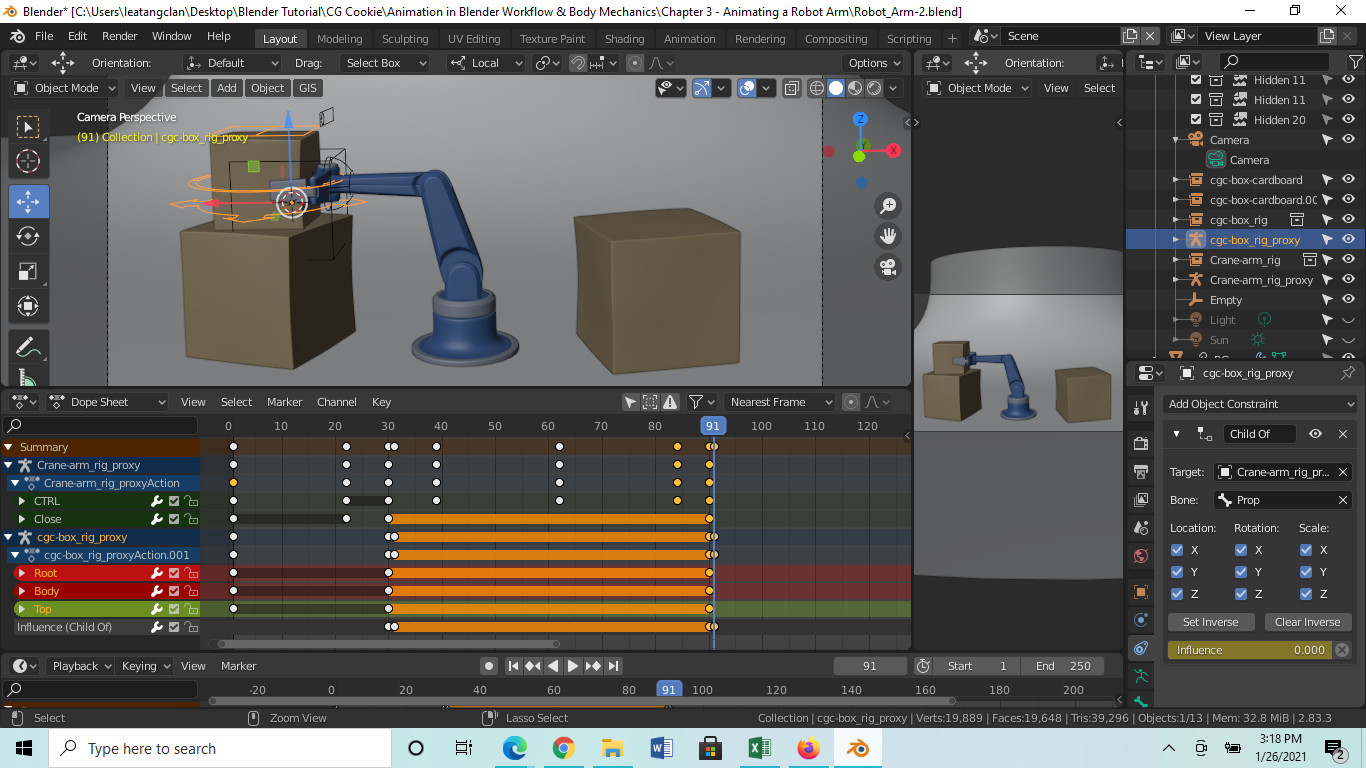
Here is frame 91 after successfully executing the "hack". By the way, thank the person that pointed out setting the orientation to "Local" instead of "Global", to prevent the box from rotating. I left the "Empty" object in place to show the "hack". So the cgc-box-rig-proxy snapped back to the left box from the right box.
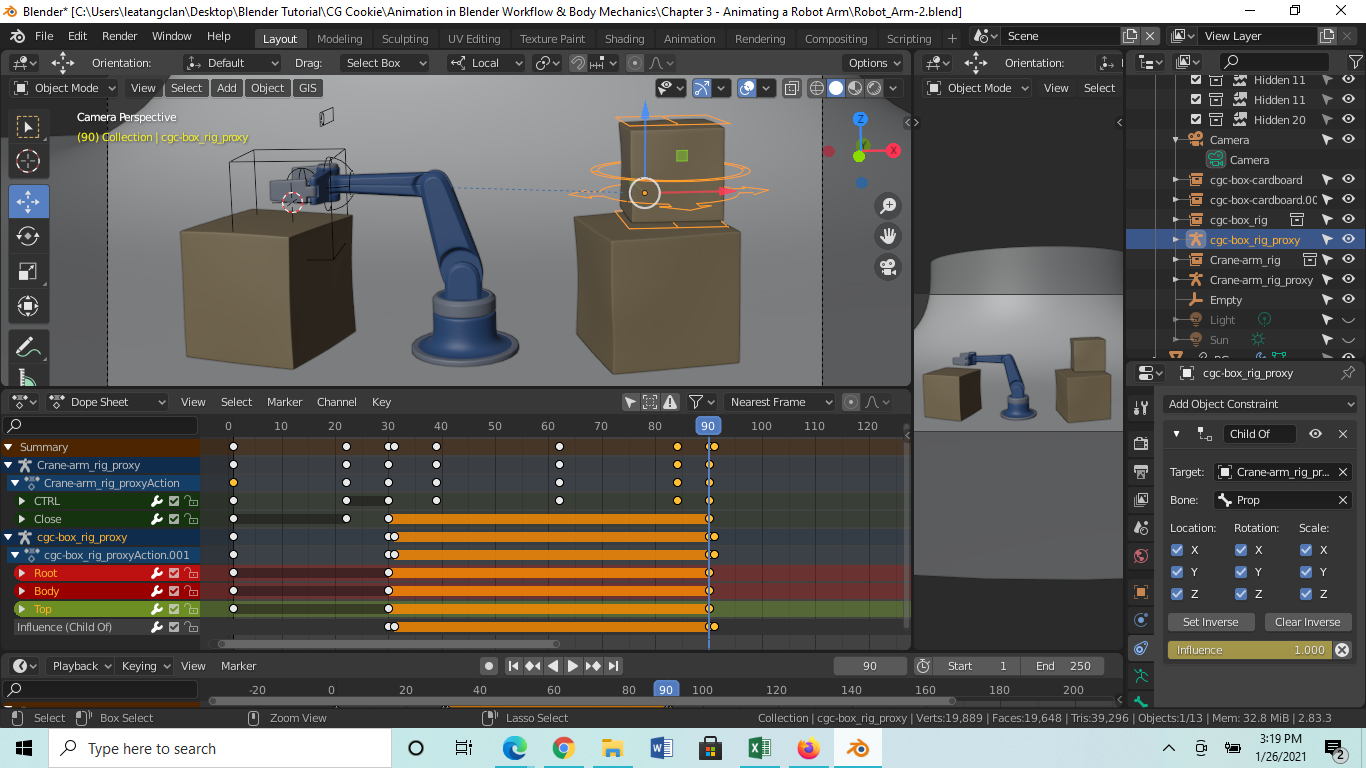
Now comes the weird part. I went back one frame to frame 90 to check, and lo and behold, the box has jumped backwards. And there is a line connecting the robot arm to the box. By the way, when I keep going backwards, the box moves right behind the arm attached to the line. If I start from the beginning, the robot arm would just animate like there is an invisible box and would pick "it" up. All the while with the actual box trailing behind it. Pretty wild!
 I will keep trying to figure this out. I just don't understand the mechanism behind this. I tried looking it up in the Blender manual but so far I am coming up empty. I also could not figure out how to execute the Visual Keyframe the other person suggested. So any help would be greatly appreciated. Thanks much in advance.
Hey Stevo,
Sorry to hear you are having technical issues.
Since the release of this course, that has been some updates to Blender to make things like this easier!
I haven't got a video to show this process yet but do you see the X button that is right next to the influence on the constraint. (not the one to delete the constraint)
When you press that, it will turn the influence down to zero but add the transforms to the bone to make it stay in that location.
This will help you out but make sure you keyframe all the things that changed (autokey doesn't grab everything).
It works in a similar way to how I explain in this video except you don't have to do that hack bit.
-Add the child of at the point you want to pick up the box. (This no longer jumps around when added too)
-Keyframe the influence at 1.0 on that frame
-Keyframe the inf at 0.0 on the frame before
-Go to the frame before you want to let it go.
-Keyframe the loc/rot and inf.
-Then on the frame where you want to drop it. Press the X button and keyframe everything that changes (loc/rot and inf)
Hope that's enough info for you to sort it out.
I will do an updated video of this in the future but I'm working real hard on getting the next course delivered on time.
(can you see the sweat dripping down my forehead)
Sorry Wayne. I was hoping that your latest instructions would work. However, at least for me, it is still not working. The only part that worked is I don't have to do the "hacking" thing to have the box stay in place. However, the last keying off of the influence still totally messes up the front portion - same as last time I asked.
I spent a lot of time diagnosing and researching to find a solution. I see how some people were able to use the Visual location and rotation to solve the problem on the release; but it just doesn't work for me. I can have the box picked up and moved around just fine. It's when I release the box that is when things go haywire - in the front portion. Here are the screen shots of the animation:
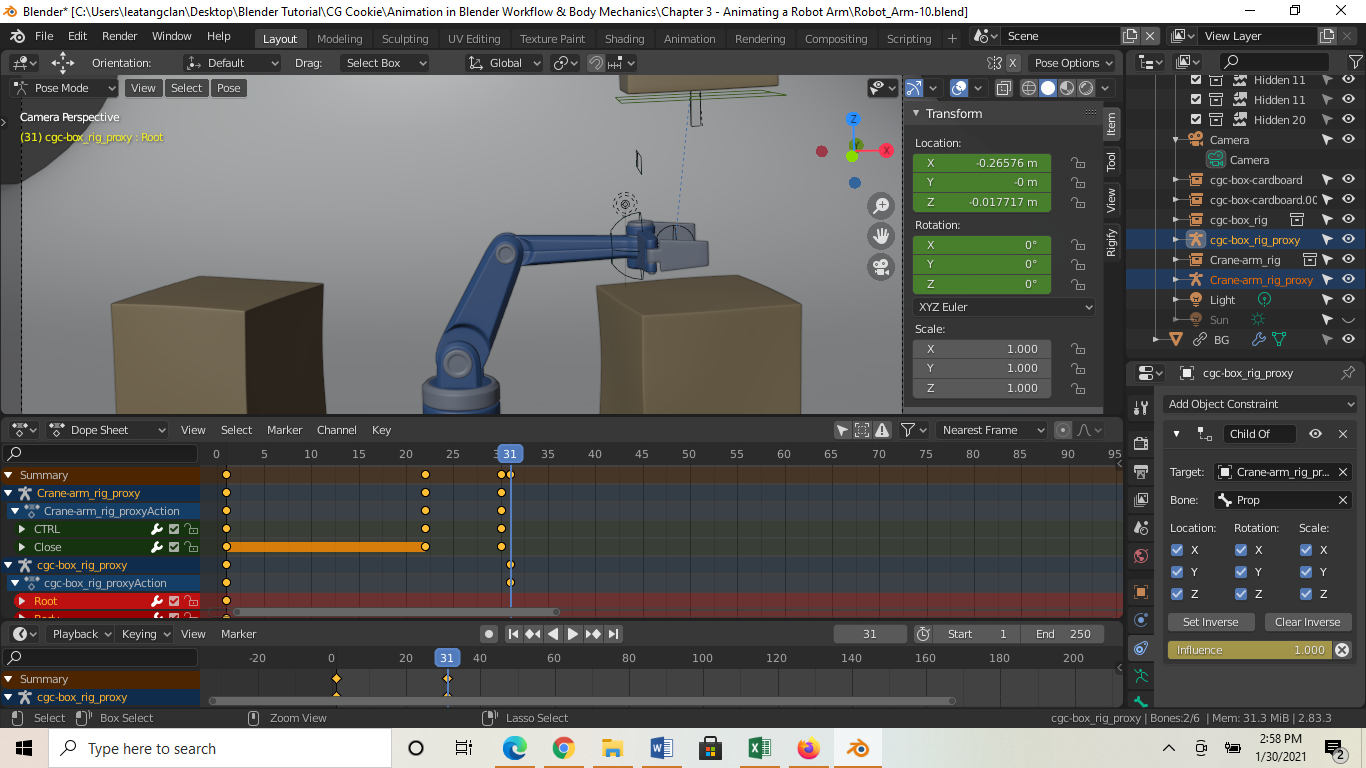
On frame 31 is when I apply the Child of Constraint. This is what you instructed "Add the child of at the point you want to pick up the box. (This no longer jumps around when added too)". However, as you can see, the box still jumps. That's when I had a feeling that something may still be wrong. I went ahead and Set Inverse to get the box back in place. I then set the influence to 0 at frame 30.
-Go to the frame before you want to let it go.
-Keyframe the loc/rot and inf.
-Then on the frame where you want to drop it. Press the X button and keyframe everything that changes (loc/rot and inf).
These instructions were done respectively at frame 100 and frame 101.
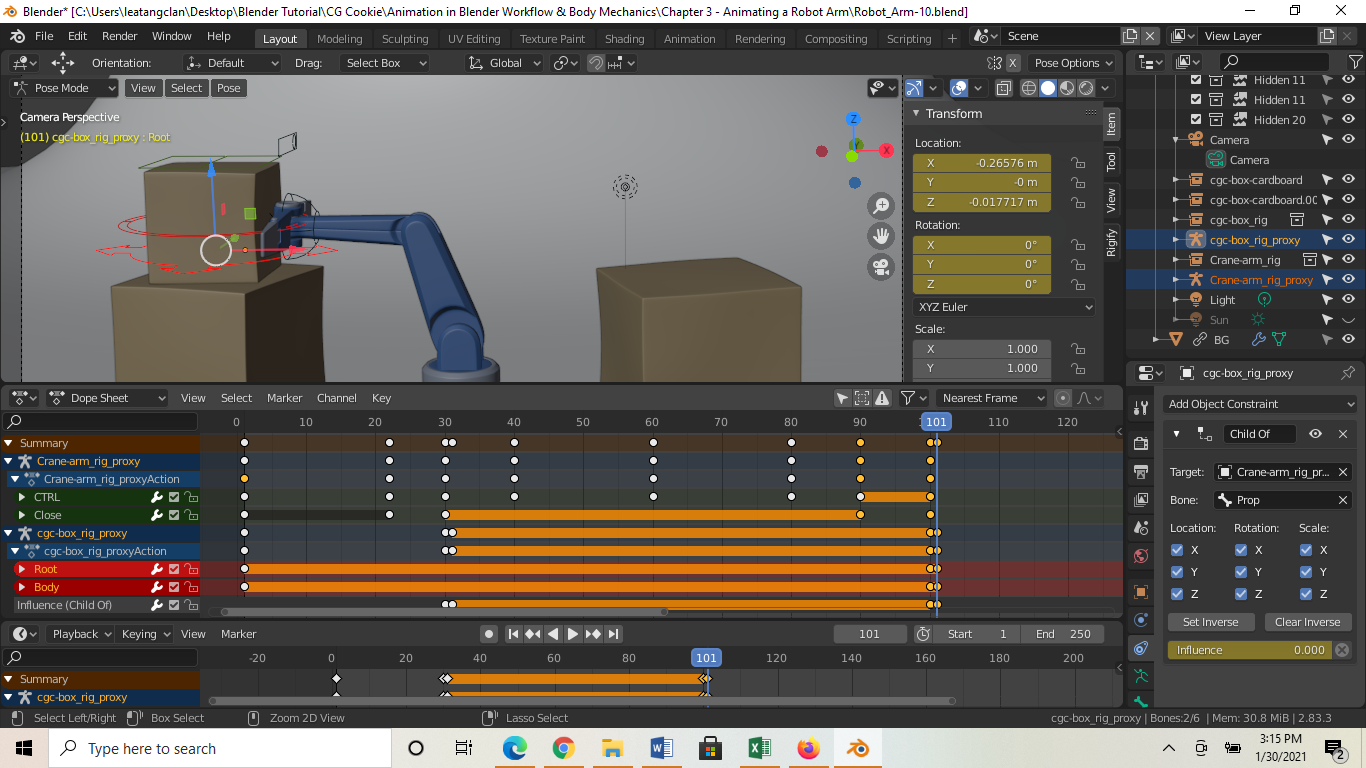
And this is what happens when I go back one frame to frame 100 after I key the Influence to 0. The box jumps back to the original position with a blue dotted line attached to the arm rig. So I would imagine that shows the relationship with the strange offset brought on by turning the Influence off.
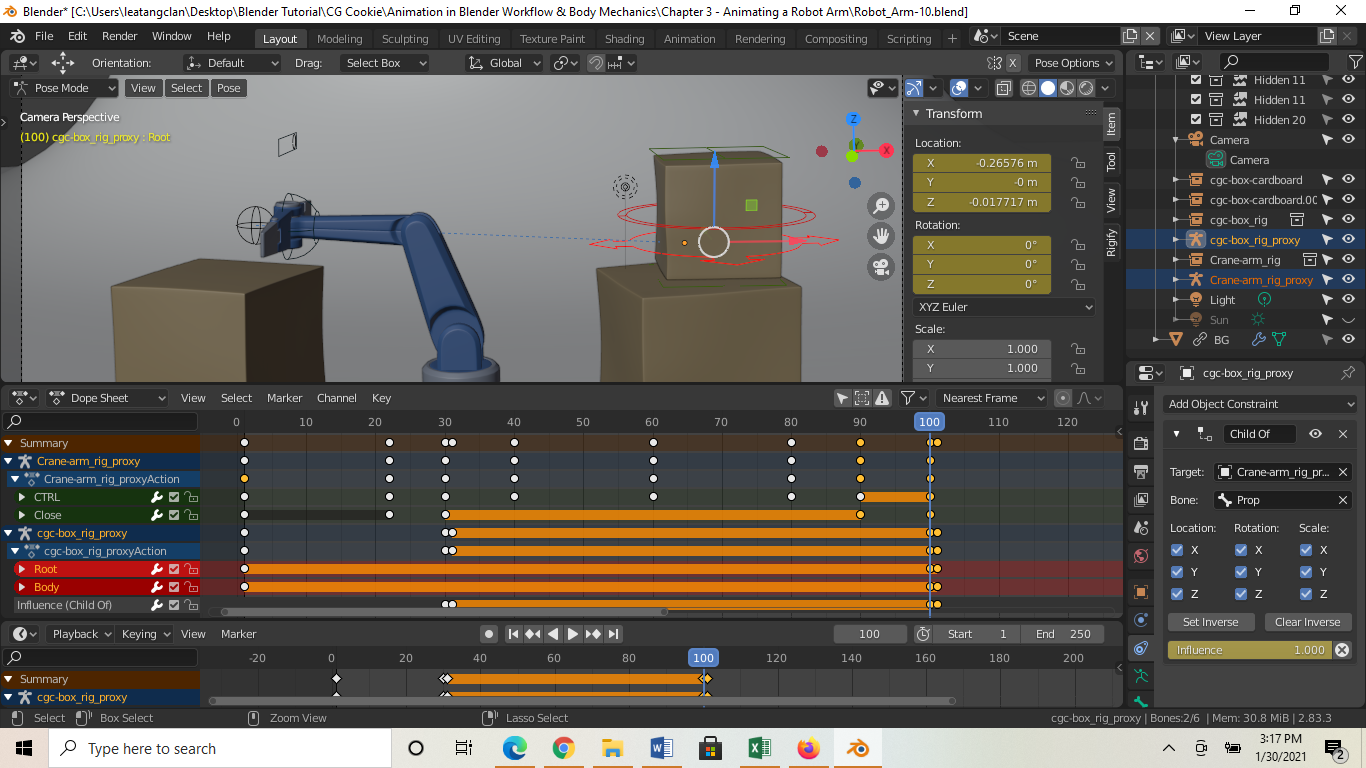
Going back further, you can see the arm would animate like there is a box at the proper location; but all the while it is trailing behind it. It would go and pick up a phantom box. I also show the graph editor where to my surprise, all of the graphs for the box is flat. I guess that is due to the Child of relationships? And that is why the Visual keyframe doesn't work? However, I can sort of make it work by manually manipulating the graph to make the box be in front of the arm - versus trailing it. But a viable alternative I don't think. At any rate, thanks much in advance to shed some light on this.
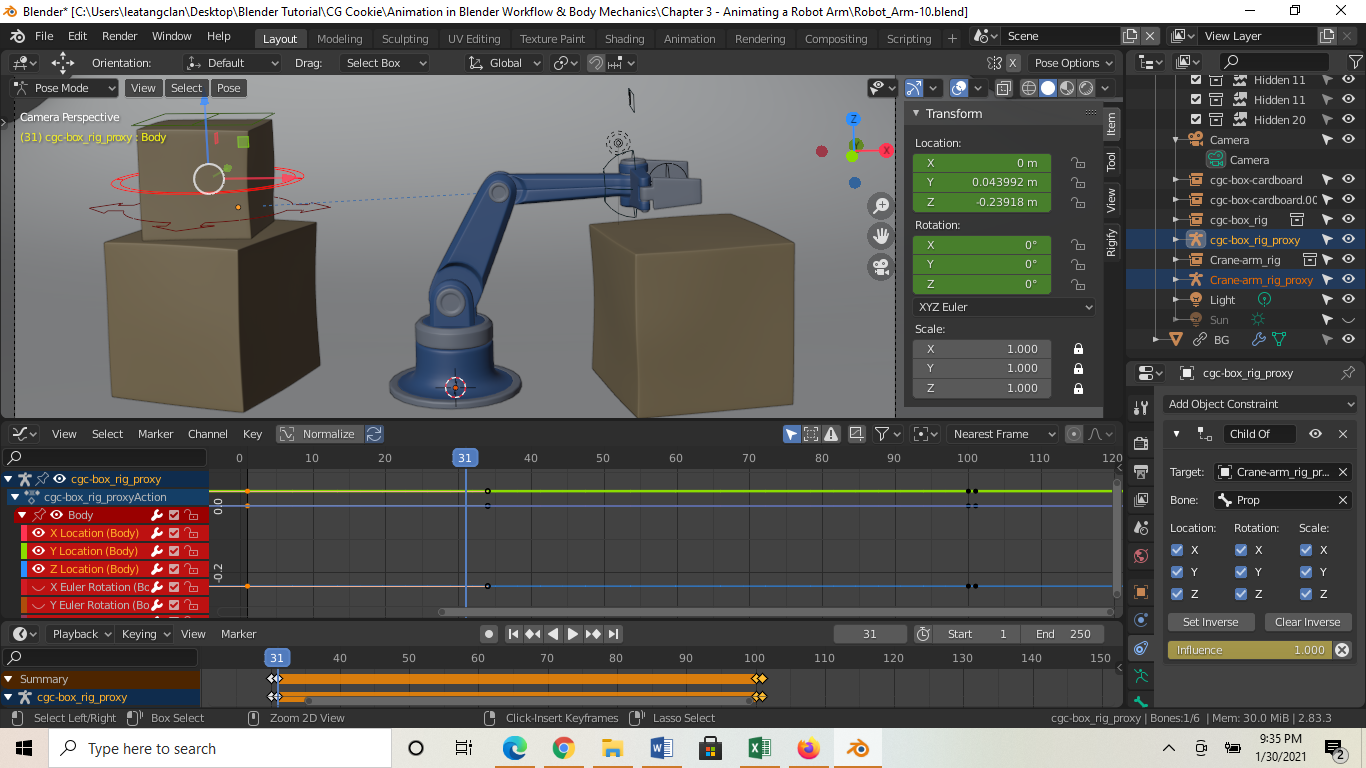
Thank you so much in advance Wayne. I am trying to think out of the box for an alternative solution :). It's something along the line with your next lesson. I am actually learning a lot from all this research. Thanks again.
Hey Steve,
Here's a video demo.
https://www.dropbox.com/s/ae0mljehcuti809/child-of-help.mp4?dl=1
I will hazard a guess and say that you are not keying things before you change them. Hopefully this video helps.