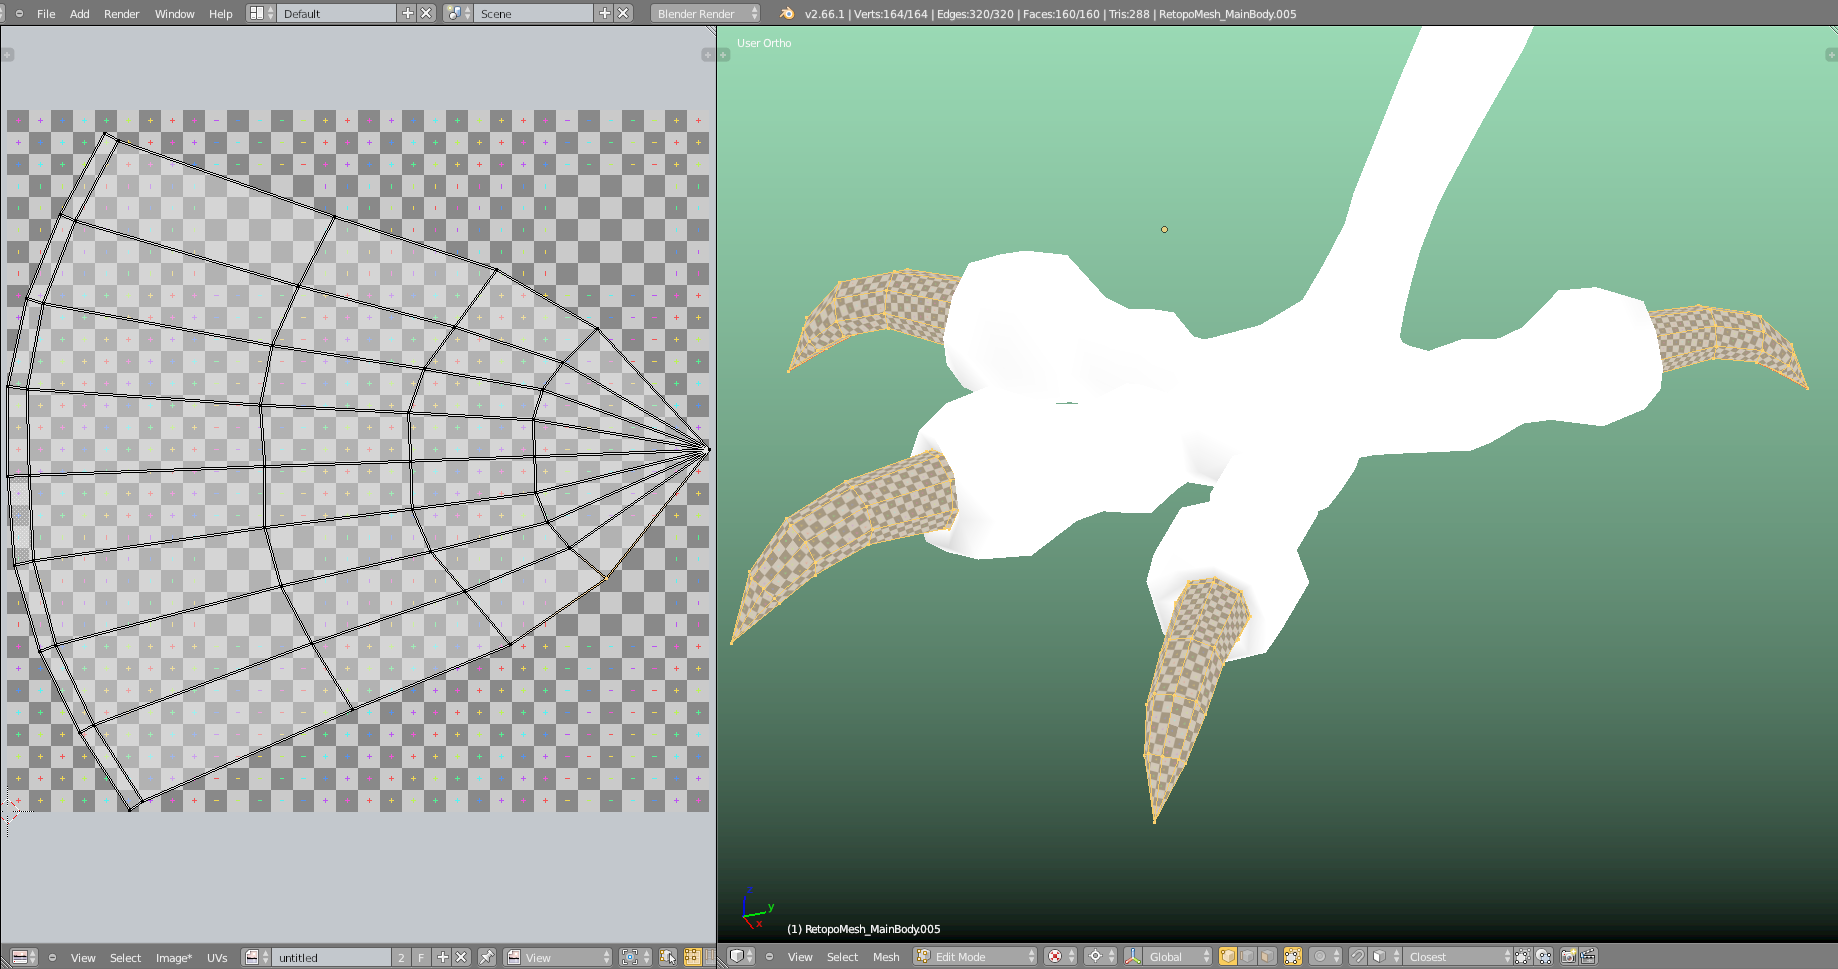
The two claw toes in the middle of Piero's left claw in the image below have distorted textures despite having identically looking UV map islands as the other two claw toes with undistorted textures?

It seems that although the UV islands for all 4 claw toes look the same corresponding faces on these toes aren't mapped to the same area in the UV map:
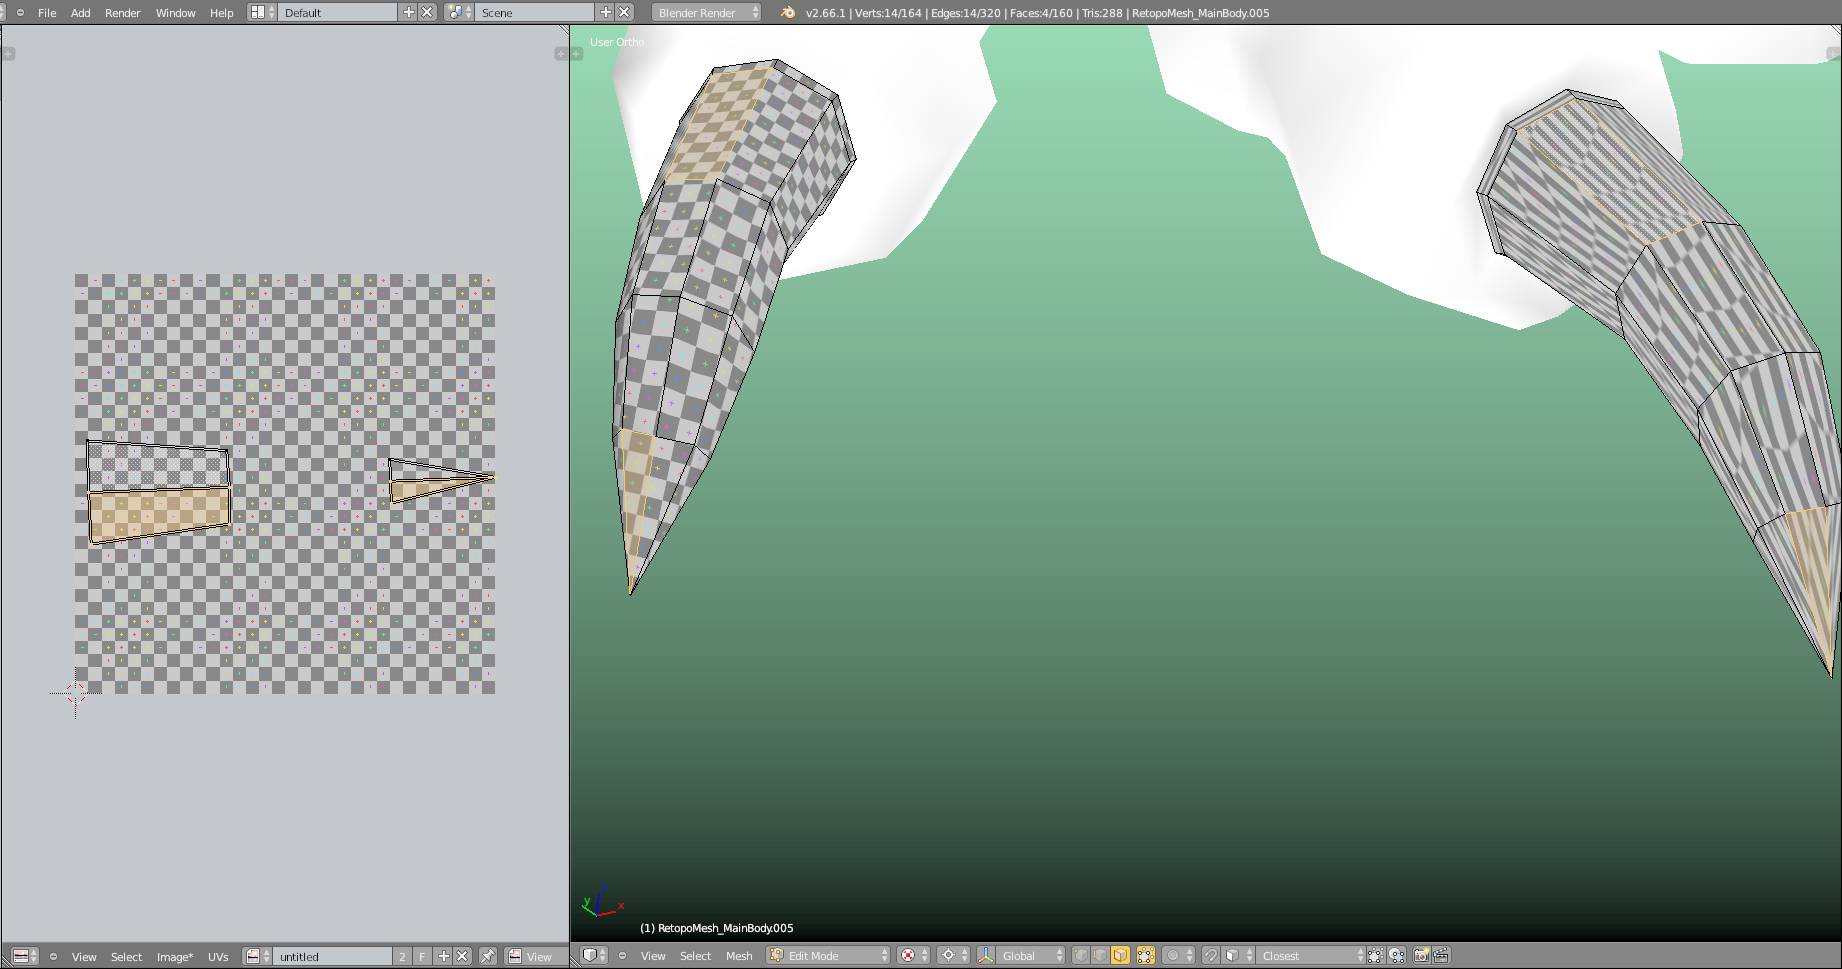
The highlighted faces are those of the left claw toe and the should overlap exactly with the UV faces linked with the 2 faces selected on the right claw toe at the same relative position on that toe as those selected on the left toe.
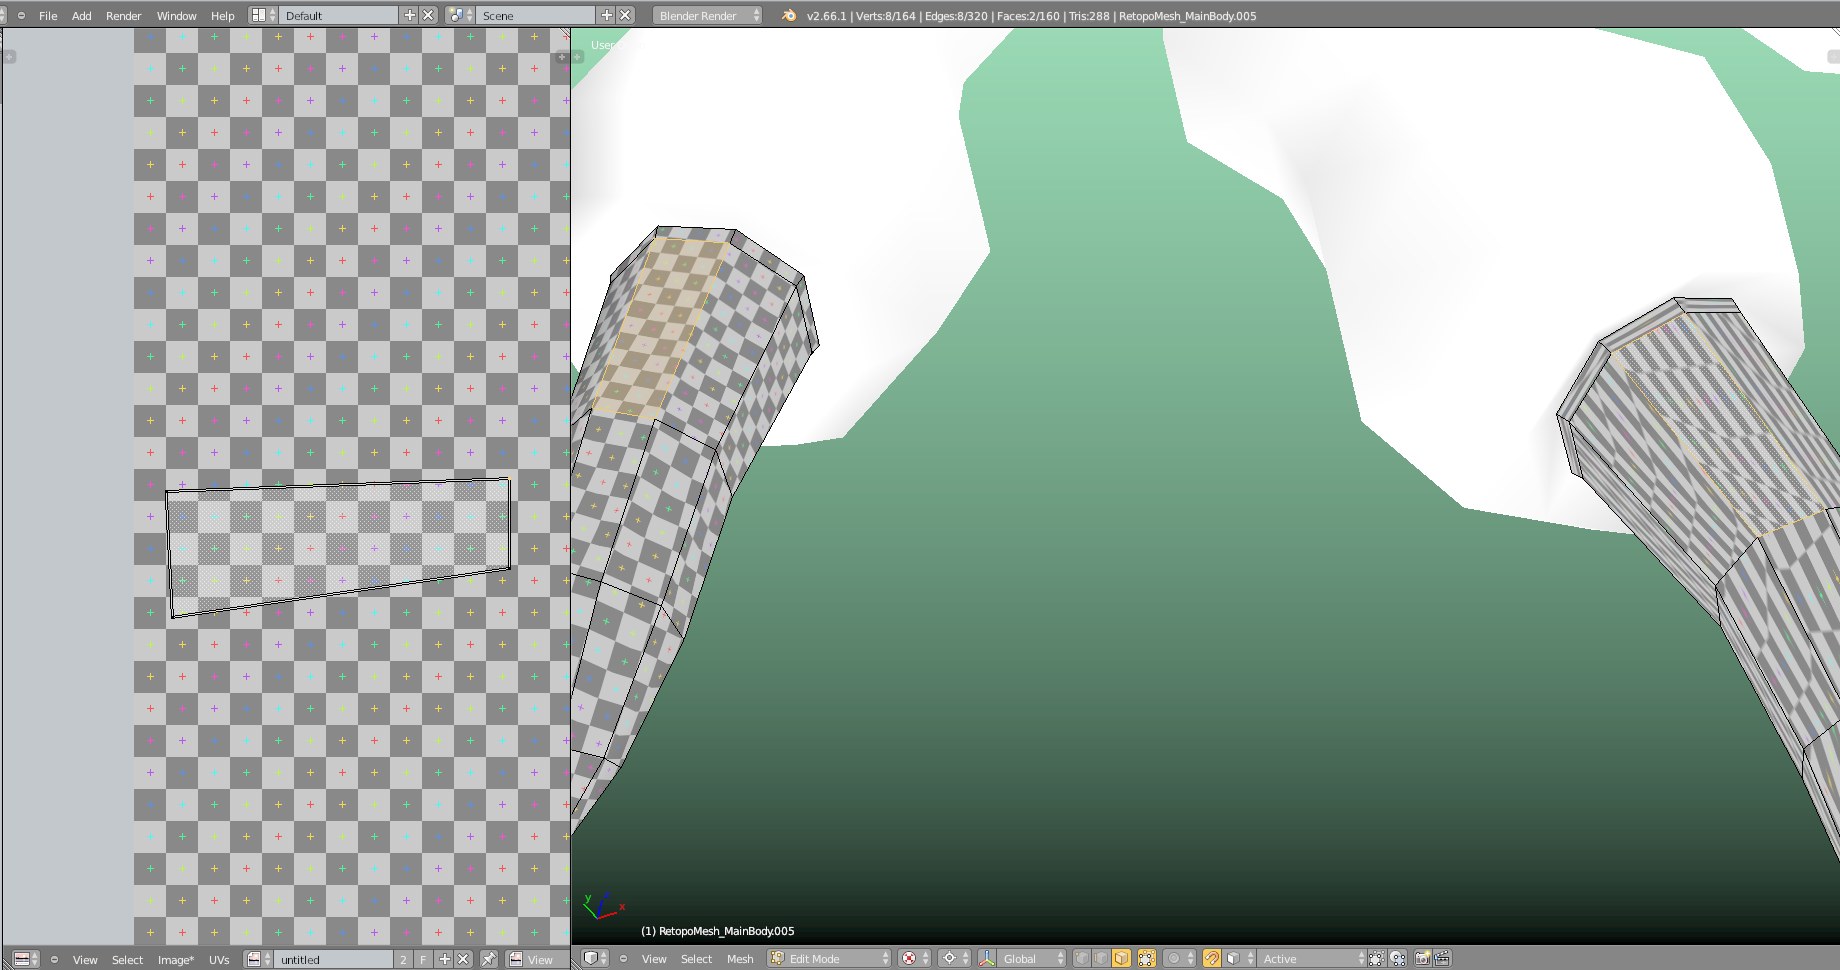
I've made 2 corresponding UV faces overlapping from the two toes in the next image above, but the distortions are still there. Maybe the order of the vertices is different?
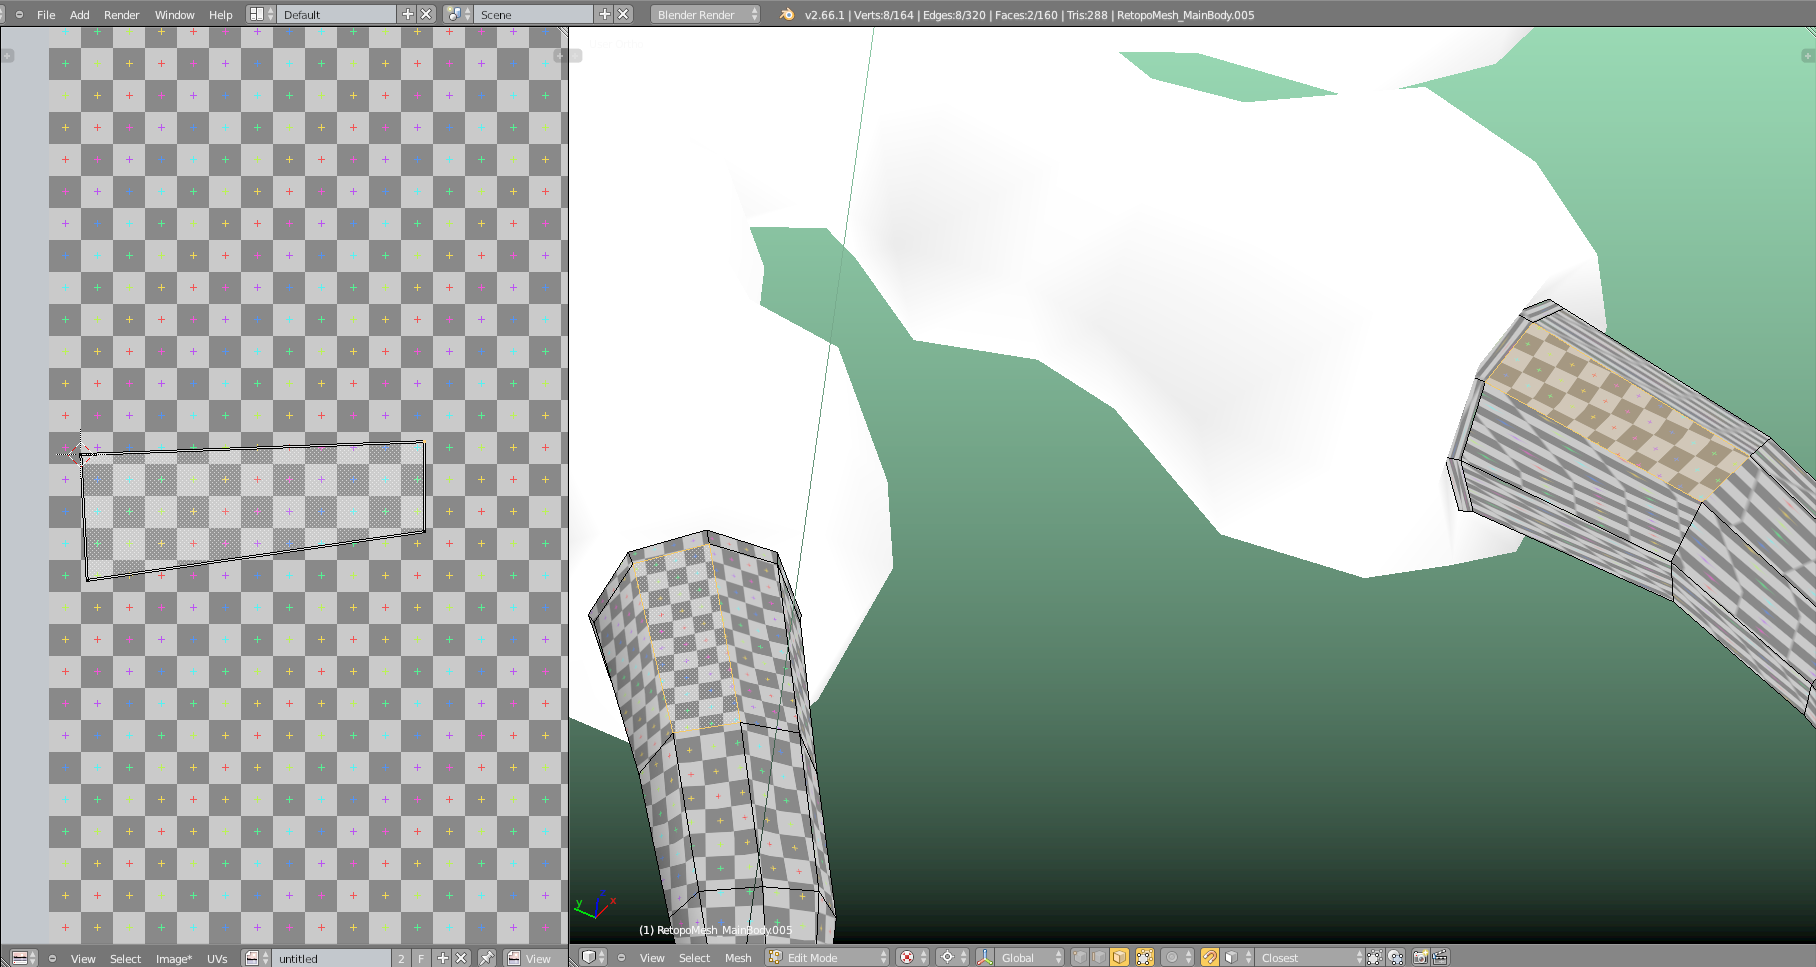
Now, I've manually snapped the "UV vertices" for the two mesh faces hightlighted in the image below and the texture on the right toe in the highlighted face looks normal. It has to be taken into account, that the two side toes at the front of each claw have been scaled down slightly before attaching them to the claw during the modeling phase of Piero so that the same texture area has to be stretched to a bigger face on the center toe seen at the right side of the image below:
How can I prepare the mesh so that the "Join as UVs" command not only creates perfectly overlapping "UV Map Islands" but also makes sure that corresponding "Mesh Vertices" from all four toes of each claw share the same position in the "UV Map"?
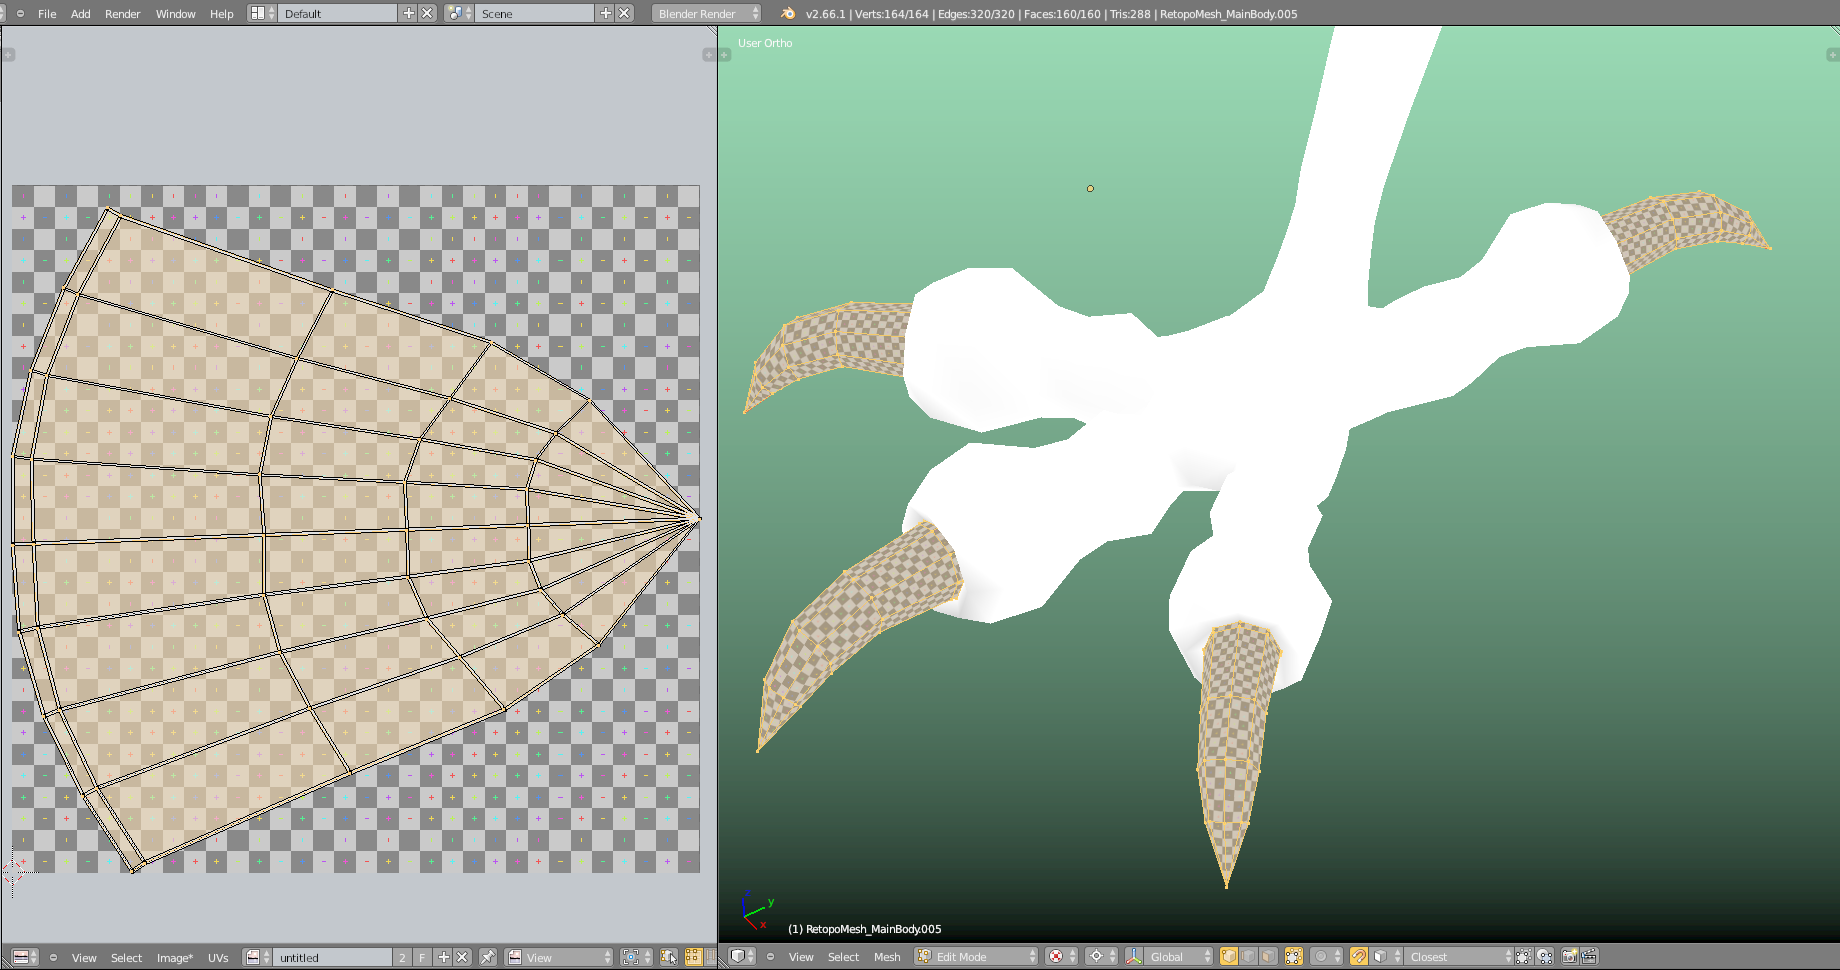
I've now unwrapped each toe separately after having added a seam to each toe. The "UV Map Islands" are almost overlapping perfectly and I'll use snapping to make it perfect. Now, there's no texture stretching on the toes:
I don't understand the sense of a "Join as UVs" function if it's so sensitive and easily produces messy results. Then it's easier and faster to do it manually than wasting a lot of time with an unnecessary cleanup.
And the result with corresponding "UV Vertices" set to the same position by scaling them to zero:
If someone wants to try his luck, here's the file after having separated the claw toes and before marking any seams or unwrapping something. Vertex groups and shapekeys from the main body mesh still have to be removed.
I don't understand the sense of a "Join as UVs" function if it's so sensitive and easily produces messy results
The Join as UVs tool is like copying UVs from one mesh to another. It requires that the meshes have identical mesh data (vertex count and vertex order). It should be a pretty black-and-white tool, meaning it either works right or it doesn't; pass or fail. So I'm not sure how it could give you messy, kind of working results 🤔
However this theme of slightly inconsistent mesh data is in the same category as your mirror shape key issue. Somehow you're tweaking the mesh data just enough to mess up these functions that depend on perfect mesh data. This can be hard to pinpoint what exactly caused the issue until your awareness in the moment realizes it. My best advice is just to be very mindful of the tweaks you make every step of the way because things get unstable if you don't.
Everyone developing advanced skills has to learn this the hard way, including me. Modeling in the beginning is fun and carefree, especially sculpting. But when we get into the technical weeds of animation production it's imperative that we're careful with everything. Every production I've been a part of is a LOT of technical problem solving like this. There's just so many little things that can go wrong / quirky along the way.
The good news is that you solved it yourself. Often re-doing the problematic step is the way to go 👍
Thank you, @theluthier, for your advice. I have already tried to find out what could have "confused" the "Join as UVs" function but couldn't remember anyhing and some experiments with recalculating the vertex order didn't work either. The big question is whether I could do something before copying the UV that ensure that the "Join as UVs" function gets good mesh data in order to do its job properly. Are there ways to examine the mesh so that I can see prior to copying the UVs whether the mesh is ready for this UV function? Displaying the vertex indices didn't give me a clue.
PS:
But when we get into the technical weeds of animation production ...
I have to memorize that expression 😉