
You are one of the most valuable aspects of a CG Cookie membership. You make up a community that is learning together, asking important questions, and helping each other over roadblocks. Posing a question to the group provides the opportunity to get a variety of answers and suggestions to find the one that works best for you.
Bonus! You are also helping others who could be struggling in the same area and we all push the group forward together. ❤️
With the help of our Instructor Assistants Adrian, Omar, Martin and Shawn who you often see answering those questions, we have put gathered the 5 most common Blender questions being asked in our community right now and the best answers to keep you going!
Here they are in no particular order.
- Why is the bevel not working on the back slots of my Press Start console?
- Why is my Boolean cutting a hole in the object instead of indenting?
- Why do I have Z fighting when my boolean is working correctly?
- What happened to Transfer Attribute in Geometry Nodes?
- Can the knife tool move in increments like the rotation and translation tools in Blender?
Why is the bevel not working on the back slots of my Press Start console?
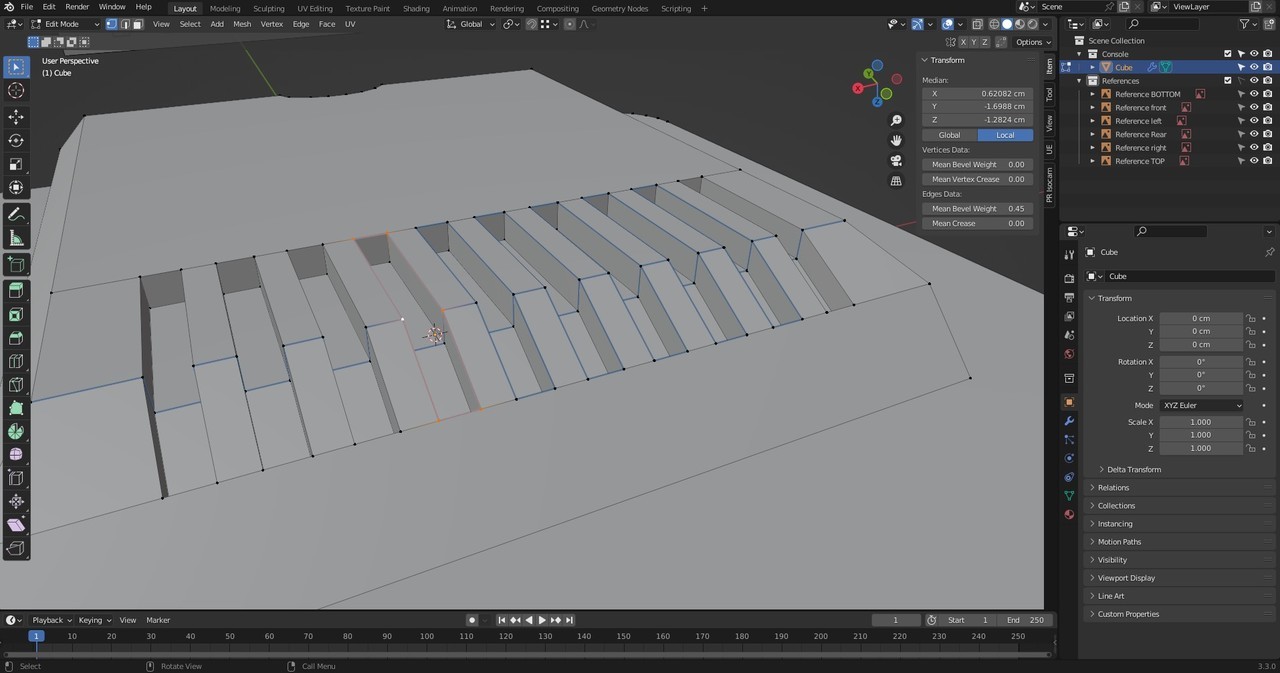
There could be several reasons the bevel in this situation is not behaving as it should. Here are some troubleshooting ideas to find your solution.
Make sure you've applied the scale. In object mode with the console selected, press 'CTRL+A' and select 'Scale'. This will set the scale values to 1,1,1.
Double vertices are a common problem a beginner to Blender and 3D in general will come across. Double vertices are two vertices occupying the same 3d space or so close together it will look like one vertex.
To remove double vertices, select all using 'A', press 'M' for Merge, then select 'By Distance'. You will notice an Info Message on the Status Bar with the number of vertices removed.
If no vertices are removed, in the 'Adjust Last Operator' window, try increasing the distance from the default 0.0001 (10th of a mm) to 0.0005 (half a mm). Beware not to increase this value too high, and keep an eye on the rest of the model so as to not remove vertices you need elsewhere on the model.
(Learn more about the Adjust Last Operator panel in this quick tutorial 👆)
You may need to disable Clamp Overlap under the Geometry settings of the Bevel Modifier. The Clamp Overlap option prevents vertices from overlapping and producing unwanted mesh problems. In this case, as soon as two Vertices meet, the modifier stops beveling any further and its result may be unnoticeable.
Use edge select mode and NOT vertex select mode when selecting the edges to be beveled. Using vertex select may include edges that you do not want to be bevelled.
On the Item, Transform Panel, make sure you are adjusting the 'Mean Bevel Weight' under 'Edges Data', NOT the same named value under 'Vertices Data'.
On the bevel modifier, make sure the limit method is set to 'Weight'. This will take the weight from the 'Mean Bevel Weight'.
Why is my Boolean cutting a hole in the object instead of indenting?

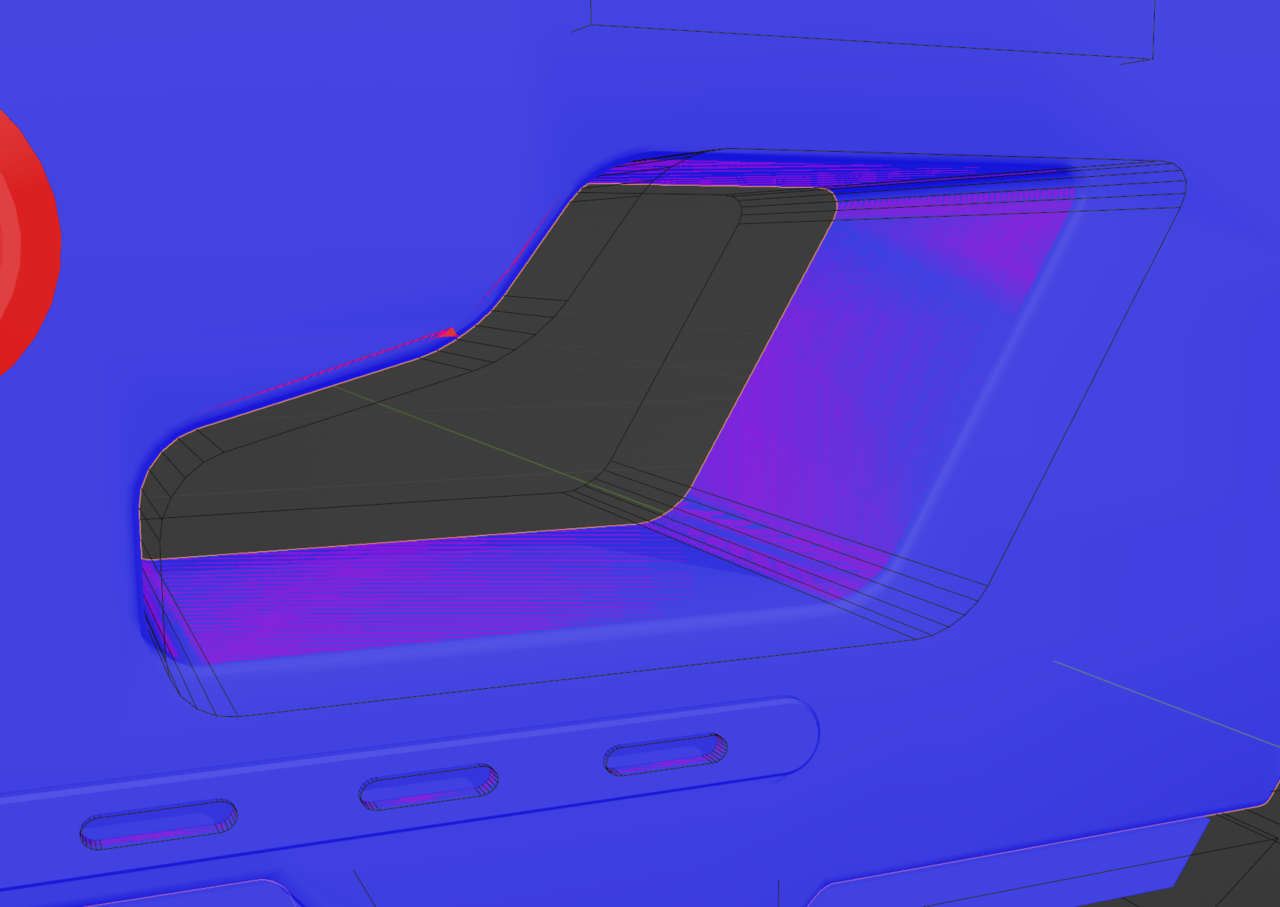
This is a common question on the Press Start course. The answer is Flipped Normals. To check the normals you can enable the Face Orientation Overlay in the Viewport Overlays menu. Blue is the external or positive direction of the face, Red is the internal or negative direction of the face. If you see red, where it should be blue, then in Edit Mode of an offending object, press A to select everything, and press Shift+N to Recalculate Normals.
When using Booleans ensure the main object and the cutter object have the normals in the correct direction.
In fact, model your cutter object as if it was a main object, and take as much care with cutter objects as you would any other.
Why do I have Z-fighting when my boolean is working correctly?
The answer is how the object is displayed in the viewport. In the Object Properties of the cutter object, and under Viewport Display, Display As is set to wire. This option still displays the intersecting faces of the cutter and the main object.
If you set the Display As option to Bounds, the faces are no longer visible. However, the Bounds may not represent the correct shape of the cutter object. Don't forget the Disable In Renders option for the cutter object before your final render.
Tip: The Bool Tool Add-on, free with Blender, will do this for you. Go to Edit > Preferences > Add-ons, and search for Bool Tool and enable it.
Once enabled, to add a Boolean Modifier easily, select the cutter object then shift select the main object, press SHIFT+CTRL+B and select the Boolean type from the list, or you can use the shortcut as listed.
The Auto Boolean's will also apply the Modifier.
What happened to Transfer Attribute in Geometry Nodes?

This one came up a lot with the CUBICITY course and took some time and research to resolve, not only by the CGCookie crew, but the awesome community chipped in with part of the solution.
It turns out the Transfer Attribute node has been replaced with 3 separate nodes in Blender 3.4. Sample Index Node, Sample Nearest Node and the Sample Nearest Surface node.
For our use case in the Cubicity course, the Sample Nearest Surface node is needed. With the value field set to Vector, the Bounding Box node connected to the Mesh input, the Named Attribute node connected to the Value input and the Value output connected to the Vector input of the Separate XYZ node we achieve the desired result.
Remember: This relates to Blender v3.4+, previous versions will still use the Transfer Attribute node.
Can the knife tool move in increments like the rotation and translation tools in Blender?
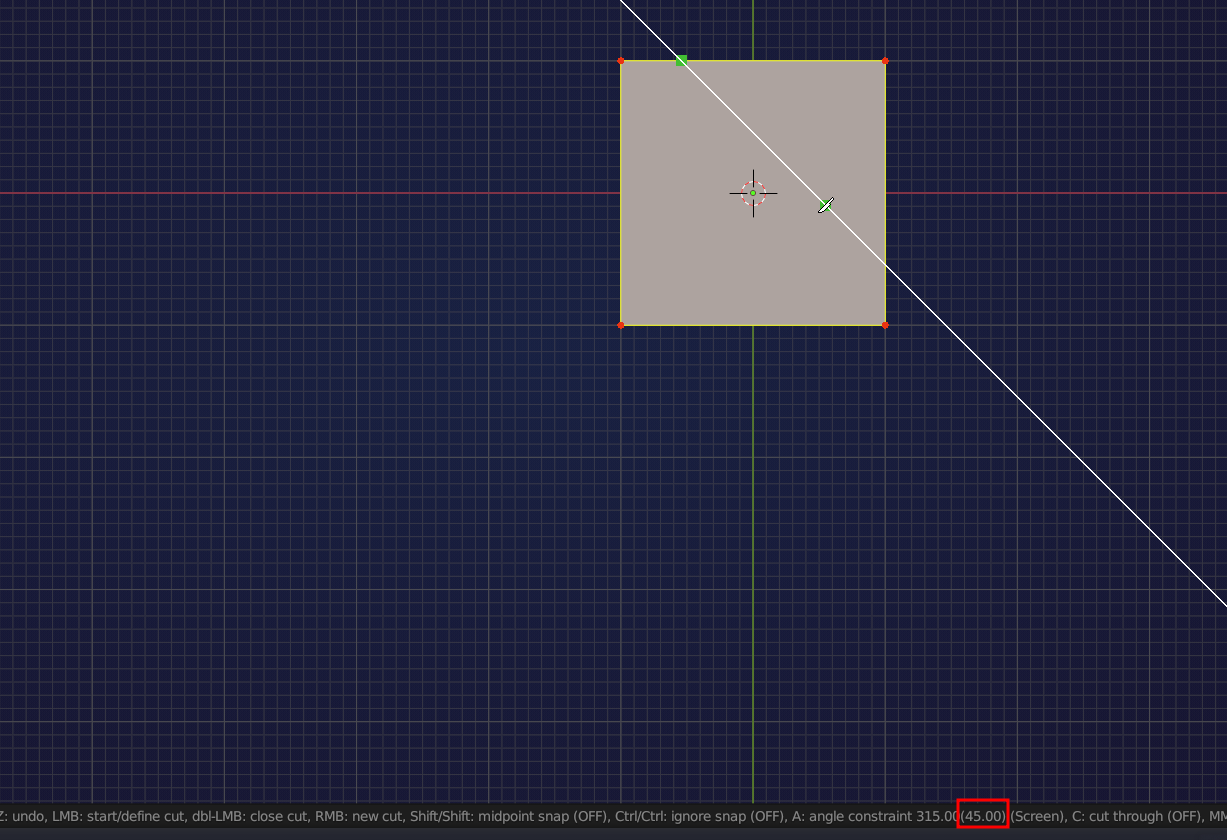
For example, if I wanted to make a perfect 45 degree cut, how would I do that instead of trying to eyeball it?
The Knife Tool is mostly used as a free-hand tool, but if you press A while making a cut with the Knife Tool, you are constraining it to an Angle.
By default this snaps to 30° increments, but a (secret) lesser known feature is that you can change the increments by typing a number, for instance A and then 45 will give you 45°. The angle is in reference to the view, not the object.
There are also other options to explore. These are displayed in the Info Bar at the bottom of Blender. For example, C to make a cut through the mesh rather than just on the surface. X, Y or Z to constrain the cut to the Global X, Y or Z Axis.