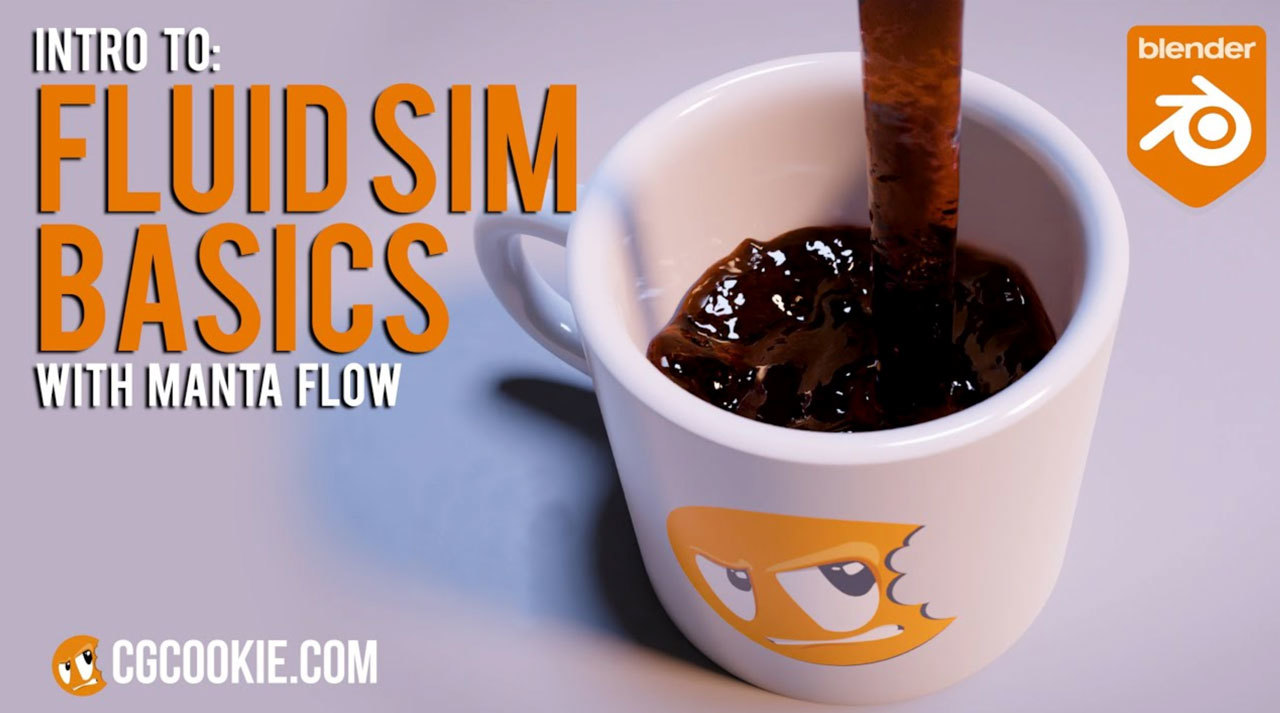
Let's Make Coffee: Blender Fluid Simulation (Mantaflow) Tutorial For Beginners
Oct 24th 2022
Mantaflow is a powerful fluid simulator in Blender, but it can have a steep learning curve. Luckily for all you Blender beginners out there, today we’re going through a basic introduction to creating and simulating fluids in Mantaflow.
I don’t know about you all, but I could definitely use some coffee, so strap in and let’s see if we can pour ourselves a fresh-brewed cup in Blender to get our day started right. Feel free to follow along here, or take a look at the video version of this tutorial for a step-by-step deep dive into this process.
First, let’s establish a little fluid simulation vocabulary. Any simulation has four main components:
- Domain - The domain is the boundary that your simulation takes place inside of. Tip: scale down the domain as small as you can while still having it contain any place where the fluid is going to go. That’ll let the simulation run as fast as possible since Mantaflow has less space it needs to process and compute.
- Inflow - The inflow is where your fluid is going to be generated and poured into your scene. Think of this as the faucet or spout that the fluid flows into your scene from.
- Colliders - Colliders are objects that the fluid can interact or collide with while being simulated. In the case of our coffee simulation, the cup we’re pouring into is going to be a collider.
- Outflow - Similar to the inflow, the outflow is where your fluid is going to flow out of your scene. Think of this as the drain in your sink. Since we want a full cup of coffee—not an empty one—our scene today won’t have an outflow.

To fill up our cup, let’s begin by going through these components one by one. I’m starting off with a scene containing just a basic cup and a ground plane.
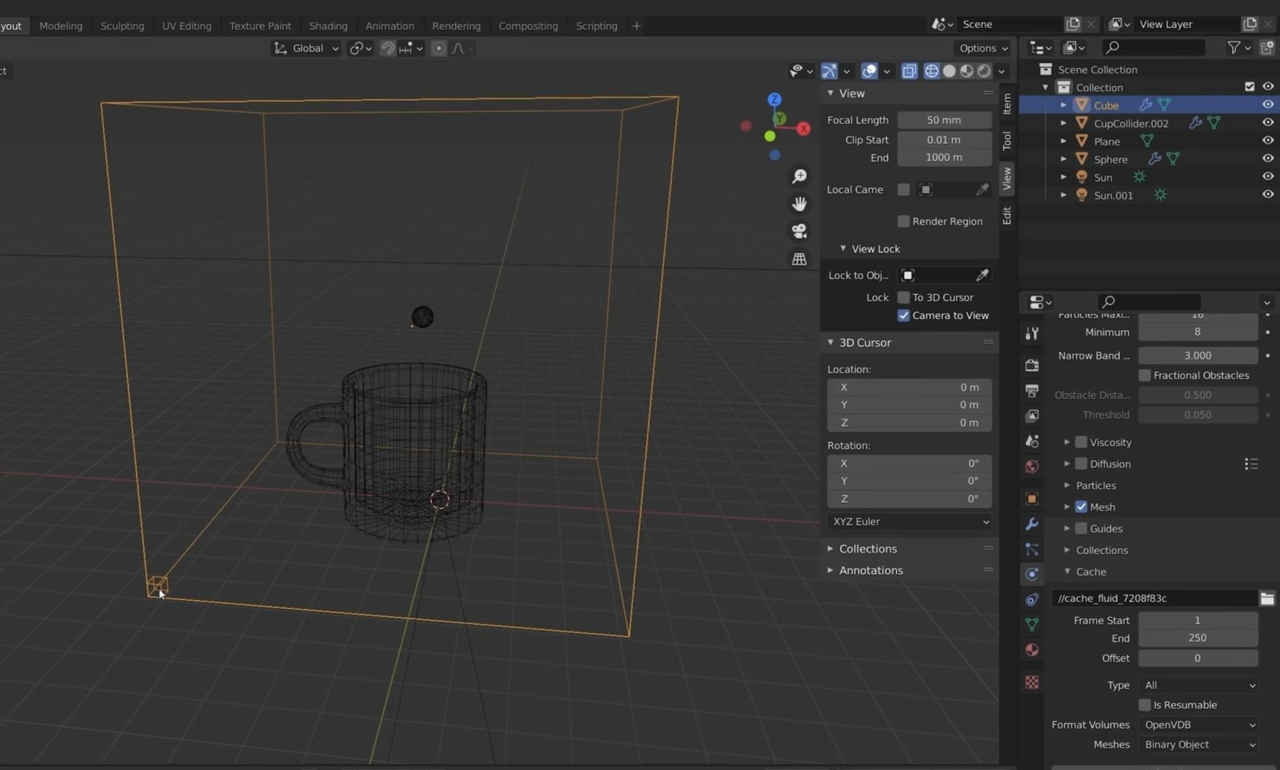
Create a domain. The first thing we want to do is create a domain. To do this, we can create a regular old cube and resize so it encompasses the whole cup we'll be filling. Then in the physics tab for the cube, we can enable the fluid physics and pick the “Domain” fluid type.

Create an inflow. Our next step is to create an inflow. To do this, let’s create a simple UV sphere and place it where we want our fluid to originate from. Then, just like with the domain, we can enable fluid physics in the physics tab for the sphere. This time, we’ll pick the “Flow” fluid type.
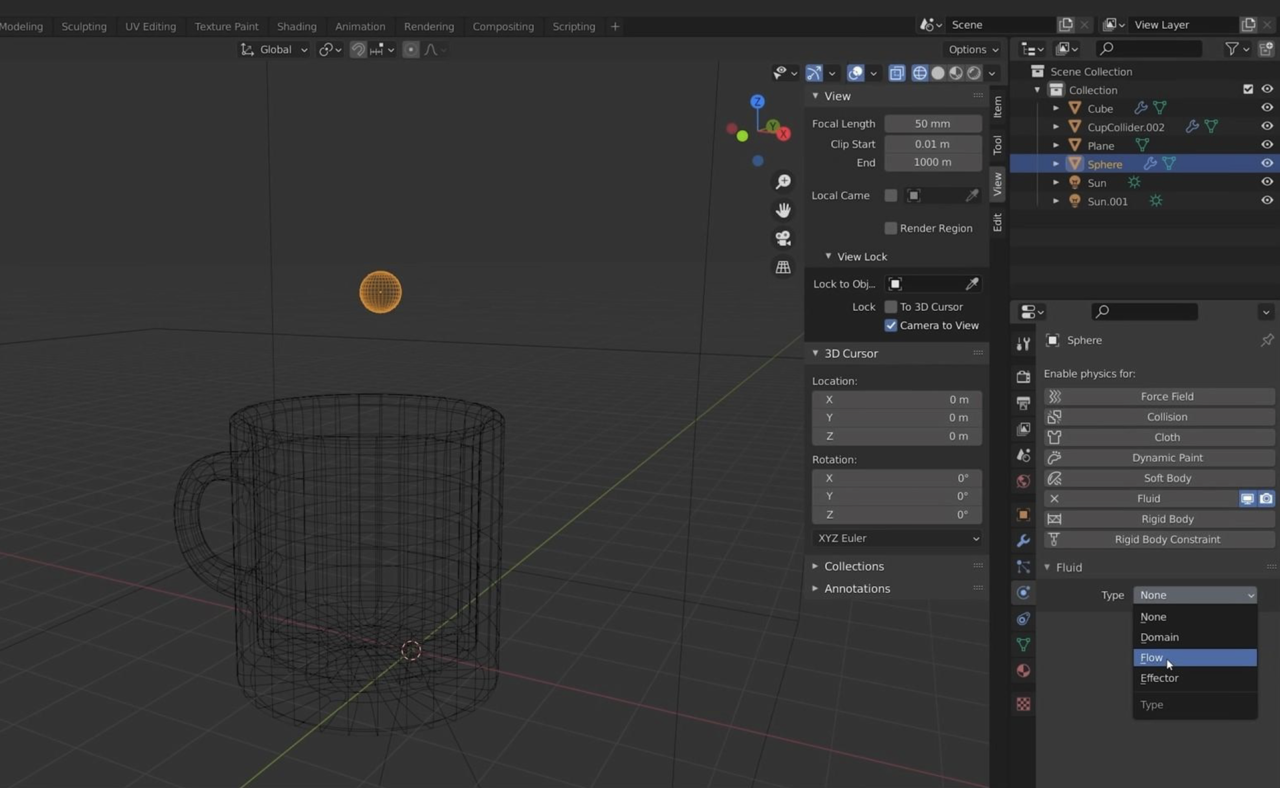
Create a collider. Our last step is turning our cup into a collider so our fluid interacts like a real coffee cup. To do this, we’ll enable the fluid physics in the physics tab for the cup, the same as before. The fluid type we’ll use this time is “Effector." The effector type should be set to “Collision” and the “Use Effector” option should be checked by default.

Important note: since our coffee cup has some thickness and is a closed mesh, that’s all we need to do here. However, if you had an unclosed mesh (e.g. a plane) that you wanted your fluid to interact with as a collider, you could check the “Is Planar” option.

Now that we have our objects created, we have some settings we need to change.
1. Switch the domain’s domain type to “Liquid."

2. Switch the inflow’s flow type to “Liquid."

3. Switch the inflow’s flow behavior to “Inflow."

Note: There are three settings for flow behavior: “Inflow," “Outflow," and “Geometry." The difference between Inflow and Geometry is that the Inflow option will act like a faucet, pouring out a steady and continuous stream of liquid until stopped, whereas the Geometry option will take the Flow object—in our case, the UV sphere—and treat it as a finite amount of liquid with the same geometry. That is, if we wanted a ball of liquid to just drop into our scene and splash on the floor and disappear, the Geometry option would be perfect. For our scene, we’ll stick with Inflow.
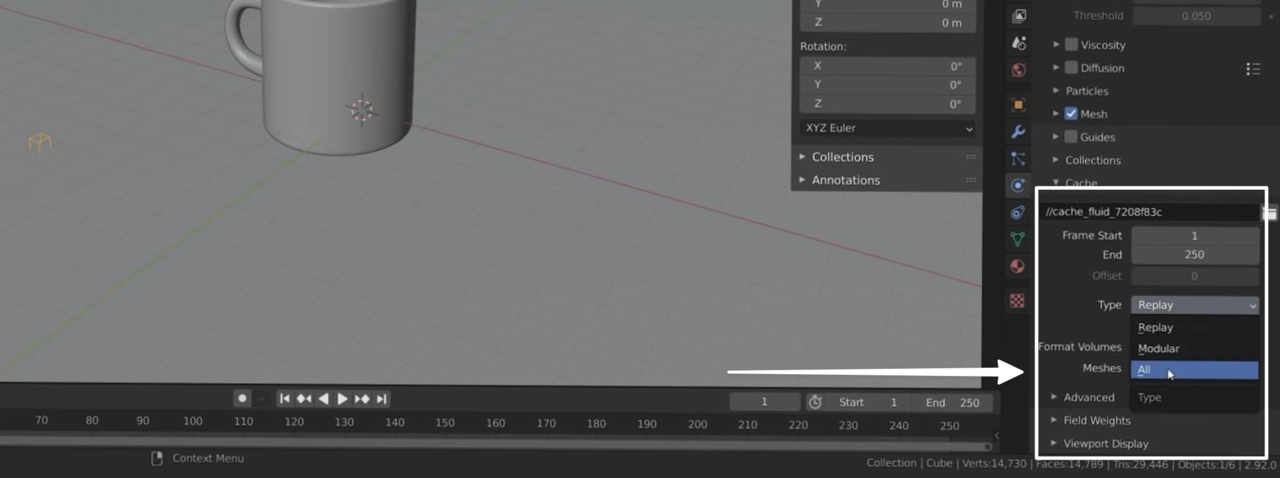
Enable the domain’s “Mesh” option. This will tell Blender to take our simulation and turn it into mesh for us. At this point, the cube should disappear, because the cube has become the fluid simulation itself. You can now hit Play on your timeline and see the fluid start to generate!

It’s important to note that running the simulation directly in your timeline is very unstable and will generate weird results like this.

To get more reliable, consistent results that let you see what’s really going on, you’ll need to use the cache, which you can find right under “Mesh.” Let’s change the cache type to “All” so that our fluid cache gets saved as a file on our computer; this will make sure our simulation is stable.
With that done, we can hit “Bake All” to bake our simulation.

Let’s take a look at what we get!
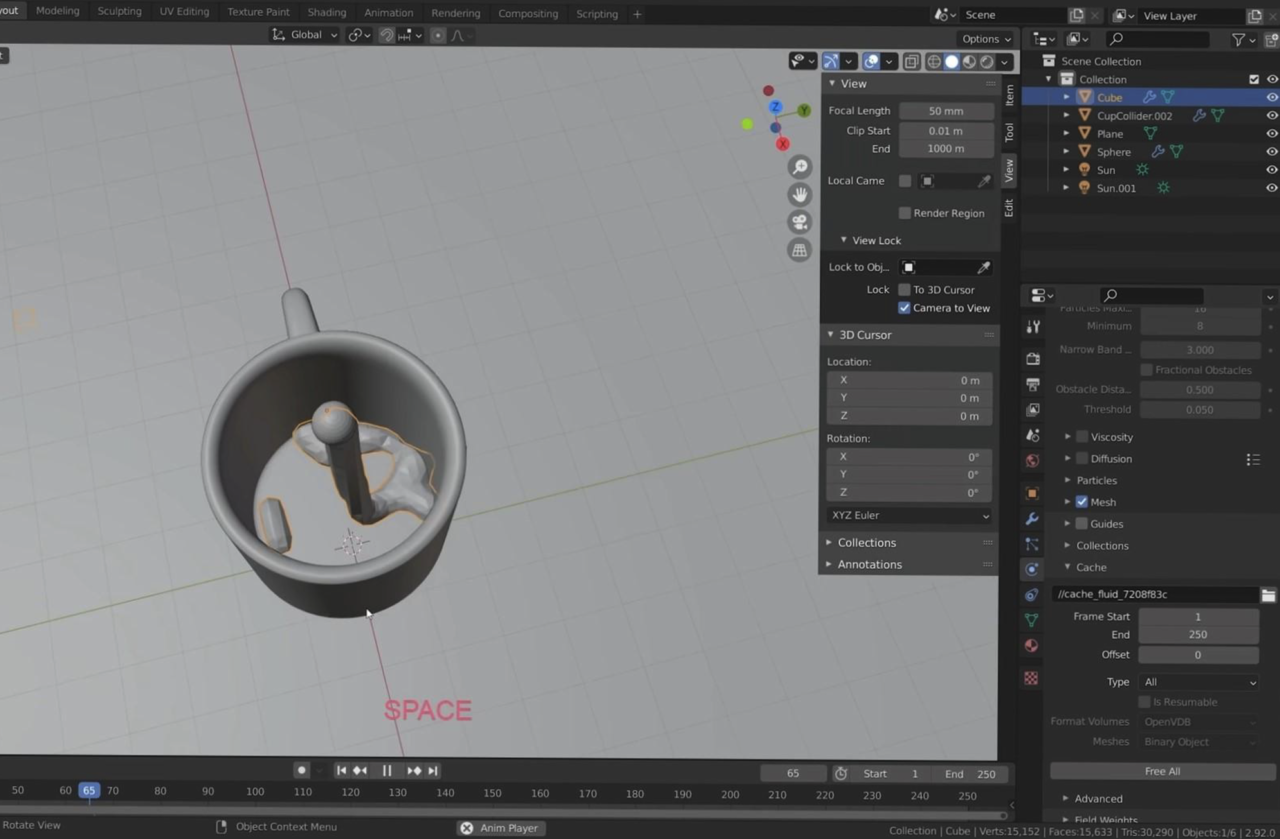
The simulation looks like it’s working, but it’s not the greatest. Let’s hit “Free All'' so we can troubleshoot. The problem here is that the resolution of our fluid sim is pretty low. You can see the resolution of the fluid simulation from the box in the corner of your domain while in wireframe mode.
This small box represents the size of one “voxel," which is basically the particle size that the fluid simulation works with. Because of that, the higher the resolution, the more voxels our domain is divided into, and the finer the detail on our simulation, but the longer the simulation takes to run. Conversely, the lower the resolution, the lower the number of voxels, and the chunkier and grosser our simulation will look, but the faster it runs.
By default, the resolution divisions (which controls the number of voxels our domain is divided into) is set to 32. Let’s go ahead and set it to 64 so that our fluid simulations are closer to the final product.

Now let’s bake again and take another look.

Hopefully, you agree that things are looking a lot better now. Let’s turn the resolution divisions back down to 40 for the time being so our simulation runs quickly while we’re changing settings.
Now that our cup is filling up as we want, we want to be able to turn off the flow and stop pouring the coffee as well. To do this, we’ll animate the “Use Flow” parameter on our sphere. Find the point on the fluid simulation where we want to stop the flow, and set a keyframe on the “Use Flow” parameter.

Then go to the next frame, turn off “Use Flow," and set another keyframe.
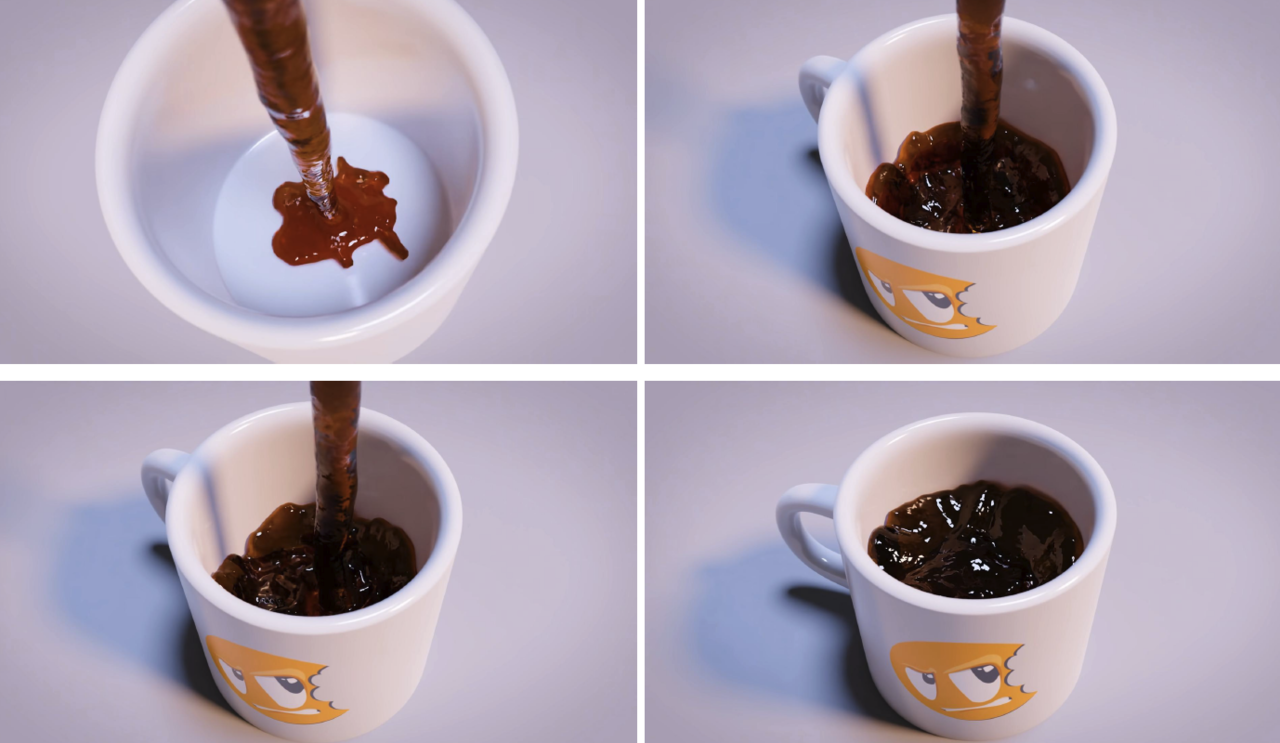
That should get our coffee to stop pouring exactly when we want it to. Now it’s time to see if we can texture this fluid to actually make it look like coffee. We’ll go into rendered view, make sure our render engine is set to “Eevee,” and turn on “Ambient Occlusion,” “Bloom,” and “Screen Space Reflections.”

From here, we can open up our Shader Editor and change some parameters to get closer to the look of coffee. I recommend watching the video version of this tutorial for a deep dive into exactly what I’ve set each value to and how, but the parameters I’ve changed are base color, transmission, IOR, specular, and roughness.

And here’s the final result!
Hopefully, you found this Blender tutorial giving you a crash course in fluid simulation helpful. If If you liked this, make sure to grab your Citizen membership here at CG Cookie for more tutorials.