
Rigging is the technical art of creating a digital skeleton or “rig” for a 3d model. It is one of the steps required in order to bring your creations to life.
But you know that already; that’s why you’re here, right?
Learning on your own or from random YouTube videos can be difficult, so I’d like to give you a head start with this.
Unfortunately, this article won’t teach you how to rig your character (we have a Rigging Course for that), but it will provide an overview of the main steps in the rigging process, introduce key concepts, and offer some tips to give you a glimpse behind the scenes of the technical wizardry involved.
How rigging works in Blender.
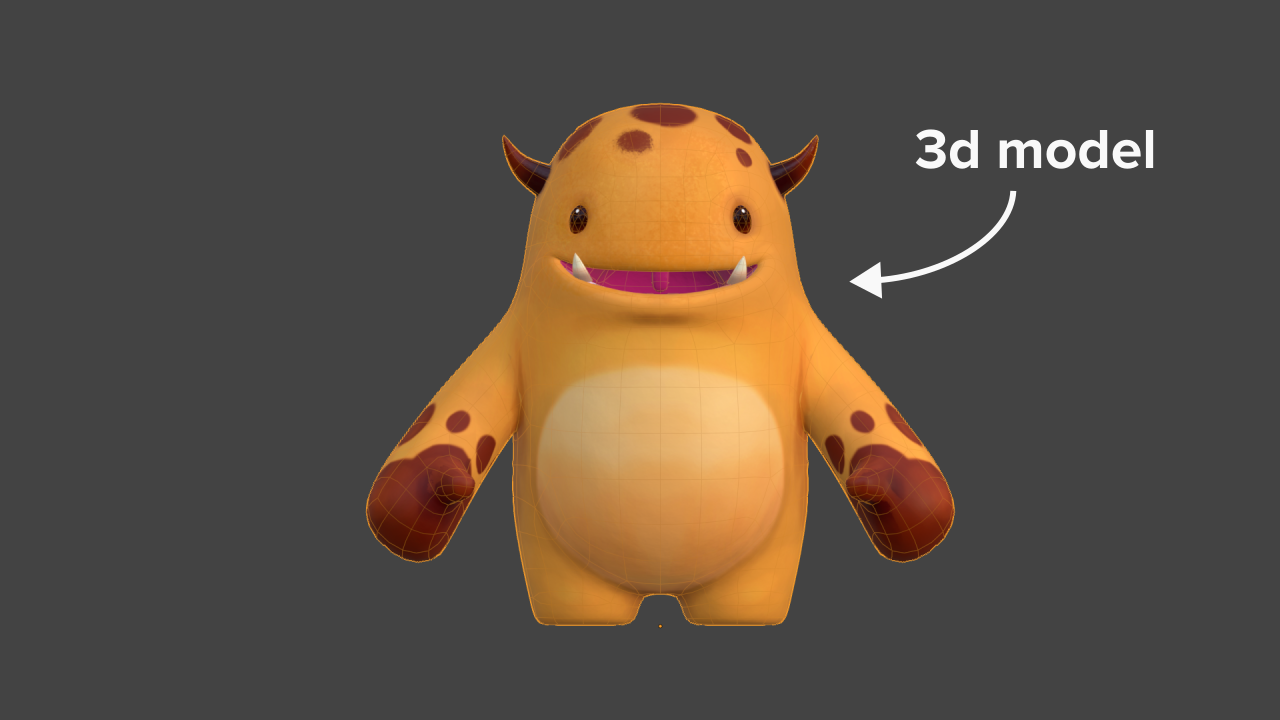
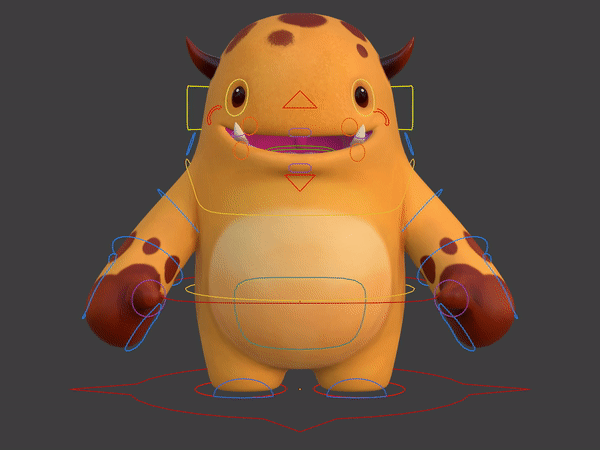
You have a 3d model (also called a ‘mesh’).
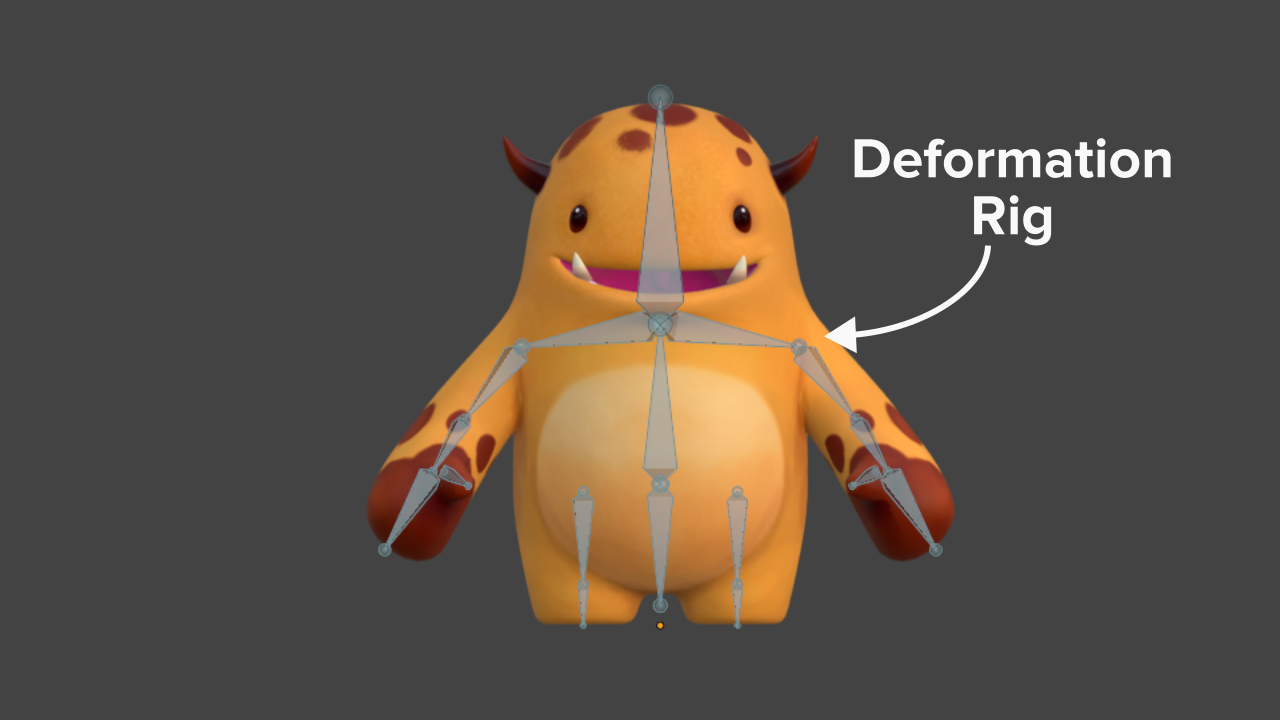
To make it articulate or move you will need an armature. An armature is a digital object that is essentially a container for bones.

You bind these bones to specific vertices so they can deform the mesh and move it around. Binding has many names; it can also be called Skinning or Weighting. But there will be more on this in just a moment.
The bones that actually deform the mesh are called the Deformation Rig…..because, well….they deform the mesh.
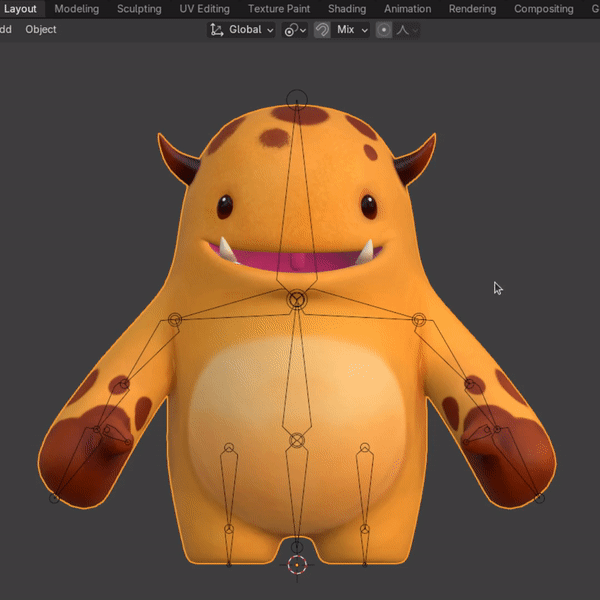
Ok, so now you have the deformation rig you’ll need to connect it to your mesh.
For that, you’ll use the Armature modifier and weight-paint some vertex groups.
The Armature modifier tells the mesh object which armature to get the movement from, and the weight painting tells it which part of the mesh should move with each bone. (the vertex group names need to match the names of the bones)
By far the best starting point for the weights will be the Auto-Weighting tool.
Select the mesh, then select the armature > Ctrl P > Automatic Weights.
This will set up the correct parenting relationship, add the armature modifier to the mesh and automatically weight the vertex groups to the names of the bones of the armature.
SIDE NOTE:
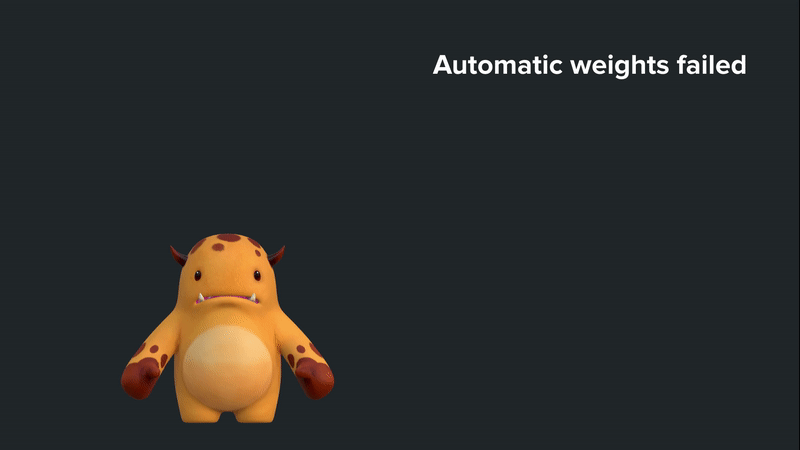
If you ever encounter an error with the automatic weighting that says,
“Bone Heat Weighting: Failed to find solution for one or more bones”
This usually occurs when the influence of many bones overlaps with each other, and the algorithm can’t figure out which vertices to weight to which bones.
So try scaling your armature and mesh much larger (10 or 20x bigger) and try again.
The weighting should work. Don't forget to reset the scale to what it should be and continue on with your day.
Awesome, now your mesh can move, but it can’t easily be animated. To make that happen, you’ll need a Control Rig. These are all the controls that the animator will use to make the character move.
In Blender the Control Rig and the Deformation Rig are usually housed inside the same Armature object.
This is a big difference between Blender and other 3D software. In most other software, the control rig is built from a bunch of different objects combined to make the deformation rig do what you want it to.
If you see someone on YouTube rigging a character with a bunch a different Empties - you can stop watching. They do not know what they are doing.
In Blender, armature objects were specifically designed to be animated. They have dedicated animation tools that are only available to armatures and bone constraints that are much more flexible than the normal object constraints.
99% of the things you need to make your character articulate can be done with just bones using parenting, constraints and drivers.
This means most of the time your control rig and the deformation rig are actually part of the same object.
Bones in Blender can take on any custom shape you desire. That’s how you can make those appealing controls.
The technical part of rigging is connecting and adding constraining all these bones so they work exactly the way an animator needs it work.
This is the essence of what rigging really is and far too complicated for a simple article to teach you how to master.
It’s not uncommon for hundreds of bones to be in a rig. It will be overwhelming to try and think about every one of these bones and its purpose on an individual level. So here’s a way of thinking about rigging that will hopefully simplify things.
There are only 3 main purposes for any bone in a rig.
If you think about these bones as only having one of these purposes then it can become a lot less daunting.
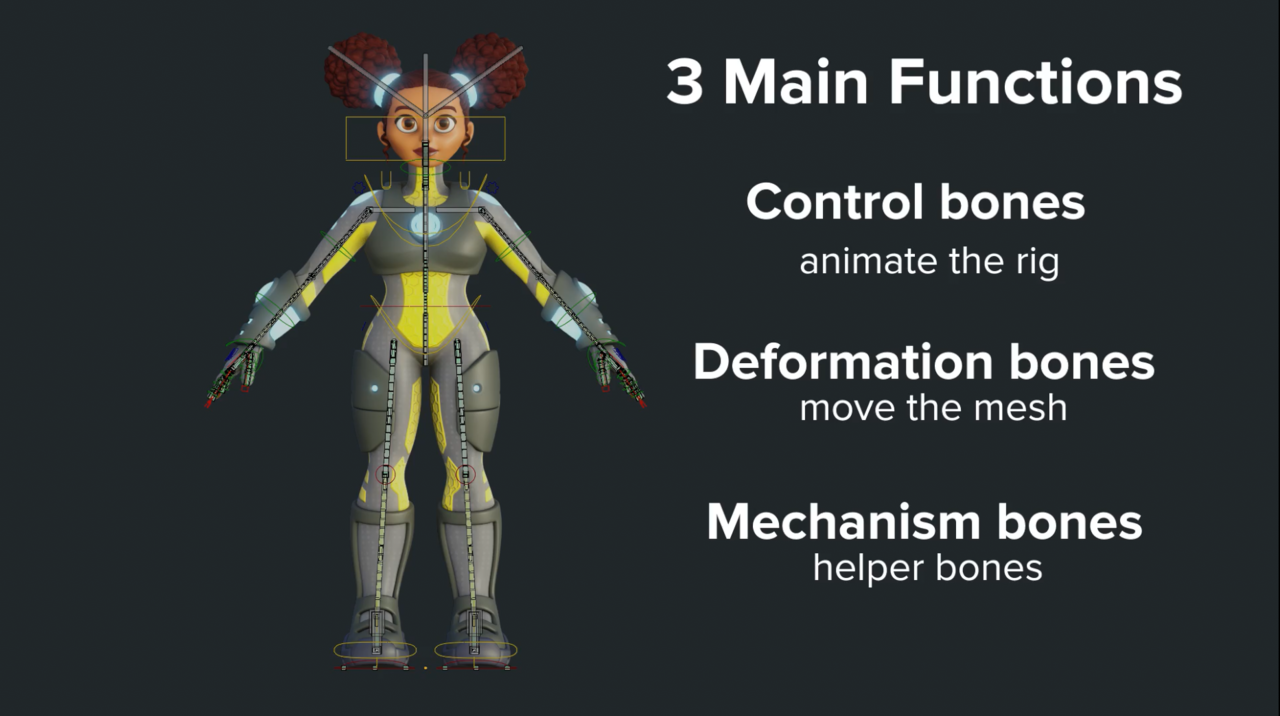
Deformation Bones:
This should be obvious now, but these are the bones that will actually deform the mesh.
Control Bones:
These bones are bones that the animator will use to control the character.
Mechanism Bones:
These bones are needed in the rig to help make all the other bones to move in a specific way. This is the hardest part for beginners to comprehend, so perhaps a good way of thinking about this concept is to picture a marionette puppet.
The Marionette Puppet EXAMPLE
- The Control bones is the part the puppeteer moves.
- The Deformation bones is the actual puppet.
- And the Mechanism bones are the strings that connect the controls to the puppet. Without them, the puppet won’t function correctly.
That's probably as much insight as I can give you in the form of an article. I hope it has illuminated some aspects of the magical art of rigging. But we're not done just yet! As promised, here's a bunch of helpful tips to give you a head start in your rigging journey.

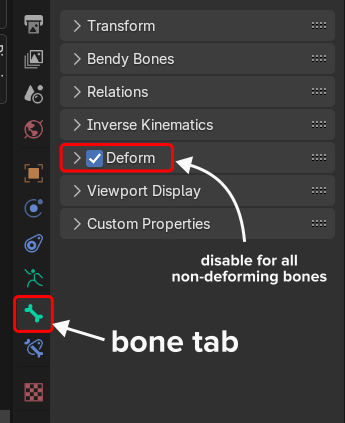
Disable the Deform option on non-deforming bones.
Only use the deform option on the bones that will deform.
That way, you can take full advantage of the auto-weighting tools. You won't accidentally have a bunch of control bones influencing the mesh and making the weight painting harder than it needs to be.
Work Smarter, not harder, with symmetry
Name the symmetric parts of your rig with the suffix “.L” and “.R”. There are many tools in Blender that can symmetrize 1 side to the other - from the actual bone structure and constraints as well as the weight painting. Naming bones correctly can save you hours of work!
Getting your hands dirty
One of the ways I learned to the rig was by jumping in and pulling existing rigs apart to see how they function. But to help with the overwhelm, try focusing on section at a time (like a leg, or the arm etc)
Also don’t forget that there are only 3 main purposes for any of these bones. That would be…come on say it with me. Deformation bones, control bones and mechanism bones.
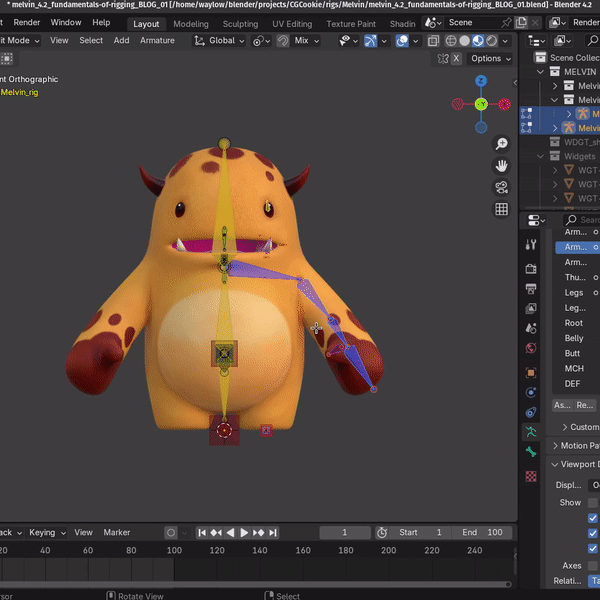
Check out the Bone Collections (or bone layers on older rigs), this will help you see how things relate to each other.
Also and take a look at these few key things.
The Parenting:
Try to look at the hierarchy to see what is connected to what.
Constraints:
Check out the bones that have constraints on them.
What types are they? What do they do? Mute them to find out.
Drivers:
Do you see any purple? This indicates there is a driver on a specific attribute. Drivers can be complicated but more often than not they are really simple. Most of the time that are just use as simple switches in order to turn a constraint on or off to change the behaviour of the rig.
Building a picture of how a rig is put together through dissecting an existing one is going to help you understand the basic anatomy so to speak. Don't forget to take notes on what you discover and then try to recreate certain parts as you think you understand what's going on
Want to dive in deeper?
You’ve learnt about the main steps in the rigging process, a few main concepts and pitfalls, and I even threw in a few tips to help you reverse engineer some existing rigs.
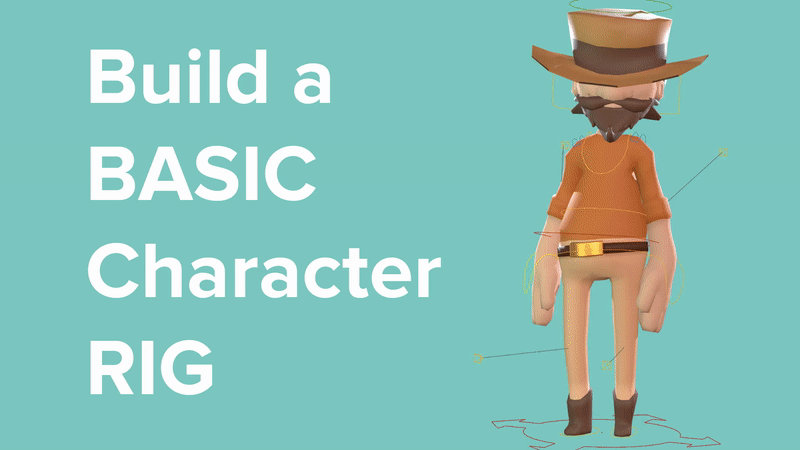
If you’re looking for something simple to dissect to get you started, I can suggest the Basic Wrangler Rig. It was designed to be as simple as possible yet actually usable.
Of course if you are interested in diving deeper you can check out the fundamentals of rigging.
You will learn about everything mentioned on this article and a whole lot more. You will also build a bunch of rigs that each use an underlying technique, plus you’ll even learn how to create that basic rig.
I appreciate how this excerpt breaks down the concept of rigging into an accessible introduction for beginners. Rigging can seem intimidating at first, but understanding the main steps and key concepts makes the learning process much less overwhelming. I think having a clear overview before diving into detailed tutorials is incredibly helpful. In a way, it reminds me of learning the mechanics of https://veckio.io —once I understand the underlying systems and strategies, everything becomes easier to master and more enjoyable to explore.