Topology, the geometry, and structure of your 3D model
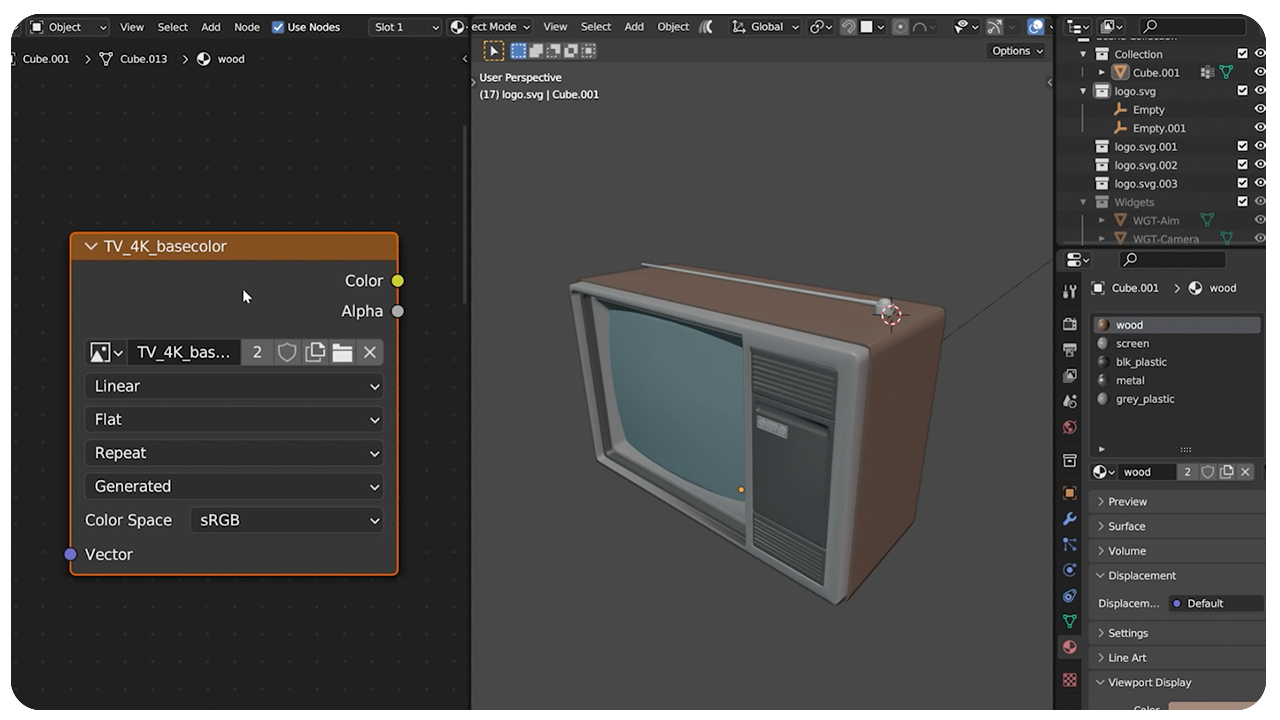
When modeling in Blender, there are a few things to keep in mind; localized geometry, dissolve edges that don’t contribute to the models silhouette, and breaking up the mesh is okay. In this example, I’m using a TV model to help demo a few of these tips.
- Localize geometry by adding loops or edges only where needed, using tools like the knife to redirect edge flow and dissolving unnecessary edges
- Dissolve edges that don't affect the object’s silhouette to optimize geometry, ensuring unnecessary edges are removed without altering the object's form.
- For better topology, consider breaking up the mesh. Instead of adding numerous points and edges to create an integrated feature, like a TV antenna, simply intersect a new shape, like a cylinder, into the existing mesh. This reduces geometry but may have minor texture space and close-up appearance drawbacks.

Consider the TV's back vent as an illustration of mesh separation for optimization. Instead of laboriously blending the high-geometry vent with the simpler TV body, I designed it as an independent mesh. This approach isn't just simpler and mirrors real-life manufacturing, where TVs comprise different panels and materials. While this can remain a single object in UV space, every vertex doesn't need to be connected.
So to briefly review, localize geometry, dissolve excess edges, and break your object up into manageable sections.
This is an art, and takes practice, so re-visit these concepts as needed, and most importantly, try to be patient with yourself and practice frequently.This skill takes time and practice to develop, so refer back to these concepts as needed, and most importantly, be patient with yourself and practice regularly.
Further reading on Topology
Optimizing Textures with Baking
Venturing into 3D modeling with Blender can seem intricate, but one of the pivotal steps after topology is optimizing textures, a process accomplished using texture baking.
After UV unwrapping our model, it presents different materials, like the distinct properties between the TV's glass and its metal antenna.
 While various textures bring depth, to enhance engine efficiency, these materials are simplified into a single set of baked maps. This is crucial since procedural textures, while powerful, are cumbersome for real-time rendering and can't be exported directly to game engines. Thus, baking converges these diverse materials into one consolidated baked material.
For game assets, texture baking should always follow triangulation, ensuring consistent and predictable polygon triangulation. To organize and simplify, every element is reduced to a single set of PBR (physically based rendering) maps, which inform the engine about the object's surface appearance.


The baking process involves creating a standard image (like a 4k map named TV_4k_basecolor I use in the YT video above) to which base colors of all materials are copied. Using Blender's sensitive baking system, this image captures the essential information from each material.
In gaming, efficiency is paramount. While color maps utilize red, green, and blue channels, single channel maps like metallic, roughness, and ambient occlusion require just one. To optimize, game developers employ a trick known as channel packing, condensing three single-channel maps into the RGB channels of a singular image.

This method reduces draw calls for the engine, ensuring it operates seamlessly, remembering less and avoiding the need to retrieve multiple images.
Three takeaways to write down
- Texture Baking: Converge multiple textures into one baked map for better engine performance.
- Triangulation Before Baking: Ensure polygons are consistently arranged before texture baking.
- Channel Packing: Combine three single-channel maps into one RGB image to optimize resources.
Sharpening
Here's a neat little trick for you. Have you ever tried sprucing up your images in Blender's compositor?
With a touch of the diamond sharpen filter, you can make a lower-resolution image pop and look as sharp as a higher-res one. This magic lets you use smaller maps while keeping things crisp and beautiful.

- Dive into Blender's compositor and give the diamond sharpen filter a whirl.
- With some sharpening magic, a 2K image can shine just as bright as an un-sharpened 4K.
It's a fun and handy tip, but remember not to overdo it—keep things looking natural.

_____
Alright, we've wrapped up my game asset optimization pointers! We've prepped our asset in Blender, ready to rock and roll in any game engine. If you're keen on utilizing the channel-packed texture within Blender, grab a separate color node.
Quick recap: metallic is in the red channel, roughness in green, and ambient occlusion in blue.
Happy Blending!
Related reading and tutorials
- Fundamentals of Texturing in Blender
- Grab your free copy of Press Start, your first Blender Project
- 26 Blender UV Unwrapping Tips
