Starting in March 2020, I began a large stream project to model a comprehensive, highly-detailed Caterpillar 434E backhoe. Please watch the first stream (first 3 minutes of abridged version at least) for an overview.
It's a straight-forward project of building a complex model over an extended period of time. The spin on the project is that I want your help to accomplish it! If I build some parts and you build some parts, we will finish this thing much quicker. Plus the contribution format will include reviews, the potential of having your piece(s) assimilated into the final model. Not to mention large quantities of XP are at stake 🤑
NOTE: This is an involved project reserved for Citizen members.

The general idea is that I kickoff stages of the project via live stream, which is typically once per month. For the time in between streams, you choose a piece of the backhoe and apply what you learned from the stream to that piece. For example, the first stream covered initial block out. So between stream 1 and stream 2, your job is to pick a piece and block it out.
This is the repeating protocol for each Assignment Period (between-streams):
I will reply to this thread after each stream with a [big] assignment post denoted by a 📣 emoji in the title. There I will clarify instructions about each Assignment Period.
We will centralize our collaborative communication between the streams and this thread. Ask any and all questions pertaining to the Backhoe project here.
And this is the best I could do:
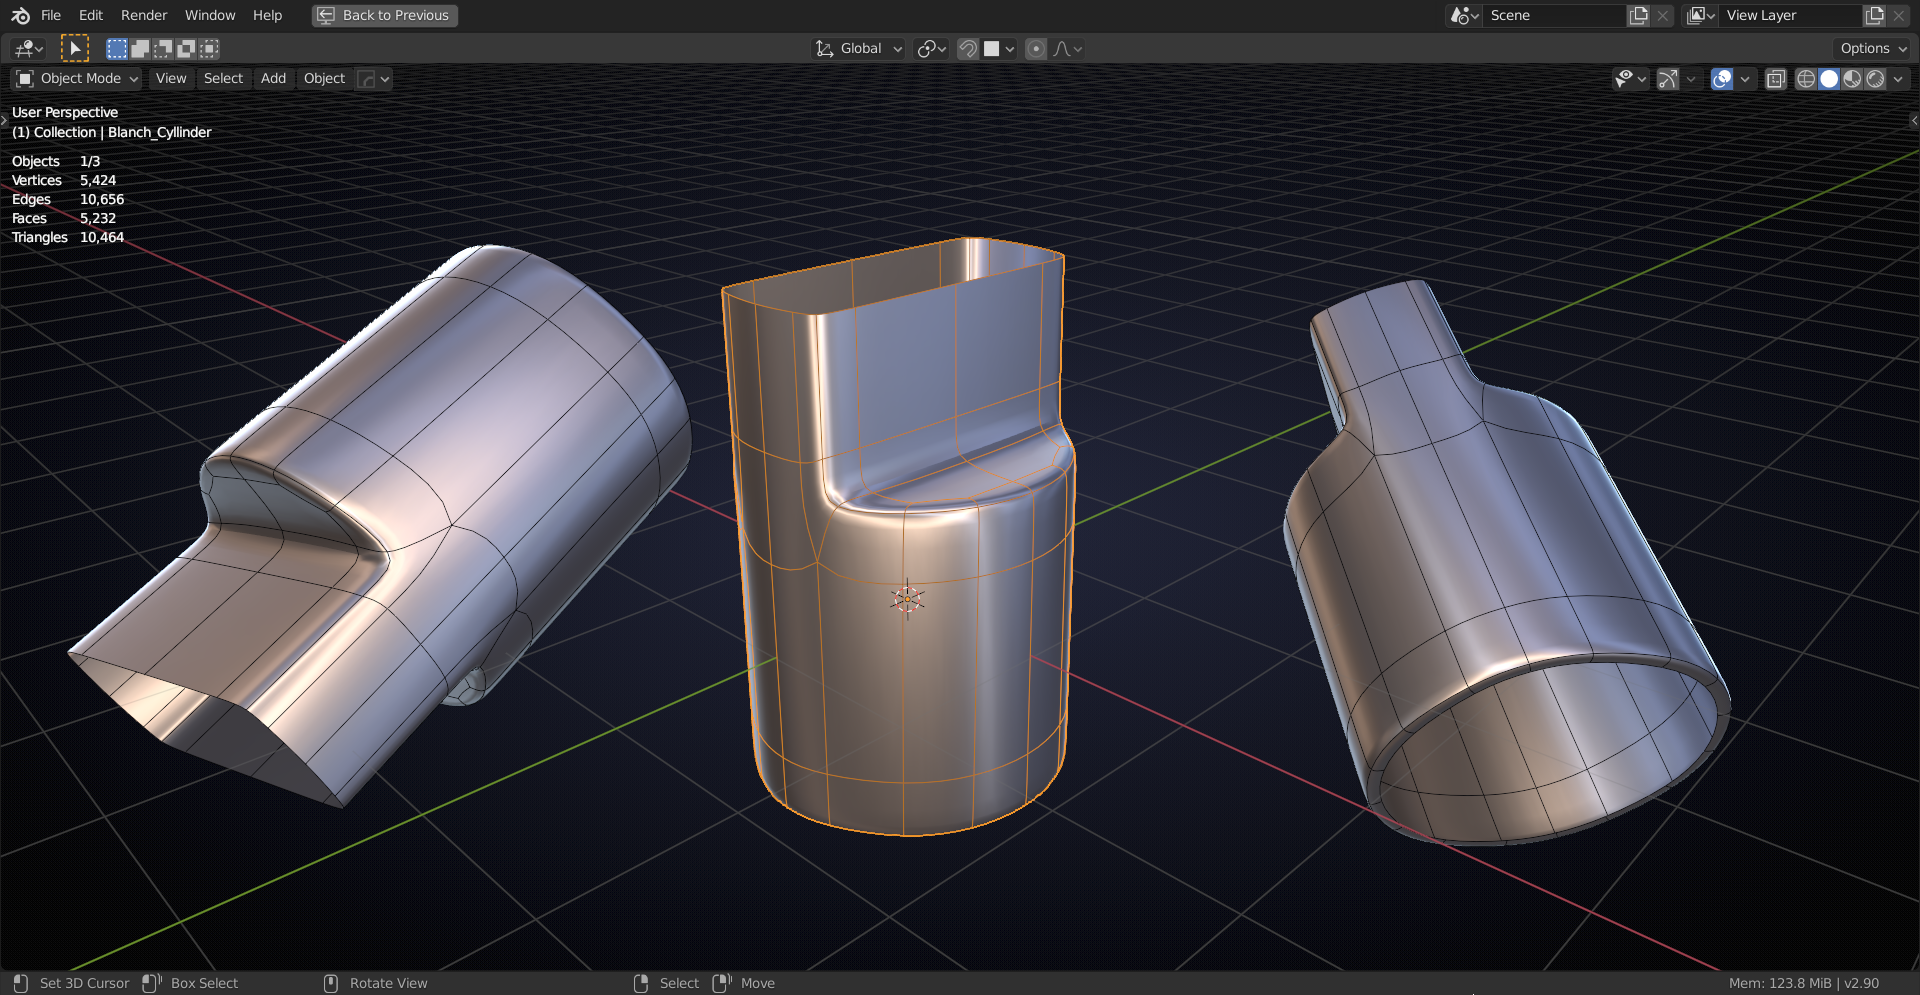
Just the hard part, you can do the rest yourself: https://drive.google.com/open?id=1ih00jdRbC0DuJ76Sgi9lZvzxwi6cqM0G
See if you can use it;)
ppfbourassa I'm still confused as to what I am looking at;)
Anyway a quad that comes in the shape of a triangle is not considered good practice...
ppfbourassa without seeing the bigger picture of whats actually happening, I think as for the second image I would dissolve the 3 edges shown removing the 2 verts circled, if you need to define the edge more I would edge slide the 2 outer edges closer as shown here: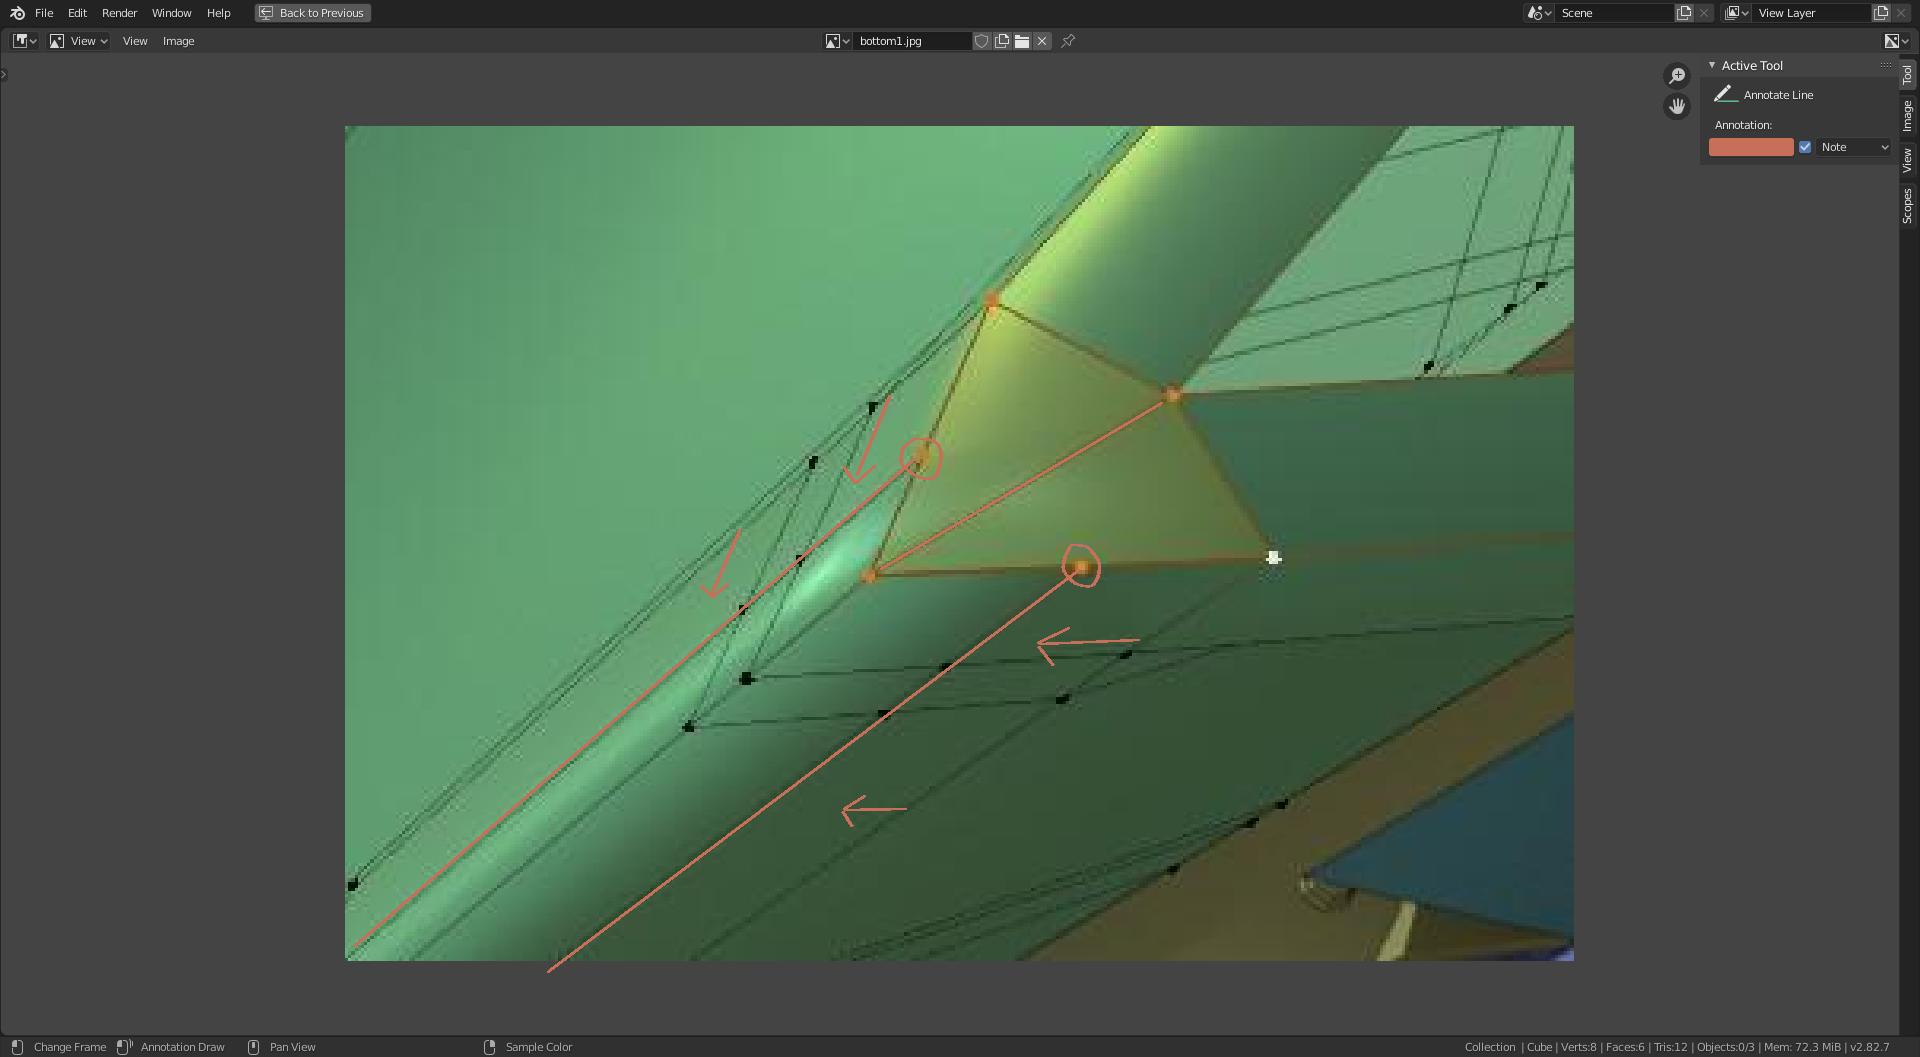
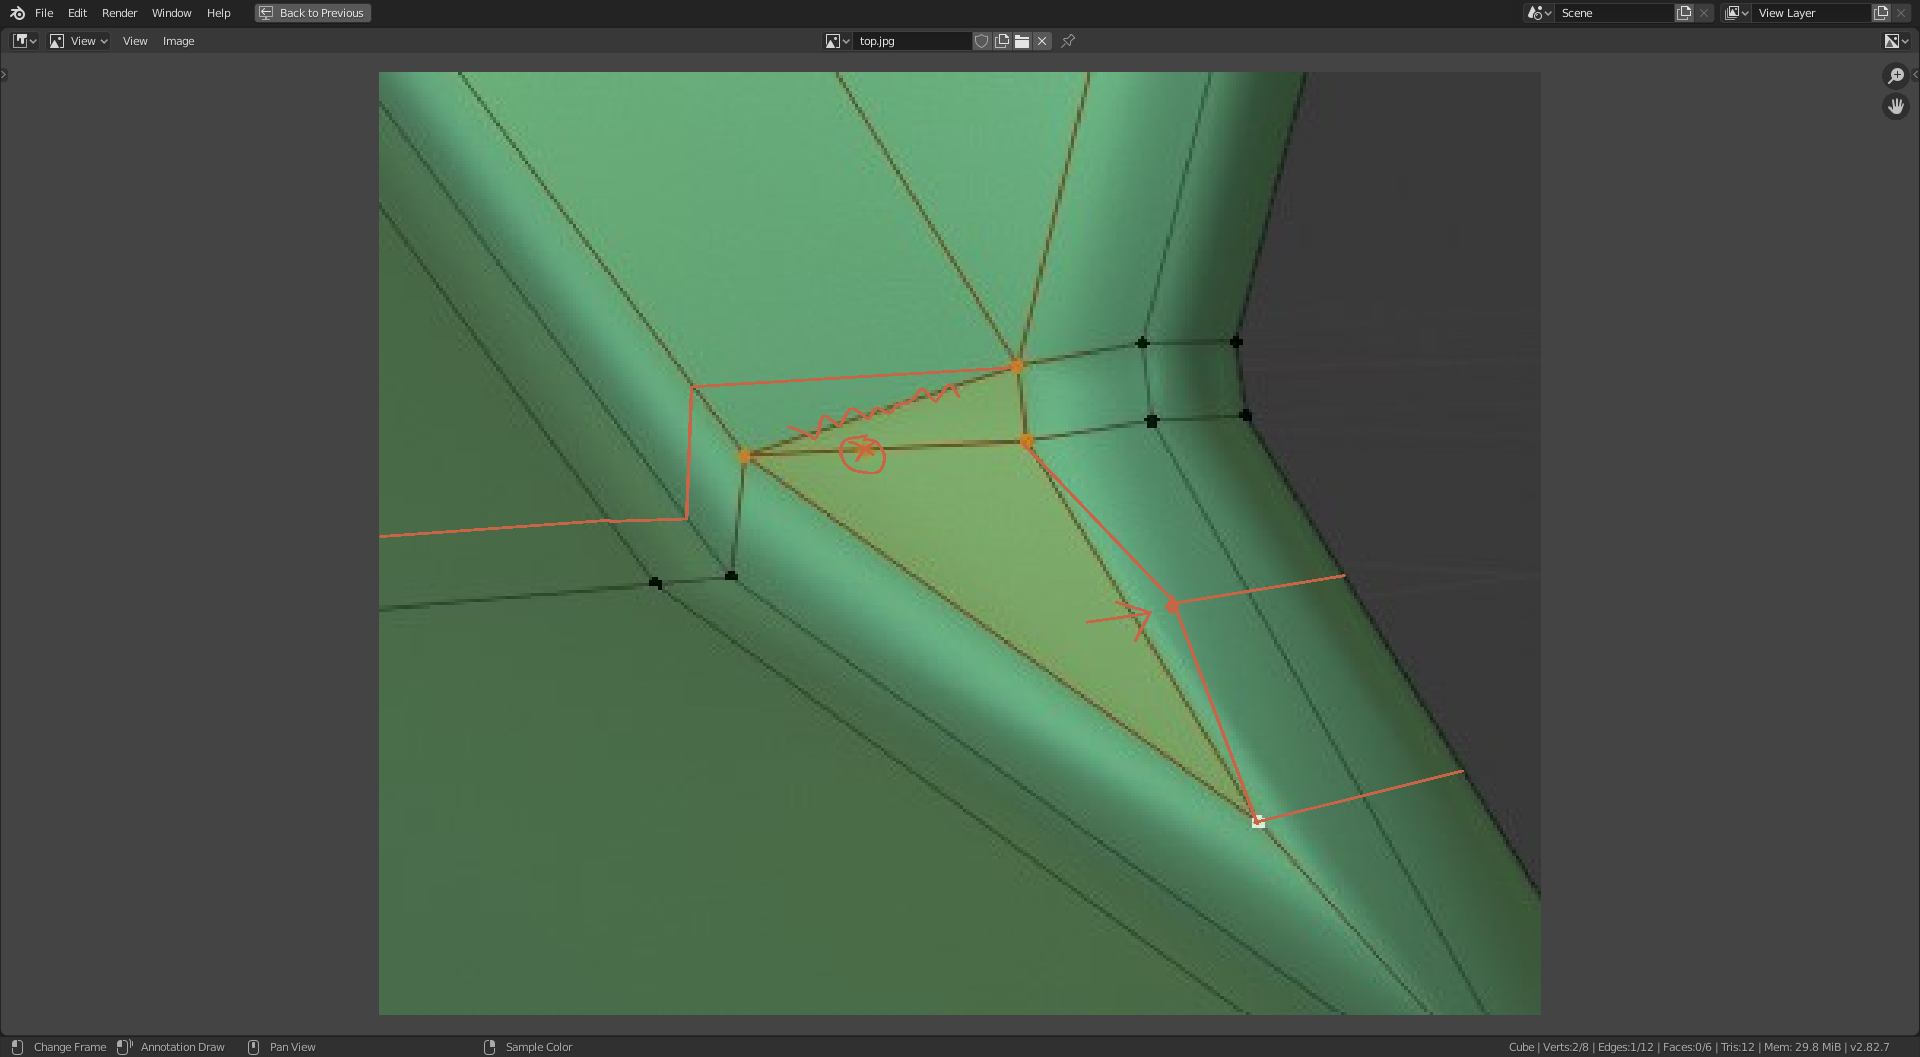
As for the other image, again without the bigger picture, I think dissolve the random vert, make some cuts with the Knife tool and slide the arrowed vert out slightly and dissolve the edge squiggled out. But again without the bigger picture and knowing whats round the corner it's hard to solve.
sshanr Did you watch the tutorials in the link I posted for you? Your part is essential dude, it's the wheels, we ain't going nowhere without them, c'mon we are only a few days away from the stream.
![]() spikeyxxx and
spikeyxxx and ![]() dostovel and @adrian2301 and everyone thanks for the tips. I think most of the solutions work that have been posted. I am going to go with
dostovel and @adrian2301 and everyone thanks for the tips. I think most of the solutions work that have been posted. I am going to go with ![]() spikeyxxx elegant final solution. I also found a spare duplicate edge while repairing this one and blasted it away manually because it wasn't caught by the remove doubles this whole time........arghhhh.
spikeyxxx elegant final solution. I also found a spare duplicate edge while repairing this one and blasted it away manually because it wasn't caught by the remove doubles this whole time........arghhhh.
Here's putting it into practice. It was elegant but still required a lot of work. I think adding more topology to the circle to make it a 16 sided circle gave me more room to work with in this case. I'll have to remember when things are going to take harsher turns and change from one shape to another perhaps maximise the topology without adding too much and also make it elegant.
The final solution looked like as if the entire circumference was "inset" in a sense and then a couple of holding edges added to the top of the shoulder in a way that moved the 5 sided pole inwards.
I'm interested to see what all y'all think now that I have tried my hand at it again for the umpteenth time and lessons learned. I'll do a short recap below
Problem Before:
Not enough geometry to work with (I think). 8 sided circles not working when rectangle sections needed more holding edges that the circles could provide
Using Bevel and Weights (not industry standard way of doing things for this project).
And 5 sided pole seemed to be interfering with the subdiv modifier producing a crisp look and feel.
1 stray long edge duplicating an area that was already covered by 2 edges along the cylinder cross section.
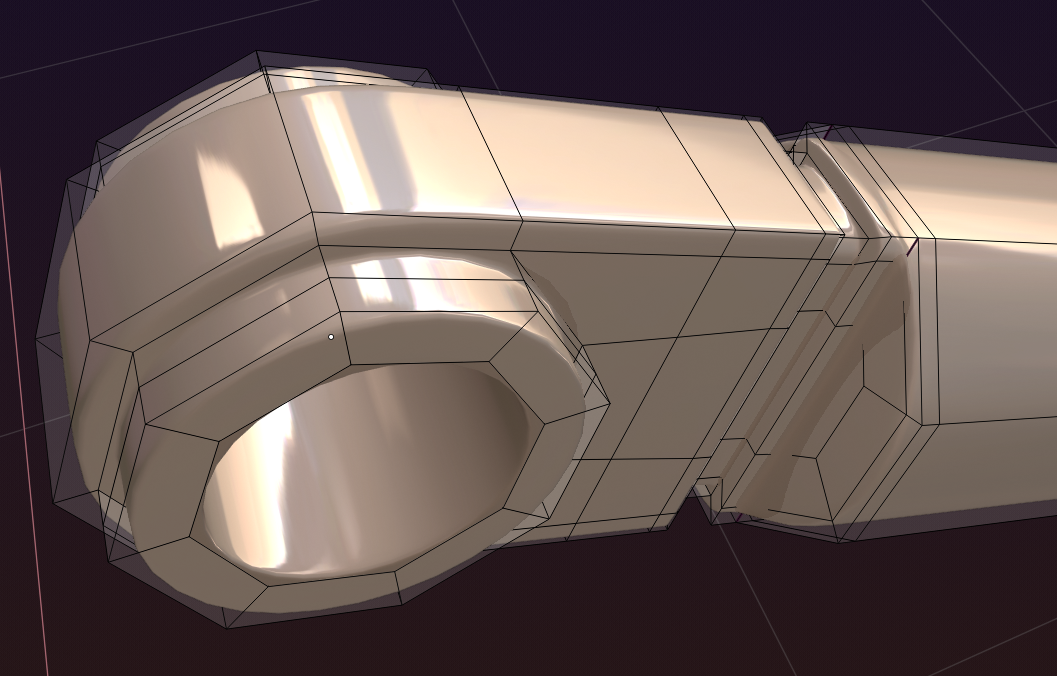 I hid the Bevel Weighted Edges but they are still active. Notice how the light pinches at the top shoulder on the right of the image
Solution After:
Made use of ![]() spikeyxxx elegant solution which covers most of the comments below:
spikeyxxx elegant solution which covers most of the comments below:
Added more geometry to circular cross sections. I think I really needed this many due to the "holding edges" needed for good corners.
After adding more sides to the circles (gone from 8 to 16 edges) used Shift+Alt+S on individual circle loops to turn them back into perfect circles (the Edit Loop Tools: Circle macro was moving the circles around on me and causing headaches)
Dealt with pesky 5 sided poles to get them away from harsh edges (made use of inset in ways I haven't done before haha) and I was able to keep the shoulder I was concerned about losing at the side of the cylinder (this was really the big pain point).
Found 1 stray edge that was going the length of the cylinder and connecting in places it shouldn't. Deleted it.
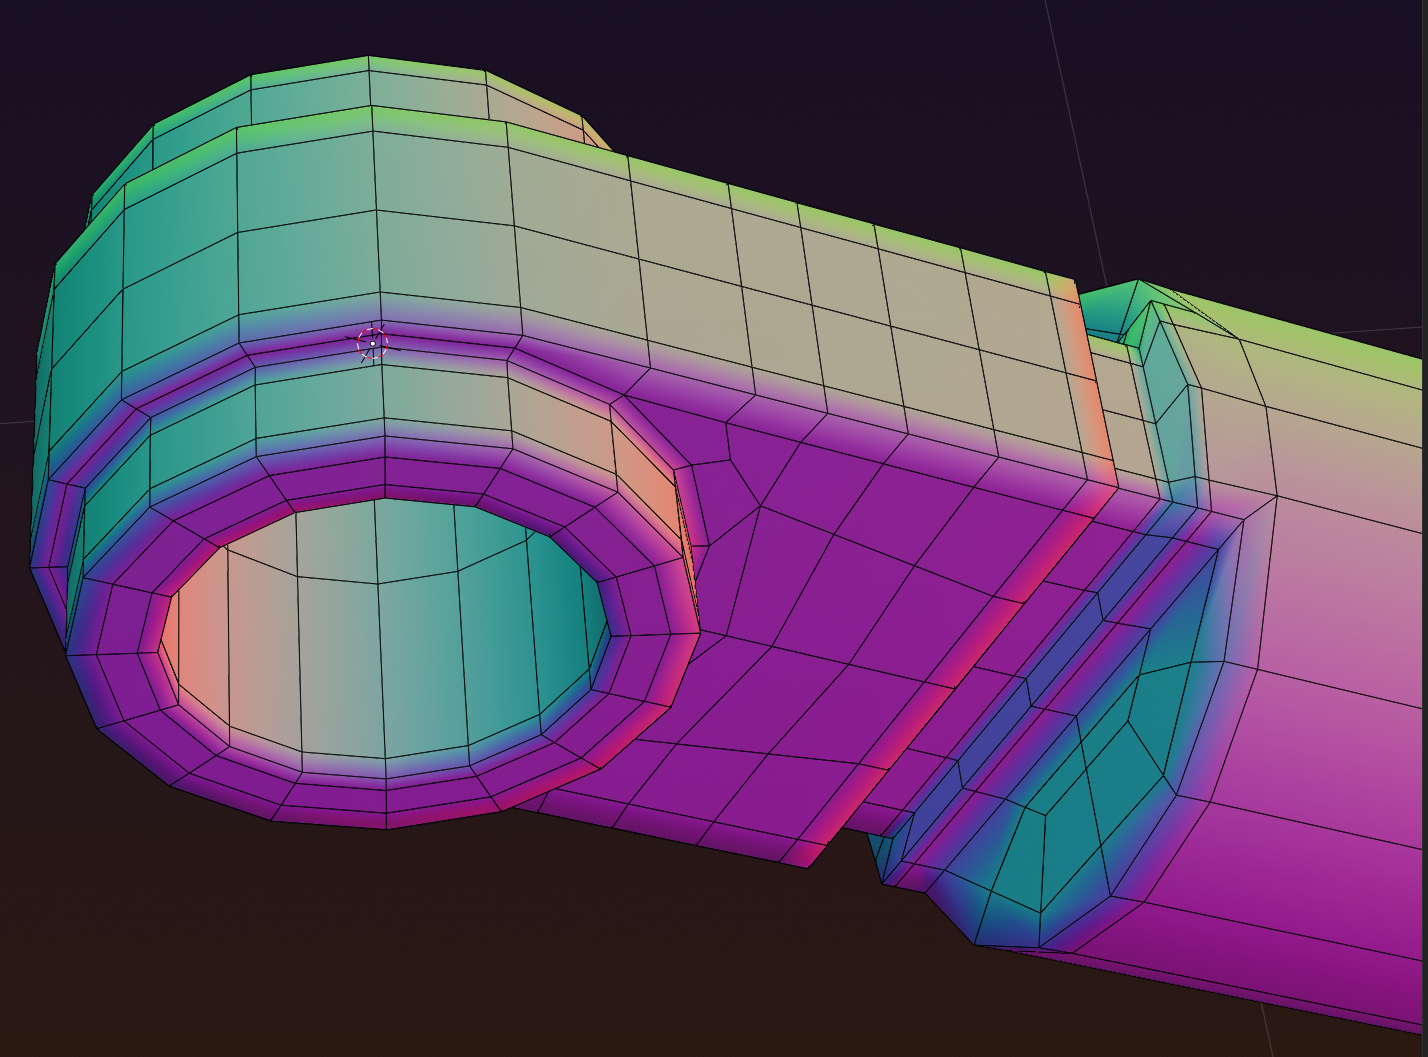 Actual Verts: with 5 sided pole moved to the cylinder. This was actually quite tricky for me to do properly even with Spikey's example.
With a glassy matcap and subdiv "On Cage" preview on to show how light catches it:
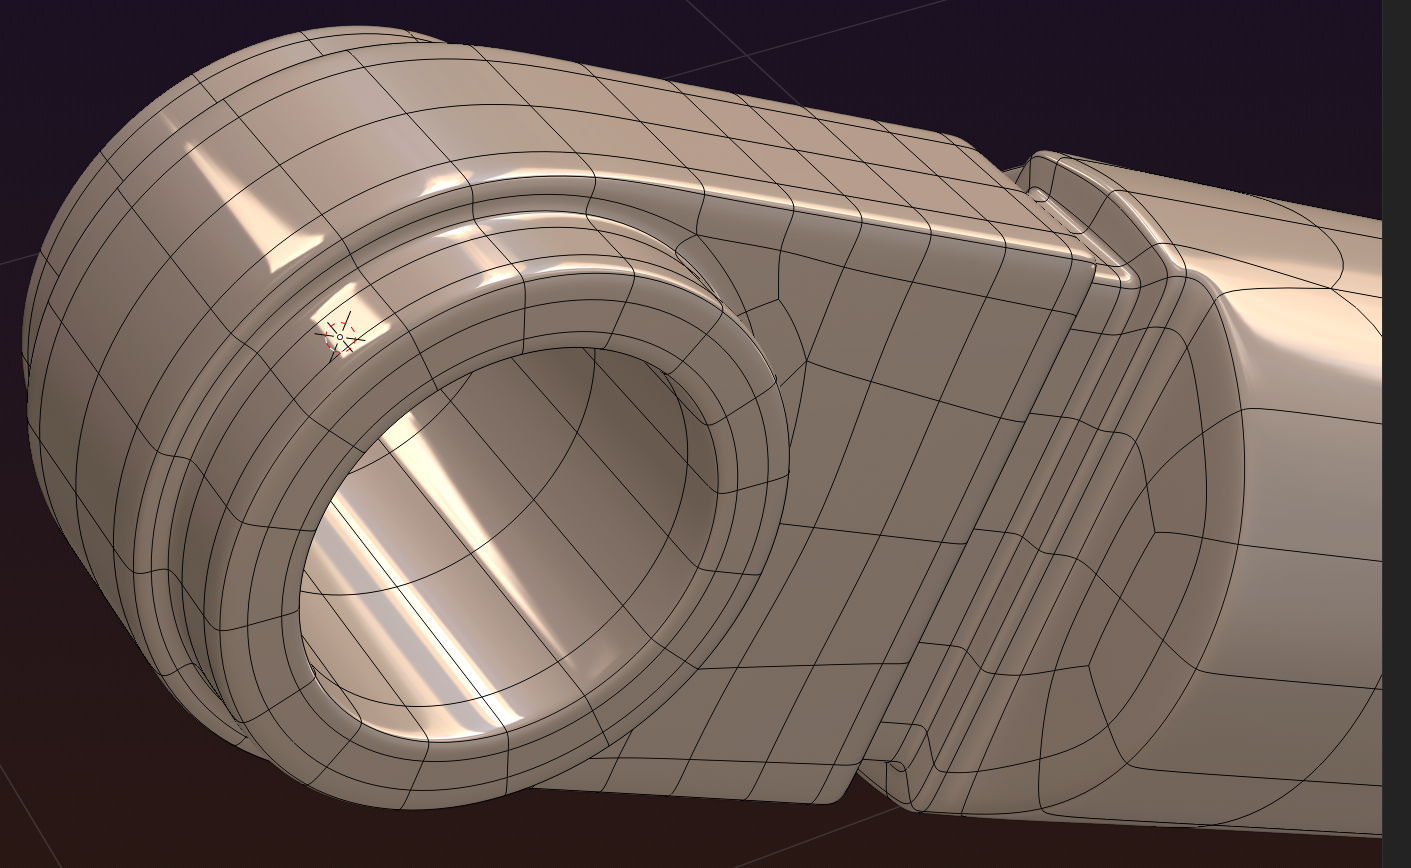 Much more elegant look with the light smoothly transitioning around the circumference.
Not gonna lie I am terrible at tires. I love the "Tiled" elegance from ![]() spikeyxxx in the file posted from Kent's live stream 2. We could all learn a lot from this guy just going into edit mode and admiring the simplistic approach that remains easily editable and relies heavily on a few modifiers to look great.
spikeyxxx in the file posted from Kent's live stream 2. We could all learn a lot from this guy just going into edit mode and admiring the simplistic approach that remains easily editable and relies heavily on a few modifiers to look great.
My brain is still figuring out how to think this way more and more.
"...and there will be no pinching on this DOG!"
Looks fantastic now!
Maybe we could 3d print the 434E when it's finished...
Looking smooooth!!!!
There are times when more geometry is needed even if our minds are programmed for less.
With the loops tools circle thing, can be a bit unpredictable sometimes, gives bigger circle than expected usually, and you do have to be sure you only have right verts selected, ALT + A is good practice before using it.
Great result, this is what collaborating is all about.
We'd need a BIG 3D printer LOL. I don't want any less than True to Life Size
All this progress being posted has me playing catch-up! Here's where I'm at after working a couple hours the past two Thursdays:
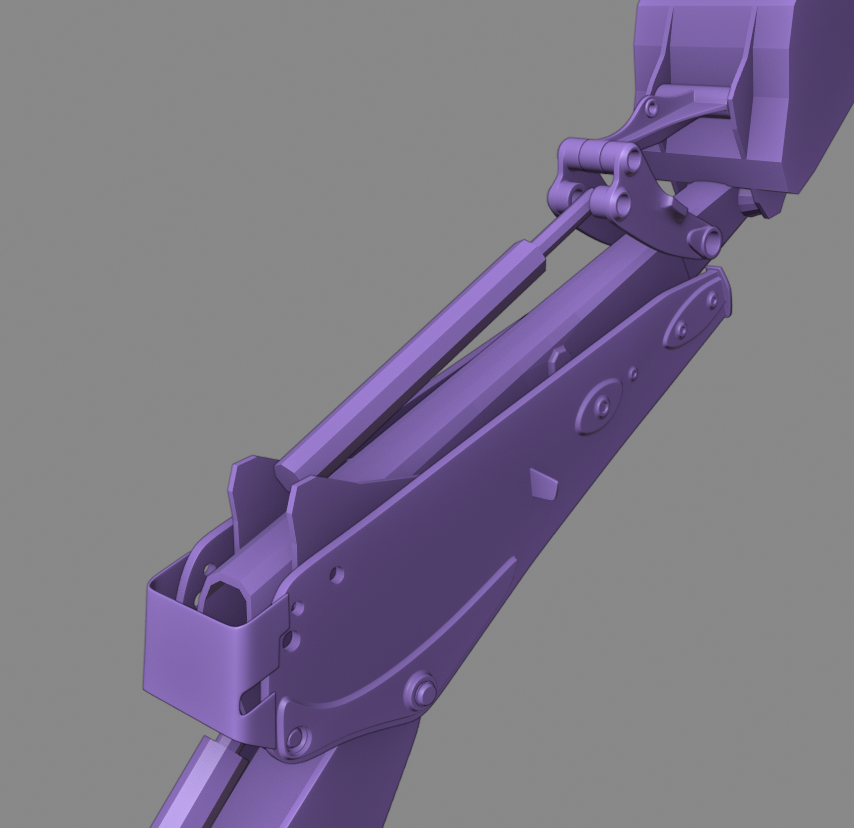
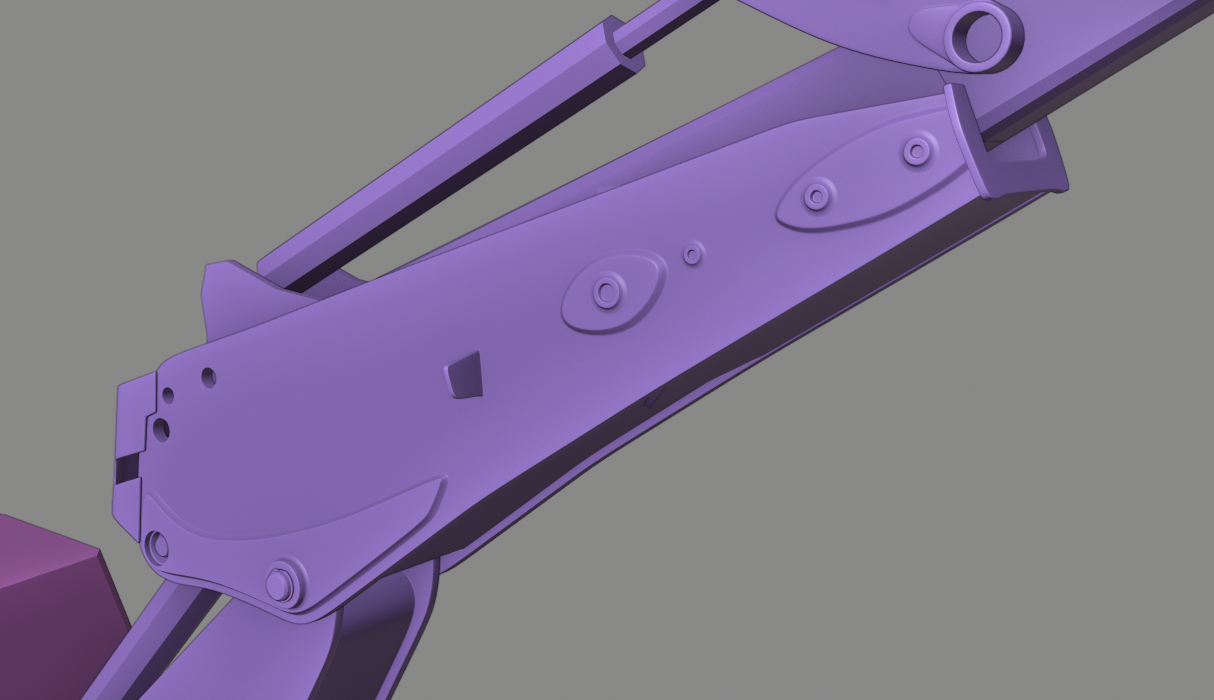
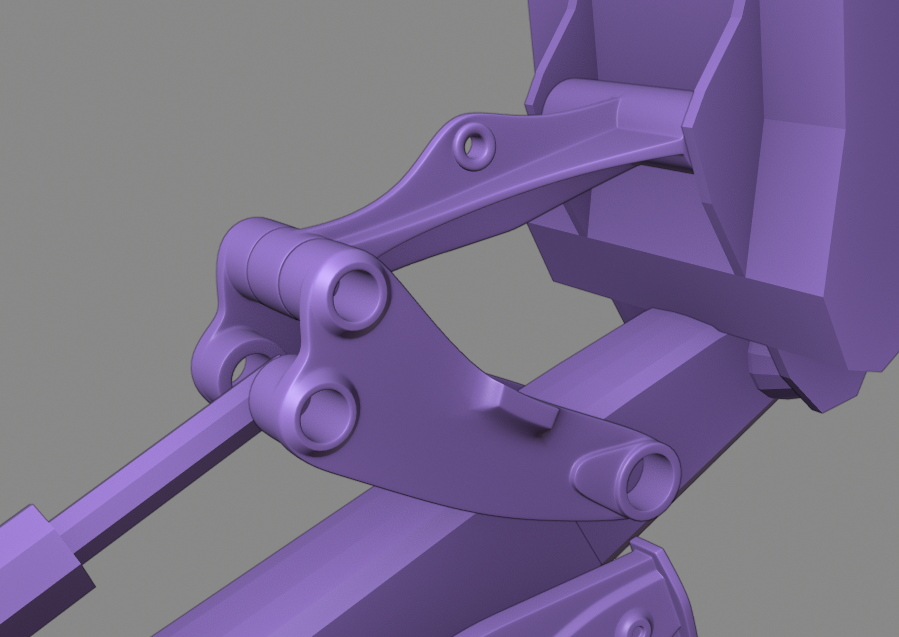
Still a long way to go. There's so many details and pieces to model and interconnect. The diagram website is an absolute life-saver. I never could have figured out these intricacies with photos alone.
Like you, I'm running into similar subsurf pinch problems as ![]() blanchsb, especially cylindrical shapes into rectangular shapes. I'll be sure to discuss such junctions in the next stream.
blanchsb, especially cylindrical shapes into rectangular shapes. I'll be sure to discuss such junctions in the next stream.
Keep up the great work! The progress everyone is posting is inspiring 🙌
Nice work as always @theluthier.
By the way I have added my chassis/stabilizers file to the sheet but you have not resolved it as yet. I was wondering if there was an issue with notification. There is also no 0 in the Total XP column. Just saying, I want my XP. trying to catch up with ![]() dostovel . Winner gets to drive the DOG first.
dostovel . Winner gets to drive the DOG first.